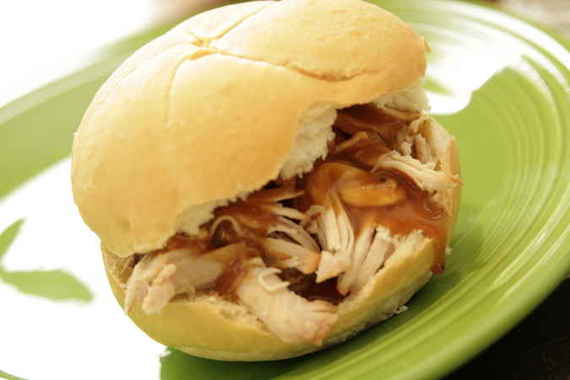
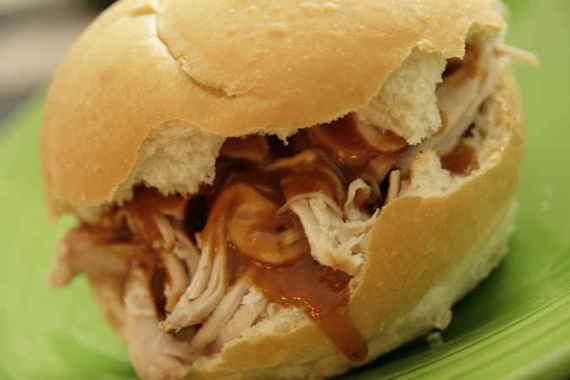
Originally, I had found a pretty good sounding recipe for pulled pork on allrecipes.com, but somehow, I ended up sort of ditching the recipe and just throwing in whatever I thought sounded good. As it turns out, I ended up with a pretty tasty result (if I do say so myself).
Pulled Pork
1 pork butt roast (2-5 pounds, depending on how many servings you need – I used a pretty small roast since it was just the two of us)
1/2 Cup Hickory Brown Sugar BBQ sauce (however much you want, really), plus 1/2 cup
salt and pepper to taste
1 teaspoon garlic powder
1/2 teaspoon onion powder
Season pork roast with salt, pepper, garlic powder, and onion powder and place in crock pot with 1/2 cup water. Cover with 1/2 C. BBQ sauce, and cook on high heat for 4-5 hours or low heat for 6-8 hours. (Cooking time will really depend on how big your roast is).
For the Sauce:
When pork is done, remove from crock pot and set aside. Pour the remaining juice into a medium sized pan over medium heat. Stir in a little flour (approx. 1 tablespoon) and whisk. After flour is fully incorporated, add remaining BBQ sauce and whisk until sauce thickens. Season with salt and pepper to taste.
Take two forks and pull apart the pork roast into small “shreds”. Pile shredded pork on top of kaiser rolls and top with homemade sauce and pickles.

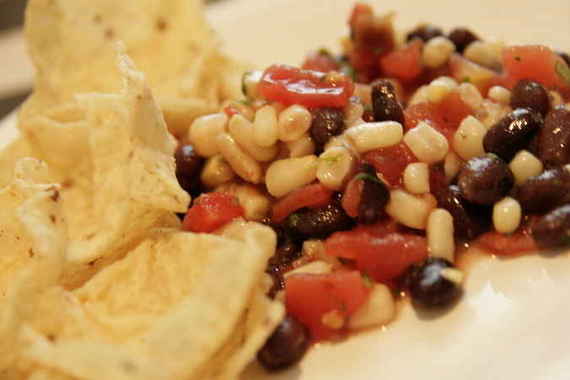
A few years ago (before I was married, still in college, and living at home with my parents), we lived in a house next door to our really good friends, Chris and Scott (and their two boys). Its so nice to live next door to your friends – you can just walk right over and hang out whenever you want (and they have a really nice pool, so they probably saw more of us than they cared to!). Anyway, Chris is a really good cook – one of those kinds of people who can just throw something together with a few random pantry items and create a fantastic dish (I wish I were one of those kinds of people. But hey, I’m not bitter…..stinking clever people with their stinking pantry items……), which is how this tasty dip came to be. I don’t remember the specifics, but here’s gist of the story – (sorry, Chris, if I totally botch this up….) apparently, Chris found out she needed to entertain some last minute guests (probably my parents) and needed to serve a little something to “nibble on”. She searched the fridge and pantry for anything she could throw together and came up with a refreshing, delicious black bean and corn concoction she dubbed, “On Demand Dip”. Well, needless to say, it was a huge hit at her little get-together, and now me, my mom and my sister serve it at most of our get-togethers! I’ve taken it to one of Joel’s family shindigs and it was a big hit! You’ll definitely want to serve this at your next party – its a perfect alternative to regular bean dips or cheese balls! Perfect for summer! Oh! – and it gets better the longer it sits in the fridge!
On Demand Dip
– by Chris
If I’ve somehow changed it up from the original recipe – sorry, Chris!
A lot of these ingredients are just thrown in there according to how much you like, so just taste is as you go a long and add as needed!
1 regular size can black beans, drained and rinsed
1 regular size can Rotel tomatoes, with their juice
1 regular size can white shoepeg Corn, drained
a handful of chopped fresh cilantro (as much or as little as you want – we like a lot!)
Juice of 1-2 limes (Or more if you want – this is what gives it most of the flavor)
Salt, pepper and garlic powder to taste
Mix all ingredients in a medium-sized bowl and refrigerate for at least an hour (Like I said, it gets better the longer it sits). Serve with tortilla chips (Tostito’s “Scoops” are best, in my opinion!)
MMMMMM!! Thanks, Chris!
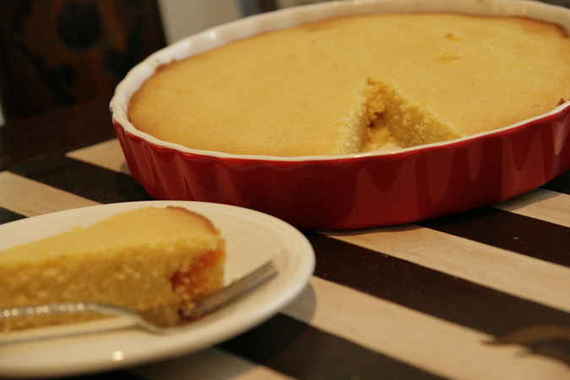
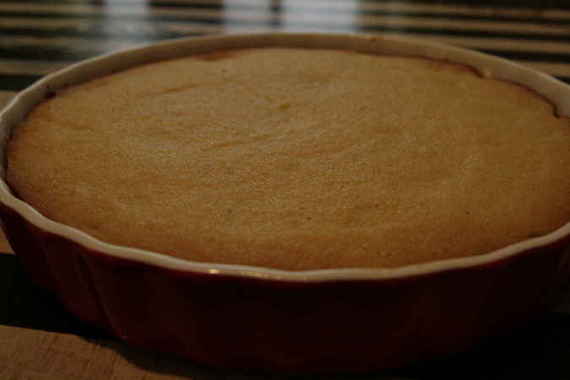
So, when I found out that this week’s TWD recipe (chosen by Caitlin of Engineer Baker ) was Fluted Polenta and Ricotta Cake, I was like, “what the heck is that?” My buddy Jessica and I were a little wary of making this cake for a couple of reasons: 1.) we’re not big fans of figs, and 2.) polenta?……in a dessert??? But after some encouragement from both of our moms and the decision to use another type of fruit, we decided to go for it! Try everything once, right? And plus- I mean, come on – if Dorie says its good, then you can bet it’ll end up in my kitchen!
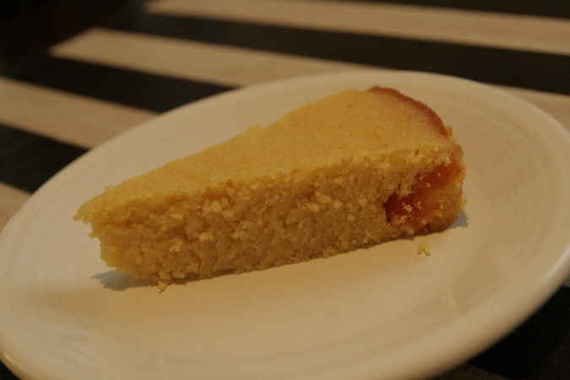
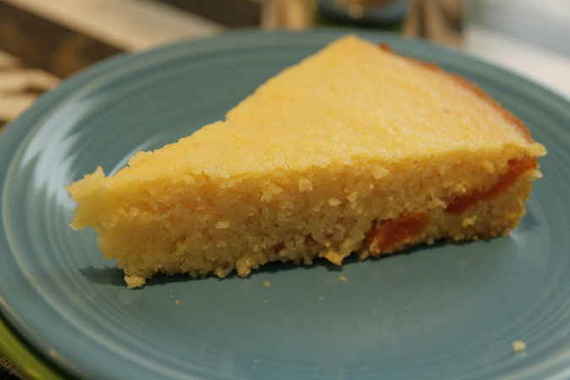
You know, this cake was actually really tasty! I decided to use dried California apricots instead of dried figs, and they really went well with the polenta. I also forgot my lemon zest (one of those recurring “oops” moments that happen so frequently in my kitchen), but the tartness of the apricots made up for it nicely. My mom and dad happened to be visiting just as I had finished the cake, so I decided to use them as “guinea pigs”. They really loved it! Especially my mom (I ended up sending the whole rest of the cake home with her she enjoyed it so much!).
A lot of the TWD girls commented on there being almost too much sweetness to the finished product, so I only used 1/2 a cup as opposed to the 3/4 cup it calls for and it turned out perfectly sweet. All in all, this is a great recipe! I’m so glad I didn’t “wuss out” this week and skip it just because it sounded different. I’m proud of myself for trying something new and I think now my mom has a new favorite! Thanks Caitlin, for pushing me to try something new and “different”!
Fluted Polenta and Ricotta Cake
About 16 moist, plump dried Mission or Kadota figs, stemmed (I used dried apricots)
1 c. medium-grain polenta or yellow cornmeal
1/2 c. all-purpose flour
1 stick unsalted butter, melted and cooled
1 tsp baking powder
1 c. ricotta
1/3 c. tepid water
3/4 c. sugar (I only used 1/2 c.)
3/4 c. honey (if you’re a real honey lover, use a full-flavored honey such as chestnut, pine, or buckwheat)
Grated zest of 1 lemon
2 large eggs
Getting Ready: Center a rack in the oven and preheat the oven to 325 degrees F. Butter a 10 ½-inch fluted tart pan with a removable bottom and put it on a baking sheet lined with parchment or a silicone mat.
Check that the figs are, indeed, moist and plump. If they are the least bit hard, toss them into a small pan of boiling water and steep for a minute, then drain and pat dry. If the figs are large (bigger than a bite), snip them in half.
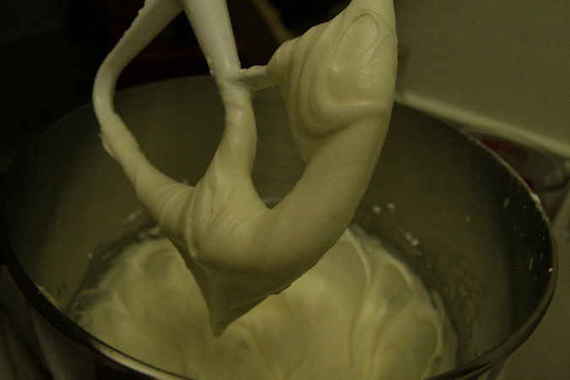
Whisk the polenta, flour, baking powder, and salt together. Working with a stand mixer fitted with the whisk attachment or with a hand mixer in a large bowl, beat the ricotta and water together on low speed until very smooth. With the mixer at medium speed, add the sugar, honey, and lemon zest and beat until light. Beat in the melted butter, then add the eggs one at a time, beating until the mixture is smooth. Reduce the mixer speed to low and add the dry ingredients, mixing only until they are fully incorporated. You’ll have a sleek, smooth, pourable batter.
Pour about one third of the batter into the pan and scatter over the figs. Pour in the rest of the batter, smooth the top with a rubber spatula, if necessary, and dot the batter evenly with the chilled bits of butter.
Bake for 35 to 40 minutes, or until a thin knife inserted into the center of the cake comes out clean. The cake should be honey brown and pulling away just a little from the sides of the panm, and the butter will have left light-colored circles in the top. Transfer the cake to a rack and remove the sides of the pan after about 5 minutes. Cool to warm, or cool completely.
You know, “oops” happens. Life would be pretty boring if there were no “oopsies” every now and then. Me, I think I’m probably the Ambassador of “oops”, when it comes to being in my kitchen (except when I have an “oops” moment, its not so much a quaint, lady-like “oops” that comes out of my mouth, so much as a steady stream of expletives, accompanied by flying pots and pans and poor Joel running for cover). I think, probably my biggest “oops” moment was the time I decided to try brioche. Yeah, BIG “oops” there (you know the saying, “when it rains, it pours”?). Now, slowly but surely, I’m getting to the point where “oops” moments are happening less and less frequently for me – I guess that means I’m improving. But every now and then, something will go wrong here and there. I’m only human, right?
So, this week’s Tuesdays With Dorie recipe was Bill’s Big Carrot Cake, chosen by Amanda of Slow Like Honey. Well, to be totally honest, I’m not a big fan of carrot cake; its encompasses everything I don’t particularly care for in a dessert- raisins…coconut…nuts. Don’t get me wrong, I don’t mind nuts in a dessert…but coconut, raisins and nuts – well that’s just too much for me to handle! But who am I to turn down a dessert challenge? Especially when its my second TWD recipe to make….I couldn’t have possibly chickened out on carrot cake! I decided since I wasn’t particularly fond of it, I would just send it to work with Joel the next day. Genius.
Now I know what you’re thinking – “if you don’t like raisins and coconut, why didn’t you just leave them out?” Because Dorie said to put them in there to begin with, that’s why! I don’t care how much I dislike something – if its good enough for Dorie, by gosh, its good enough for me! Obviously, she knows what she’s doing, and I (obviously) don’t. Therefore, if she says it tastes good, that’s how I’m going to make it. Plus, I’m a purist – I like to follow recipes pretty darn closely, and if it tastes bad, well, then I’ll know for next time. So in went the raisins, coconut and walnuts…….
This cake was super easy to make. Throw the ingredients in a bowl, spread it in pans, and you’re done! And can we talk about that cream cheese frosting? – YUM. I think I ate half of it before the cakes were even finished baking!
My house smelled heavenly as the cakes baked away in the oven. After taking them out and letting them cool, it was time to put the cake together! This is where the “oops” comes into play….
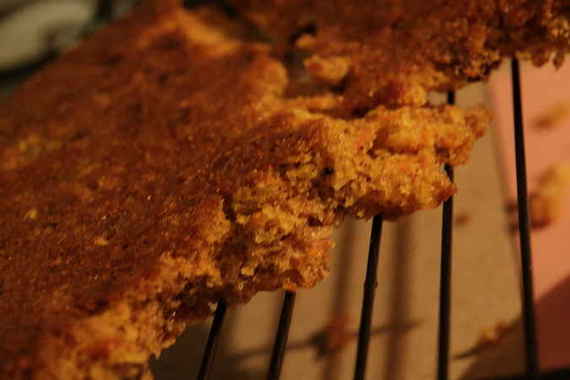
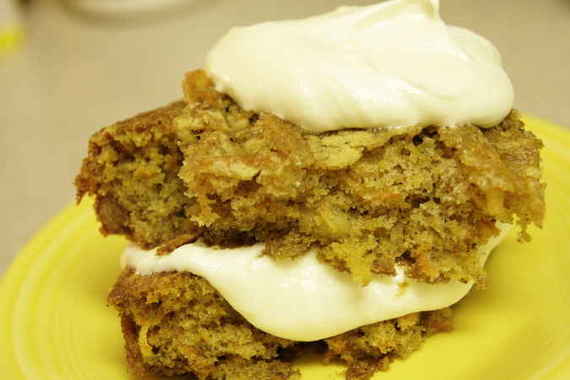
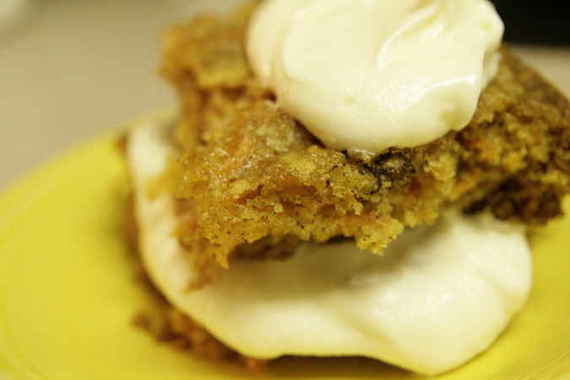
The little buggers STUCK! As I inverted the pans onto the plate, something felt wrong. Sure enough, there, on the plate, was half of my cake….the rest was still stuck in the pan. “No big deal”, I figured….I’d just discard that unfortunate layer and just use the other two. Um…..yeah….another “oops”. Long story short, all the cakes stuck….I ended up with a huge mess, and large “chunks” of carrot cake to work with. So, instead of getting mad and throwing it all away, I decided to still take pictures of it. And hey, even if it didn’t look good, we could still have a taste, right? Joel and I each had a large “chunk” of cake slathered with cream cheese frosting (by far, the best part), and I have to say, this cake was pretty yummy, despite my issues with raisins, coconut and nuts.
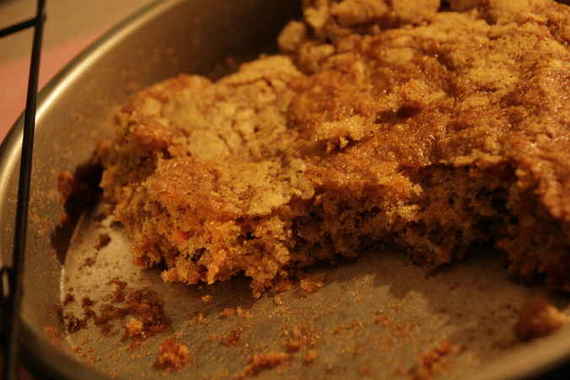
So, here they are…my wonderful pictures of carrot cake “chunks”. Please don’t disown me, TWD members….have pity on a humble “oops”-prone baker.
Bill’s Big Carrot Cake
Baking: From My Home to Yours by Dorie Greenspan
Ingredients:
For the cake:
2 cups all purpose flour
2 teaspoons baking powder
2 teaspoons baking soda
2 teaspoons ground cinnamon
¾ teaspoon salt
3 cups grated carrots (about 9 carrots, you can grate them in food processor fitted w/ a shredding a blade or use a box grater)
1 cup coarsely chopped walnuts or pecans
1 cup shredded coconut (sweetened or unsweetened)
½ cup moist, plump raisins (dark or golden) or dried cranberries
2 cups sugar
1 cup canola oil
4 large eggs
For the frosting:
8 ounces cream cheese, room temperature
1 stick ( 8 tablespoons) unsalted butter, at room temperature
1 pound or 3 and ¾ cups confectioners’ sugar, sifted
1 tablespoon fresh lemon juice or ½ teaspoon pure lemon extract
½ cup shredded coconut (optional)
Finely chopped toasted nuts and/or toasted shredded coconut (optional)
Getting ready:
Position the racks to divide the oven into thirds and preheat the oven to 325 degrees Fahrenheit. Butter three 9-x-2-inch round cake pans, flour the insides, and tap out the excess. Put the two pans on one baking sheet and one on another.
To make the cake:
Whisk the flour, baking powder, baking soda, cinnamon and salt. In another bowl, stir together the carrots, chopped nuts, coconut, and raisins.
Working with a stand mixer, preferably fitted with a paddle attachment, or with a hand mixer in a large bowl, beat the sugar and oil together on a medium speed until smooth. Add the eggs one by one and continue to beat until the batter is even smoother. Reduce the speed to low and add the flour mixture, mixing only until the dry ingredients disappear. Gently mix the chunky ingredients. Divide the batter among the baking pans.
Bake for 40-50 minutes, rotating the pans from top to bottom and front to back at the midway point, until a thin knife inserted into the centers comes out clean. The cakes will have just started to come away from the sides of the pans. Transfer the cakes to cooling racks and cool for about 5 minutes, then run a knife around the sides of the cakes and unmold them. Invert and cool to room temperature right side up.
To make the frosting:
Working with a stand mixer, preferably fitted with a paddle attachment or with a hand mixer in a large bowl, beat the cream cheese and butter together until smooth and creamy. Gradually add the sugar and continue to beat until the frosting is velvety smooth. Beat in the lemon juice or extract.
If you’d like coconut in the filling, scoop about half of the frosting and stir the coconut into this position.
To assemble the cake:
Put one layer top side up on a cardboard cake round or a cake plate protected by strips of wax or parchment paper. If you added the coconut to the frosting, use half of the coconut frosting to generously cover the first layer (or generously cover with plain frosting). Use an offset spatula or a spoon to smooth the frosting all the way to the edges of the layer. Top with the second layer, this time placing the cake stop side down, and frost with the remainder of the coconut frosting or plain frosting. Top with the last layer, right side up, and frost the top- and the sides- of the cake. Finish the top with swirls of frosting. If you want to top the cake with toasted nuts or coconut, sprinkle them on now while the frosting is soft.
Refrigerate the cake for 30 minutes, just to set the frosting before serving.
Serving:
This cake can be served as soon as the frosting is set. It can also wait, at room temperature and covered with a cake keeper overnight. The cake is best served in thick slices at room temperature and while it’s good plain, it’s even better with vanilla ice cream or some lemon curd.
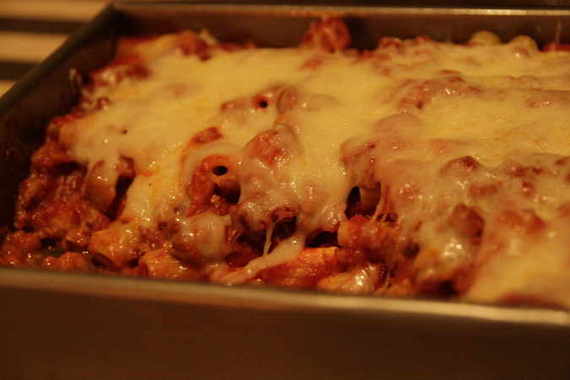
I don’t have a lot to say about this dish except that it’s delicious!! I’m all about cooking things that don’t take a lot of time to make and require minimal work! I’m a big fan of www.allrecipes.com/, which is where I found this Ziti recipe, and it was definitely tasty! It had never really occurred to me to use sour cream in baked Ziti, but it actually made the dish really creamy and gooey (and who doesn’t love that?!). This one’s definitely a keeper…
Baked Ziti
Adapted from allrecipes.com
1 (16 ounce) package dry ziti pasta
1 pound lean ground beef (I used ground turkey)
1 onion, chopped (I omitted this and used onion powder)
2 (28 ounce) jars spaghetti sauce
6 ounces sliced provolone cheese
6 ounces sliced mozzarella cheese
1 1/2 cups sour cream
1/2 cup grated Parmesan cheese
1/4 cup chopped fresh basil
I also added a clove of minced garlic for a little extra flavor
Bring a large pot of lightly salted water to a boil. Add pasta and cook for 8 to 10 minutes or until al dente; drain.
In a large skillet, brown beef over medium heat. Add onions; saute until tender. Drain off fat and add spaghetti sauce; simmer for about 15 minutes.
Preheat oven to 350 degrees F (175 degrees C).
In a lightly greased 2 quart baking dish, place about half of the pasta; top with a layer of provolone and mozzarella cheese slices. Spread on a layer of half the spaghetti sauce mixture and sour cream.
Cover with remaining pasta, cheese and sauce; sprinkle a layer of Parmesan cheese and fresh basil.
Bake in preheated oven for about 30 minutes or until cheese and sauce are bubbly; serve.

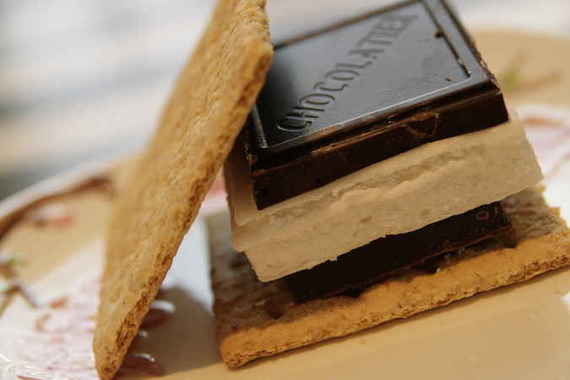
So, here it is – my very first Tuesdays with Dorie post. Pretty darn exciting, if you ask me. I’ve really been itching to join for weeks now, but for whatever reason I haven’t until now. I was super nervous about this week’s recipe, being that its my first ‘TWD’ post, and I wanted to “make a good impression”, so to speak, but also because its MARSHMALLOWS! For the love of Pete- marshmallows? For a girl who likes to make cute little cookies, easy-peasy brownies and cakes, and the occasional flan, tart, or other “slightly-more-challenging” dessert, marshmallows are like……….woah.
Now, for those of you who are wondering, “what the heck is Tuesdays with Dorie?!” – its a group of people (mostly women) who love to bake and love Dorie Greenspan’s new cookbook Baking: From My Home to Yours. Every week, a member of the group chooses one of Dorie’s (amazing) recipes for the group to make; then everyone makes the recipe and posts it in their cooking blog on Tuesdays. Sorry if I’ve just confused you….just go to the website if you still need more answers. tuesdayswithdorie.wordpress.com/
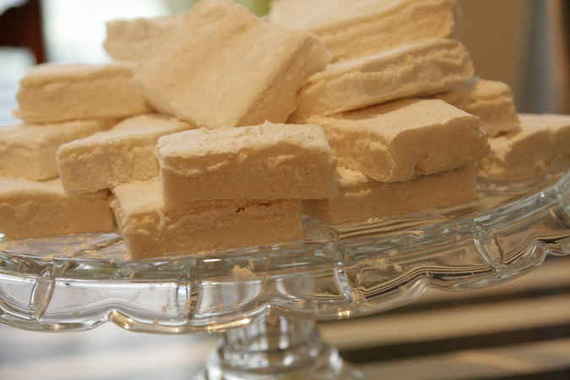
I’m not sure why I imagined marshmallows were so difficult to make – aside from being slightly tedious, they turned out to be fairly easy. I know a few people had encountered some problems with the marshmallows separating, or the egg whites deflating; I didn’t seem to have either of these issues – I guess I just got lucky this time around. I read a lot of the comments on the Tuesdays with Dorie website, which gave me a few helpful tips (like what to do with the extra tablespoon of sugar). So all-in-all, I’d say my first shot at marshmallows turned out to be a success!
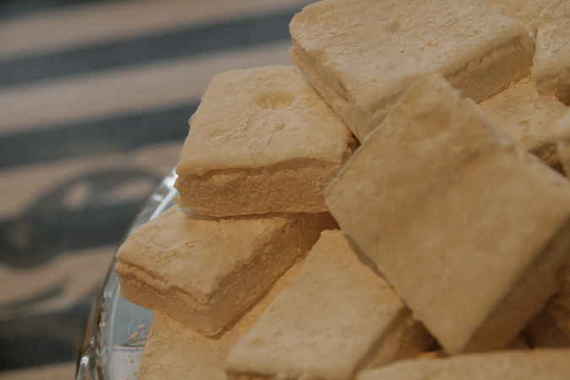
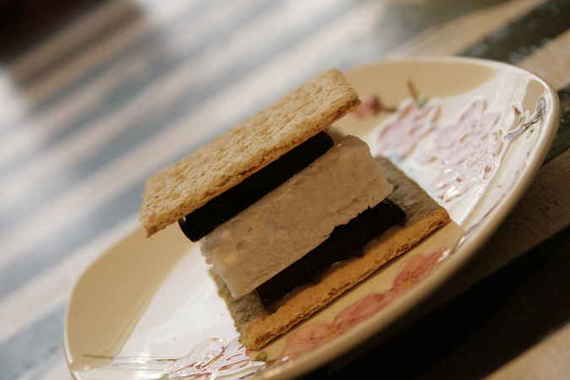
So many people made so many great “tweaks” and personal touches to the recipe – to see everyone’s results, go here. Since I wasn’t totally familiar with this recipe, I decided to keep it simple and not do anything fancy to mine. The only adjustment I made was substituting half of the vanilla with coconut extract – just for a little extra flavor. Just a tip – these are pretty tasty in a s’more!
Homemade Marshmallows
(any changes I made are in Italics)
Makes about 1 pound marshmallows
About 1 cup potato starch (found in the kosher foods section of supermarkets) or cornstarch
2 tablespoons light corn syrup
2 1/4-ounce packets unflavored gelatin
3 large egg whites, at room temperature
3/4 cup cold water
1 tablespoon pure vanilla extract
1 1/4 cups plus 1 tablespoon sugar
GETTING READY: Line a rimmed baking sheet — choose one with a rim that is 1 inch high (I used a 9×13 pan so my marshmallows would be nice and tall) — with parchment paper and dust the paper generously with potato starch or cornstarch. Have a candy thermometer at hand.
Put 1/3 cup of the water, 1 1/4 cups of the sugar and the corn syrup in a medium saucepan over medium heat. Bring the mixture to a boil, stirring until the sugar dissolves. Once the sugar is dissolved, continue to cook the syrup — without stirring — until it reaches 265 degrees F on the candy thermometer, about 10 minutes. (I didn’t have a candy thermometer and wasn’t interested in buying one – so I just did without. I just let the syrup cook for about 7-10 minutes, and it turned out fine)
While the syrup is cooking, work on the gelatin and egg whites. In a microwave-safe bowl, sprinkle the gelatin over the remaining cold water (a scant 7 tablespoons) and let it sit for about 5 minutes, until it is spongy, then heat the gelatin in a microwave oven for 20 to 30 seconds to liquefy it. (Alternatively, you can dissolve the gelatin in a saucepan over low heat.)
Working in the clean, dry bowl of a stand mixer fitted with the whisk attachment or in another large bowl with a hand mixer, beat the egg whites on medium-high speed until firm but still glossy — don’t overbeat them and have them go dull. (This is where I added the extra tablespoon of sugar that wasn’t ever called for in the original cooking directions)
As soon as the syrup reaches 265 degrees F, remove the pan from the heat and, with the mixer on medium speed, add the syrup, pouring it between the spinning beater(s) and the sides of the bowl. Add the gelatin and continue to beat for another 3 minutes, so that the syrup and the gelatin are fully incorporated. Beat in the vanilla.
Using a large rubber spatula, scrape the meringue mixture onto the baking sheet, laying it down close to a short end of the sheet. Then spread it into the corners and continue to spread it out, taking care to keep the height of the batter at 1 inch; you won’t fill the pan (unless you use a 9×13 like I did, then you will indeed fill the pan). Lift the excess parchment paper up to meet the edge of the batter, then rest something against the paper so that it stays in place (I use custard cups).
Dust the top of the marshmallows with potato starch or cornstarch and let the marshmallows set in a cool, dry place. They’ll need about 3 hours, but they can rest for 12 hours or more.
Once they are cool and set, cut the marshmallows with a pair of scissors or a long thin knife (I used a pizza cutter – it worked beautifully). Whatever you use, you’ll have to rinse and dry it frequently. Have a big bowl with the remaining potato starch or cornstarch at hand and cut the marshmallows as you’d like — into squares, rectangles or even strips (as they’re cut in France). As each piece is cut, drop it into the bowl. When you’ve got 4 or 5 marshmallows in the bowl, reach in with your fingers and turn the marshmallows to coat them with starch, then, one by one, toss the marshmallows from one hand to the other to shake off the excess starch; transfer them to a serving bowl. Cut and coat the rest of the batch.
Earlier today, I emailed Joel to ask him what he wanted for dinner…this was his response: “Surprise me. Make it blog-worthy.” Well, needless to say, “blog-worthy” is exactly what he got…..
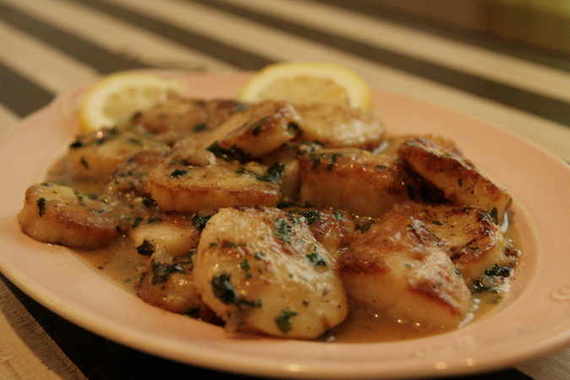
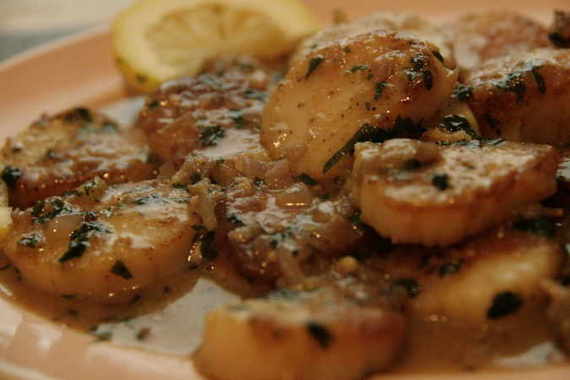
I had been wanting to try Ina Garten’s recipe for Scallops Provencal for a while now, and I thought surely, that would be blog-worthy! I absolutely adore scallops; they’re quite possibly, my favorite type of seafood. They’re good fixed just about any way – my dad wraps them in bacon and grills them…now that’s tasty, folks!
This dish took about 10 minutes total to make. Talk about a no fuss meal! I decided to serve couscous alongside the scallops, which was also a breeze to make. This meal is a prime example of something that looks like you went to a lot of trouble to make, but secretly, was a cakewalk. Joel really enjoyed it (and so did I, come to think of it!) and requested that I definitely make this again. So, I’d say that I succeeded in delivering a sure fire “blog-worthy” meal for my hard-workin’ man!
Scallops Provencal
-from Barefoot in Paris
1 pound fresh bay or sea scallops
Kosher salt and freshly ground black pepper
All-purpose flour, for dredging
4 tablespoons (1/2 stick) unsalted butter, divided
1/2 cup chopped shallots (2 large)
1 garlic clove, minced
1/4 cup chopped fresh flat-leaf parsley leaves
1/3 cup dry white wine
1 lemon, cut in 1/2
If you’re using bay scallops, keep them whole. If you’re using sea scallops, cut each 1 in half horizontally. Sprinkle with salt and pepper, toss with flour, and shake off the excess.
In a very large saute pan, heat 2 tablespoons of the butter over high heat until sizzling and add the scallops in 1 layer. Lower the heat to medium and allow the scallops to brown lightly on 1 side without moving them, then turn and brown lightly on the other side. This should take 3 to 4 minutes, total. Melt the rest of the butter in the pan with the scallops, then add the shallots, garlic, and parsley and saute for 2 more minutes, tossing the seasonings with the scallops. Add the wine, cook for 1 minute, and taste for seasoning. Serve hot with a squeeze of lemon juice.
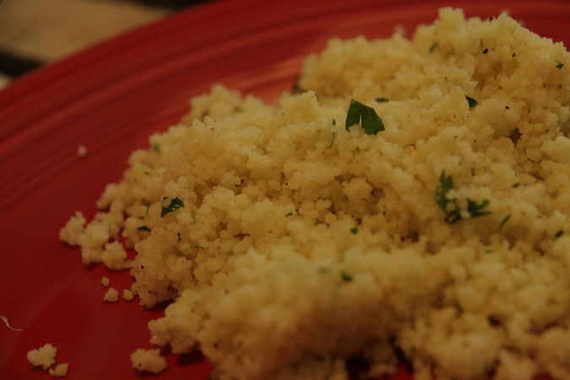
Simple Couscous
1 cup couscous
1 1/4cup chicken broth
1 tablespoon butter or olive oil (I used olive oil)
salt and pepper to taste
1/4 cup chopped fresh parsley
1/4cup grated Parmesan cheese
fresh lemon juice
Bring chicken broth and olive oil (or butter) to a boil. Remove from heat and add the couscous. Let sit for 5 minutes, then fluff with a fork. Add parsley, a squeeze of lemon juice, and parmesan cheese and stir.
I love french fries. Everybody loves them. You can find them all over the world – in Germany, I ate them served up alongside wiener schnitzel; when my friend Lindsay and I were in Italy, she was served a “french fry sandwich” of sorts (a pretty funny story, really, but I won’t go into it right this minute). They’re everywhere, and they’re delicious. But let’s face it, french fries aren’t the healthiest way to eat a potato. Unless……
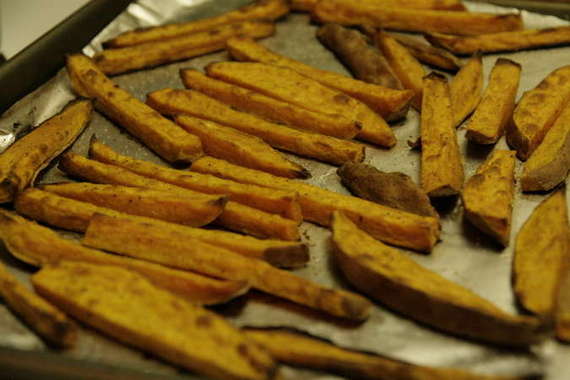
Yep, you guessed it – sweet potato fries. They’re baked, they’re delicious, and they’re good for you! I, personally, can’t get enough sweet potatoes. I’ll take them anyway I can get them – baked, with butter and brown sugar; in the “sweet potato soufflé” my mom sometimes makes, topped with coconut and chopped pecans; even the kind you get out of a can – in college, when I didn’t have an oven, I’d heat up canned sweet potatoes in the microwave for dinner; and, my new favorite: sweet potato fries, baked up crispy in the oven, served up with a garlic aioli for dipping.
These fries really are awesome. They’re incredibly easy to make and they’re versatile, too. You can add any seasonings you want – the possibilities are endless! I opted for simplicity and seasoned with garlic powder, salt and pepper. De-lish.
Baked Sweet Potato Fries
2 large sweet potatoes, scrubbed and cut into 1/2-inch sticks (this serves 2-3 people)
1 teaspoon garlic powder
1 teaspoon salt
1/2 teaspoon pepper
1 tablespoon olive oil
(I really didn’t measure – I just threw it all in, so these are just estimates – use as little or as much seasonings as you want)
In a large bowl, drizzle the sweet potato sticks with the olive oil and season with garlic powder, salt and pepper; toss to coat evenly.
Spread evenly on a baking sheet lined with foil (you might want to spray the foil with a little olive oil spray or Pam, just to ensure nothing sticks)
Bake at 400 degrees for 40-45 minutes, or until crisp and slightly brown. Serve with garlic aioli (recipe below)
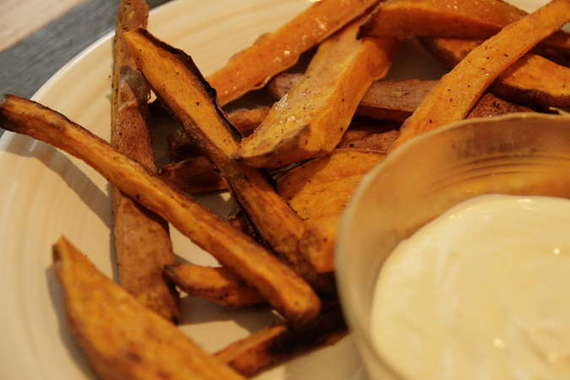
Garlic Aioli
-Giada DeLaurentiis
¾ cup mayonnaise
1 clove garlic, grated (you could just chop it if you want to, but I don’t like “chunks” of garlic, so I used my microplane)
1 tablespoon lemon juice
In a small bowl, combine mayonnaise, garlic and lemon juice; stir to combine.
The other night, hubby and I happened to be browsing through the kitchen gadget section at Bed, Bath, and Beyond (kitchen gadgets are a small obsession of mine, I admit…). I’d had my eye on a fancy microplane, but for some reason kept putting it back on the shelf saying to myself, “you don’t need that; just keep using the cheap, flimsy grater you have at home.” But something kept drawing me back to the microplane. Maybe it was its long, sleek shape; or perhaps the easy grip handle; or possibly the tiny little holes that grate so finely so that you don’t get large bits of lemon peel in your mouth, ala Amy’s old cheap grater. Whatever it was, I decided I owed it to myself to spend a mere thirteen dollars on this delightful gadget. Needless to say, I tested it out as soon as I got it home.
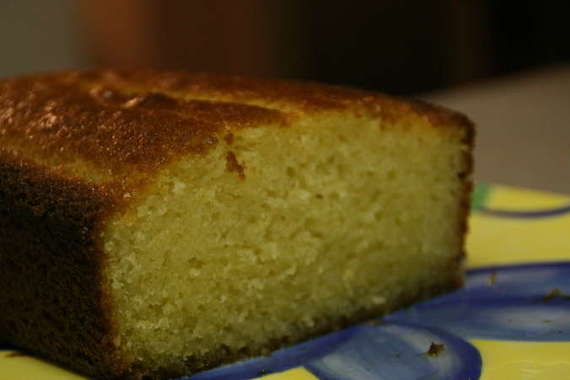
It wasn’t long after I got my magical microplane that Joelen of Joelen’s Culinary Adventures announced the “Tasty Tools Challenge Blogging Event”; and the tool of choice was the microplane!! Woo hoo! As a new blogger (and a fairly new cook), I couldn’t wait to jump in and be a part of this challenge. I was a little overzealous and made two dishes – Lemon Cake and Fruit Salad with Blood Orange syrup. However, I’m only posting the Lemon Cake because the fruit salad pictures turned out horrible (and let’s face it, who wants to read about a recipe with no picture?!).
This lemon cake is to die for! I made it the first time for my in-laws and it was a huge hit. It was so good, I told my mother all about it and she requested I serve it for her birthday dinner! Its pretty much made its way around to most of my family and everyone goes nuts for it. The tart, lemony glaze soaks into the warm cake, making it spongy with a burst of sweet lemon flavor. Its a fantastic way to end a meal, but its also great with your morning coffee…..or for a midday snack…tee hee. Anyway, I thoroughly enjoyed using my brand new microplane for this challenge (it really makes zesting SO much easier!) and I look forward to the next Tasty Tools Challenge! Hope you enjoy the lemon cake!
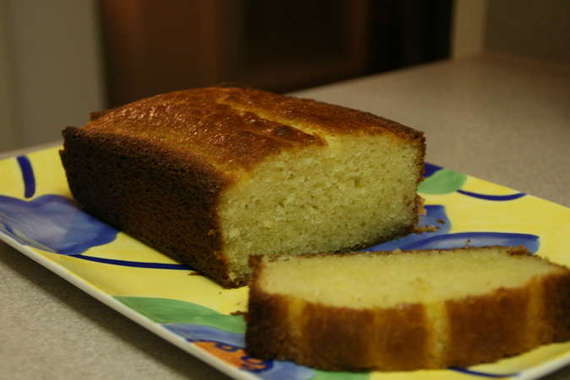
Lemon Cake
-adapted from Barefoot Contessa at Home
*The original recipe calls for yogurt, but I opted for Mascarpone cheese to add a little richness.
1 1/2 cups all-purpose flour
2 teaspoons baking powder
1/2 teaspoon salt
1 cup (8 oz container) Mascarpone cheese at room temperature
1cup sugar
3 extra-large eggs
2 teaspoons grated lemon zest (2 lemons)
1/2 teaspoon pure vanilla extract
1/2 cup vegetable oil
For the glaze:
1/2 to 1 cup confectioners’ sugar
2 tablespoons freshly squeezed lemon juice
Preheat the oven to 350 degrees F. Grease an 8 1/2 by 4 1/4 by 2 1/2-inch loaf pan.
Sift together the flour, baking powder, and salt into 1 bowl. In another bowl, mix together the mascarpone cheese and sugar with a hand mixer; then add the eggs, lemon zest, and vanilla. Slowly whisk the dry ingredients into the wet ingredients. With a rubber spatula, fold the vegetable oil into the batter, making sure it’s all incorporated. Pour the batter into the prepared pan and bake for about 45- 50 minutes, or until a cake tester placed in the center of the loaf comes out clean.
For the glaze, combine the confectioners’ sugar and lemon juice and pour over the cake while still warm.
Last Wednesday was a very exciting day. Something arrived in the mail that would bring some much needed excitement and adventure into my baking-life. I practically ran all the way to the mail box, then ran all the way back to my apartment to open my precious parcel. I tore through the packaging, and there it was – in the bottom of the box – Baking: From My Home to Yours by Dorie Greenspan. Oh joy! I sat there on my couch and read through the entire book like it was a novel. What a cookbook! The pictures are absolutely stunning and the description Dorie gives of each dessert – well, let’s just say I was practically drooling. I went through with post-it notes and marked each recipe that I wanted to try. Needless to say, my book is crammed full of little yellow post-its now!
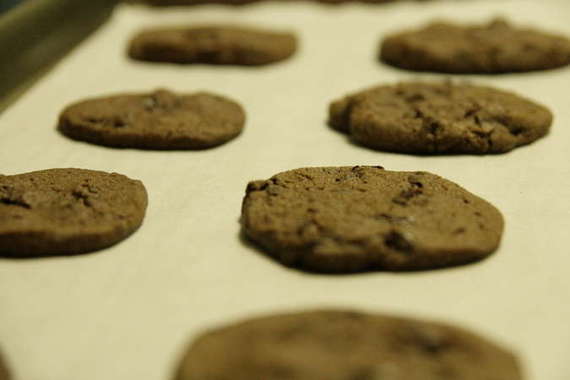
After careful consideration, I decided the first recipe I wanted to try was the World Peace Cookies – they sounded so unique and dainty. They were a breeze to make, and the results were delicious! A light, crunchy chocolate-chocolate chunk cookie (almost resembling a shortbread) that goes wonderfully with a glass of milk or your morning coffee. It was a nice break from the chewy, cakey cookies I’d been making so much of lately. As Dorie mentions in her description of the cookies, there’s a strong salty taste in the cookie – its perfect for those of us who love the combination of salty and sweet! As I suspected, Dorie didn’t let me down. I can’t wait to dig deeper into her book and create lots more of these delicious desserts!
World Peace Cookies
1 ¼ cups all-purpose flour
1/3 cup unsweetened cocoa powder
½ teaspoon baking soda
1 stick plus 3 tablespoons unsalted butter at room temperature
2/3 cup (packed) light brown sugar
¼ cup sugar
½ teaspoon fleur de sel or ¼ teaspoon fine sea salt
1 teaspoon pure vanilla extract
5 ounces bittersweet chocolate, chopped into chips
Sift the flour, cocoa and baking soda together.
Working with a stand mixer, preferably fitted with paddle attachment, or with a hand mixer in a large bowl, beat the butter on a medium speed until soft and creamy. Add both sugars, the salt and vanilla extract and beat for 2 more minutes. Turn off the mixer. Pour in the dry ingredients, drape a kitchen towel over the stand mixer to protect yourself and your kitchen from flying flour and pulse the mixer at low speed about 5 times, a second or two each time. If there is still a lot of flour on the surface of the dough, pulse a couple times more; if not, remove the towel. Continuing at low speed, mix for about 30 seconds more, just until the flour disappears into the dough – for the best texture, work the dough as little as possible once the four is added, and don’t be concerned if the dough looks a little crumbly. Toss in the chocolate pieces and mix only to incorporate. Turn the dough out onto a work surface, gather it together and divide it in half. Working with one half at a time, shape the dough into logs that are 1 ½ inches in diameter. Wrap the logs in plastic wrap and refrigerate them for at least 3 hours (the dough can be refrigerated for up to 3 days or frozen for up to 2 months. If you’ve frozen the dough, there’s no need to defrost it before baking – just slice the logs into cookies and bake the cookies 1 minute longer).

Getting ready to bake:
Center a rack in the oven and preheat the oven to 325 degrees. Line two baking sheets with parchment paper.
Using a sharp, thin knife, slice the logs into rounds that are ½ inch thick (the rounds are likely to crack as you slice them – don’t be concerned, just squeeze the bits back onto each cookie). Arrange the rounds on the baking sheets, leaving about 1 inch between them.
Bake the cookies one sheet at a time for 12 minutes – they won’t look done or be firm, but that’s the
way they should be. Transfer the baking sheet to a cooling rack and let the cookies rest until they are only just warm, at which point you can serve them or let them reach room temperature.


