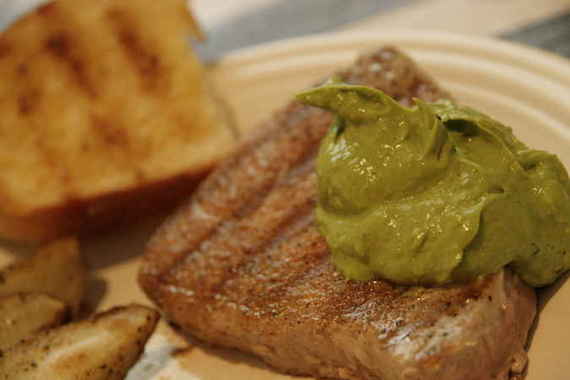
I have a confession to make: anytime I hear anyone talk about a Cooking Light recipe, my eyes glaze over and I sort of just stop listening all together. Just not interested. Now, don’t get me wrong, I’m not one of those “Paula-Dean-butter-and-fat-lovin” kind of cooks that hates all things healthy – I just tend to think cooking light = no flavor. I don’t really know why…I know, I know – it doesn’t really make sense. So, with that thought in mind, I decided to give Cooking Light a try. I found one of those magazine/cookbooks at my grocery store, flipped through it, and found a few recipes that actually didn’t sound half bad – so I bought it. So far, everything I’ve made out of it has been pretty tasty – including these tuna steaks with green goddess aioli.
This was a delicious meal! Of course, I love anything with avocados! The green goddess aioli would be great on just about anything, I think! Super easy to make and not to mention quick! I made my tuna extra spicy, which was really nicely balanced by the coolness of the aioli. I served it with some oven roasted potato wedges, grilled veggies and grilled sourdough bread.

Tuna Steaks with Green Goddess Aioli
-Adapted from Cooking Light
For the Aioli:
1/4 Cup fat-free sour cream (I used reduced fat)
2 Tablespoons chopped fresh cilantro
1 Tablespoon chopped fresh basil (I used more like 2 or 3 tablespoons because I love basil!)
1 Tablespoon chopped fresh parsley
2 ripe avocados, peeled and pitted
2 Tablespoons fat-free mayonnaise
1 Tablespoon lemon juice (I used 2 or 3)
1/4 teaspoon salt
1 garlic clove, chopped
Combine all ingredients in a blender and process until smooth. Store in the refrigerator until ready to use.
For the Tuna:
Season 2 to 4 tuna steaks on both sides with salt, pepper, ground cumin and cayenne pepper (I used a lot), and cook on a grill pan (over medium-high heat) for two minutes on each side until desired doneness.
Spoon green goddess aioli over tuna steaks and serve.
So, I guess this proves that Cooking Light really isn’t so bad – they’ve got some pretty yummy recipes, actually! From now on, anytime someone tells me about a Cooking Light recipe – I’ll actually listen! Maybe even get the recipe from them to try for myself! See, I’m growing…..
Ok, I admit it – I, Amy-the-blogger, am a CHICKEN. There. I said it – now you know.
Last week, I excitedly went to check the Tuesdays with Dorie webpage to see what this week’s recipe would be….and there it was – “Madam Chow of Madam Chow’s Kitchen has chosen Pecan Honey Sticky Buns…” Oh grrrrrrreat. Brioche – my arch nemesis. I have tried (and failed miserably) making brioche before – Dorie’s Golden Brioche Loaves, as a matter of fact. After hours of mixing, rising, “slapping”, and countless phone calls to my mother (“ok, now am I doing this part right?”) I ended up with a rock-hard, greasy loaf of…well, let’s just say not brioche! So, needless to say, when I saw this week’s pick, I was a little nervous. Ok fine – I was shaking in my BOOTS, I admit it!! Go ahead, judge me all you want…I didn’t make the little Pecan Sticky Devils and I’m not sorry! On top having late night Turandot rehearsals almost every night and opening Saturday (which went awesome, by the way!! My solo went perfectly! Phew!), which didn’t leave any time for much else this week, I wasn’t prepared to stare failure in the face again so soon. So, I opted for the Almost Fudge Gateau instead.
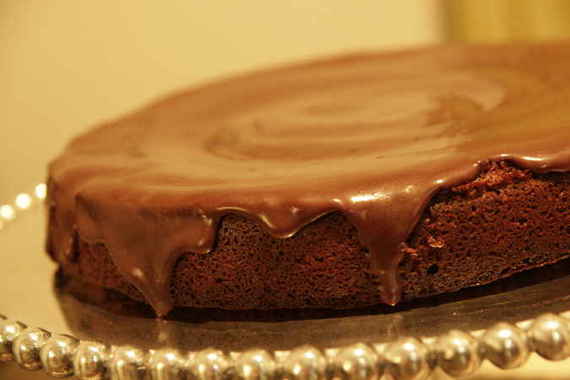
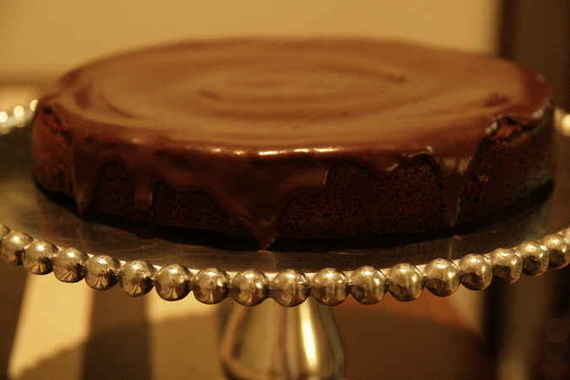
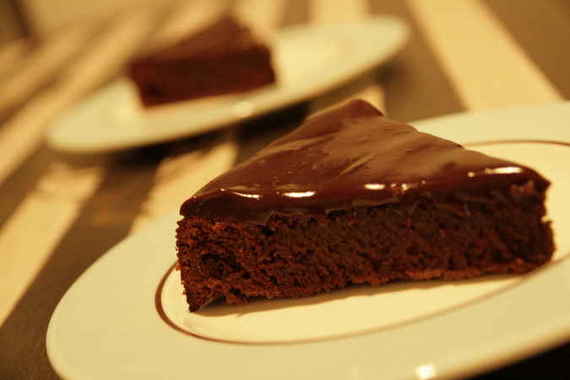
Lemme tell ya, this is one tasty little “cake”. I was shocked at how dense and fudgey it was, since it calls for beaten egg whites, which I thought would’ve made it light and fluffy. But, the title describes it perfectly – almost fudge! Not surprisingly, that’s why I chose the recipe from all of the past TWD recipes – anything with “almost fudge” in the title will win me over automatically every time! I will say, though – use a chocolate that you really, really enjoy, because the chocolate is the most predominant flavor in the cake. I used a pretty dark chocolate, so my cake was a little on the bitter side, but still very tasty. I might try it with a milk chocolate next time, just to see how it turns out.
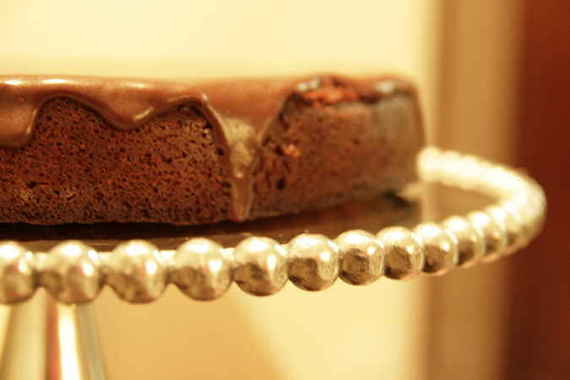
And definitely go with the optional glaze!! YUM! I can’t imagine this cake without the chocolate ganache on top of it! Ok, ok, so it is a bit of a chocolate overload, but hey, its delicious and its worth it!
Almost-Fudge Gâteau
5 large eggs
9 ounces bittersweet chocolate, coarsely chopped
1 cup of sugar
5 tablespoons unsalted butter, cut into chunks
2 tablespoons coffee or water
1/3 cup all-purpose flour
Pinch of salt
For the Glaze (optional)
4 ounces bittersweet chocolate, coarsely chopped
½ cup heavy cream
2 teaspoons light corn syrup
Getting Ready:
Center a rack in the oven and preheat the oven to 350 degrees F. Butter a 9-inch springform pan, line the bottom with parchment paper, butter the paper, dust the inside of the pan with flour and tap out the excess. Place the pan on a baking sheet lined with parchment or a silicone mat.
Separate the eggs, putting the whites in a mixer bowl or other large bowl and the yolks in a small bowl.
Set a heatproof bowl over a saucepan of simmering water and add the chocolate, sugar butter and coffee. Stir occasionally until the chocolate and butter are melted; the sugar may still be grainy, and that’s fine. Transfer the bowl to the counter and let the mixture sit for 3 minutes.
Using a rubber spatula, stir in the yolks one by one, then fold in the flour.
Working with the whisk attachment of the mixer or a hand mixer, beat the egg whites with the pinch of salt until they hold firm, but glossy peaks. Using the spatula, stir about one quarter of the beaten whites into the batter, then gently fold in the rest. Scrape the butter into the pan and jiggle the pan from side to side a couple of times to even the batter.
Bake for 35 to 45 minutes, or until the cake has risen evenly (it might rise around the edges and you’ll think it’s done, but give it a few minutes more, and the center will puff too) and the top has firmed (it will probably be cracked) and doesn’t shimmy when tapped; a thin knife inserted into the center should come out just slightly streaked with chocolate. Transfer the pan to a cooling rack and let the cake rest for 5 to 10 minutes.
Run a blunt knife gently around the edges of the cake and remove the sides of the pan. Carefully turn the cake over onto a rack and remove the pan bottom and the parchment paper. Invert the cake onto another rack and cool to room temperature right side up. As the cake cools, it may sink.
To Make the Optional Glaze:
First, turn the cooled cake over onto another rack so you’ll be glazing the flat bottom, and place the rack over a baking sheet lined with parchment or wax paper to catch any drips.
Put the chocolate in a small heatproof bowl.
Melt the chocolate over a pan of simmering water or in a microwave oven – the chocolate should be just melted and only warm, not hot. Meanwhile, bring the cream to a boil in a small sauce pan. Pour the hot cream over the chocolate and stir very gently with a rubber spatula until the mixture is smooth and shiny. Stir in the corn syrup.
Pour the glaze over the cake and smooth the top with a long metal icing spatula. Don’t worry if the glaze drips unevenly down the sides of the cake – it will just add to its charms. Allow the glaze to set at room temperature or, if you’re impatient, slip the cake into the refrigerator for about 20 minutes. If the glaze dulls in the fridge, just give it a little gentle heat from a hairdryer.
If you would like to visit the blogs of the TWD members who aren’t big whiney-baby-scaredy-pants chickens and check out their versions of Pecan Honey Sticky Buns, go here.
P.S. Don’t judge me.
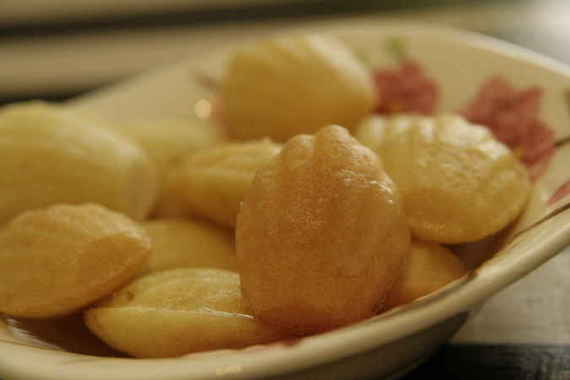
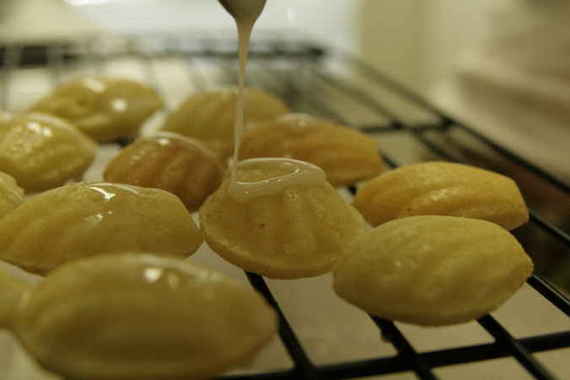
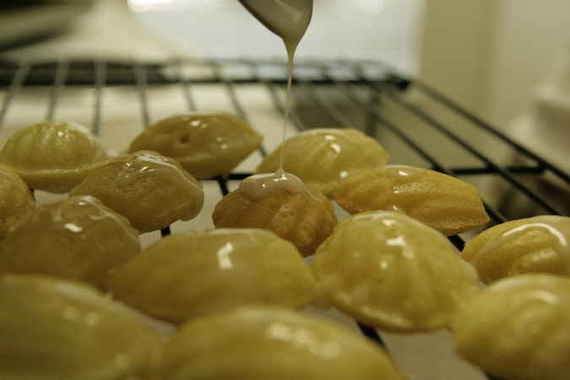
I felt fancy this week. I don’t really have a lot of experience with making French desserts- as a matter of fact, I can’t think of a time I’ve ever made a French dessert (don’t I sound like a little country bumpkin?!). So when Tara of Smells Like Home chose Traditional Madeleines for this week’s TWD recipe, I was thrilled. I had never (gasp!) had a madeleine before, but I had always wanted to try them. This was my chance to be fancy in the kitchen! Yee haw!
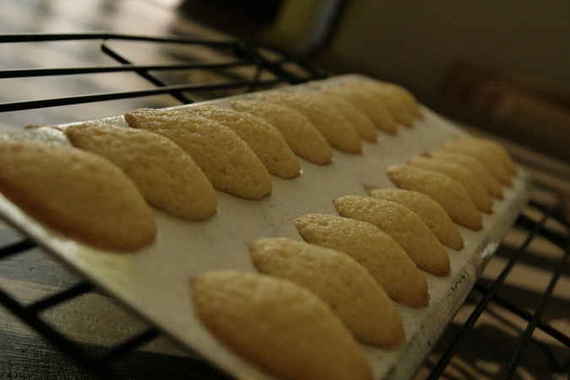
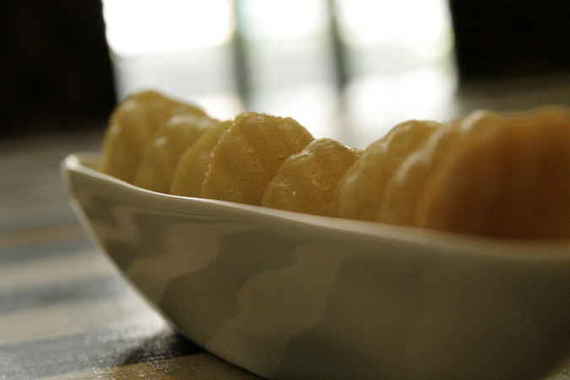
I think I may have filled my molds a little too full (thus, giving them too much of a “puff”), but honestly, I kinda liked them better that way. I chose to kick up the flavor a little by topping the warm madeleines with a lemon glaze (super YUM). But I was sure to try them fresh out of the oven without the glaze, and they tasted wonderful plain, as well. I also chose to make mini madeleines, because that’s the pan that I had, plus, I really enjoy all things “mini”.
Traditional Madeleines
2/3 cup all-purpose flour
3/4teaspoon baking powder
Pinch of salt
1/2cup sugar
Grated zest of 1 lemon
2 large eggs, at room temperature
2 teaspoons pure vanilla extract
3/4stick (6 tablespoons) unsalted butter, melted and cooled
Confectioners’ sugar, for dusting (I omitted this)
Whisk together the flour, baking powder and salt.
Working in a mixer bowl, or in a large bowl, rub the sugar and lemon zest together with your fingertips until the sugar is moist and fragrant. Add the eggs to the bowl. Working with the whisk attachment, or with a hand mixer, beat the eggs and sugar together on medium-high speed until pale, thick and light, 2 to 3 minutes. Beat in the vanilla. With a rubber spatula, very gently fold in the dry ingredients, followed by the melted butter. Press a piece of plastic wrap against the surface of the batter and refrigerate it for at least 3 hours, or for up to 2 days. This long chill period will help the batter form the hump that is characteristic of madeleines. (For convenience, you can spoon the batter into the madeleine molds, cover and refrigerate, then bake the cookies directly from the fridge; see below for instructions on prepping the pans.)
GETTING READY TO BAKE: Center a rack in the oven and preheat the oven to 400 degrees F. Butter 12 full-size madeleine molds, or up to 36 mini madeleine molds, dust the insides with flour and tap out the excess. Or, if you have a nonstick pan (or pans), give it a light coating of vegetable cooking spray. If you have a silicone pan, no prep is needed. Place the pan(s) on a baking sheet.
Spoon the batter into the molds, filling each one almost to the top. Don’t worry about spreading the batter evenly, the oven’s heat will take care of that. Bake large madeleines for 11 to 13 minutes, and minis for 8 to 10 minutes, or until they are golden and the tops spring back when touched. Remove the pan(s) from the oven and release the madeleines from the molds by rapping the edge of the pan against the counter. Gently pry any recalcitrant madeleines from the pan using your fingers or a butter knife. Transfer the cookies to a rack to cool to just warm or to room temperature.
If you are making minis and have more batter, bake the next batch(es), making certain that you cool, then properly prepare the pan(s) before baking.
Just before serving, dust the madeleines with confectioners’ sugar.
makes 12 large or 36 mini cookies
serving: Serve the cookies when they are only slightly warm or when they reach room temperature, with tea or espresso.
These were so delicious, and so incredibly simple to make (and that means a lot, coming from the Ambassador of “Oops”!). I really enjoyed making these, and felt so fancy eating them! These cookies are perfect as is, but if you would like to try them with the lemon glaze (which, in my opinion makes them even more perfect!), mix the juice of one large lemon with approx. 1/2 cup confectioner’s sugar and drizzle over warm cookies.

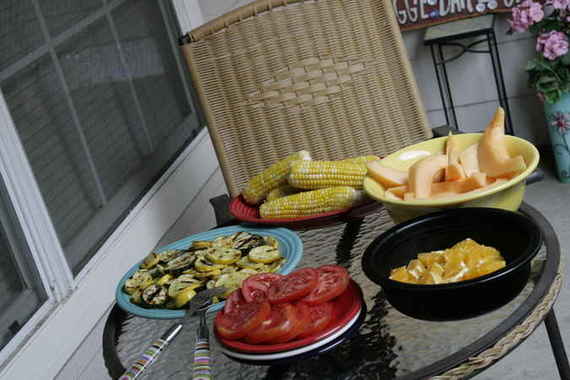
It’s been one heck of a week. Between late night opera rehearsals, work and plenty of uncalled for D-R-A-M-A, I haven’t had much time for cooking, cleaning, quality time with my husband, or shoot, even eating! Needless to say, I’ve been a little stressed. But today, thank the good Lord, I had a day off. There was a pile of whites on my couch that desperately needed folding, my kitchen was in less-than-perfect condition, and my dining room table looks more like dump grounds than a place to sit down and eat. Yeah, I know – lots of work to be done! However, it was a gorgeous, sunny day and it felt like summer outside, sooooooo, I decided to go hang out by the pool (The laundry can wait.). It was glorious….97 degrees with a delightful breeze, drink in hand, sunglasses, iPod playing the Beach Boys….the makings of a perfect afternoon! As I lay there soaking up the sun, slowly letting all the stress melt away, I was (of course) thinking about what to fix for dinner – not a hard decision – two words: grilled vegetables. One of my favorite things about the spring/summer is going to the farmers market and wandering around to see what looks good. I almost always come away with corn on the cob, tomatoes, cantaloupe and green beans. One of my favorite meals is grilled corn on the cob, green beans and red potatoes, fresh sliced tomatoes and a fresh, ripe cantaloupe . I decided to do an all-vegetable meal like that tonight. The weather was too perfect! So my buddy Alyshia and I headed to the farmers market and loaded up on yummy, fresh, delicious veggies and fruits. I decided to just do some simple grilled corn on the cob, zucchini and summer squash served with a sliced cantaloupe, sliced tomatoes (delicious with salt and pepper!) and some sliced oranges (Joel loves oranges!). There’s not much of a “recipe” for this post – I just seasoned everything and threw it on the grill – but it was too yummy not to blog it!
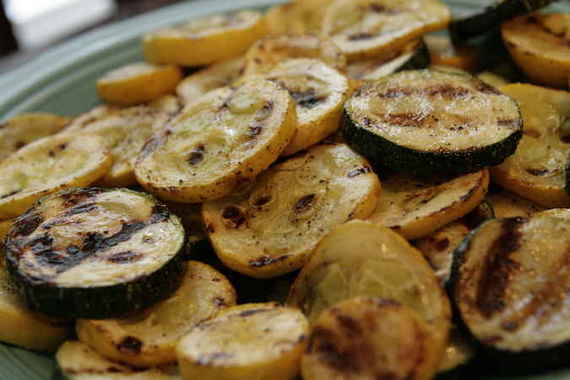
Grilled Zucchini and Summer Squash
One large zucchini, sliced
Two small summer squash, sliced
Olive oil
salt, pepper, seasoning salt
In a large bowl, toss sliced zucchini and squash with olive oil (as much as you’d like), salt, pepper, and seasoning salt. Grill on one side for 3-5 minutes, then turn and cook for another 2-3 minutes.
Grilled Corn on the Cob
There’s really no recipe for this – I just cleaned off the husks, seasoned them with salt and pepper, wrapped them in foil and cooked them on the grill for about 25-30 minutes, turning every 5 minutes or so. Top with butter and serve! Yummy!

It was such a nice evening, we decided to have a little “picnic” on our balcony! Mmmm, grilled corn, zucchini, squash, sliced tomatoes, cantaloupe and oranges…the perfect all-vegetable, yet completely filling and delicious summertime meal!!
Oops – I forgot to include this recipe in the “For Mommy” post below….so, since I’m lazy and don’t want to go back and add it – I’ll just make a new post. And now that I think of it – I believe this bread is good enough that it deserves its own post! So there!
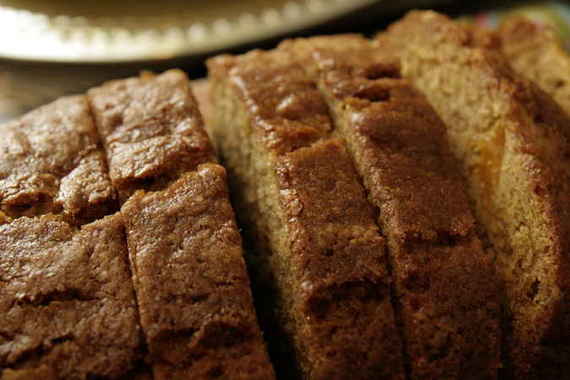
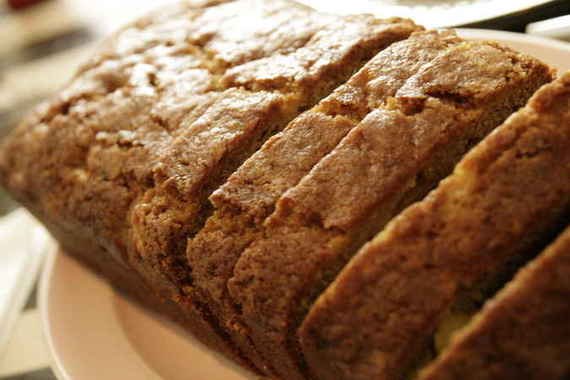
(Finally, some decent pictures!!) This recipe is great – I made it specially for my mom because she and my dad are on a “mango kick” right now and can’t seem to get enough mangos. I personally, thought it sounded a little odd, but as it turns out, this is a pretty tasty loaf!
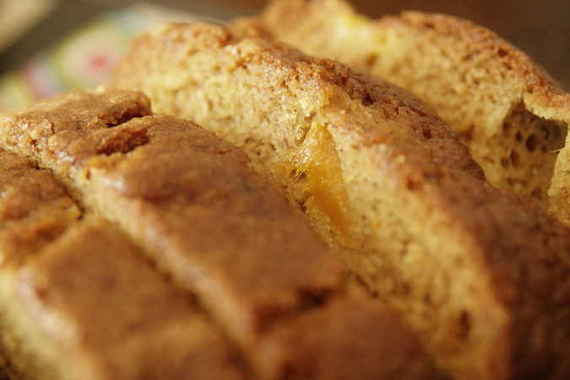
Fresh Mango Bread
from Dorie Greenspan’s Baking: From My Home to Yours
3 large eggs
3/4 cup flavorless oil, such as canola or safflower oil (I used vegetable)
1 cup sugar
1 tsp baking powder
1 tsp baking soda
1 1/2 tsp ground ginger
1 tsp ground cinnamon
1/4 tsp salt
1/2 cup light brown sugar
2 cups diced mango
3/4 cup golden raisins (I omitted this)
grated zest of 1/2 a lime
1. Center a rack in the oven and preheat the oven to 350′. Butter an 8 1/2 x 4 1/2 inch loaf pan, dust the inside with flour and tap out the excess. Put the pan on an insulated baking sheet or on two regular baking sheets stacked one on top of the other.
2. Whisk the eggs and oil together.
3. In a large bowl, whisk together the flour, sugar, baking powder, baking soda, spices and salt. Rub the brown sugar between your palms into the bowl, breaking up any lumps, then stir it in.
4. Pour the wet ingredients over the dry, switch to s sturdy rubber spatula or wooden spoon and mix until blended. The batter will be very thick (really more like a dough than a batter) and not easily mixed, but persevere, it will soon come together.
5. Stir in the mango, raisins and zest. Scrape the batter into the pan and smooth the top with a rubber spatula.
6. Bake the bread for 1 1/2 hours, or until it is golden brown and a thin knife inserted into the centre comes out clean. (If the bread looks as if it’s getting too brown as it bakes, cover it loosely with a foil tent.)
7. Transfer the pan to a rack and cool 5 minutes before running a knife around the sides of the pan and unmolding. Invert and cool to room temperature right side up on the rack.
Mmmm, yummy!!! Go make some!
Mother’s Day was kind of unfortunate this year. My mom was having my sister and her family and my grandparents stay for the weekend, and I offered to have a Mother’s Day brunch on Sunday morning for everybody (9 people total). I was so excited to have everyone over – neither my grandparents or my sister had ever had a meal at my apartment. Joel and I worked so hard to get everything ready the night before so that all I would have to do Sunday morning was pop the casseroles in the oven. Everything was perfect. And then, as luck would have it, I ended up being sick all through the night. I was still feeling horrible Sunday morning, so my mom told me to go back to bed and she and my grandparents would just come back the next morning. So, it sort of worked out anyway – although my sister and her husband weren’t able to be there, nor my dad, which sucked. However, we still had a really good time, and hopefully they enjoyed the food.
My menu consisted of:
Fresh Mango Bread
Pioneer Woman’s Breakfast Potatoes
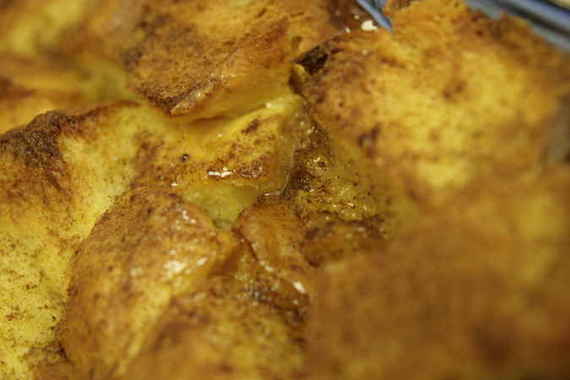
Baked Caramel French Toast
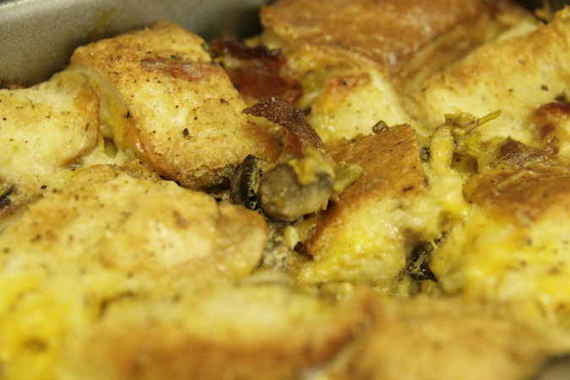
Bacon, Egg and Cheese Strata
Peach Bellinis
I had made the french toast before at Christmas and it was delicious – once again, it didn’t disappoint. Please, please, PLEASE excuse my appalling pictures- it was early Monday morning and I was expecting guests in any second, and I was still a little under the weather. I probably shouldn’t even post these pictures, but I wanted you to have some sort of idea of what the dishes look like (even if they do resemble something you might feed to your dog).
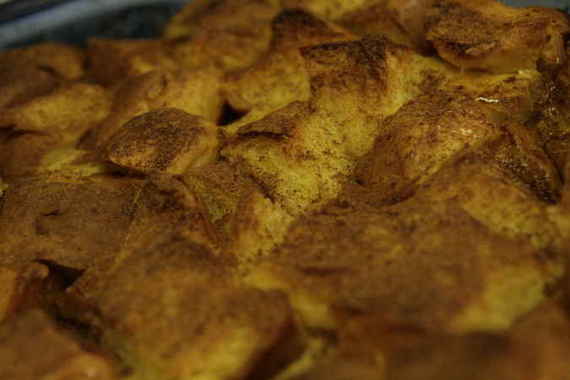
(That’s the baked french toast, in case you can’t tell…..I barely can)
Baked Caramel French Toast
– from The Magic of Christmas Gooseberry Patch Cookbook
1/2 Cup butter
1 Cup brown sugar, packed
2 Tablespoons light corn syrup
1 loaf french bread,cubed (I used Challah)
6 eggs
1 1/2 Cups milk
2 teaspoons vanilla extract
cinnamon to taste
Blend together butter, brown sugar and corn syrup in a medium saucepan over medium heat. Bring to a boil, then remove from heat. Pour into ungreased 9×13 baking dish. Place bread cubes in baking dish over sauce. Whisk together eggs, milk and vanilla until well blended; pour over bread and sprinkle with cinnamon. Let sit in the refrigerator for at least an hour (my plan was to let this sit overnight, but since we ended up having guests the next day, it sat for 2 nights and was still perfect! I just splashed a little half and half over it before i baked it). Bake at 300 degrees for one hour.
This egg strata was amazing – I can’t wait to make this again. Even with the bread, it was still light and fluffy and full of flavor! Once again, I present you with an unbelievably horrible picture. Please don’t base your opinion of this dish on my picture – it tastes SO much better than it looks!! Give it a try!!

Bacon, Egg and Cheese Strata
from allrecipes.com
12 thick slices white bread, cut into 1 inch cubes (I used almost a whole loaf of french bread)
1/4 cup crumbled cooked bacon (I used half a pound)
2 cups shredded Cheddar cheese
1 1/2 cups chopped fresh mushrooms
12 eggs
2 1/2 cups half-and-half
1 teaspoon Dijon mustard (I also used a little dry mustard)
(I also added a small can of diced green chiles and a little garlic powder)
Toss cubed bread with bacon, cheese, and mushrooms, and pour into a 9×13 inch baking dish. Whisk together eggs, half-and-half, and mustard (this is where I added the green chiles) until smooth, then pour evenly over cubed bread. Cover dish with plastic wrap, and refrigerate overnight.
Preheat oven to 350 degrees.
Remove plastic wrap from the baking dish, and bake strata in preheated oven until the top is golden brown, and the eggs are set, about 1 hour. Let stand for 10 minutes before serving.
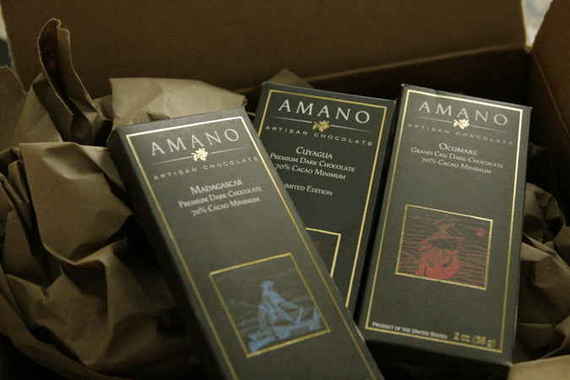
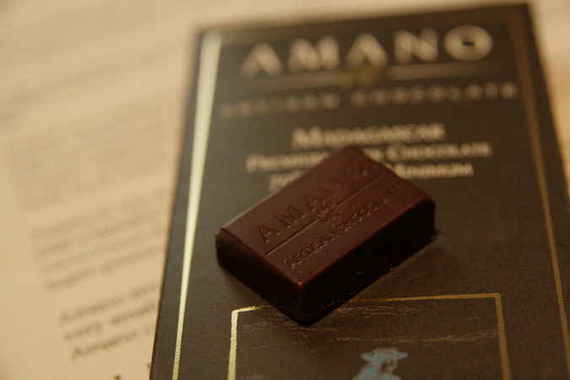
Thank you, Blake!! I was one of 98 (or 99 – I can’t remember) lucky food bloggers to win three bars of Amano Chocolate from www.blakemakes.com. This stuff is amazing – nice and dark, with a slight fruity taste….it was hard for me not to just sit down and eat all three bars right then. However, I knew I wanted to use it to make something that would really show off the flavor of the chocolate, so I limited myself (with some difficulty) to sampling just one tiny square from each bar.
I knew I had to come up with something good for this chocolate – originally I had planned on chocolate pudding, but one night as I was perusing my favorite food blog, Joy the Baker, I saw a her recipe for hot fudge (Lord almighty, this looked good!) atop Dorie Greenspan’s blueberry sour cream ice cream, and I knew exactly what I wanted to do with my Amano chocolate.
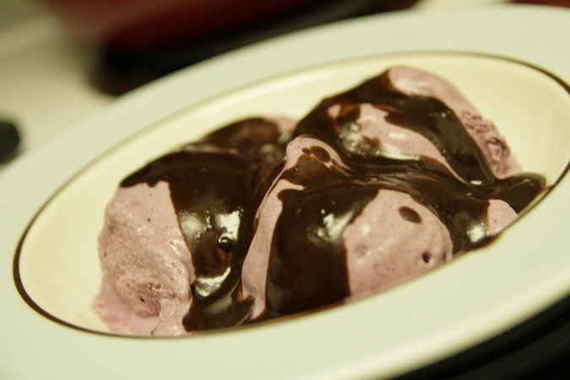
Now, you will have to excuse the wretched picture – as soon as my chocolate sauce was finished I decided I couldn’t wait for my ice cream to harden completely, soooo, the ice cream was more like soft-serve, thus, the horrible, “melty mess” of a picture. (I’m not sorry – it was delicious, and I’d do it again, given the chance!)
Dark Chocolate Hot Fudge
– Joy the Baker
1/4 cup unsweetened Dutch-processed cocoa powder
1/3 cup packed dark brown sugar
1/2 cup light corn syrup
2/3 cup heavy cream
1/4 teaspoon salt
6 ounces good bittersweet chocolate (not unsweetened), finely chopped (such as Amano! Mmmmm!)
2 Tablespoon unsalted butter, cup into 1/2 Tablespoons
1 teaspoon vanilla extract
Stir together cocoa powder, brown sugar, corn syrup, cream, salt and half of the chopped chocolate in a 2-quart heavy saucepan and cook over moderate heat, stirring, until chocolate is melted. Cook mixture at a low boil, stirring occasionally, for 5 minutes.
I decided not to post the blueberry ice cream recipe, but if you would like to have it, go here. And if you wanna know more about Amano Chocolate (and trust me, you do), go here.
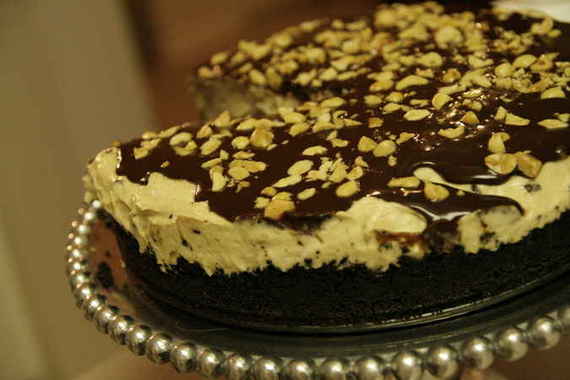
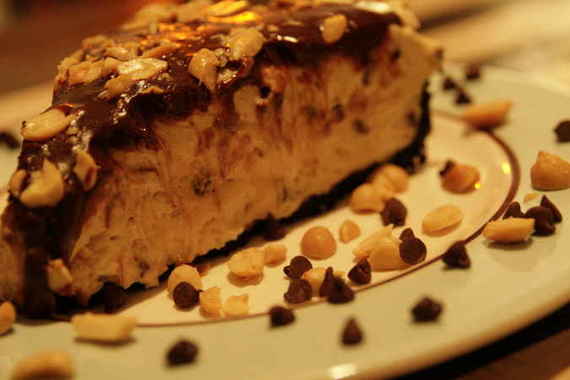
Ok, so you’re probably wondering, “what’s with the dorky ‘Rachael Ray-esque’ title?” Well, this week’s TWD recipe (Peanut Butter Torte, chosen by Elizabeth of Ugg Smell Food) was sort of two-fold for me. As always, it was another baking adventure that pushed me to try things out of my comfort zone, but it also served as a celebratory (or celebra-torte-y, if you will….hehe) cake for me. Allow me to steer away from the subject of TWD for a second:
As sort of a “second job”, I sing in the chorus of a nearby opera company every summer. Last summer was my first season with them and the opera we did (called Falstaff) had a teeny-tiny chorus role. The chorus was on stage for a total of 5 minutes, maybe. This year, however, is different – this year we’re doing Puccini’s Turandot and the chorus plays a significant role in the opera…we’re on stage practically the entire time! Woo hoo! So, the other night in rehearsal, we came to a part of the score where there was a small soprano solo. I wasn’t even paying attention because I just figured the director would give it to one of the ladies who had been in the company for a while. Out of nowhere, I heard the director say my name, and as I looked up, sure enough, he was pointing right at me (This would be the part that, if I were telling you this story in person, I’d be jumping up and down and screaming). So, after I had sort of gotten a grip on reality and my face had turned four shades of red, it finally occurred to me, “omigoshomigoshomigosh I just got a solo! I just got a solo! I just got a SOLO!” Now, this is a pretty big opera company, mind you; and I’m just a lowly chorus mignon; so hopefully you can understand my excitement.
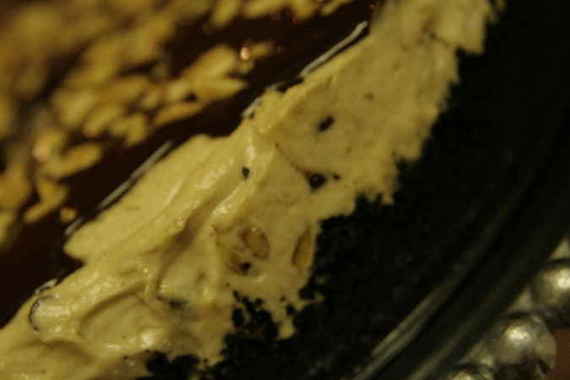
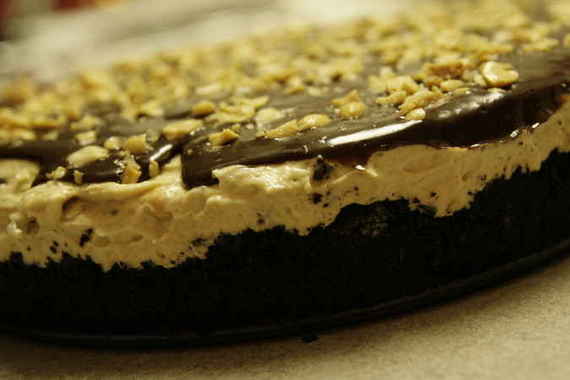
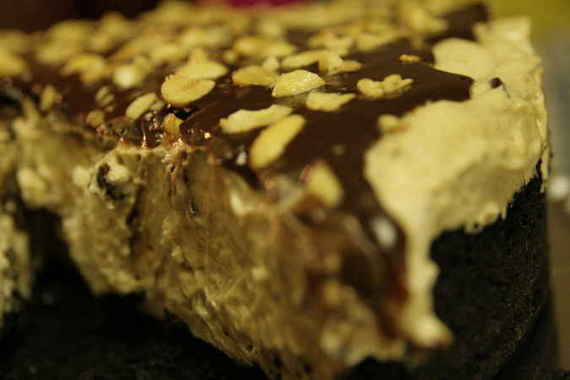
So, anyway, when something big like that happens, I always make some kind of fun dessert or meal to celebrate (last year, when I auditioned and made the opera company for the first time, I made cranberry white chocolate cookies); well I was already making the Peanut Butter Torte for Tuesdays with Dorie and that’s pretty fun, fancy dessert, so I thought, “I’ll just make this as a ‘congratulations to me’ dessert!” And that’s just what this torte is; something to celebrate with! I don’t think I would make this for anything other than a celebration or a big dinner party – its one of those desserts you only need to eat once a year, if not less – its chock full of fat and calories (but worth every bite, in my chubby opinion). You could always halve the recipe, though, if you wanted to make it for two or even four. However you make it, though – its darned delicious. The espresso powder gives it a slight coffee taste, which just adds mountains of flavor to the peanut butter mousse filling. I also loved the crunch of the peanuts and chocolate chips – and that oreo crust….heaven!
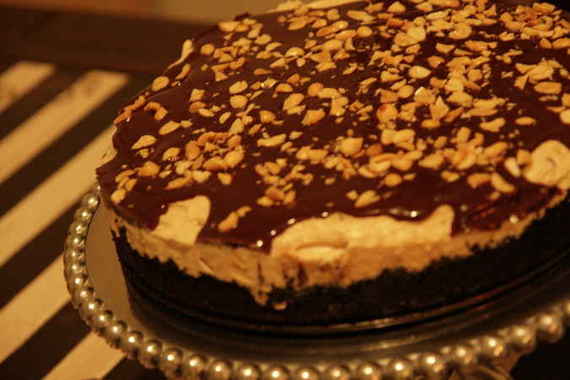
This was the perfect (don’t worry, I’ll say it normal this time-) celebratory dessert – and from now on, whenever I make this delectable peanut butter torte, I’ll always look back and think on the time I got my first solo with a big opera company!
Peanut Butter Torte
1 1/4 c. finely chopped salted peanuts (for the filling, crunch and topping)
2 teaspoons sugar
1/2 teaspoon instant espresso powder (or finely ground instant coffee)
1/4 teaspoon ground cinnamon
Pinch of freshly grated nutmeg
1/2 c. mini chocolate chips (or finely chopped semi sweet chocolate)
24 Oreo cookies, finely crumbed or ground in a food processor or blender
1/2 stick (4 tablespoons) unsalted butter, melted and cooled
Small pinch of salt
2 1/2 c. heavy cream
1 1/4 c confectioners’ sugar, sifted
12 ounces cream cheese, at room temperature
1 1/2 c salted peanut butter – crunchy or smooth
2 tablespoons whole milk
4 ounces bittersweet chocolate, finely chopped
Getting ready: center a rack in the oven and preheat the oven to 350°F. Butter a 9-inch Springform pan and place it on a baking sheet lined with parchment or a silicone mat.
Toss ½ cup of the chopped peanuts, the sugar, espresso powder, cinnamon, nutmeg and chocolate chops together in a small bowl. Set aside.
Put the Oreo crumbs, melted butter and salt in another small bowl and stir with a fork just until crumbs are moistened. Press the crumbs evenly over the bottom and up the sides of the spring form pan (they should go up about 2 inches on the sides). Freeze the crust for 10 minutes.
Bake the crust for 10 minutes, then transfer it to a rack and let it cool completely before filling.
Working with a stand mixer fitted with the whisk attachment or with a hand mixer in a large bowl, whip 2 cups of the cream until it holds medium peaks. Beat in ¼ cup of the confectioners’ sugar and whip until the cream holds medium-firm peaks. Crape the cream into a bowl and refrigerate until needed.
Wipe out (do not wash) the bowl, fit the stand mixer with the paddle attachment if you have one, or continue with the hand mixer, and beat the cream cheese with the remaining 1 cup confectioners’ sugar on medium speed until the cream cheese is satiny smooth. Beat in the peanut butter, ¼ cup of the chopped peanuts and the milk.
Using a large rubber spatula, gently stir in about one quarter of the whipped cream, just to lighten the mousse. Still working with the spatula, stir in the crunchy peanut mixture, then gingerly fold in the remaining whipped cream.
Scrape the mouse into the crust, mounding and smoothing the top. Refrigerate for at least 4 hours, or overnight; cover with plastic wrap as soon as the mousse firms.
To Finish The Torte: put the chopped chocolate in a heatproof bowl and set the bowl over a saucepan of simmering water. Leave the bowl over the water just until the chocolate softens and starts to melt, about 3 minutes; remove the bowl from the saucepan.
Bring the remaining ½ cup cream to a full boil. Pour the cream over the chocolate and , working with a a rubber spatula, very gently stir together until the ganache is completely blended and glossy.
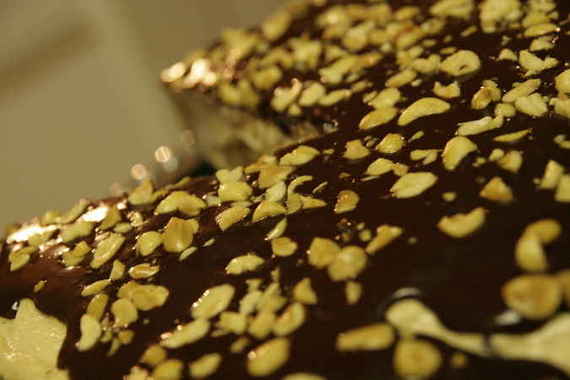
Pour the ganache over the torte, smoothing it with a metal icing spatula. Scatter the remaining ½ cup peanuts over the top and chill to set the topping, about 20 minutes.
When the ganache is firm, remove the sides of the Springform pan; it’s easiest to warm the pan with a hairdryer, and then remove the sides, but you can also wrap a kitchen towel damped with hot water around the pan and leave it there for 10 seconds. Refrigerate until ready to serve.
Um….YUM. That’s pretty much all there is to say about these little cakes. Molten, gooey, chocolaty goodness oozing from the center of a dense, warm chocolate cake. (Ok, now do me a favor and wipe the drool off of your mouth.) These Gooey Chocolate Cakes have quickly become my favorite “I’m-craving-something-warm-and-chocolatey-and-I-need-it-NOW” desserts (They surpassed brownies and chocolate chip cookies long ago). When you cut into them, the warm gooey filling oozes out all over your plate. Its almost like sitting down and eating a bowl of raw cake batter (don’t deny it – you know you’ve always wanted to do it)….except so much better! And the fact that they only take about 13 minutes total to make…well, that would make any chocolate-craving-woman-on-the-edge jump for joy!

So, we’ve covered the fact that these cakes will satisfy even the most severe chocolate cravings, but they can also serve as a fancy “show off-y” dessert when you’re having company. I served these when I recently had some friends over for a nice sit-down meal and they were a HUGE hit. I’m pretty sure my guests were on the verge of licking their plates clean.

Gooey Chocolate Cakes
1/3 cup all-purpose flour
3 tablespoons unsweetened cocoa powder
¼ teaspoon salt
4 ounces coarsely chopped milk chocolate,
1 stick (8 tablespoons) unsalted butter, cut into 8 pieces
2 large eggs, at room temperature
1 large egg yolk, at room temperature
6 tablespoons of sugar
Getting ready: Center a rack in the oven and preheat the oven to 400 degrees F. butter (or spray – it’s easier) 6 cups of a regular-size muffin pan, preferably a disposable aluminum foil pan, dust the insides with flour and tap out the excess. Put the muffin pan on a baking sheet. (I discovered that there is just enough batter to perfectly fill 4 ramekins)
Sift the flour, cocoa and salt together.
Set a heatproof bowl over a saucepan of gently simmering water, put the coarsely chopped chocolate and the butter in the bowl and stir occasionally over the simmering water just until they are melted – you don’t want them to get so hot that the butter separates. Remove the bowl from the pan of water.
In a large bowl, whisk the eggs and yolk until homogeneous. Add the sugar and whisk until well blended, about 2 minutes. Add the dry ingredients and, still using the whisk, stir (don’t beat) them into the eggs. Little by little, and using a light hand, stir in the melted chocolate and butter. Divide the batter evenly among the muffin cups.
Bake the cakes for 13 minutes. (the first time I made these, 13 minutes was too long – they came out totally firm in the center. Now I bake them at 11 minutes and they’re perfectly runny and gooey every time.) Transfer them, still on the baking sheet, to a rack to cool for 3 minutes. (There is no way to test that these cakes are properly baked, because the inside remains liquid.)
Line a cutting board with a silicone baking mat or parchment or wax paper, and, after the 3-minute rest, unmold the cakes onto the board. Use a wide metal spatula to lift the cakes onto dessert plates.
Recipe source: Dorie Greenspan, Baking From My Home to Yours
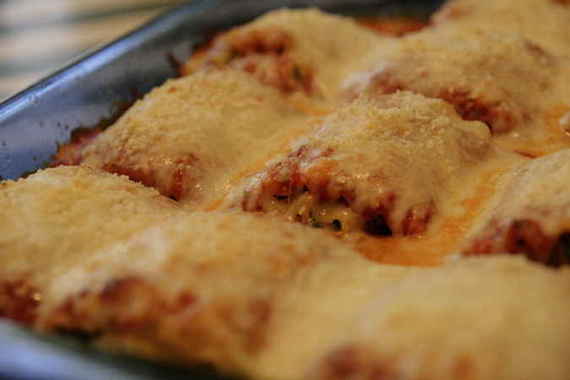
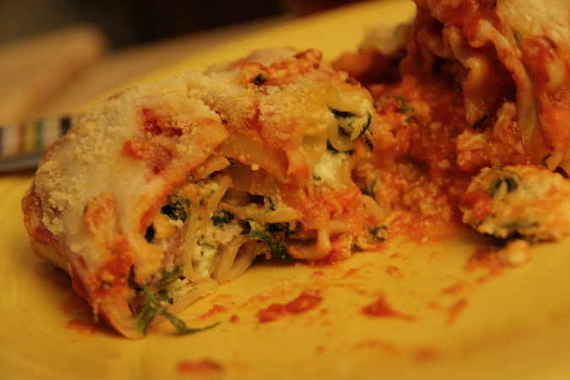
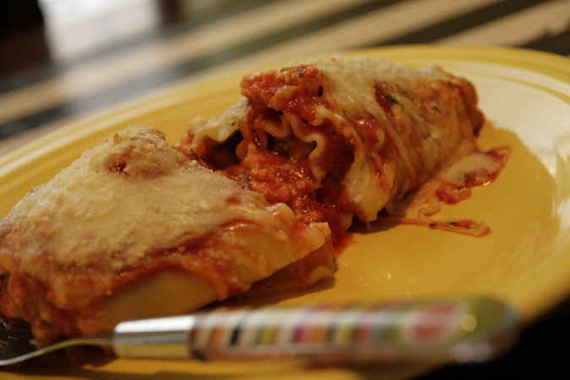
I typically don’t try new lasagna recipes. I figure, if I’m going to make lasagna, I’m going to use my mom’s recipe – it’s by far the yummiest (same situation with banana bread, banana pudding and pot roast, to name a few – but that’s another post.) But, last week I was having company (two good buddies and fellow opera singers, one of whom was a cook in a really nice restaurant in London for a couple of years), and I wanted to serve an impressive, yet “comforting” meal – and while my mom’s lasagna would have definitely fit the bill, I wanted something a little more unusual and slightly “different”. I flipped through all kinds of cook books, cooking websites, food blogs, and my personal favorite recipe resource – the Nest’s “What’s Cooking” discussion board (love ya, girls!!) and finally found myself thumbing through my “Giada’s Family Dinners” cookbook, pausing to glance at the Lasagna Rolls recipe thinking, “hmmm, spinach…prosciutto…bechamel, all rolled up in pasta….now that’s impressive and different…” I decided lasagna rolls would be perfect!
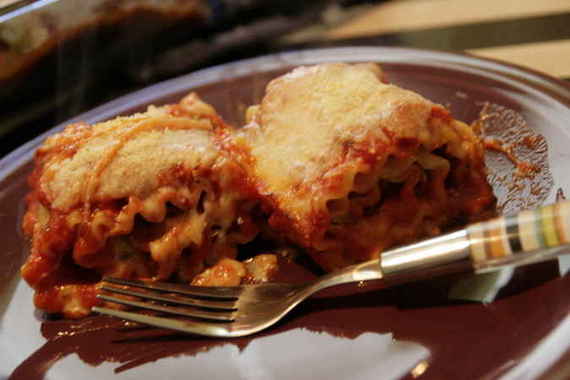
Needless to say, these were delicious – so delicious in fact, that I made them again only one week later! Its a nice change from your usual meat and cheese lasagna! My dinner guests really enjoyed them – they ate two huge helpings and cleaned their plates! Success!
Lasagna Rolls
-from Giada’s Family Meals by Giada DeLaurentiis
Bechamel Sauce (White Sauce)
2 tablespoons unsalted butter
4 teaspoons all-purpose flour
1 1/4 cups whole milk
1/4 teaspoon salt
1/8 teaspoon ground black pepper
Pinch ground nutmeg
Lasagna:
1 (15-ounce) container whole milk ricotta cheese
1 (10-ounce) package frozen chopped spinach, thawed, squeezed dry
1 cup plus 2 tablespoons grated Parmesan
3 ounces thinly sliced prosciutto, chopped
1 large egg, beaten to blend
3/4 teaspoon salt, plus more for salting water
1/2 teaspoon freshly ground black pepper
1 to 2 tablespoons olive oil
12 uncooked lasagna noodles
2 cups marinara sauce
1 cup shredded mozzarella (about 4 ounces)
To make the sauce: Melt the butter in a heavy medium saucepan over medium-low heat. Add the flour and whisk for 3 minutes. Whisk in the milk. Increase the heat to medium-high. Whisk the sauce until it comes to a simmer and is thick and smooth, about 3 minutes. Whisk the salt, pepper, and nutmeg into the bechamel sauce.
Preheat the oven to 450 degrees F.
Whisk the ricotta, spinach, 1 cup Parmesan, prosciutto, egg, salt, and pepper in a medium bowl to blend.
Add a tablespoon or 2 of oil to a large pot of boiling salted water. Boil the noodles until just tender but still firm to bite. Drain. Arrange the noodles in a single layer on a baking sheet to prevent them from sticking.
Butter a 13-by-9-by-2-inch glass baking dish. Pour the bechamel sauce over the bottom of the prepared dish. Lay out 4 lasagna noodles on a work surface, then spread about 3 tablespoons of ricotta mixture evenly over each noodle. Starting at 1 end, roll each noodle like a jelly roll. Lay the lasagna rolls seam side down, without touching, atop the bechamelsauce in the dish. Repeat with the remaining noodles and ricotta mixture. Spoon 1 cup of marinara sauce over the lasagna rolls. Sprinkle the mozzarella and remaining 2 tablespoons of Parmesan over the lasagna rolls. Cover tightly with foil. Bake until heated through and the sauce bubbles, about 20 minutes. Uncover and bake until the cheese on top becomes golden, about 15 minutes longer. Let stand for 10 minutes. Meanwhile, heat the remaining marinara sauce in a heavy small saucepan over medium heat until hot, and serve alongside.