
You know how sometimes you think too hard about something? You’re trying so hard to come up with something new, you forget all about the old standby “somethings”. That’s what happens with me frequently. Now that I’ve sort of gotten past the point where spaghetti or a casserole was my best dish and I know a little more about food and cooking in general, I spend a lot of time trying to think up good ideas for dinners that might be a little more involved than say, spaghetti (not that there’s anything wrong with spaghetti!). So the other day as I was talking on the phone to my mother and thinking aloud about what I was going to cook for dinner, throwing out all kinds of possibilities (and coming up totally empty-handed, I should mention), and she suggested that I make beef tips. Beef tips?! Tender chunks of roast slow-cooked all day long in a thick, creamy sauce served over white rice….why didn’t I think of that?! Perfect! And it was, too – I was so glad she suggested this, because it really hit the spot and hubby loved it. When I asked him if he had ever had beef tips, he replied, “Yeah, in those microwave dinners…” Oh dear. So, I was happy to set him straight on what real beef tips were supposed to taste like! I think he was happy I did too!
So, thanks, mommy, for coming to the rescue and saving me from over-thinking my meal!

Easy Beef Tips
-recipe from MY MAMA!
1 lb. chuck roast (or any kind of roast meat you want), cut up into small chunks
1 can cream of mushroom soup
1 small can mushrooms, drained (this isn’t part of the original recipe, but I thought it would be a nice addition)
Approx. 1/2 a can chicken or beef broth (If you’re using homemade, I’d say to use about 1/2 cup)
cooked white rice (however much you like)
salt and pepper to taste
Season the roast with salt and pepper and place in a crock pot with the cream of mushroom soup and chicken broth (sort of mix it all together to get rid of any lumps in the soup). Cook on low heat for 6 – 8 hours. Add the mushrooms when there’s just a little cooking time left. Serve over cooked rice.
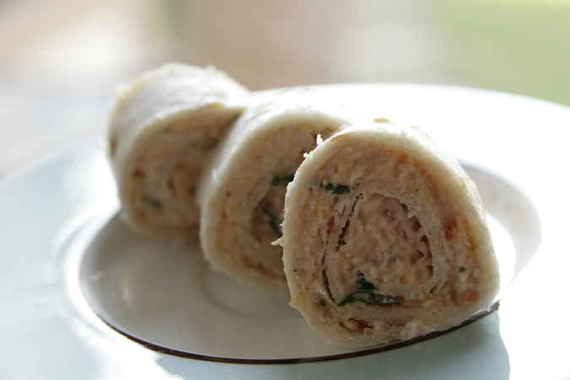
A few weeks ago, we had our good friends Michael and Andrea (who happens to be a fantastic photographer) over for snacks and a Harry Potter fest. I had no idea what I was going to serve, but I knew I didn’t want it to be too fussy or involved – it was supposed to be just junky snack food, after all! So I decided to flip through one of my Gooseberry Patch cookbooks that is specifically for having company and found this recipe. Cream cheese, chicken, cilantro, rotel tomatoes….how can you go wrong with that cast of characters?! Sure enough, this was some seriously good dip – in fact, these little roll-ups didn’t even make it out of the kitchen! Once hubby and Mikey got a taste, they pretty much devoured them in no time. So, needless to say, I didn’t wait long before making it again – this time for my mom, who was visiting for a couple of days (the ultimate test, mind you). Thankfully, she loved it too! In fact, she didn’t wait long before making it herself! This is good dip, people.
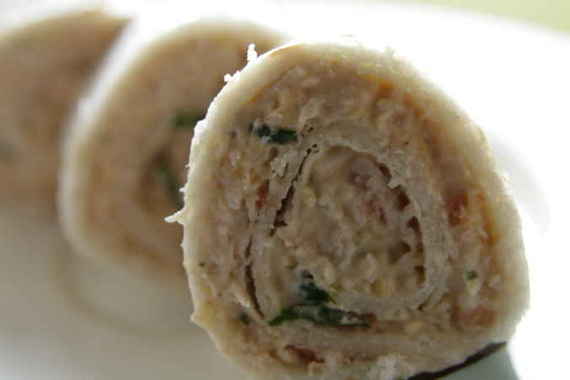
The recipe is for dipping, but they also suggest spreading the dip on torillas, rolling them up and slicing them to make roll-ups, which is what I chose to do – perfect for parties!
Festive Chicken Enchilada Dip
– Gooseberry Patch “Come On Over”
2 8-oz. packages cream cheese, softened
1 1/3 cup shredded cheddar cheese
1 teaspoon minced garlic (I used garlic powder)
1 1/2 tablespoons chili powder
1 teaspoon cumin
cayenne pepper to taste
salt to taste
3 boneless, skinless chicken breasts, cooked and chopped or shredded
1 bunch cilantro, chopped
4 green onions, chopped (I used onion powder)
10-oz. can diced tomatoes with green chiles (Rotel tomatoes)
Mix cheeses together until well blended; add remaining ingredients and mix well. Cover and refrigerate for at least 1 hour. Serves 6-8.
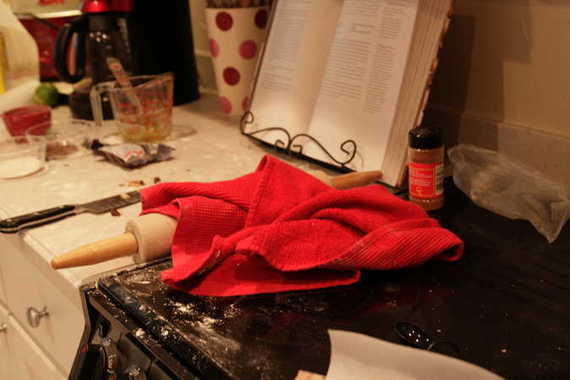
Do you see this giant mess of a kitchen?? That would be my kitchen…..after my first attempt at making this week’s TWD recipe. What a MESS I am when I get in a hurry!!! Yikes!
Ok so anyway, this week’s TWD recipe is one I have been waiting for for quite some time. I had never even heard of Rugelach until I saw Ina making it one day on the Barefoot Contessa – you know, that adorable episode where she makes Jeffery a big ‘ol traditional Jewish meal? So cute! – anyway, I decided right then I would try my hand at making these cute little crescents myself. Its a shame I waited this long…but whatever – now I can cross them off my “Dying To Try” list!
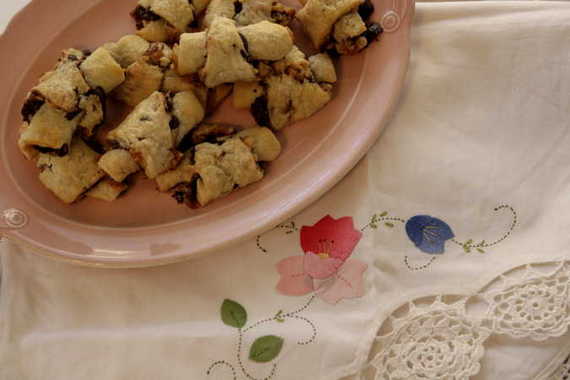
So, now I have Piggy of Piggy’s Cooking Journal to thank for choosing these tasty little cookies and forcing me to finally try them! For those of you who don’t know, Rugelach (or “Little Twists”) is a traditional Jewish cookie that starts with a cream cheese dough topped with things like raspberry jam, apricot jam (which is what I used), chocolate, raisins, walnuts or pecans, sugar and cinnamon, etc, then cut into wedges and rolled up crescent-style. Very tasty. Dorie’s recipe calls for a thin layer of jam, a sprinkling of cinnamon and sugar, pecans, chopped chocolate and raisins – I, however, omitted the raisins (duh!) and used walnuts instead of pecans. I have to say, these were the biggest MESS to make, but in my opinion, worth all the effort (and clean-up).

I really enjoyed these – hubby hasn’t tried any yet, but I’m sure he enjoy them too!

If you would like the recipe, head on over to Piggy’s blog and she’ll fix you up!


This is going to be a fun post, I can tell…….

YIPPEE!! Its the week of Halloween!!! I love this holiday, people! Not just me, though – my family too. My mom, my sister and I always decorate our houses with cute Halloween decor – not creepy stuff, though – I don’t dig on having fake spider webs and black lights on my front porch. Cute stuff, like pumpkins, candy corn and cute, friendly little ghosts! Although I will admit that I have an embarassingly large collection of The Nightmare Before Christmas stuff on display every year (its my second favorite movie ever!), which is about as morbid as I get on Halloween (however, I guess the fact that I leave it all out on display until Christmas adds to the morbid factor a bit).

Sorry, just couldn’t resist!!
Anyway, back to my post….every year we all get together and watch fun stuff like It’s the Great Pumpkin, Charlie Brown!, Hocus Pocus (boy, do I love Bette Midler!) and the Disney version of Ichabod Crane (you know, the cute animated version with Bing Crosby narrating? Golly I love that movie!) So obviously, Halloween is big in my family. Which is why I was SO excited when Clara of I Heart Food 4 Thought chose Chocolate-Chocolate Cupcakes for this week’s TWD recipe with the idea in mind that we could decorate them for Halloween!! How fun!! How clever you are, Clara!

Now, you’d think that a cupcake wouldn’t take much trouble…wouldn’t cause any confusion….no worries, right? W-R-O-N-G. We’ve had all kinds of nerdy food discussions all week about these cupcakes! Just look! Apparently these cupcakes came out rather dry for many of the bakers, and dry cupcakes just won’t do. So, the TWD geniuses started thinking of ways to make them more moist – sour cream, pudding, oil instead of butter, applesauce, less flour, etc – really good stuff! So I took their ideas and ran with it; I’ll give you the low-down:
- Instead of using a softened stick of butter, I used half butter (melted) and half oil
- Instead of 1/2 cup buttermilk, I used 1/2 cup low-fat sour cream
- I used half brown sugar, half white sugar instead of all white
- I used semi-sweet chocolate instead of bittersweet (for the cake and the glaze)

And there you have it. Its not much of a change but I’ll tell you, these were THE MOST AWESOME CUPCAKES I’VE EVER TASTED. Oh my heavens, that chocolate glaze….to die for!!! These were seriously amazing. Seriously. And oh-my-goodness, did I have a good time decorating them all Halloweeny-like!

I was planning on sending these to work with hubby tomorrow, but after tasting, I think these babies will stay right here with mama! Oh yeah!
You know, honestly, I’d love to know what these cupcakes taste like when using the recipe as written. I’m sure they’re still fabulous – but I just couldn’t risk a dry cupcake…nope, sorry.

Isn’t that little plate cute?! I got that at Hobby Lobby and I’m oh-so-proud of it!!
Ok, I suggest rushing over to Clara’s blog and getting the recipe for these babies…..they’re good. What a great party treat!
(Hehe – if you look really close, you can see my reflection in the spoon!)
There comes a time (not very often, mind you) when you want something more than chocolate chip cookies or brownies for dessert. Now, I LOVE a good chocolate chip cookie fresh out of the oven…there’s nothing like it! But on a cool Fall night, there’s nothing better than a bowl of warm apple crisp – soft, cinnamony apples covered with a crispy, yet slightly chewy, buttery topping, dripping with a scoop of melty vanilla ice cream. Ohhhhhh baby…..now THAT’S a dessert!! And the fact that it takes practically no time to prep, which means you don’t have to wait long to shove your pie hole full of a big ‘ol bite, doesn’t hurt its case, either! Its one of those quick fix desserts that I find myself making every single Fall. The same recipe. Everytime. Why change a good thing, you know?
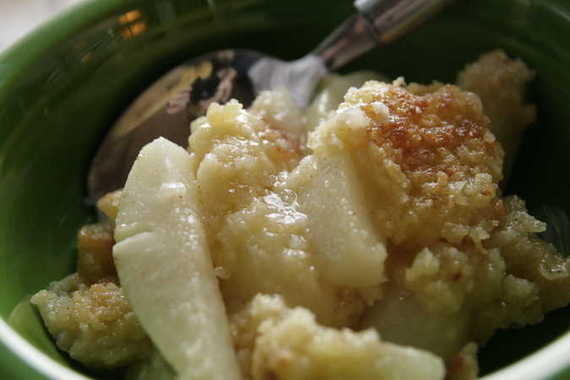
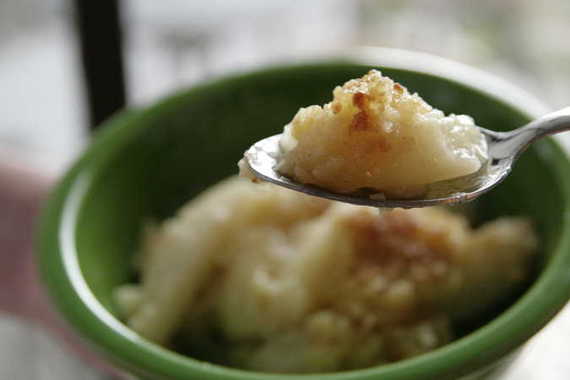
BUT – I didn’t come here to talk about apple crisp….I’d rather talk about pear crisp. (“Oooh, pear crisp?” you’re thinking….yeah, pear crisp – and its fantastic!) Yesterday I was at the grocery store picking up stuff for dinner (beef tips over rice – post coming soon!) and as I walked through the produce section, I was hit in the face with the overwhelming smell of fresh, juicy pears. “Hmmmm, pears would be great in place of apples in my apple crisp recipe!” , I thought! So I decided to give it a try and boy was I glad I did! This was delicious! Last night was a really chilly night, and hubby and I cuddled up on the couch with a big bowl of warm pear crisp and had ourselves a fantastic night! I highly recommend this recipe – its just delicious!
Pear Crisp
-original apple crisp recipe from my mom
1 Cup AP flour
1 Cup sugar
pinch salt
1 stick butter or margarine, melted (I found that about 6 tablespoons does the trick – a whole stick is a little too much, in my opinion)
1 egg, beaten
cinnamon to taste
3 -4 pears, peeled, cored and sliced into wedges
juice of half a lemon
Preheat oven to 350 degrees and grease a square baking dish. In a bowl, whisk together flour, sugar, and salt, then add the beaten egg and stir until you have pea-sized pieces of dough. Place sliced pears in the baking dish and squeeze lemon juice over them; sprinkle desired amount of cinnamon over pears. Sprinkle crumb topping over pears and pour the melted butter evenly over the topping. Cover and bake for about 20 minutes, then remove foil and bake for another 20 – 25 minutes or until golden brown and bubbly. Serve with a big ‘ol scoop of ice cream!

Before I go into my TWD post, as originally planned, I thought I’d take a minute or so to get everybody in the proper “pumpkin-y” mood. I love pumpkin – every year around the middle of September, I start drooling over all the pumpkin recipes I’ve yet to make – there’s a lot of them out there, but hey, all I got is time, people! 🙂 In fact, I’ve got my eye on a sinfully delicious looking pumpkin cheesecake recipe that’s just calling my name. Sure, there is lots of new, uncharted territory when it comes to pumpkin recipes; but what about the old stand-by ones? The ones you can’t help but make every single year as soon as there’s the slightest hint of a nip in the air? (except not really in Texas…..there isn’t an actual “nip” in the air until about Thanksgiving, and you’re lucky if you even get one then!) The ones like the pumpkin muffins my mom would make for me in the Fall when I would come home from college for the weekend. Ahhh, pumpkin muffins – one of my great loves. Moist, fluffy, full of spice,packed with pumpkin and dripping with melty butter….does it get any better? I think not! Which is why I was so very excited when Kelly of Sounding My Barbaric Gulp (interesting blog name, no?) chose Pumpkin Muffins for this week’s TWD recipe. God love her!

Usually when I make pumpkin muffins, I like to use either my mother’s recipe or one from allrecipes.com (Downeast Maine Pumpkin Bread), but I was more than happy to give Dorie’s recipe a shot – I mean, let’s face it, everything I have ever tried of hers’ has been a complete success (unless I did something to screw it up). And really, her recipe was almost exactly the same as my mother’s…cinnamon, nutmeg, pumpkin puree, sugar…all the usual ingredients. The only big difference is that she adds walnuts (which I love) and raisins (which I do not love and gladly omitted) to the batter and tops them with sunflower seeds (which I didn’t have so I left out). So, by the time I finished omitting most of Dorie’s different-from-everybody-else’s ingredients, these were almost identical to the one’s I love so much. Perfect!

Now, its just not Fall until you’ve made pumpkin muffins, so if you haven’t and you’d like the recipe, just head on over to Kelly’s blog and then make these as soon as possible! Otherwise you’re only cheating yourself out of the complete “Fall Experience”.

I am categorizing this under “Soups/Stews/Other” because I really have no idea what to call this dish….or what kind of dish it is, exactly. I figure it fits under the “other” category pretty well – so we’ll just leave it at that.
I was a DARN picky eater as a kid…I hated a lot of things my mother would cook for us, as well as most restaurants. Some of the things my mom would make that I can remember having the most disdain for were her chicken enchiladas (WHA?! What was I thinking??!), chicken stew and stuffed peppers, to name a few. Of course I love all of those things now, but back then there was just something about them that made me absolutely despise them. I guess I was just your typical snot-nosed picky little girl….heheh- some things never change, I guess. 😉
My sister was sort of picky too, I suppose, though not near as whiny and shrieking about it. But there were some things that my sister and I loved that most kids wouldn’t touch with a ten foot pole. For example, everyday when we would come home from school, our choice of snack would always be canned, cold spinach and Vienna Weenies (you know, those short, stubby little weenies that come in the tiny little can?). We’d sit there and eat the stuff right out of the CAN! Even though we could have our choice of cookies, brownies, WHATEVER! We always wanted the cold spinach and weenies. Even looking back now I wonder what the heck we were thinking…and we were little kids, mind you – I was in like, 2nd grade! Weird freaking kids…..
So yeah, we had a habit of liking odd, non-kiddy type foods. I mean, sure, I liked those little frozen kiddy dinners that came with the cartoon-shaped macaroni and a tiny little brownie, but some grown-up foods were very appealing to us. One of those foods was cabbage. My sister and I both loved cabbage. I remember my Nana (hey Nana!) cooking cabbage in her big pot in the kitchen and my sister and I would absolutely gobble it up.
I still love cabbage to this day – its great in soups, as a side dish or cooked my personal favorite way – in a big pot with sausage and potatoes. YUM. I’m almost positive this dish came from somewhere, I just have no idea where. I don’t have a title for it, nor do I know what kind of food category it would fall under. Obviously. All I know is, my mother got the recipe from our Uncle Benny. He didn’t have a title for it either – he just thew it all in a pot and that was that. So, without further ado, I give you Cabbage, Sausage, Potato….stuff.

Cabbage with Sausage and Potatoes
1 head cabbage, roughly chopped (I guess you could use any type of cabbage you wanted – I just use the regular old “white looking” cabbage that you find everywhere)
1 pound fully cooked Hillshire Farms smoked sausage, sliced into big bite-sized pieces (I used Turkey sausage – fat free and you couldn’t taste the difference!!)
2-3 yukon gold potatoes, cut into chunks
Salt and Pepper to taste (I also use a bit of Cajun seasoning)
Pour approx. 1/2 cup water in the bottom of a large dutch oven or heavy pot, then add the sausage; layer the potatoes, then the cabbage over the sausage, seasoning with salt and pepper as desired (not too much, though – the sausage will do most of the seasoning for you). Cover and cook over medium-high heat for 15-20 minutes, or until cabbage and potatoes are tender. Make sure the bottom of the pot never goes dry – if the water dries up during cooking, quickly add more. Serves 4.
* You can also add onions if you want; I just choose not to. My Uncle Benny likes to add a can of Rotel Tomatoes as well. I like to keep mine simple, though. But that’s the beauty of this dish, you can pretty much add whatever you want to it – carrots, celery….whatever!
You could definitely serve this all by itself, but I like to have a little bread with it – I served this with Katie’s Easy Cheesy Beer Bread. This is seriously filling and delicious – hubby LOVES it. Plus, its a super satisfying meal in one pot that costs less than $5.00! You can’t beat that, people!

Its true – I’ve never made biscotti before. In fact, I’d only ever eaten it a couple of times. I have to say, I’ve never been a big fan of biscotti – I know you’re supposed to dunk it in your coffee and all, but its just too crunchy and hard for my taste. Those chocolatey kind at Starbucks aren’t half bad, but its not something I want to spend money on. I wasn’t thrilled about this week’s choice – Lenox Almond Biscotti, chosen by Gretchen of Canela and Comino, but I really wanted to give it a chance, especially since last week’s recipe was such a bust.

After all was said and done, I actually really enjoyed these. They weren’t too crunchy and really were excellent with my coffee! I will say, though, the cornmeal kinda threw me off a little….but not enough to cause a problem! These were great and I’ll most definitely be making them again!!

If you want the recipe, visit Gretchen’s blog! These are really great – give ’em a try!!

Yep, that’s right…we’re trying to eat a tad bit healthier these days; so when I saw this creamy broccoli soup on Tastespotting.com (my new favorite website -check it out sometime…you might even see some of my photos on there from time to time!) I knew I had to try it! Hubby loves soups, so I make them pretty often and we both reeeeeally loved this one. The title makes it sound fattening, but its actually really healthy…and hearty!! And it goes absolutely WONDERFULLY with Katie’s Easy Cheesy Beer Bread (see post below!).

Creamy Broccoli Soup
-Jillian @ Butter and Sugar
2 tbsp olive oil
1 tbsp butter
1 onion chopped
2 cloves of garlic chopped
2 tbsp flour
1 cup low fat milk
1 quart of chicken stock
1 sprig of fresh thyme
1 bay leaf
1 cup water
6 cups of broccoli
1 cup of butter beans (canned)
2 tbsp grated parmesan
Salt and pepper
Heat the butter and olive oil over medium heat in large soup pot (at least 4 quarts). Add the chopped onion and sauté until translucent and add the garlic. Cook the garlic for about a minute and add the flour. Stir continuously for about 1 minute and add 1 cup of milk. Continue to stir until milk thickens slightly (enough to coat the spoon). Add the chicken stock and stir well to combine. Bring to a simmer and broccoli florets, fresh thyme, fresh ground pepper and a bay leaf. Simmer until the broccoli is just tender. Remove the bay leaf and thyme sprig and add the beans. Blend with an immersion blender or carefully transfer to a standing blender (note: if you do it with standing blender, be sure to blend it in two batches, otherwise your blender will overflow). Blend to desired thickness (I left some small unblended pieces of broccoli for texture). Stir in the parmesan cheese.
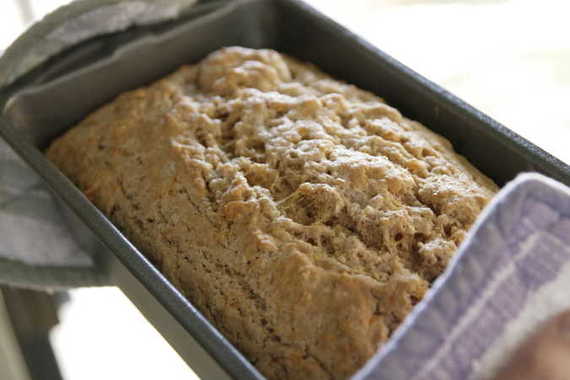
For my WC girls, this bread needs no introduction…in fact, this recipe has very quickly become everyone’s favorite on our cooking board! Let me just break it down for you: beer+cheese+bread= pure heaven in loaf form!! And one of the best things about it – its SUPER easy…and I mean it! I’m one of those weenie-cooks who runs away screaming from anything involving yeast…so this was perfect for me! No yeast – just beer!! And for those of you non-drinkers, don’t worry, the alcohol cooks out…no worries. I’ve made it twice in one week since discovering the recipe on Katie’s blog (ok, see how I did that just now? I made “Katie’s blog” a link….do us all a favor and click on it! You’ll find tons of wonderful, delish recipes!). This bread went great with our broccoli soup…and I have a feeling it’s going to go great with lots of my meals in the future. 🙂
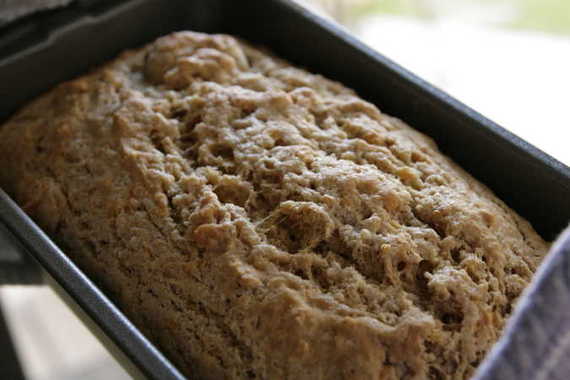
Mmmm, look at all that cheesy, beer-y goodness!!!
Easy Cheesy Beer Bread
–Katie @ Good Things Catered
Ingredients:
2 c. all purpose flour
1 c. whole wheat flour
1/3 c. packed brown sugar
4 1/2 tsp baking powder
1 tsp salt
1 tsp garlic powder
1 c. shredded sharp cheddar
12 oz. bottle of lager or stout (I used Sam Adams Oktoberfest because Katie told me to) 🙂
2 Tbsp butter, melted
Directions:
-Preheat oven to 350 degrees and prepare loaf pan for baking.
-In large bowl, combine flours, sugar, baking powder, salt, and garlic powder.
-Whisk to combine well.
-Add cheese and whisk to combine.
-Slowly add beer to dry ingredients and stir lightly until combined.
-Knead dough lightly until it just comes together.
-Place into prepared loaf pan and pour melted butter over top.
-Place in oven to bake for 55-60 minutes, or until toothpick inserted into center of loaf comes out clean.


