I had heard of this dip about a thousand times – originally called Buffalo Chicken Dip, it’s been nicknamed “crack dip” because its supposedly quite addicting. I thought, “hmm, anything with that title must be good!”, and then I read the ingredient list – canned chicken, buffalo sauce, blue cheese, ranch dressing….? BLECH! I’m sorry but that does NOT sound like something I would want to put in my mouth. So I never made it. I mean, I have to draw the line somewhere, right? It wasn’t until I was perusing some of my favorite food blogs looking for Super Bowl recipes that I found this recipe, once again. The guys over at The Bitten Word were raving about this dip – and that got me curious, I mean, if those guys like it then surely I could give it a try. So I did, and I took it to the Super Bowl party. As it turns out, this dip really is like crack…I could sit there and eat it all day! Hubby and I are both big blue cheese fans, so of course we loved it – but here’s a little warning for those of you who are picky eaters (ahem, my sister) – if you don’t like buffalo sauce and/or blue cheese, this dip isn’t for you. And even if you don’t like those things, still give it a try – you might be pleasantly surprised. Everybody at the party loved it! So without further ado – CRACK DIP!!!

Buffalo Chicken Dip (AKA: Crack Dip)
8 ounce package of cream cheese, softened
1/4 cup ranch salad dressing
1/4 cup blue cheese salad dressing
1/2 cup buffalo sauce or buffalo style barbecue sauce
1/2 cup crumbled blue cheese (shredded mozzarella cheese can be substituted)
2 boneless, skinless chicken breasts, cooked and shredded
Pre-heat oven to 350 degrees F. In a deep baking dish, mix cream cheese, salad dressing, buffalo sauce, and cheese. Stir until combined. Stir in chicken.
Bake uncovered for 20-25 minutes, until the dish is heated through. Serve with crackers, pita chips, sliced bread or vegetables.
NOTE: Depending on your tastes and the ingredients on hand, you can use 1/2 cup ranch or blue cheese salad dressing rather than 1/4 cup of each. Similarly, you can mix blue cheese and mozzarella, or use portions of each.
*I used sliced baguettes and celery for dipping…mmm, MMMM!
Recipe source: The Bitten Word, originally from Frank’s Red Hot
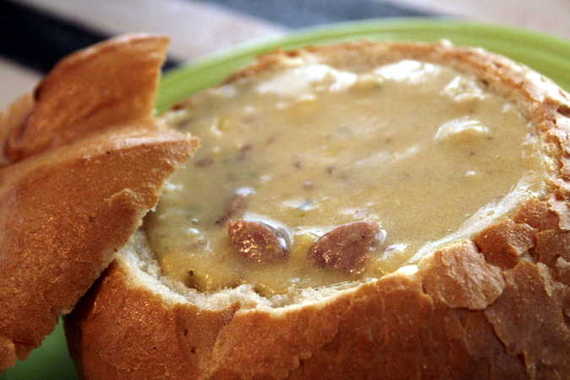
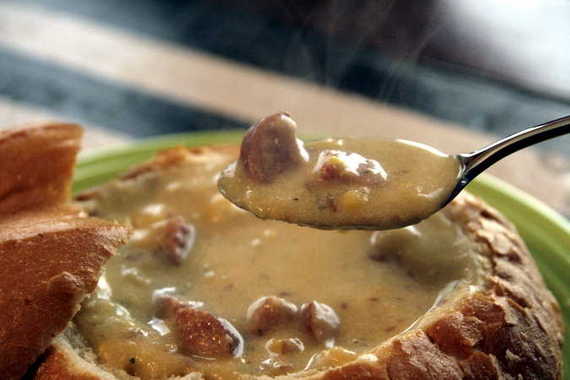
With all this cold, icy weather, I thought it would be only fitting to post a great soup recipe! And who knows, maybe this warm, hearty chowder will make it to your dinner table tonight to keep out the cold!
This Potato, Corn and Sausage Chowder is great because it’s not one of those all day soups – it takes no time to make! And it gave me a great excuse to try out my new immersion blender hubby got me for Christmas!! (*But don’t worry if you don’t have one – you can either use a regular blender, or just leave it chunky, which I think is a great idea). This is a great recipe because unlike most chowders and creamy soups, it’s made with low-fat milk instead of cream; and I took the healthiness a step further and used lean turkey sausage – great taste and no guilt!
Corn, Sausage and Potato Chowder
-adapted from Food Blogga
1 tablespoon butter
1 cup yellow onion, chopped
2 cups Yukon Gold potatoes, chopped
2 cups vegetable broth
2 cups fresh corn kernels from 2 ears (or frozen)
1/4 teaspoon white pepper or cayenne pepper
1/2 teaspoon salt
6-7 cranks of freshly ground black pepper
2 cups low-fat milk
1/4 cup sharp white cheddar cheese, shredded
3 tablespoons finely chopped fresh parsley
1 package fully cooked turkey sausage (about 1 pound – you can use more or less if you want)
In a deep pot over medium-high heat, melt butter. Saute onions for 5 minutes, or until lightly browned. Add potatoes and broth, and bring to a boil. Reduce heat to medium-low; add corn kernels, cayenne, salt, and black pepper, and stir well. Cook until potatoes are tender, about 15 minutes. Add the milk, cheddar cheese, and parsley. Turn off heat and allow chowder to cool for 5-10 minutes.
Puree soup in two batches until smooth, and return to the pot over medium-low heat. Stir in cooked sausage and warm until thoroughly heated. Season with salt and freshly ground black pepper, to taste.
I served it in individual bread bowls and hubby absolutely loved it! And it tastes even better the next day, by the way. Just perfect for super cold weather!
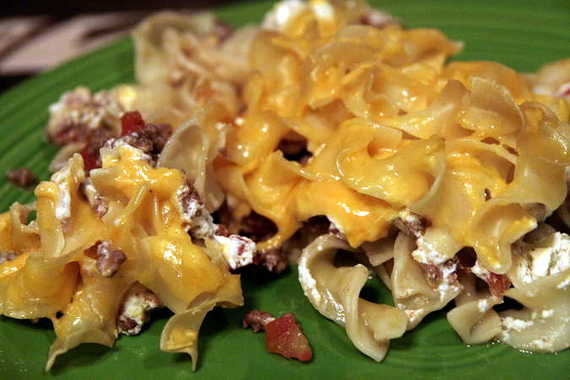
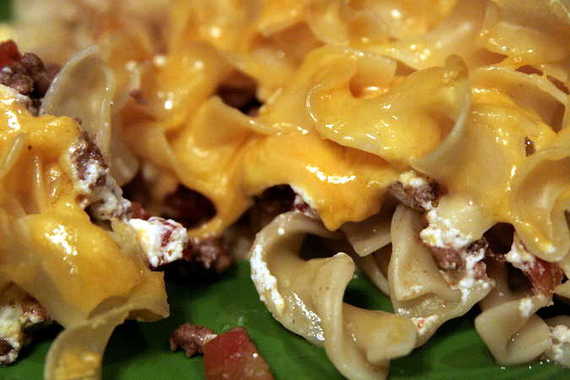
This is one of our favorite easy weeknight meals – I don’t make it that often, but it’s always so tasty and comforting when I do! You remember how I’ve told you I didn’t really know how to cook when I was first married, right? Well, this casserole was the first homemade meal I ever made for hubby after we got married – I didn’t read the directions closely enough, which resulted in a slightly “crunchy” texture (ok not so slight…more like, “woah, why the heck are these noodles so freaking CRUNCHY?”), because I didn’t boil the noodles before putting them in the dish. Niiiiiiice, Amy. And the funny thing is, it took me forever to realize that I had even made the mistake – all this time I had been thinking it was a typ-o or something in the recipe! HA! So I have a little note written in my recipe book saying, “it might be a good idea to put all the noodles on the bottom – otherwise they’re kind of crunchy…” Hahahahaha!! So, after giving it a second chance – this turned out to be one of our favorites and now it brings back all kinds of ooey gooey nostalgia when I make it. Joel likes to make fun of me, actually….
You can make all kinds of variations with this recipe – turkey instead of beef, different kinds of pasta, you can add other kinds of vegetables – peas might be good! Lots of things! And as usual, it’s super easy to make. I made it for my mom when she was visiting once, and now she makes it all the time! Give it a try – the sour cream might sound weird to you, but trust me, it’s goo-ooooood!
Easy Weeknight Casserole
-Gooseberry Patch “Best-Ever Casseroles”
1-1/2 pounds lean, ground beef (I like to use turkey a lot, too)
14-1/2 oz. can diced tomatoes
1 teaspoon salt
1 tablespoon sugar
1-1/2 cups sour cream (I always use low-fat)
3 oz. package cream cheese, softened
1/4 cup onion, chopped (I leave this out and just use onion powder)
8 oz. package medium egg noodles C-O-O-K-E-D. Did you get that?- COOKED!
1-1/2 cups shredded cheddar cheese
Brown beef in a large skillet over medium heat; drain. Add tomatoes, salt and sugar; reduce to low heat and simmer for 15 minutes. Set aside. Combine sour cream, cream cheese and onion in a bowl; mix well and set aside. Place half of the (COOKED) noodles in a lightly greased 13×9 baking dish; top with meat mixture, then sour cream mixture. Layer remaining (COOKED) noodles over top; sprinkle with cheese and bake at 350 for 25 minutes. Serves 6. Enjoy!
These stacked enchiladas come from my great-grandmother; but not Baba, the one who’s recipes I post so often – my other great-grandmother (my Daddy’s grandmother). I probably owe a lot of my culinary curiosity to Grandmother. There were three things I always wanted to do when I visited Grandmother- 1. put on one of her long, comfy nightgowns, 2. root around in her jewelry boxes, and 3. get in her kitchen and make a giant mess. She would let me put practically anything I wanted in her frying pan and “cook” my own little recipes (under her supervision, of course…I probably would’ve burned the house down had I been left alone. I was that kid) – one time in particular I remember making an epspecially large mess with a tub of marshmallow fluff. There was nothing I enjoyed more than having free reign in a grown-up’s kitchen. Good times….
Anyway, on to the enchiladas. When I was first married, my mother gave me a stack of hand-written recipes (all of her favorites) in my stocking at Christmas. A lot of the recipes have little stories written along with them, explaining where they came from or how they got to be so loved. Here is the story my mom wrote on the back of the recipe card for these enchiladas:
“Grandmother would call us and say, ‘I’m making enchiladas” – usually sometime after Christmas when Mexican food tastes so good after all the rich Christmas food, or the first really cold day in Winter. She never had to ask twice; we couldn’t get there fast enough!”
The best thing about these enchiladas (besides the taste, obviously) is how easy they are. They’re made with simple stuff you probably already have in your pantry. I like to use ground turkey and turkey chili to make them a little healthier. They’re just perfect when the weather is really cold and you need a quick, comforting dinner. They also make a great Super Bowl meal – a couple of years ago we had our friends over to watch the game and I served these along with hubby’s homemade salsa, guacamole and margaritas. That was one successful Super Bowl party.

Grandmother’s Stacked Enchiladas
1 pound ground beef
1 – 2 tablespoons minced onion (I use onion flakes or onion powder)
1 teaspoon salt (you can also add a little cayenne pepper if you like extra heat….I do)
2 tablespoons flour
1 can enchilada sauce
1 can chili (we like the kind with no beans…these ain’t no “Yankee enchiladas”!) 😉
1 can tomato soup
corn tortillas (I use flour)
shredded cheddar cheese for topping
Brown meat in skillet and drain fat; stir in onion, salt and flour. Add enchilada sauce, chili, tomato soup and one can full of water and stir over medium heat until combined. Cook for 2 or 3 more minutes then turn the heat off. On oven-safe plates, layer one tortilla, then the meat mixture, then another tortilla and more meat mixture, then top with cheese and place in a 350 degree oven until bubbly and the cheese is melted. * If you don’t have oven-safe plates, I’ve found just popping it in the microwave will work just fine too. Some good toppings are sour cream, jalapenos, cilantro…whatever you want! Enjoy!
This week, Rebecca of Ezra Pound Cake chose Dorie’s Savory Corn and Pepper Muffins. And wow, these were GOOD. They’re sort of like my mom’s Mexican Cornbread, but with a few differences. I made these the other night with beef stew (*A little tip- next time you’re making beef stew, throw in a little red wine and transform it from good stew to GREAT stew!) and they were the perfect side to a great meal! I’m betting they’d also go great with chili!

Here’s the run-down of key ingredients that make these corn muffins so special: cornmeal, corn kernals, Jalapeno peppers, red peppers, chili powder (lots of if!), black pepper and cilantro. Sooooo tasty! And actually, I didn’t even have cilantro, red peppers, or fresh Jalapeno – I just chopped up some pickled Jalapenos and threw them in and called it a day. They were still fantastic – plenty of little colorful tidbits in there, even without the cilantro or red peppers. I suggest you run over to Rebecca’s blog and get the recipe for these muffins – I guarantee they’ll really perk up your next meal!


A while back, I saw this recipe on Bunny’s Warm Oven and thought it would make a great dessert for company! A few weeks ago, I had my parents over for a nice dinner and decided to serve these for dessert. They were a big hit, thankfully – and so simple to make. I love that it calls for puff pastry!

Cream-filled Pastry
-Bunny’s Warm Oven
PASTRY:
1 pkg. frozen puff pastry sheets, thawed per package directions
Remove the package of puff pastry from the box; take it out of the wrapper and allow it to sit on the counter @ room temperature for 20-30 minutes Carefully open one pastry sheet along the creases; place remaining sheet in the refrigerator to keep it cold (I cut the pastry when it’s partially frozen-as long as I can unfold it and it doesn’t tear, it’s fine. The pastry seems to puff higher when it bakes if it’s cold when it goes in the oven). Using a long, sharp knife, cut each strip of pastry at creases, forming 3 strips. Cut each strip widthwise into 7 pieces, slicing straight down-don’t drag the knife across the pastry. Flip each cut piece over (to place the side you cut on down onto the sheet). Place on lightly greased baking sheets, leaving room between each piece. Repeat with remaining sheet of pastry. Bake at 400 degrees for 10-12 minutes or until golden brown. Remove to a wire rack and cool completely. Using a serrated knife, slice through the center to make top and bottom halves.
CREAM FILLING:
1 c. whole milk
5 Tbsp. all-purpose flour
1 c. granulated sugar
1/2 tsp. salt
1/2 c. shortening
1/2 c. butter or margarine, at room temperature
1 tsp. vanilla extract
Place flour in a small saucepan; slowly whisk in milk. Cook and whisk constantly over low heat until mixture thickens and comes to a boil. Remove from heat; place mixture into a small bowl. Cover bowl with a paper towel and cool to room temperature.
Place cooled mixture in bowl of electric mixer; beat until fluffy. Add remaining ingredients, one at a time, and continue beating on medium-high speed for 5-10 minutes or until light and fluffy (I use my KitchenAid mixer-I start with the paddle, then when all the ingredients are very well mixed, I switch to the whisk attachment and let that do the rest of the work). The mixture should look like a whipped cream type frosting. I rub a little of it between my fingers to make sure the sugar has totally dissolved. Spread about 1 Tbsp. of filling on bottom half of each pastry; replace tops. Store in refrigerator. Yield: 42 pastries.
*I used Dorie Greenspan’s chocolate ganache recipe for the glaze on top:
3 oz bittersweet chocolate, coarsely chopped
1 tbsp confectioners’ sugar, sifted
2 tbsp cold unsalted butter, cut into 6 pieces
Melt the butter, then pour over the chocolate and stir until chocolate melts. Gradually whisk in the sugar and stir until lumps are gone. Let sit at room temp. to cool slightly before using.
I just used a ziploc baggie with a tiny hole cut in the tip (a la Aunt Sandy) to pipe the chocolate onto the pastries.3 oz bittersweet chocolate, coarsely chopped (Valrhona bittersweet 70%)

**WARNING** This post contains large amounts of cheesiness and ooey gooey “warm fuzzies”. Please don’t make fun of me. Thank you.
This is a very special week for TWD – not only are we celebrating one year since Laurie dreamed up this amazing group, but Dorie herself (as in Tuesdays with) has chosen the recipe for this week!!! I mean, how freaking awesome is that?! I’ve been looking forward to this post all week!
**And just in case Dorie reads this (hey, a girl can dream, right?), I want to say what a joy this group has been for me. Before I joined TWD, the only things I ever baked came out of a box. I never really knew how good something baked from scratch could taste. Now I bake almost everything from scratch (except brownies…honestly, I just haven’t found a recipe I like better than good ‘ol Duncan Hines! I’m not ashamed!), and I’m so much more open to new recipes and ideas than I was a year ago. I mean, last week I made my first EVER cheesecake! That was huge for me, and it’s all because I committed to this group and this amazing book. I have so much pride in the things I bake now….and I owe that to being in this group and most importantly to Dorie.
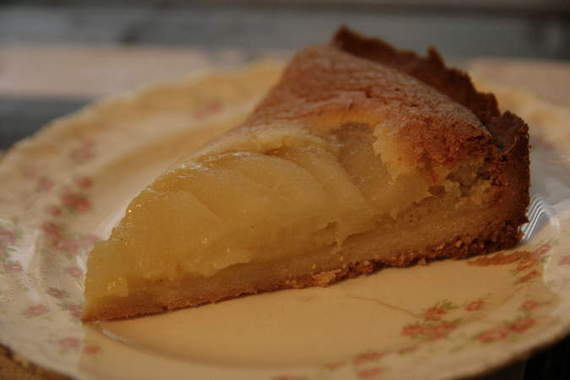
Ok, enough of me being a huge loser. Onto the recipe! Dorie chose one of her favorites for us this week- the French Pear Tart (oooh, ahhhhh…)
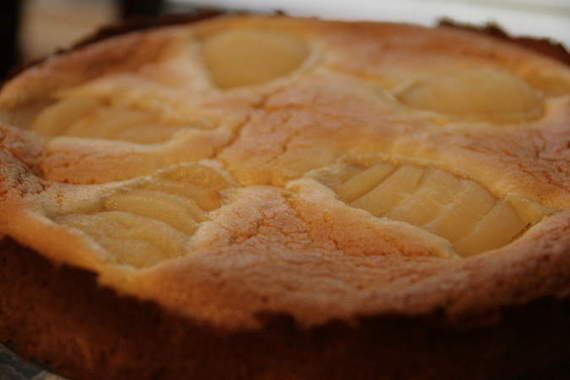
I was so glad Dorie chose this, because honestly it’s not something I would’ve chosen on my own, but it turned out to be fantastic! It starts out with Dorie’s Sweet Tart dough (which is awesome, by the way – it tastes like a shortbread cookie!), filled with an almond cream, then topped with sliced pears. The great thing about this dessert is, you can use canned pears if you’re short on time – Dorie gives you permission! The almond cream calls for either rum or vanilla extract, but I wanted to use my new vanilla paste, so my custard had lovely little flecks of vanilla bean all through it, which I really liked! My crust got a little too “done”, but it still tasted wonderful!
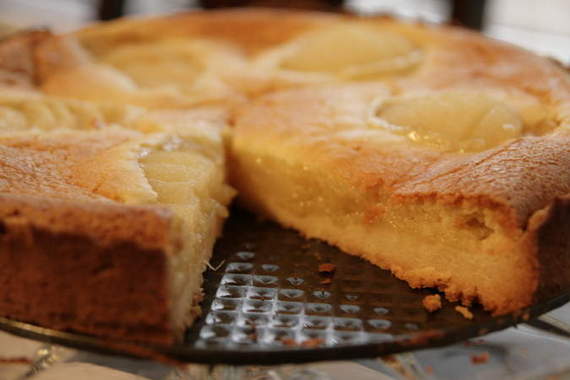
I had to use my 9 inch springform pan because I didn’t have the right sized tart pan; so mine looks a little less “Frenchy” and a little more “rustic”. This was a really good tart and hubby and I both really enjoyed it. I think it would be great to serve for company – it looks really impressive but it doesn’t require a lot of work! Perfect! Dorie will be featuring this recipe on her blog (and trust me, her’s looks waaaaaaay better than mine!) so be sure to head over there and check it out!! Seriously. Go now.
If there are those of you out there that do not own a copy of Baking From My Home to Yours by Dorie Greenspan, let me urge you to go out and get yourself a copy. This book changed my life – seriously. I haven’t come across a bad recipe yet. Or even just a mediocre recipe, come to think of it – they’re all absolutely amazing. Go! Grab yourself a copy and start baking! Your husbands will thank you. And HAPPY BIRTHDAY TUESDAYS WITH DORIE!!! Here’s to another great year!
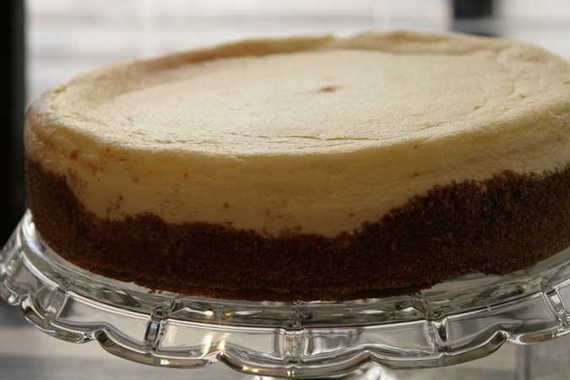
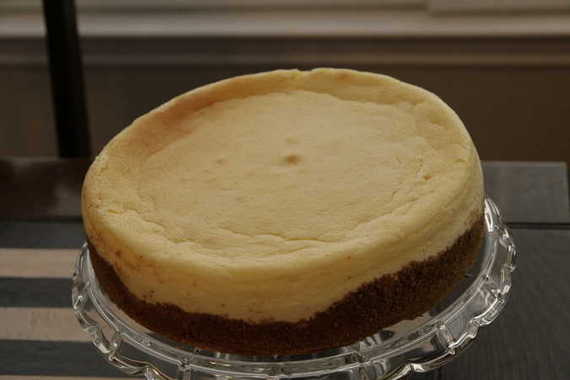
First of all, I hope everyone had a fantastic Christmas and enjoyed time with family and friends! Me, I had a great Christmas – I got new silverware! And my thoughtful hubby bought me some really fancy vanilla paste for my stocking, which I am SUPER excited to use! Not to mention, we had a great time with our families and both decided this was our best married Christmas so far! So, all-in-all…great Christmas. But now onto more important things like MY VERY FIRST CHEESECAKE!!! YIPPEEEE!! (Can you tell I’m just a wee bit proud of myself here?).
I want to give Anne of Anne Strawberry a HUGE thanks for picking this week’s TWD recipe: Tall and Creamy Cheesecake, and forcing me to get over myself and finally make a cheesecake! That’s right – I’ve never in my life made one. Everyone has told me how simple and no-fail they are, but for some reason, cheesecake has always been one of those things I’ve always been scared to death to attempt. I know, dumb, right? So now I can say that I’ve MADE ONE and it was a HUUUUUUUUUUGE success!! I took it to my hubby’s family Christmas and everyone seemed to really enjoy it (brownie points for me!). This was not only simple to make, but the best freaking cheesecake I’ve ever put in my mouth…I’m so glad I followed the recipe totally as is, because this was perfect as Dorie makes it. Perfect, I tell you!! I can’t wait to make another one of these….I feel so big and powerful now – like I’ve conquered something deep inside of me….who knows, maybe I’ll give brioche another try soon (or maaaaaybe not…). Anyway, go check out Anne’s blog and get the recipe for this FREAKING AWESOME CHEESECAKE. Do it. Right now. Go.
(sorry there are no pictures of the actual slices of cake….I couldn’t take a hacked up cake to family Christmas)
This is probably going to be a short post because I still have a tiny bit of shopping left to do today!
Here are just a couple of little things I wanted to share with you because they’re simple, take practically no time to prepare, and they’re darned TASTY! They are: my great-grandmother’s gingerbread and quick and easy saltine toffees. So good!! So here we go!
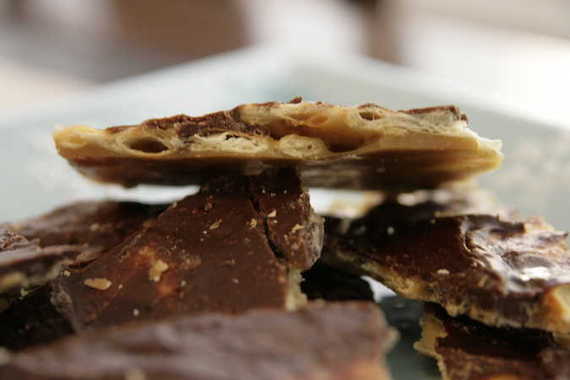
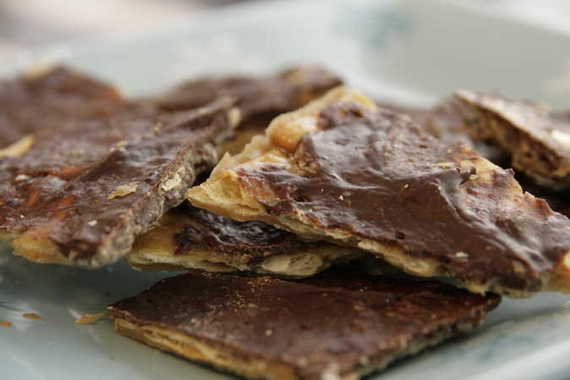
These toffee squares are just about the easiest snack/dessert to make and they’re oh-my-gosh delicious to boot! Perfect for parties or homemade gifts! I had some unexpected company this weekend and decided to whip these up for a little snack and they were a huge hit! It took literally about 10 minutes to make. I know it sounds weird because you make it with saltine crackers, but I’m telling you, it works!
Saltine Toffees
1 cup unsalted butter
1 cup brown sugar
2 cups semi-sweet chocolate chips
40 saltine crackers
Preheat oven to 350 degrees. Line cookie sheet with foil and spray with non-stick spray. Lay a flat layer of crackers out on the foil. In a medium saucepan, melt the sugar and butter until it starts to boil. Reduce the heat and simmer until mixture is thickened and sugar is completely dissolved. Pour this mixture over the crackers and spread to coat evenly. Bake for 2-3 minutes, or until the toffee becomes bubbly. After removing the pan from the oven, let it sit for 3-5 minutes. Sprinkle on the chocolate chips, let them soften and melt, and then spread them into an even layer. Refrigerate to harden, then break into chunks for serving. (These are soooooooooo good!!)
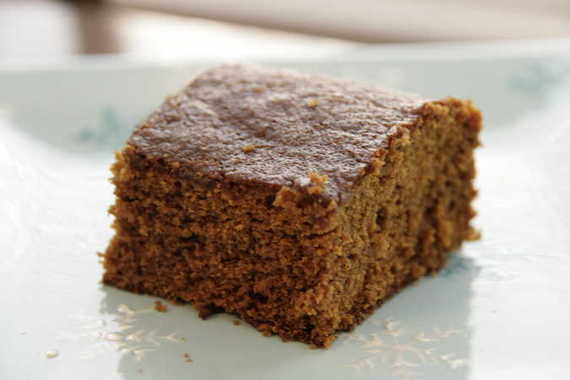
Ok, next up is my Baba’s gingerbread – I had been searching everywhere for a good gingerbread recipe to make for hubby one night (and coming up sort of empty handed). I should’ve known that all it took was one phone call to my mother to fix everything! She gave me this recipe – my great-grandmother, Baba’s recipe; and it’s DELICIOUS! It has just the right amount of spice and molassess….it was so good served warm with a (big ‘ol) dollop of whipped cream on top! Hubby loved it! Thanks again Baba, for yet another perfect recipe!
(Unfortunately, I was in a big hurry and didn’t have time to take very good pictures of this – I would’ve liked to top it with a little powdered sugar and some whipped cream so you could get the real effect of how good this is…but you’ll just have to use your imagination!)
Baba’s Gingerbread
1/2 cup sugar
1/2 cup butter, softened
1/2 cup molassess
1 egg
1 teaspoon ginger
1 teaspoon cinnamon
1 teaspoon baking soda
1/2 teaspoon salt
1 1/2 cup flour
1/2 cup boiling water
Mix together the butter and sugar, then add the egg and molassess, mixing well. In a separate bowl, combine the flour, spices, soda and salt, then add to wet mixture. Stir to combine, then add the boiling water and mix. Pour batter into a greased square pan and bake at 350 for 35-45 minutes or until springy.
I hope you enjoy these recipes….they’re perfect for the holidays! Merry Christmas and happy baking!
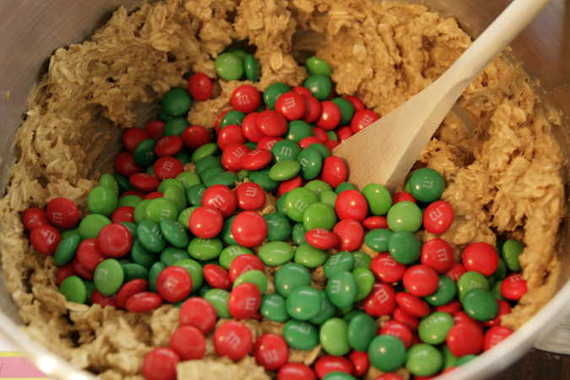
To me, one of the best things about the Christmas season is baking cookies…lots of them! These are slowly becoming my favorite Christmas cookie – you can make them in a flash and everybody always seems to love them. What cookie am I talking about? Why, Monster Cookies, of course!

Oatmeal, peanut butter, holiday M&M’s….these cookies are chock full of goodies! Normally I don’t really like peanut butter-y desserts, but I made these last year for the first time and fell in love! They’re chewy, not-too-sweet, and have a little crunch, thanks to the M&M’s. I made a huge batch of these the other night for a party (yeah, the same party that I made the buttery jam cookies for) and they were definitely everyone’s favorite – especially my good buddy Susan – she loves her some cookies!
These are flourless, which I always thought was kind of weird, but it really works out – I’m tellin’ ya, these are awesome cookies! Probably a great cookie to make with your kids…if you have any….I definitely don’t have any…..not really a “kid” person….there’s a bird that sleeps on our front porch every night….that’s about as close to having kids as I get…..I doubt the bird would want to make monster cookies with me, though………….um, right…well anyway – if you’ve got some peanut butter, oats and chocolate chips or M&M’s lying around in your pantry, you can definitely make these cookies TODAY! Do it!
Monster Cookies
-slightly adapted from allrecipes.com
6 eggs
2 1/3 cups packed brown sugar
2 cups white sugar
1/2 tablespoon vanilla extract
4 teaspoons baking soda
1 cup butter
2 2/3 cups peanut butter
9 cups rolled oats
2 cups M&M’s candy (I use the holiday kind)
Preheat oven to 350 degrees F (175 degrees C). Lightly grease cookie sheets or line with parchment paper. Cream butter and peanut butter together. Add the sugars and stir until well mixed. Add eggs one at a time, then add vanilla. Mix oatmeal and baking soda separately, then stir into batter. Add M&M’s last. Drop by heaping teaspoons onto cookie sheets. Bake for 12-15 minutes.
*NOTE: the above recipe makes about 10 gazillion cookies…I was smart and cut the recipe in half and still got about 3 dozen or more