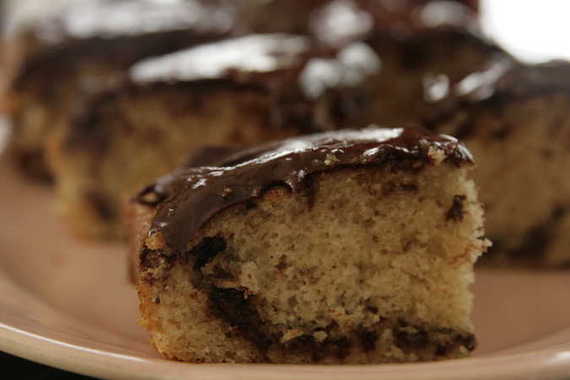
I know – no clever title this week – it’s late and my brain just isn’t feeling clever tonight. Oh well – that won’t stop me from sharing these yummy cinnamon squares with you all! Here we go!
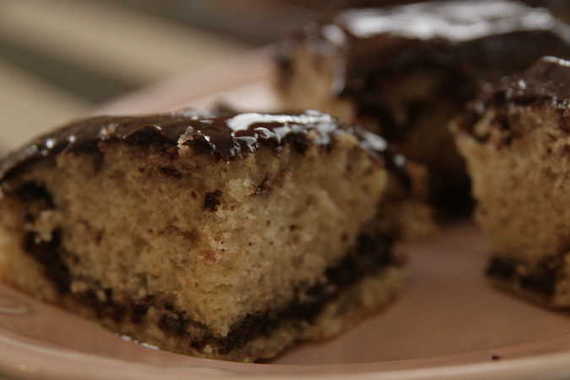
This week’s recipe is Dorie’s Cinnamon Squares, chosen by Tracey at Tracey’s Culinary Adventures. I have to admit (with no disrespect to Tracey!), I was NOT looking forward to baking these this week. It’s hot here and we’ve been eating lots of fresh fruits and summery desserts – cinnamon and chocolate isn’t something I really want to eat in the hot summertime (I’m weird like that). But, since I missed last week (oops), I knew I had no choice but to make them. And good thing I did! I ended up really loving these – I mean really, really. The frosting was by far the best part – a little chocolate, a little butter – YUM. I also love the thin layer of cinnamon, sugar, chocolate and espresso powder hidden in there! I cut the recipe in half and baked it in a loaf pan (it seems like I’m doing that a lot these days- the trusty old loaf pan has been getting a lot of action lately!) and still got eight squares. Just enough for the hubby and me to enjoy!
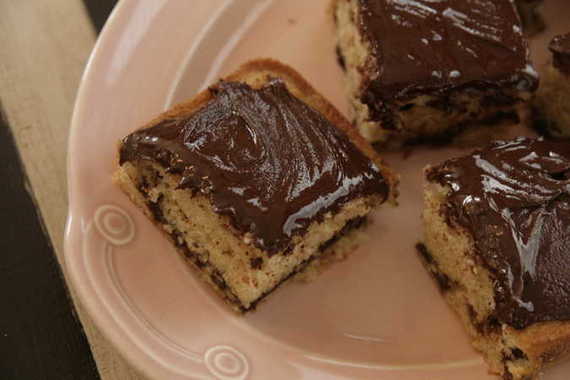
I’m really glad I didn’t flake out and skip this week – these were a very nice surprise. I know I’ll be making them again and again. Thanks, Tracey, for picking a winner! Head on over to Tracey’s blog if you’d like the recipe – which, you should, because it’s as simple as can be and totally yummy!
Last week, hubby and I enjoyed our first al fresco meal by the pool. It was heaven. A nice breeze, pretty flowers all around, and a big, blue, beautiful pool…not a bad view! When we lived in our apartment, we had a tiny little balcony that left barely enough room for a little bistro set and a couple of hanging plants – and it was sandwiched between buildings, so there was no breeze to speak of. We loved to eat outside, but it was just too cramped and HOT, so we didn’t get to do it much (plus, it’s hard to enjoy a nice, quiet meal when your neighbors are sitting right across from you out on their balconies and people are walking their dogs, scooping poop about 6 feet away from you…). So, needless to say, we enjoy our new back yard….a LOT.

Since the weather was so nice and “summery” the other night, I decided to make our favorite summertime meal – fish tacos. I love these! The fish isn’t fried, so it’s nice and light, and the white sauce is just delicious. I make this all the time in the summer – it’s perfect. Now for those of you who think you “hate fish tacos” – you should give these a try, because my parents were the same way and they quickly changed their tune after trying them. They’re good! I promise!
Fish Tacos
For the Fish:
2 Tilapia fillets, or any white fish you like (this is for two people)
half a head of cabbage – thinly chopped
paprika to taste
salt to taste
dill to taste (I used dried because it’s what I had on hand, but fresh would be better)
Cayenne pepper to taste
juice of one lime (or lemon)
Extra Virgin olive oil to coat the pan
flour tortillas (you’ll probably need around 4)
White sauce (recipe follows)
For the White Sauce:
-recipe from The Way the Cookie Crumbles by Bridget
1½ tablespoon minced cilantro
3 tablespoons mayonnaise
1 tablespoon sour cream
1 tablespoon lime juice
Heat a couple of tablespoons of olive oil in a skillet over medium heat; season fillets with salt, paprika, dill, and Cayenne and place in skillet. Cook for about 3 minutes on each side or until cooked through and flaky. While the fish is cooking, squeeze the lime juice over each fillet.
To make the white sauce, mix all ingredients in a small bowl and refrigerate until needed.
To assemble tacos: spread a generous amount of white sauce on each tortilla, top with fish (you can break the fillets into small pieces if you want, or leave them whole) and cabbage. Serve with a big pina colada and enjoy! 🙂

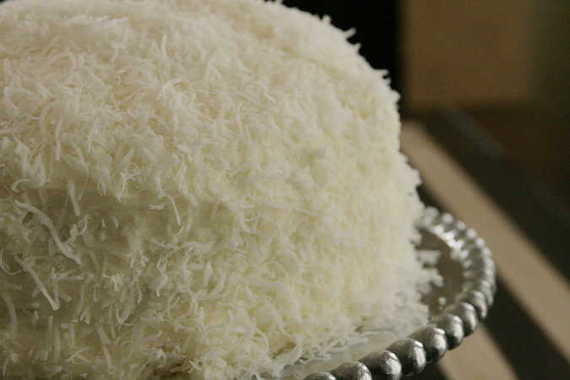
Ok, I realize saying something is “the best [fill in the blank] ever” is quite a statement. You’d better be darn sure it’s the best ever, or else everyone will start thinking you say that about everything. Well I’m sure! I’m 100% sure! This was probably the best slice of cake I ever put in my mouth – and I don’t even LIKE coconut in my baked goods!!! That’s big, ya’ll.
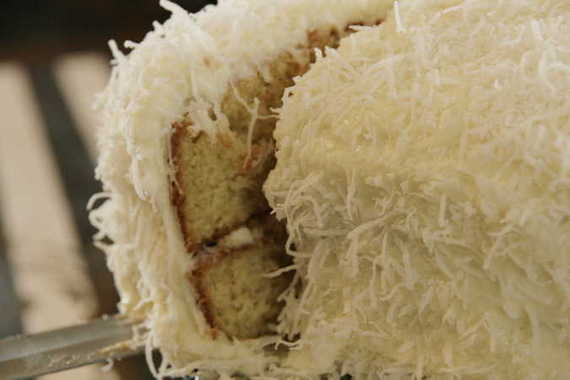
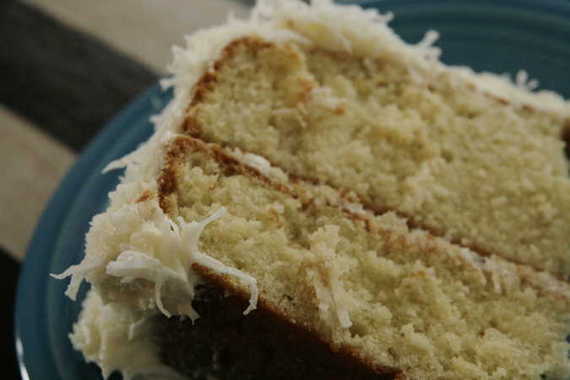
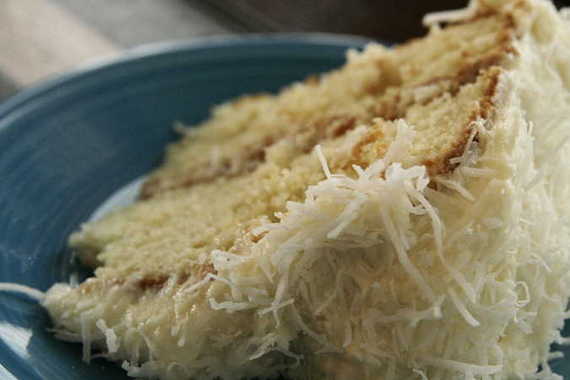
My parents were coming over for Memorial Day weekend and I wanted a yummy, summery, fun dessert to make for them. I was originally going to go with a good ‘ol stand-by chocolate cake (everybody loves a chocolate cake, right?), but then this recipe for coconut cake jumped out at me from Ina Garten’s Barefoot Contessa at Home cookbook and I immediately changed my mind. Although I don’t much care for coconut, I knew both of my parents love it, so I figured I’d just make the sacrifice and please everyone else – I’d just have a little taste of it. Well, that little “taste” ended up being two giant pieces – I LOVED it and so did everyone else. The cake is moist and slightly dense, the cream cheese icing is light and fluffy, and the coconut adds a flavor and texture that just send this cake over the top. It was amazingly delicious. And best of all, I have finally made my peace with coconut.
The only thing is, you might not want to make this cake all that often – it’s pretty heavy on the fat. You might as well just hand out sticks of butter to your guests, but still – once or twice a year never hurts. And even though I may develop a few extra dimples on my backside (what? Don’t act like you don’t have them…) just from those two slices of coconut cake – it was worth it. I’ll just get one of those grandma swim suits with the extra long skirt. Nothing could separate me from this cake…not now that we’ve come to love each other so.
I think this cake would be perfect for a 4th of July party or your grandma’s birthday, or a Tuesday night…it’s just perfect, really. So what are you waiting for? Get out there, put your grandma swim suit on and have a big ‘ol slice of coconut cake!

Coconut Cake
-Ina Garten, Barefoot Contessa
For the Cake:
3/4 pound (3 sticks) unsalted butter, at room temperature, plus more for greasing the pans
2 cups sugar
5 extra-large eggs, at room temperature
1 1/2 teaspoons pure vanilla extract
1 1/2 teaspoons pure almond extract
3 cups all-purpose flour, plus more for dusting the pans
1 teaspoon baking powder
1/2 teaspoon baking soda
1/2 teaspoon kosher salt
1 cup milk
4 ounces sweetened shredded coconut
For the frosting:
1 pound cream cheese, at room temperature
1/2 pound (2 sticks) unsalted butter, at room temperature
3/4 teaspoon pure vanilla extract
1/4 teaspoon pure almond extract
1 pound confectioners’ sugar, sifted
6 ounces sweetened shredded coconut
Preheat the oven to 350 degrees F. Grease 2 (9-inch) round cake pans, then line them parchment paper. Grease them again and dust lightly with flour.
In the bowl of an electric mixer fitted with a paddle attachment, cream the butter and sugar on medium-high speed for 3 to 5 minutes, until light yellow and fluffy. Crack the eggs into a small bowl. With the mixer on medium speed, add the eggs 1 at a time, scraping down the bowl once during mixing. Add the vanilla and almond extracts and mix well. The mixture might look curdled; don’t be concerned.
In a separate bowl, sift together the flour, baking powder, baking soda and salt. With the mixer on low speed, alternately add the dry ingredients and the milk to the batter in 3 parts, beginning and ending with dry ingredients. Mix until just combined. Fold in the 4 ounces of coconut with a rubber spatula.
Pour the batter evenly into the 2 pans and smooth the top with a knife. Bake in the center of the oven for 45 to 55 minutes, until the tops are browned and a cake tester comes out clean. Cool on a baking rack for 30 minutes, then turn the cakes out onto a baking rack to finish cooling.
For the frosting, in the bowl of an electric mixer fitted with a paddle attachment, combine the cream cheese, butter, vanilla and almond extract on low speed. Add the confectioners’ sugar and mix until just smooth (don’t whip!).
To assemble, place 1 layer on a flat serving plate, top side down, and spread with frosting. Place the second layer on top, top side up, and frost the top and sides. To decorate the cake, sprinkle the top with coconut and lightly press more coconut onto the sides. Serve at room temperature.
No, I don’t mean “Greek Week” as in all that sorority/fraternity college stuff – I mean it literally. A couple of weeks back, it really was a pretty “Greek” week – I cooked lots of Greek-style food and also received a bunch of Greek yogurt from Stoneyfield to use however I wanted. Fun! I’ll start with the meal:
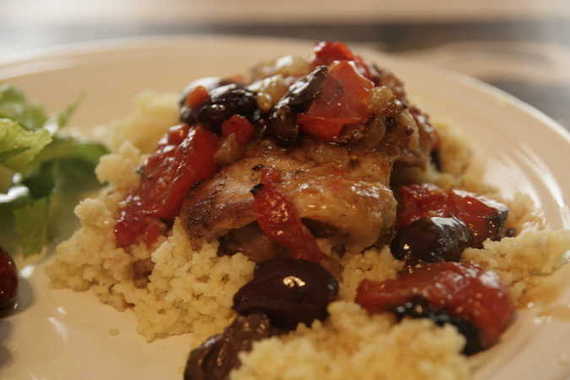
I really love Greek food – really really love it. Only thing is, I never really make it. Finally, I saw a couple of great-looking recipes on my favorite food blog, For The Love of Cooking. She had a recipe for Greek Chicken Thighs (pictured above) and Greek Salad – perfect! So I set out to make my own little Greek feast. Both of these recipes were super easy and took no time to make. I think this was one of Hubby’s favorite meals I’ve ever made – he loved the combination of flavors. The chicken thighs were awesome, but my favorite was the salad – I’ll definitely be making that one over and over again – in my opinion, it tasted better than a restaurant’s!
Greek Chicken Thighs
-For the Love of Cooking
2 tsp olive oil, divided
1-2 shallots, sliced into thin rings
1 clove of garlic, minced
6 boneless/skinless chicken thighs, trimmed of any fat
Sea salt and fresh cracked pepper, to taste
Garlic powder, to taste
Dried oregano, to taste
Handful of grape tomatoes
Small handful of kalamata olives, sliced in half
1/2-1 lemon juiced
Zest of one lemon
2 tbsp fresh parsley, chopped (divided)
2 tbsp low fat feta cheese
*I also chopped up some roasted red peppers and threw them in – it was great!
Preheat the oven to 425 degrees. Heat 1/2 tsp of olive oil in an OVEN SAFE skillet over medium heat. Once hot, add the shallot and cook, stirring frequently until soft and tender (about 2 minutes), add garlic and cook for an additional 45 seconds, stirring constantly. Remove from the pan and set aside.
Add the remaining olive oil to the same skillet and turn the heat up to medium high heat. Season the chicken thighs with salt, pepper, garlic powder and oregano to taste on each side. Once the pan is very hot, add the seasoned chicken breast to the skillet. Cook for 2-3 minutes, until the chicken is golden brown on one side, flip the chicken and add the grape tomatoes, kalamata olives, shallot and garlic mixture, lemon zest, lemon juice and half the parsley then season with sea salt and black pepper to taste. Place in the oven and roast for 9-10 minutes or until the chicken is cooked through. Remove from oven and sprinkle with the remaining parsley and the feta cheese. *I served mine over Couscous, but rice or pasta would be great too.

Greek Salad
-For the Love of Cooking
For the Salad:
Romaine lettuce, chopped
Kalamata olives
Grape tomatoes
Cucumber, seeded and chopped
Feta cheese
Sea salt and fresh cracked pepper, to taste
For the Lemon Garlic Dressing:
6 tablespoons olive oil
Juice of 1/2 of a lemon
1-2 garlic cloves, minced (I used a microplane to grate mine in)
2 tsp red wine vinegar
Sea salt and fresh cracked black pepper, to taste
1/4 tsp dried oregano
Whisk all ingredients together until thoroughly combined. Taste and re-season if needed. Toss the salad with the dressing and serve.

And now for the yogurt! A few weeks back, a representative of Stoneyfield Farm asked if I would be interested in trying their new Greek yogurt cups….heck yeah, I would! I had actually never tried Greek yogurt, so I was super excited to try this. The verdict: Ohmygawh amazing! Greek yogurt is my new favorite!! It’s so thick and creamy…YUM! And I especially liked the flavored ones – they had blueberry, honey and vanilla. The honey was by far my favorite- the honey is at the bottom and you stir it in….so freaking good! (And I promise I’m not just saying that for the Stoneyfield people…these really were amazing). I don’t know if I was supposed to cook something with the yogurt or just eat it. Hopefully just eat it, because that’s what I did – they were so good by themselves, I didn’t want to use them to cook with. I’m selfish like that, I guess….

And that pretty much brings us to the end of my Greek Week…give the chicken thighs and salad a try – you definitely won’t be sorry!! Hope everyone has a happy Memorial Day on Monday – enjoy your weekend!
Yes, I know my use of an exclamation mark in the title is probably a little over-the-top for muffins, but it seems like lately, I’m in a constant state of excitement, so I figure I get a free pass. Why am I so extra perky, you might ask? Well, for a couple of reasons – #1.) As I type this, there are two men installing a beautiful set of French doors in my dining room where there used to be a big, ugly, non-functioning behemoth of a sliding door before. That excites me. Big time. And #2.) it has finally stopped raining long enough for me to arrange my patio furniture and get the pool swim-ready. I now have a beautiful, tropical (ish) backyard getaway, perfect for al fresco dining with my hubby, followed by a long, leisurely dip in the pool – summer is here!! And finally, #3.) This week is the last week I have to teach voice lessons – after Thursday, I’m done, baby! Woo hoo!! So, now it’s probably a little easier for you to understand my over-excitedness for all things lately – including mango muffins.
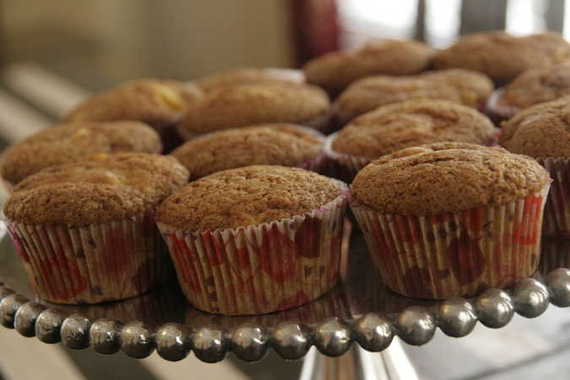
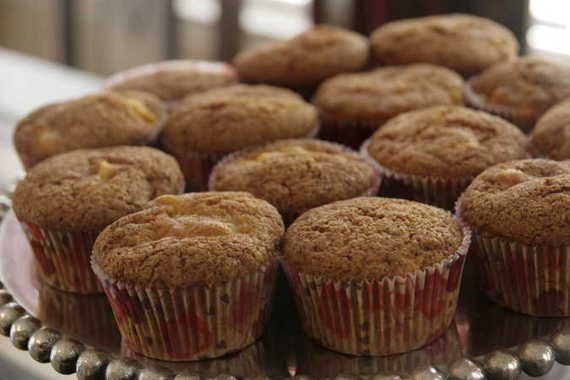
This week’s recipe is Fresh Mango Bread, chosen by Kelly of Baking With the Boys. This is the second time I’ve made Dorie’s mango bread, so I decided to make muffins this time around. Plus, muffins are easier to just grab and eat at a brunch (I served them at Mother’s Day Brunch). I was surprised at the amount of muffins I got out of one recipe – at least 20 – there may have been more, I can’t remember. Everybody really enjoyed these – in fact, everyone took a few home for later, which I always count as a compliment! Besides cutting the mangos being a giant pain in the butt, I always enjoy making this recipe because everyone seems to really enjoy it. A great summer recipe!

If you’d like the recipe for these little beauties, head on over to Kelly’s blog – she’ll post the recipe for you! Happy summer!
Some of you may remember my post “For Mommy” from last year – well, this is part 2. Mother’s Day brunch a year later. This year for Mother’s Day, I had the whole family over for brunch at my house. It was such a treat to have everyone over – I spent the whole day before baking all kinds of goodies and had my house fixed up just like I wanted it. This house is perfect for entertaining, and I do it as often as I can. There was tons of great food on the menu – my mother brought her breakfast casserole (eggs, sausage, croutons and lots of other good stuff), Nana brought a big fruit salad with a marshmallow cream/sour cream topping (we call it fruit gravy), my sister brought her Bruschetta cups (phyllo shells filled with tomato, basil, onion, mozzarella and mayo- really good!), and I fixed mango muffins, a lemon tart as part of my mom’s gift, mimosas, coffee, and from-scratch cinnamon rolls. Yes, that’s right- I, Amy-Scaredy-Pants, put on my Texas A&M apron, rolled up my sleeves and overcame my well-known fear of yeast. This is big, people.

(And sorry – the pictures are nothing short of disastrous. I forgot to take pictures until I realized too late that there was no natural light left….)
For too long now, the Pioneer Woman‘s Cinnamon Rolls have taunted me, made me drool all over myself, and made me ashamed that I was scared to attempt something so beautiful. I decided enough was enough – it was time to put my fears aside and attempt the unthinkable – yeast. What better dish to serve at brunch? Warm, gooey, chewy cinnamon rolls. I imagined my whole family taking a bite and instantly getting down on their knees, proclaiming me the greatest cook (greatest person, really) of all time. Joel would want to marry me all over again; my Daddy, brother-in-law and Grandaddy would declare I was the best wife a young man could ever hope for; and my mother, sister and Nana would all secretly wish they were as gifted as I in the arts of home-making. Yes, it could happen. It would happen. And all because of these cinnamon rolls.
Ok, so that stuff probably wouldn’t happen. But these were excellent cinnamon rolls. And honestly, they weren’t hard at all. I just followed the directions as closely as possible, and poof – yummy cinnamon rolls! The icing is really what makes these so darned tasty. That was by far my favorite part. I will most definitely be making these again…and again….and again. So thank you, Pioneer Woman, for helping me overcome my fear of yeast. Who knows what else I’ll try now? Do I dare attempt Brioche again?……………….um, maybe next year.
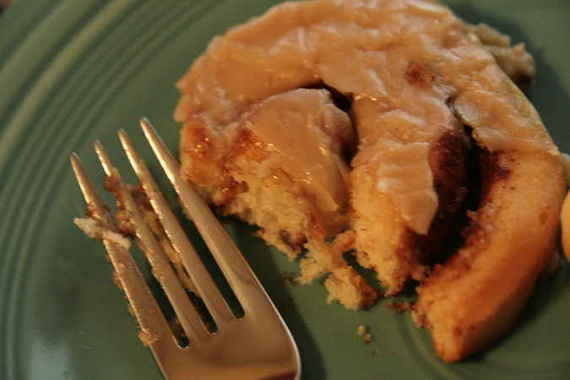
(Sorry for the blurry picture)
The Pioneer Woman’s Cinnamon Rolls
-I used half of this recipe and got about 4 pans of rolls
For the Dough:
4 cups whole milk
1 cup vegetable oil
1 cup sugar
2 packets active dry yeast
8 cups all-purpose flour
1 cup flour
1 teaspoon baking powder
1 teaspoon baking soda
1 tablespoon salt
1 1/2-2 cups melted butter
1 cup sugar
generous sprinkling cinnamon
For the Icing:
7 tablespoons melted butter
2 lbs powdered sugar
2 teaspoons maple flavoring
1/2 cup milk
1/4 cup melted butter
1/4 cup brewed coffee
1/8 teaspoon salt
Mix milk, vegetable oil, and sugar in a pan (large soup-pot type). “Scald” the mixture (heat until just before the boiling point.) Turn off heat and leave to cool 45 minutes to 1 hour.
When the mixture is lukewarm to warm, but NOT hot, sprinkle in yeast. Let this sit for a minute so the yeast gets all warm and moist and happy. Then add 8 cups of all-purpose flour. Stir mixture together. Cover and let sit for at least an hour.
Now add 1 more cup of flour, baking powder, baking soda, and salt. Stir mixture together. At this point, you could cover the dough and put it in the fridge until you need it—overnight or even a day or two, if necessary. Just keep your eye on it and if it starts to splurge out of the pan, just punch it down. Or, of course, you can just go ahead and make the rolls.
Sprinkle surface generously with flour. Take half the dough and form a rough rectangle. Then roll the dough thin, maintaining a general rectangular shape. Rectangle should increase in both width and length as you roll it out.
Now drizzle melted butter over the dough. Don’t be shy; lay it on thick, baby. Sprinkle sugar over the butter, followed by a generous sprinkling of cinnamon.
Starting at the opposite end, begin rolling the dough in a neat line toward you. Keep the roll relatively tight as you go. Some of the butter/sugar/cinnamon mixture may ooze out toward the end, but that’s no big deal. Next, pinch the seam to the roll to seal it.
Spread 1 tablespoon of melted butter in seven round, foil cake or pie pans. Then begin cutting rolls approximately 3/4 to 1 inch thick and laying them in the buttered pans. Repeat this process with the other half of the dough. This recipe makes approximately seven pans of rolls (56 rolls)
Let the rolls sit for 20 to 30 minutes to rise, then bake at 400 degrees until light golden brown, about 15 to 18 minutes.
While the rolls are in the oven, make the deliciously sinful maple frosting. To a mixing bowl, add powdered sugar, maple flavoring, 1/2 cup milk, 1/4 cup melted butter, brewed coffee, and salt. Stir until mixture is thick but pourable. Taste and adjust as needed.
Generously drizzle frosting over warm rolls after you pull them out of the oven. And take a walk on the wild side. Don’t be afraid to drown them puppies. Be sure to get frosting around the perimeter of the pan, too, so the icing will coat the outside of the rolls.
Make these for your mom sometime, trust me, she’ll thank you!
First, let me start by saying how glad I am to be back to normal and back to blogging again! After a week and a half of being sick, I’m glad to report that I’m healthy again and back to my old self! Of course, now my hubby is sick, wouldn’t you know….but don’t worry, I’m taking good care of him. 🙂
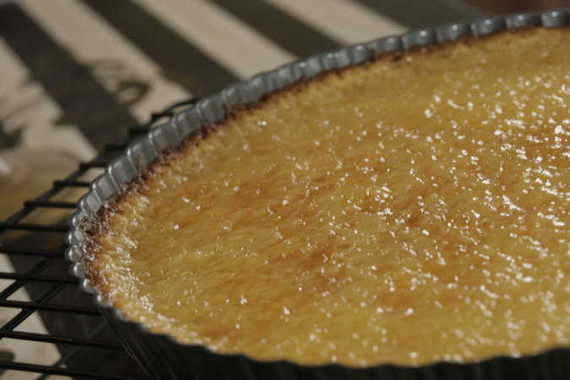
Ok, so, this week’s TWD recipe is Dorie’s Tartest Lemon Tart, chosen by Babette of Babette Feasts. It sure was nice to get back into my kitchen again and bake lots of goodies – I was very busy this weekend, in fact. Besides making this tart, I also got ready for my Mother’s Day brunch by baking next week’s mango bread and defeating my fear of yeast with the Pioneer Woman’s cinnamon rolls (all coming soon!). I was actually really excited about this tart because my mother loves lemony desserts but never gets them because my daddy doesn’t like lemon – perfect!- the tart would be part of my mom’s Mother’s Day gift!

The thing that makes this tart extra special (and extra lemony) is the fact that the recipe uses the entire lemon – zest, pulp, juice, everything. You cut the lemon in pieces and throw the whole thing into the blender with some sugar, egg yolks (pictured above- I had frozen them in a heart shaped ice tray) and a few other things, blend it all together and pour it into Dorie’s amazingly delicious tart crust. A few TWD members had issues with it being too bitter due to the pith of the lemon, however, I heard from my mother and she said she really enjoyed it. She said it was definitely tart, but she loved it. Yay!
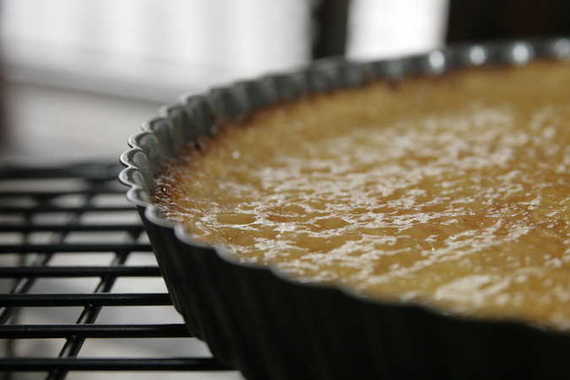
If you would like the recipe, visit Babette’s blog and she’ll fix you up! My mom said this is the perfect summer dessert, so everybody get busy and make yourself a lovely, summery lemon tart!

Unfortunately, there will be no TWD for me this week….washing my hands 20 times a day, never leaving my house, and staying away from large crowds is apparently exactly what it takes to catch this wonderful “Swine Flu” we’ve all been hearing about non-stop. Four days, five different kinds of medicines, one missed performance of Carmen, about a million cups of hot tea, 20,000 tissues and my entire collection of “chick flicks” later and I’m still nowhere close to being well. I was really hoping to be able to get in the kitchen and make Dorie’s Tiramisu Cake for this week’s TWD recipe, but apparently Mother Nature has other ideas. So instead of participating with the other happy bakers, posting gorgeous, mouth-watering pictures and talking about the deliciousness of cake – I’m sitting here in bed watching movie after movie with 20 pounds of gunk in my chest, forced to breathe through my mouth, and my head feeling like it’s about to explode. Good times. Here’s hoping I’ll at least be well in time for the final performance of Carmen on Friday and Mother’s Day…..cross your fingers!
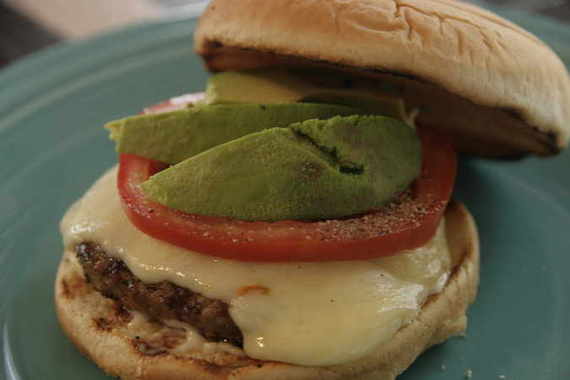
This is one of our standby favorites. I mostly make it in the Spring/Summer, but it’s good all year round. I first saw this recipe in a Rachael Ray Magazine a year or so ago and have been making it ever since. I love it because it’s healthy, full of flavor and of course, really darn tasty. As you’ll be able to tell from my picture, I didn’t stick too close to the recipe this time – usually I do, but as you all know, I’m busy as heck this month, so I’ll take a shortcut anytime I can. I used an awesome jalapeno cheddar I found at Whole Foods and just piled the avocado right on top instead of mixing it in with the mayo – I also forgot the cilantro, oops. (Don’t worry, it was still really good…)
Salsa Verde Turkey Burgers
–Everyday With Rachael Ray, March 2007
1 avocado, halved and pitted
1/2 cup mayonnaise
1 clove garlic, finely chopped
Salt
1 pound ground turkey thigh meat
1/2 cup salsa verde
4 slices pepper Jack cheese
4 kaiser rolls, split
1 cup fresh cilantro leaves, coarsely chopped
2 small green or red tomatoes, sliced (I did NOT use green…the only time I eat green tomatoes is if they’re fried.)
Scoop the avocado flesh into a small bowl. Add the mayonnaise and garlic and mash with a fork until well combined but chunky. Season with salt and set aside.
In a medium bowl, combine the ground turkey and salsa. Divide the mixture to form 4 patties.
In a large nonstick skillet over medium-high heat, cook the patties for 4 minutes on one side. Flip and top each with a slice of cheese; cover and cook for 4 minutes more.
Spread the avocado aioli on the split side of each roll bottom and cover with 1/4 cup cilantro. Top with a patty and 2 tomato slices; set the roll tops into place.

This would be a great company recipe – have a couple of friends over, grill up some salsa verde burgers and go to the opera! What? That’s what I’m doing tonight….I bet plenty of young people gather their friends and go to the opera…………….yeah, ok fine, you’re right…I’m a geek.
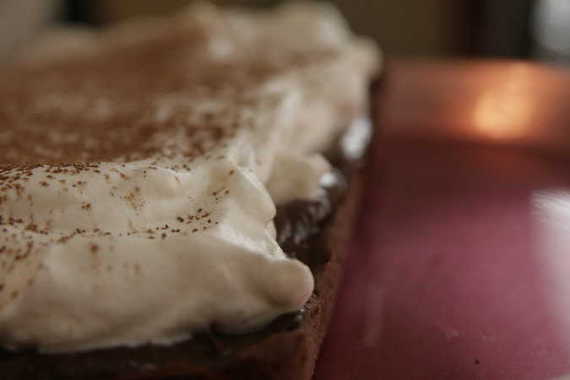
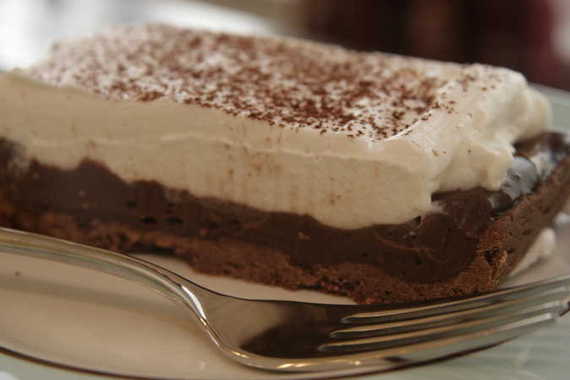
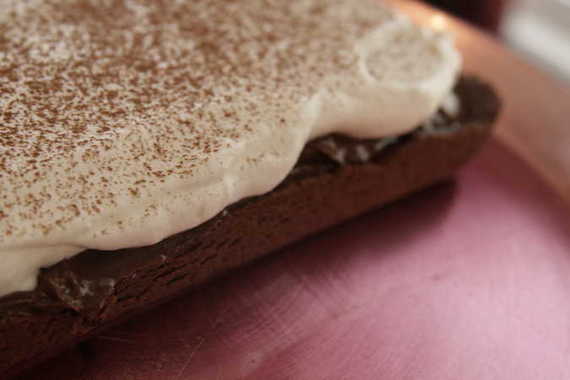
Here’s another perfect example of Dorie taking a classic, well-loved recipe and tweaking just slightly to make it extra fancy and extra special. You might say she “Dorie-fies it”. Gosh, I’m so clever. Anyway, this is Dorie’s Chocolate Cream Tart, chosen by Kim of Scrumptious Photography, one of my very favorite food blogs. Do yourself a favor and check out her blog – her pictures will make you drool all over your keyboard. I was really glad to see this recipe chosen because I’m a biiiiiiiiiiiiig fan of chocolate cream pie, especially, ESPECIALLY my mama’s. She doesn’t waste time with that meringue stuff – she whips up some heavy cream to pile on top. Now that’s how pie should be done, folks. So of course, I was pleased to see that Dorie does the same thing with her Chocolate Cream Tart – so basically, this is just my mom’s chocolate cream pie, but with a tart crust instead of a pie crust. Perfect!
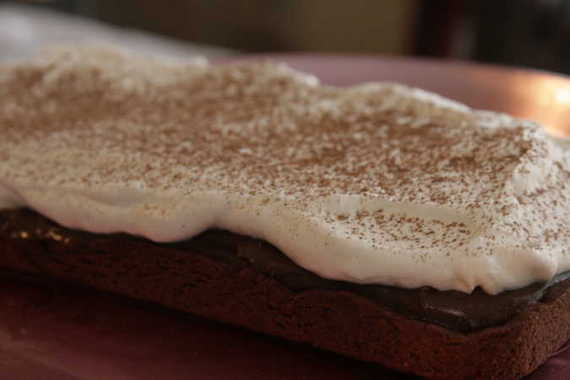
I came *this* close to using Dorie’s Sweet Tart Dough (the most heavenly crust ever known to man), but decided to follow the rules and use the chocolate tart dough that’s called for instead. I was kind of sorry I did, actually – it was a little too bitter for me, plus I felt like it needed something non-chocolate to balance out the chocolate filling. It was still good, though. I also cut the recipe in half and baked it in a loaf pan lined with parchment so I could just pull it right out and spread the filling and whipped cream on it. Ok, so let me get to the verdict – this was GOOD. I mean really good. So good I stood there in the kitchen licking every last bit of the chocolate filling off of spoons, whisks, bowls, and fingers. I added a little sour cream to the whipped cream topping (just like in the banana cream pie a couple of weeks back) and it really added a lot of extra flavor. All in all, this was a DELICIOUS dessert. We both loved it. Was it as good as my mom’s? Well, no, but I never really expected it to be, either. 🙂
This would be absolutely perfect to serve for company – its tart status brings it up a couple of notches in “fanciness”, but it tastes like something out of your grandma’s comfy kitchen. Perfect! Head on over to Kim’s blog and get the recipe – your spouse will thank you.

Yummy, yummy, yummy!! Thanks, Kim, for choosing a WINNER!