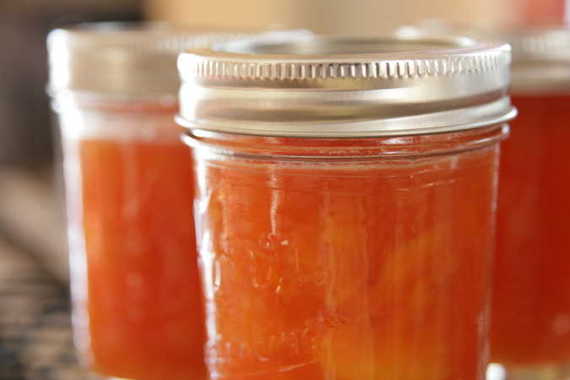
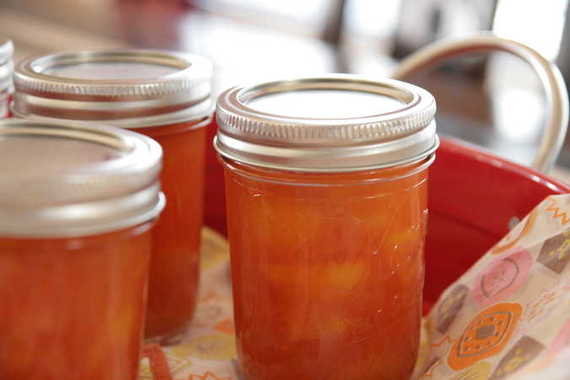
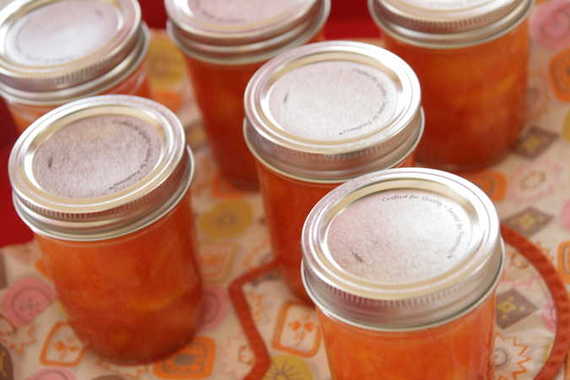
LOOK! Look what I’ve been doing today!! I’m so proud of myself…homemade jam!!! This is something I’ve been wanting to do for a while now, but always thought it would be too difficult. Luckily, my good buddy Tabitha talked me into it! She makes her own jam all the time and said it was no big thing. So, after about a thousand phone calls to Nana and a quick prayer- I had six beautiful jars of homemade peach jam (well, actually they’re preserves, but we don’t need to get technical…)!
This has been such a fulfilling year for me as far as overcoming obstacles in the kitchen – I tackled my fear of yeast, bought and used a pastry bag numerous times, and made homemade preserves – just like my great-grandmother did! I felt almost as if I were chanelling Baba while I was spooning hot peach-y goodness into jars this afternoon. I know she’d be proud of me, making my own preserves. I know I am!
Ok, I know I’m making a huge deal out of this, but the truth is, making your own jam/jelly/preserves is really easy (just make sure you have your grandmother on speed-dial…just in case, ya know?). I bought a little package of Sure-Jell (as Tabitha advised) and (sort of) followed the directions that came with the box. I started with ten ripe peaches that I got at the Dallas Farmer’s Market yesterday, boiled them for about 2 minutes so the skin would peel off easily, cut them into little chunks, thew them in a pot with 2 cups of sugar and the juice of 1 1/2 lemons, brought it to a rolling boil, turned the heat down, added half a packet of the Sure-Jell pectin, stirred it all together and cooked it for about 5 minutes more, then spooned it into 6 sterilized jars and put the tops and lids on tightly. And voila! Peach preserves! If you’re freaking out (like I was) about sterilizing the jars and lids – don’t. It was totally easy. I just brought a big pot of water to a boil and carefully added the jars with a pair of tongs, let them boil for about 5 – 7 minutes, carefully removed the jars and set them on a clean kitchen towel to dry, then added the lids and tops for 30 seconds or so, removing them with the tongs and setting them on the towel as well. And that’s it! I really hope all of these (very informal) instructions haven’t been confusing in any way – if so, please let me know and I’ll try to re-word it a little better for you!
This was really so much fun – I really enjoyed making these preserves today. And I absolutely cannot wait to spread these on some homemade biscuits tomorrow….I’m thinking breakfast-for-dinner!! Yippee!!!
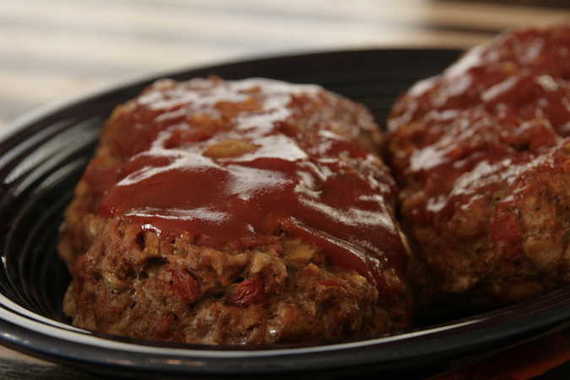
It’s pretty darn hot outside today (I think 102 is the high…) and normally on days like this, I’d be posting something cold and refreshing…like lemonade or ice cream. But I’m not. I’m posting Nana’s meatloaf. Why? Because it’s been one heck of a week and I needed something comforting. It doesn’t get much more comforting than Nana’s meatloaf. For years that was the only meatloaf I would eat as a kid. So, naturally, that’s the only recipe I use when I make meatloaf now. Only thing is, it definitely tastes better eaten at Nana’s table…
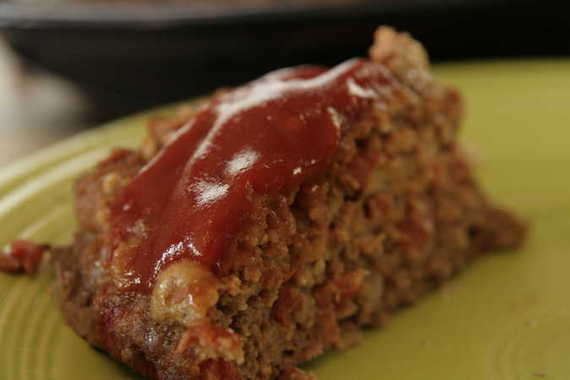
And today’s your lucky day, because I’m going to share her recipe with you. You don’t have to make it in this intense heat (I don’t know about you, but it’s pretty hard for me to turn my oven on when it’s the hot summertime)….you can save it for cooler weather or for when you have a week like mine and need something comforting to make you feel better. Either way, I hope you enjoy it as much as I do.
Nana’s Meatloaf
1 pound lean, ground beef
1 egg, beaten
1 15-oz. can diced, stewed tomatoes
1 teaspoon salt
(I like to add lots of pepper to mine, but she doesn’t call for it)
1 small onion, chopped
1 green pepper, chopped
1/2 package Saltine Crackers, crushed (probably about 10 crackers or so)
Lawry’s Seasoned Salt to taste
(I also like to add a few dashes of Worchestershire sauce)
Mix everything in a large bowl. Form into two loaves and place on a broiler pan (so all the fat can drip down into the bottom of the pan), cover loosely with foil and bake at 375 degrees for approximately 45 minutes or until brown, taking the foil off halfway through the cooking process (at this point, I like to mix a few tablespoon of ketchup with some brown sugar and Worcestershire sauce and spread on the top of each loaf – this is optional!). Serve and enjoy!
No Tuesdays with Dorie this week….honestly, I just didn’t get a chance to make it. Ooops.
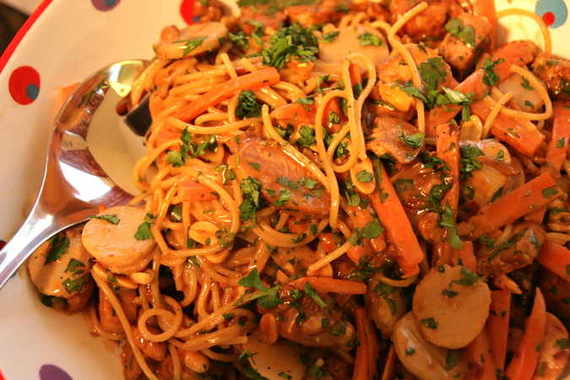
BUT – here is a scrumdiddlyumptious pasta dish instead!
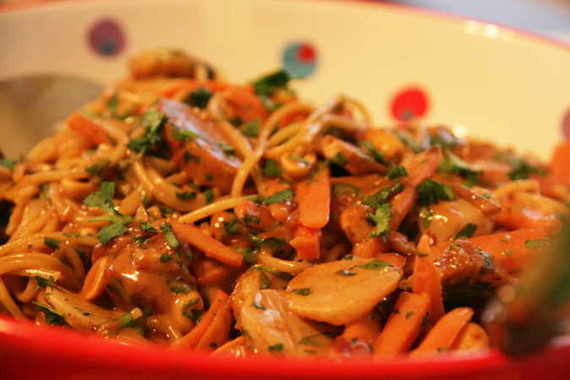
We used to go to the Cheesecake Factory a lot and my absolute favorite dish to order was the Thai Chicken Pasta. I’ve made it at home a few times, but I used a bottled peanut sauce, which was pretty good, but I wanted to make a homemade sauce this time. I started just throwing in things that I thought would work together and ended up with a great peanut sauce. I don’t mean to toot my own horn, but this was one fantastic pasta (toot, toot!).
Thai Chicken Pasta
For the Peanut Sauce:
1 cup smooth peanut butter
1/4 cup soy sauce
3 teaspoons chili paste
2 tablespoons brown sugar
2 limes, juiced
1/2 cup hot water
1 clove of garlic, minced
1 teaspoon rice vinegar
1 teaspoon ground ginger
1/2 teaspoon sesame oil
For the Pasta:
1/2 a pound thin spaghetti, fully cooked and drained
2 boneless, skinless chicken breast, fully cooked and sliced diagonally (I like to roast mine with olive oil, salt and pepper)
2 carrots, julienned
1 small can water chestnuts, drained
handful chopped peanuts, for garnish
bunch cilantro, chopped
To make the sauce, put all ingredients in a small bowl and mix until well combined. Store in the refrigerator until needed.
Blanch the carrots in boiling water for about 3 minutes, pulling them out while they’re still bright and crisp. Place in a large bowl with the cooked pasta, sliced chicken, water chestnuts, and cilantro. Pour the sauce over the pasta and toss to coat; top with more cilantro and chopped peanuts. Serve and enjoy!
Give this a try soon – you’ll love it!
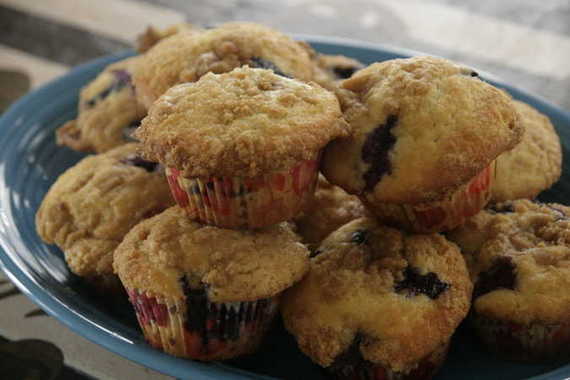
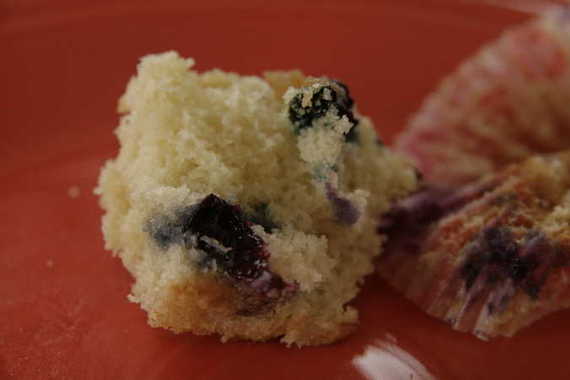
Do you love warm, fragrant blueberry muffins on Saturday morning? Ok, I know – who doesn’t, right? Well, we’re all in luck because these just happen to be the most perfect, delicious, easy blueberry muffins – PERFECT for Saturday morning (or Sunday…whatever)! And I’m sure none of you will be surprised when I say it’s an Ina Garten recipe – we all know my love for Ina.
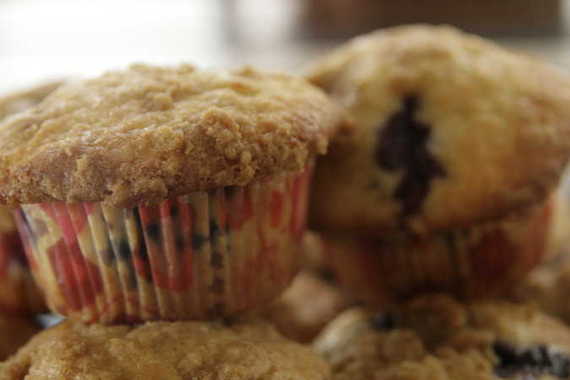
These aren’t just your regular, run-of-the-mill blueberry muffins. These muffins have a gorgeous, buttery, golden crumb topping that really send them over the edge. I couldn’t get enough of them! All you need is a cup of coffe and a couple of these bad boys and you’ve got yourself a perfect start to the weekend. Guaranteed. 🙂

Blueberry Streusel Muffins
-Barefoot Contessa, Back To Basics
3 1/2 cups all-purpose flour
1 1/2 cups granulated sugar
4 1/2 teaspoons baking powder
1 teaspoon baking soda
1 teaspoon salt
2 cups buttermilk, shaken
1/4 pound (1 stick) unsalted butter, melted and cooled
1 1/2 teaspoons grated lemon zest
2 extra large eggs
2 cups fresh blueberries (2 half-pints)
For the Streusel Topping
3/4 cup all-purpose flour
1/2 cup light brown sugar, lightly packed
1 teaspoon cinnamon
1/4 teaspoon salt
4 tablespoons cold, unsalted butter, diced
Preaheat oven to 375 degrees. Line muffin tins with liners. Sift the flour, sugar, baking powder, baking soda and salt into a large bowl and blend with your hands. In a separate bowl, whisk together the buttermilk, butter, lemon zest, and eggs. Stir the buttermilk mixture into the flour mixture with a fork, mixing just until blended. Fold the blueberries into the batter. Don’t overmix! With a large spoon, scoop the batter into the prepared cups, filling them almost full.
For the topping, place all ingredients in the bowl of a food processor fitted with the steel blade and pulse until the butter is in very small pieces. Pour into a bowl and rub with your fingers until crumbly. Spoon about 1 tablespoon of the streusel on top of each muffin. Bake muffins for 20 to 25 minutes, until golden brown.
Hope you all enjoy your Father’s Day weekend and Happy Baking!

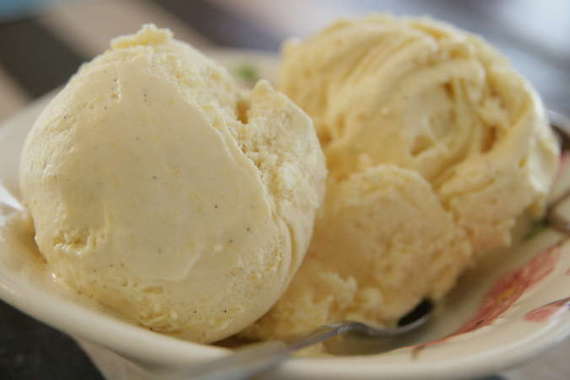
Yep. Today’s my birthday. The big two-five. I can now rent a car. My insurance goes down a little. I can justify eating ice cream cake. Those are a couple of good things I guess. The bad things – I’m five years from thirty. Halfway to fifty….dear Lord. It seemed like just yesterday I was just graduated from college, turning twenty-two, getting married….jeez. You blink and three years go by. My birthday’s been great so far – had my family over for a little party (complete with my own ice cream cake!) this past weekend, went out to dinner last night with hubby’s parents to my favorite restaurant, and tonight hubby and I are trying a new oyster bar – and of course, I’ve gotten some great gifts! Anyway, this post isn’t really about my birthday – it’s about Dorie’s Honey Peach Ice Cream. The greatest frozen treat ever concocted. I mean, yeah, my birthday is pretty important, but not quite as important as honey peach ice cream; this is serious ice cream, ya’ll……
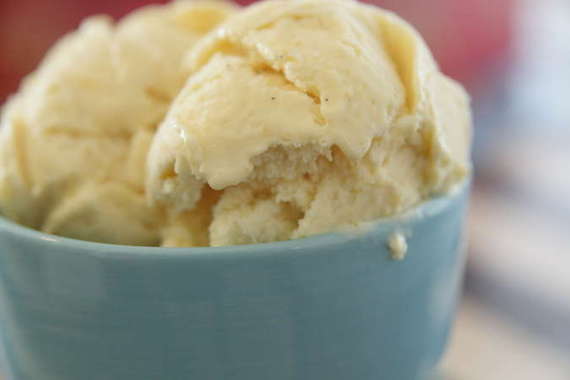
I’ve made this once before, last summer, and totally fell in love. It’s peachy, incredibly creamy, and the honey gives it a smoothness and flavor that totally set it apart from all other ice creams. I’m completey sold on this ice cream. It’s my all-time favorite. Dorie talks about her love of ice cream in her book, Baking From My Home to Yours (the book we bake from) – and you can make any of her recipes and tell right off that this woman knows her ice cream. The Blueberry Sour Cream is to die for, and of course the Honey Peach is amazing…I can’t wait to give the others a try!

To make this, basically you just boil your milk mixture and your honey/peach mixture, then blend it all together in a blender and throw it in your ice cream maker. Coudn’t be easier – or more delicious. Dorie reserves a few chunks of peaches to toss in the ice cream mixer at the last minute, but I personally wasn’t a fan of the frozen peach bits last time, so I just pureed all the peaches and enjoyed it much more this time. My parents were visiting, so they got to sample it and really loved it. This is one of those recipes I’ll make every single summer from now on.
Do yourself a (big) favor right now and check out Tommi’s blog – Brown Interior, and get the recipe for this amazing ice cream! And THANK YOU, Tommi, for picking one of my absolute favorite Dorie recipes for my birthday!! This ice cream was the cherry on top of a great birthday!
And P.S. – a BIG thank you to my good buddy Andrea, for showing my how to (finally) use my camera….it’s amazing how all those little buttons actually DO something! 🙂
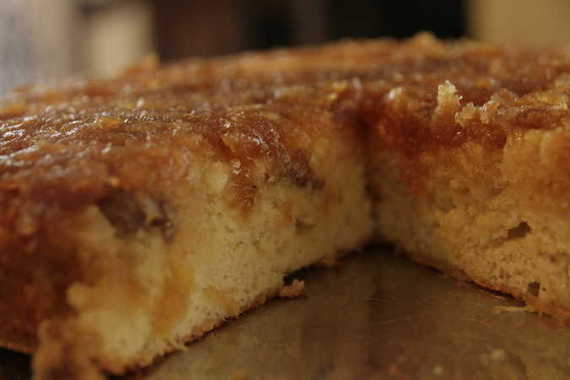
Here’s a useless, random fact that you might not know about me – I love to read. I’ll pick up a good book and finish it in less than a week, or even a couple of days, depending on how long it is. And, I read super fast, which drives my hubby crazy… My favorite books are Pillars of the Earth, by Ken Follet, the Stephanie Plum novels, by Janet Evanovich and my all-time, absolute favorite – the Outlander series by Diana Gabaldon; but the Stephanie Plum books are what I’m focused on today. I pretty much read these books (there are 13 of them as of right now, but a new one is coming out in a couple of weeks) every year – they’re totally hilarious. Stephanie Plum is an unorthodox, accident-proned bounty hunter in Jersey with a wacky family and really funny sidekicks. Her 80-something year old grandma is particularly hilarious (there’s lots more to the stories, but I won’t go into it right now). Anyway, her mother always lures her over for family dinners with her homemade pineapple upside down cake. In the books, Stephanie is always talking about how delicious her mother’s cakes are – especially the pineapple upside down cake. Everytime I read these, I always end up craving it – even though I’d never even tried one! I decided a couple of weeks ago to put an end to my cravings and give one of these famous cakes a try. So here is my very first Stephanie Plum-inspired pineapple upside down cake.
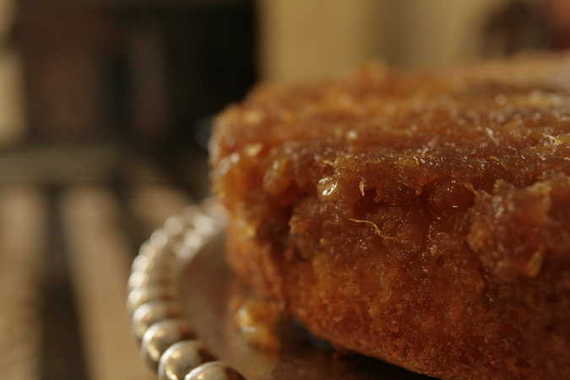
I did a lot of searching before deciding on the best sounding recipe – a fellow food blogger‘s 70-year old recipe that belonged to her grandmother. And boy am I glad I picked this one – talk about delicious! This was seriously some of the best cake I’ve ever had in my life. I left out the maraschino cherries (blech!) and used crushed pineapple – I’m telling you – this was miiiiiiighty tasty. Hubby and I both loved it. So, thank you, Stephanie Plum, for inspiring me to make this delicious cake (even though you’re a fictional character..)!

This was delicious with a big dollop of whipped cream – I can’t wait to make it again! If you don’t try the cake, at least do yourself a favor and read the Stephanie Plum novels – they’re a good, quick read and totally hilarious (with a touch of romance). Make yourself a cake this weekend! Happy baking!
Pineapple Upside Down Cake
–Food Blogga
1/2 cup butter (8 tablespoons)
1 cup brown sugar
1 (20-ounce) can sliced pineapple
6 maraschino cherries
a few whole pecans
1 cup flour, sifted*
1 teaspoon baking powder
1/8 teaspoon salt
3 eggs, separated
1 cup granulated sugar
5 tablespoons pineapple juice
1 teaspoon pure vanilla extract
Position a rack in the center of the oven, and preheat to 350 degrees F.
Add butter to a 9-inch-round baking pan, and place inside of a warm oven until melted, about 5 minutes. Remove from oven, and sprinkle brown sugar evenly over the butter. Add 6 pineapple slices and place a cherry inside of each one. Fill in the nooks and crannies with whole pecans.
In a medium bowl, combine sifted flour, baking powder and salt, and stir.
Using a hand mixer, in a metal or glass bowl, beat egg whites at high speed until fluffy. Set aside.
In a separate bowl beat egg yolks with sugar at medium speed until creamy. Add pineapple juice, and vanilla extract, and beat well. Add the flour mixture to the creamed mixture, and beat until well combined. Fold in the egg whites with a rubber spatula. Pour cake mixture evenly over the fruit, and smooth with the spatula.
Bake for 40 minutes, or until cake is golden and a toothpick inserted into the center comes out clean. Place on a wire rack to cool for 10 minutes. Run a blunt knife around the edges of the pan to loosen the cake. Invert carefully onto a plate. Serve warm or at room temperature.
*Note: Sifting the flour creates a lighter cake.
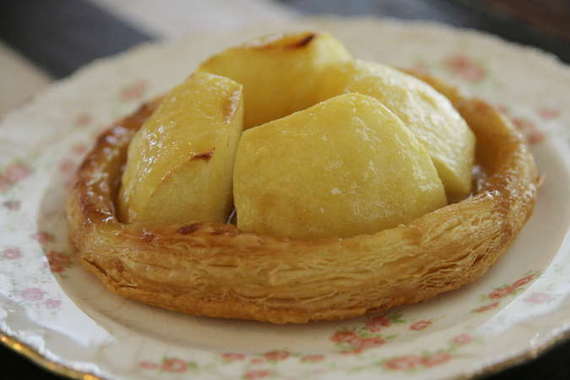
Yippee! This week’s recipe was chosen by my good buddy, Jessica, of My Baking Heart! Great pick, Jess!! These were sooooooooo easy! They literally took me 5 minutes to put together! Now that’s a recipe I can get behind!! All you need is some frozen puff pastry, an apple, brown sugar and butter…that’s it! And you get a gorgeous, flaky, buttery tartlet….it’s like a little apple birds nest! So cute!
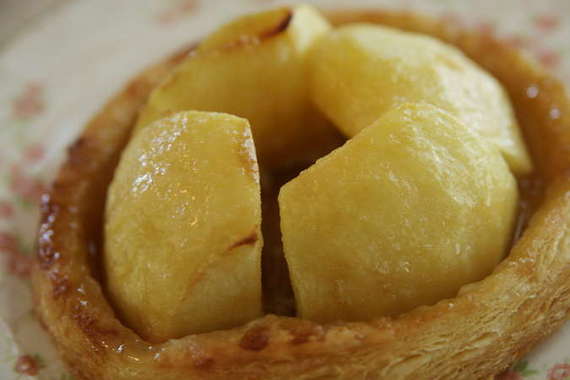
I am SO looking forward to making these again with other kinds of fruits – peaches, nectarines, plums, apricots….oh man, I’m getting all excited just thinking about it! My mother and nephew are coming for a few days this week and I’m thinking these are going to be the perfect little treat to welcome them!

I made two tarlets and sneaked a few bites as I was photographing them….a “few bites” quickly turned into me standing in the kitchen scarfing the remaining tartlet with my hands, with juice running all down my wrists. Talk about food guilt. I think Izzy and I will go on a nice, long walk tonight.
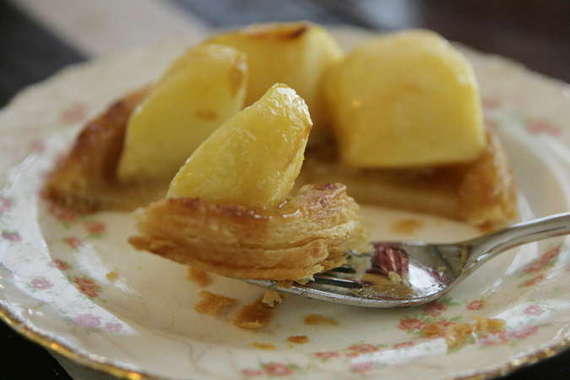
Go visit my good buddy Jessica’s blog and get the recipe from her- these would be perfect for company – they look like they were so much trouble, but really they’re embarassingly easy! Perfect!
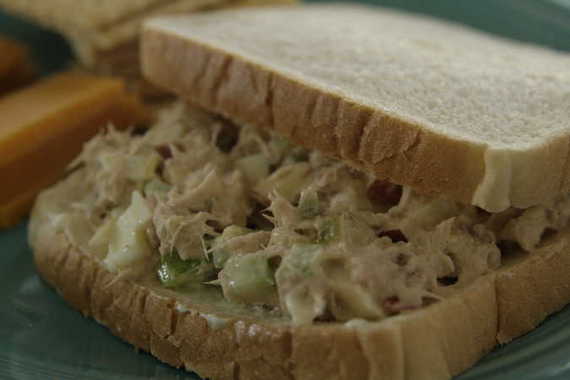
There’s not a whole lot to say about tuna salad- it’s nothing new. Most of us have been eating it our whole lives. In college, I used to eat it every day at lunch when I worked in the music department office, and people would come in and go, “Ewww, what’s that smell? Ugh, gross! Yuck – it smells fishy in here!”, which actually really got on my nerves, but didn’t stop me from eating it every day (hehe- take that, you tuna haters!). Tuna salad can be pretty dull. Tuna, mayo, relish…not much to write home about. But with the right ingredients, tuna salad can be pretty darn tasty! I’ll show you how I make it (and my mom, and grandmother, and sister…) and you can decide if it still sounds dull, mmkay? Here we go!
Tuna Salad
1 large can, chunk light tuna in water
1 celery stalk, chopped into very small pieces
2 dill pickles, chopped (not the uber-huge monster pickles, and not baby dill, either – just a regular sized pickle)
3 hard-boiled eggs, chopped
1 small apple, chopped (any kind of apple you like – I used Fuji, but if you like it more tart, Grannysmith is good)
approx. 1/4 cup mayonnaise (the real thing)
approx. 1/4 cup Miracle Whip
1 teaspoon Cajun Seasoning (I use Tony Chachere’s…in my family, we use this on just about everything)
1/4 teaspoon Cayenne pepper
splash of pickle juice
Mix all ingredients together in a bowl and chill until ready to serve. Enjoy!
*As far as the mayo goes, you can use as little or as much as you like – these are just approximations, as I usually just throw some in and taste as I go.
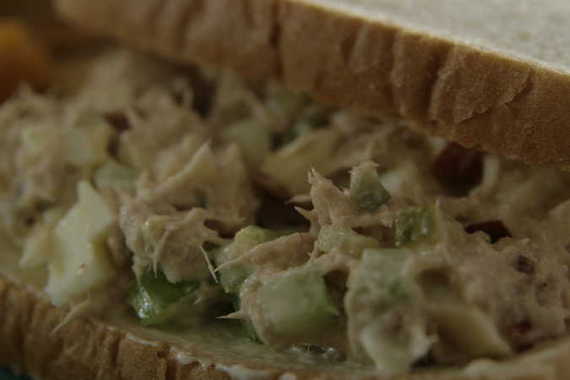
This is the tuna salad my family has been making forever – it’s always delicious and perfect for a summer picnic! It’s got a lot of crunch and a lot of flavor – hope you enjoy it!
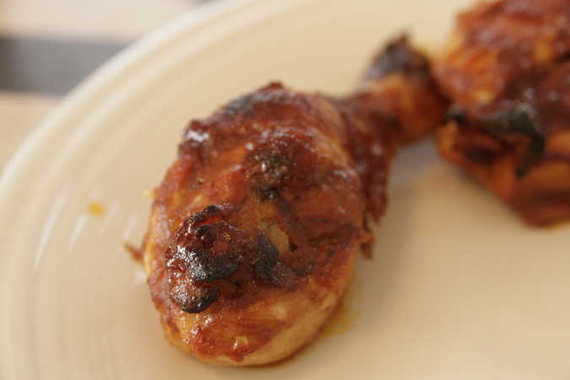
I guess you could eat barbecued chicken in the Fall or Winter, but I personally don’t want to. I want it in the summertime. I like to sit outside in a shady spot, eating barbecued chicken legs, deviled eggs and baked beans; getting sauce all over my face and under my fingernails. Oh yeah…that’s good. Last week, I decided I’d gone long enough without trying a homemade barbecue sauce. And I thought Ina Garten’s was the best place to start.
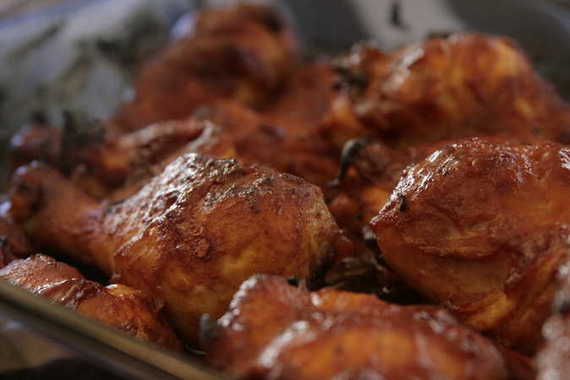
It was surprisingly really easy to make! It was delicious, but I think next time, I’ll add a little less mustard, as this was a little too “mustardy” for me. I loved that it used hoisin sauce, though – that really gave it a great flavor. Hubby and I both really enjoyed this. And the great thing is, I have tons of sauce left over, so I’ll be using it for weeks and weeks!
Barbecue Sauce
The Barefoot Contessa
1 1/2 cups chopped yellow onion (1 large onion)
1 tablespoon minced garlic (3 cloves) (I only used 1 large clove)
1/2 cup vegetable oil
1 cup tomato paste (10 ounces)
1 cup cider vinegar
1 cup honey
1/2 cup Worcestershire sauce
1 cup Dijon mustard
1/2 cup soy sauce
1 cup hoisin sauce
2 tablespoons chili powder
1 tablespoon ground cumin
1/2 tablespoon crushed red pepper flakes
*I also added a few dashes of liquid smoke, 1/2 cup of brown sugar and lots of black pepper
In a large saucepan on low heat, saute the onions and garlic with the vegetable oil for 10 to 15 minutes, until the onions are translucent but not browned. Add the tomato paste, vinegar, honey, Worcestershire sauce, mustard, soy sauce, hoisin sauce, chili powder, cumin, and red pepper flakes. Simmer uncovered on low heat for 30 minutes. Use immediately or store in the refrigerator.
I marinated the chicken in some of the barbecue sauce for 3 hours, then baked it in a 400 degree oven, covered with foil for about 40 minutes; I took the foil off, brushed on some more sauce, then baked uncovered, for about 10 or 15 minutes more. This goes great with some baked beans and deviled eggs (posted below). Enjoy your weekend!!
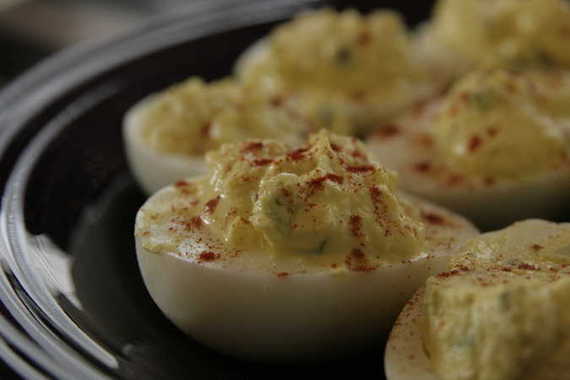
What picnic, barbeque or 4th of July party would be complete without deviled eggs?? It just wouldn’t be right to have barbecued chicken and not have deviled eggs with it. I seriously love deviled eggs. I stuff my face with them whenever they show up to a party, and I make them every chance I get. Yummmmmmm. Recently, at Easter dinner, my Uncle Steve (who is an amazing cook – his food is to die for!) was in charge of the deviled eggs. Not only did he bring the deviled eggs – he brought Jalapeno deviled eggs, with chopped, fresh Jalapenos mixed right in. SO GOOD! They were gone in seconds! I know it sounds simple, but even a small change like adding a little jalapeno made these so amazingly good – they’ve stuck with me since then, and I set out to make some of my own!

I wasn’t able to find out exactly how Uncle Steve made them, because the same night I was making them, he somehow managed to break a rib -I didn’t think it would be the best idea to call about deviled eggs when the man had a broken rib…call me crazy… So I just decided to wing it. I ended up just making them the way I normally do, but then adding a handful of fresh jalapeno. I don’t know if he did that or not, but oh well – these were delicious!
Jalapeno Deviled Eggs
(*makes enough for 2)
*Reminder: when I make stuff like this, I don’t measure, so all of these measurements are approximations. If you like more, add more; if you like less, add less! It’s all about personal taste, here!
4-5 large eggs, hard boiled
1 tablespoon mayonnaise (you can use the real stuff or Miracle Whip…whatever you like)
1 teaspoon dijon mustard
splash of white vinegar
small handful of finely chopped dill pickle
handful of chopped fresh Jalapeno pepper
salt, pepper and cayenne pepper to taste
paprika for garnish
*I like to keep some pickle juice handy just in case it’s too thick at the end- then I thin it out with the pickle juice
Slice the eggs in half length-wise and scoop the yolks out into a small bowl. Set the white aside. Mix in all other ingredients with the yolks and mash it all together, making sure to get rid of all the lumps. Taste for seasoning/texture and add extra mix-ins (ex: mayo, pickle juice, salt, etc) if needed. Scoop a small amount into each egg white and arrange on a plate. Sprinkle eggs with paprika. Chill until ready to serve. Enjoy!