Honestly, I wasn’t really sure what to expect with this week’s recipe. I mean, the title sounds great – ‘Brownie Buttons’ – pretty cute, right? But I’m super-duper picky when it comes to brownies and I wasn’t sure how I’d feel about mini-mini brownies. A lot of members had said this recipe didn’t quite do it for them, or that they stuck, or the glaze wasn’t good…I didn’t have very high hopes.

But, as it turned out, these were really, really good! I don’t know about everyone else’s, but mine had sort of a chewy, almost crunchy outside, with a really soft, fudgy inside….I wan’t expecting that! I loved the texture of these! Instead of the white chocolate glaze (I can’t stand white chocolate), I used a little dusting of powdered sugar, which really went well with the bitterness of the chocolate. These were just all around good- fun to make, fun to eat and super cute to boot!

Thanks to Jayma of Two Scientists Experimenting in the Kitchen for picking this week’s recipe – check out her blog and get the recipe. These would be so fun for kids or to take to work – easy and fun to eat! I’ll definitely be keeping this recipe close by!


I didn’t get a chance to make this in time for last week’s TWD, but I sure wasn’t going to let this recipe pass me by! I knew as soon as I got the chance, I needed to make this cake. Luckily, my friend Courtney was coming to visit last week, which gave me a great excuse to bake it. Honestly, I wasn’t expecting much more than a regular old banana bread out of this cake – and it was, actually, very similar to banana bread…but SO much better! This will be my go-to recipe for banana bread now (I thought it was closer to a bread than a cake). Courtney, hubby and I all loved it. It was so good, I’m making it again for my mother, who is coming to house sit and dog sit for us while we’re out of town this week. I know she’ll love it with her coffee!

This cake was chosen (last week) by Mary of The Food Librarian. She has a great blog – be sure to check it out and get the recipe for this! You won’t be sorry! Come back tomorrow for my (regularly scheduled and on time!) TWD post – Brownie Buttons. So cute!!

It’s that time again! Here is my monthly “You Want Pies With That?” blog entry! This month’s theme is “Nuts About Pie”, chosen by Jaque of Daisy Lane Cakes. We could make any kind of “nutty” pie we wanted – at first I thought about doing a really tasty pecan pie or some other kind of pie chock full of nuts. However, my hubby doesn’t like nuts at all, especially in pies, so I had to get creative. Late one night as I was trying to fall asleep, this idea popped into my head and I loved it! I present to you, the Elvis FlufferNutter Pie.

For those of you who are wondering what the heck fluffernutter is, I’ll explain. Take the fluffernutter sandwich, for instance – two slices of bread: on one side, marshmallow fluff, on the other side, peanut butter; put the two slices together and voila! Fluffernutter! I thought a pie made out of peanut butter and marshmallow fluff would be great, but then I decided adding bananas would make it extra special! Plus, I could “Elvis-ize” it that way (since Elvis was quite fond of his peanut butter and banana sandwiches!)! Perfect!
I started with a plain ‘ol pie crust (blind baked), topped it with a layer of sliced bananas, then a layer of peanut butter mousse, and topped it off with marshmallow fluff and more bananas. Not your normal, run-of-the-mill pie, but hey, it was still darn tasty! I was actually surprised at how good this tasted. My good friend Courtney is staying with us for a few days, and she helped me make the pie and served as my honorable taste-tester. We both really enjoyed our slice!

Elvis FlufferNutter Pie
1 9-inch pie crust, blind-baked
3 bananas, thinly sliced
3/4 cup smooth peanut butter (not natural)
8 ounces cream cheese, softened
1/4 teaspoon cinnamon
1/2 pint heavy cream
1/4 cup powdered sugar
2 tablespoons milk
1 jar marshmallow fluff
In a stand mixer fitted with a whisk, beat the heavy cream and powdered sugar until firm peaks form. Transfer to another bowl and refrigerate until needed. In the same mixer bowl with the paddle attachment, beat the cream cheese until light and fluffy; add the peanut butter, cinnamon and milk and continue to beat until mixed. Gently fold in the whipped cream.
Place the sliced bananas in a single layer on the baked (and cooled) pie crust, then top with the peanut butter mousse. Spread a layer of marshmallow fluff and top with additional bananas. Refrigerate until ready to serve.
*Peanut butter mousse adapted from Dorie Greenspan

This was an incredibly fun pie to make…and eat! We really enjoyed it! Head on over to the You Want Pies With That? page in the next few days and check out everybody’s fantastic, nutty pies!

You may have remembered me saying that I got myself a copy of David Lebovitz’s The Perfect Scoop recently. Well, obviously I just love it…I’ve already made quite a few treats from it and they’ve all been totally delicious. But I have to say that this one takes the cake. I completely fell in love with gelato when I first tried it in Germany a few years ago, and then again in Italy (it just doesn’t get better than that…big scoops of gelato at a cute little street cafe on the Amalfi Coast) and we were lucky enough to live less than 5 minutes away from a great gelato shop for two years. So I make/eat the stuff whenever I can!

When I first got this book, this gelato recipe was the very first one that I marked to try. It didn’t take long for me to give it a go, either. This is definitely one of those recipes that requires a lot of time to make – not just a “throw it all into the ice cream machine” kind of recipe; but it was totally worth all the extra effort – totally and completely.

This particular recipe is called Gianduja Gelato – Gianduja (pronounced jahn-doo-yah) basically means hazelnut and chocolate. Considering I have an undying love for this combination, of course I was over the moon for this gelato. It’s so amazingly creamy and chocolatey with a good amount of hazelnut flavor. Perfect, in my opinion! My hubby went nuts for it too. I know this is a recipe I’ll be making over and over again for years to come.

Gianduja Gelato
-David Lebovitz
1 1/2 cups hazelnuts, toasted
1 cup whole milk
2 cups heavy cream
3/4 cup sugar
1/4 teaspoon coarse salt
4 ounces milk chocolate, finely chopped
5 large egg yolks
1/8 teaspoon vanilla extract
Rub the hazelnuts in a kitchen towel to remove as much of the papery skins as possible, then finely chop them in a food processor or blender.
Warm the milk with 1 cup of the cream, sugar, and salt in a saucepan.
Once warm, remove from the heat and add the chopped hazelnuts. Cover and let steep at room temperature for 1 hour.
Put the milk chocolate pieces in a large bowl. Heat the remaining 1 cup cream in a medium saucepan until it just begins to boil. Pour it over the milk chocolate pieces and stir until the chocolate is completely melted and smooth. Set a mesh strainer over the top.
Pour the hazelnut-infused milk through a strainer into a medium saucepan, squeezing the nuts firmly with your hands to extract as much of the flavorful liquid as possible. Discard the hazelnuts.
Rewarm the hazelnut-infused mixture. In a separate medium bowl, whisk together the egg yolks. Slowly pour the warm hazelnut mixture into the egg yolks, whisking constantly, then scrape the warmed egg yolks back into the saucepan.
Stir the mixture constantly over medium heat with a heatproof spatula, scraping the bottom as you stir, until the mixture thickens and coats the spatula. Pour the custard through the strainer and stir it into the milk chocolate mixture. Add the vanilla and stir until cool over an ice bath.
Chill the mixture thoroughly in the refrigerator, then freeze it in your ice cream maker according to the manufacturer’s instructions.
Toasting Nuts
Preheat the oven to 350°F.
Spread the nuts in an even layer on an ungreased baking sheet.
Bake the nuts in the oven for 10 to 12 minutes, stirring them once or twice while baking so they toast evenly. To see if they’re done, snap one in half: it should be lightly golden brown throughout.
Let the nuts cool completely before using unless the recipe indicates otherwise.

(That’s my hubby enjoying his gelato). 🙂 This is seriously some of the best ice cream I’ve ever made…if you have an ice cream maker, you should totally give this one a try! You’ll fall in love with the chocolate/hazelnut combo, I guarantee!
Sing For Your Supper has a new home….and a completely new look!! My sweet hubby has spent the last month working on getting me moved from my last blog to this one – I’m so excited!!! Hopefully WordPress will be a little easier for me to work with than my last one. Special thanks to my good buddy Andrea for coming up with this cute design – I love it!!! We’re still working out a few kinks, so please let me know if there are any problems seeing my page or subscribing to my RSS feed. Look around and enjoy the new me! 😉
P.S. Please bear with me as we get those kinks worked out. Right now we’re getting an error when you post a comment. Your comment will show up, but you will see an error message. Just ignore it for the time being.
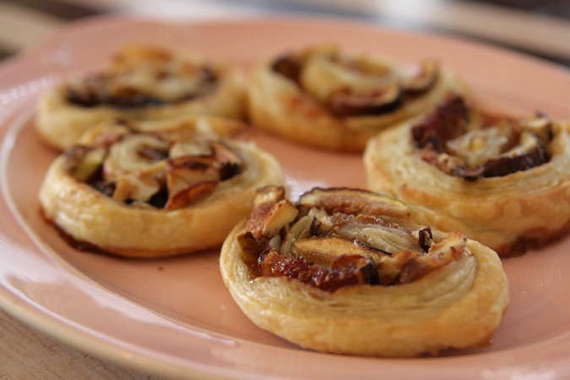
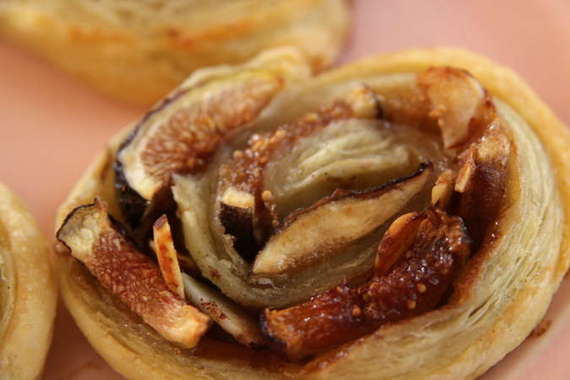
You may find this hard to believe, but I have never had figs before. I mean, of course I had tried Fig Newtons when I was younger, and like most kids, hated them. But when I saw that my local grocery store had a big, beautiful display of them, (and despite the fact I had no idea what to do with them) I just couldn’t resist. So, I spent all last week trying to find or think of ways to use my big, beautiful figs. Finally, I just rolled out a sheet of puff pastry and went from there.
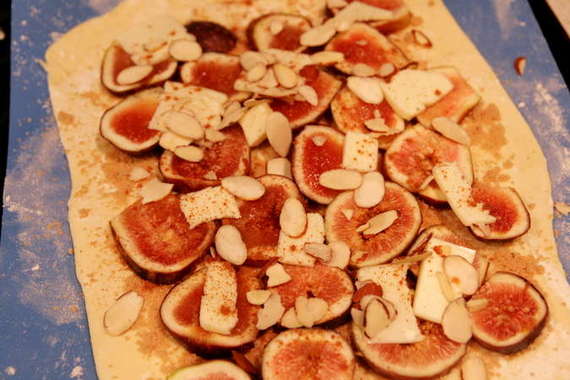
I sliced them up and scattered them all over the puff pastry along with brown sugar, cinnamon, sliced almonds and butter, rolled it up, sliced them into little pinwheels, threw them into the oven and hoped for the best. I couldn’t believe how beautifully they turned out! Just like I’d hoped!
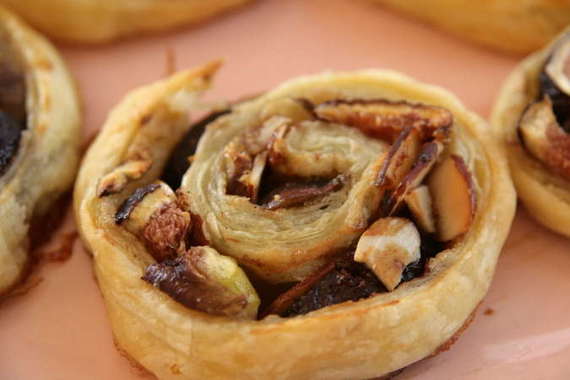
There are still tons of fig recipes I’d like to make in the future, but I was really glad I decided to start with this one. These would be great with coctails, or for dessert – very versatile, in my opinion! Hubby really loved them, and while I’m still getting used to the taste of figs – I thought they were great too.
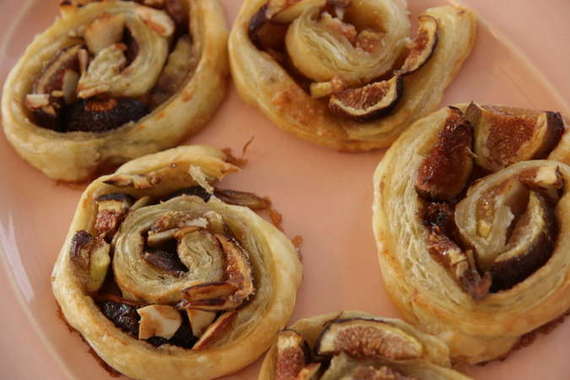
Fig and Brown Sugar Pinwheels
1 sheet puff pastry, thawed
6-8 fresh figs, sliced length-wise (I used Brown Turkey figs, but you could also use Kadota or Mission)
1/2 cup brown sugar
1 teaspoon cinnamon
1/3 cup slice almonds
2 tablespoons butter, melted and cooled (In the picture above, I didn’t melt the butter – I just placed little pieces of butter over the top of the figs, but I think melting it would be better!)
Preheat oven to 350 degrees. On a floured surface, roll out the puff pastry slightly. Brush the melted butter over the pastry, then top with brown sugar. Spread the sliced figs evenly over the whole surface, then top with cinnamon and sliced almonds. Roll the puff pastry up like a jelly roll, then slice into little pinwheels – you should get 10-12 rolls. Pinch the edges of each pinwheel to keep them from coming unrolled. Place on a baking sheet lined with parchment paper and bake for 15-20 minutes, or until golden brown and bubbly. Enjoy!
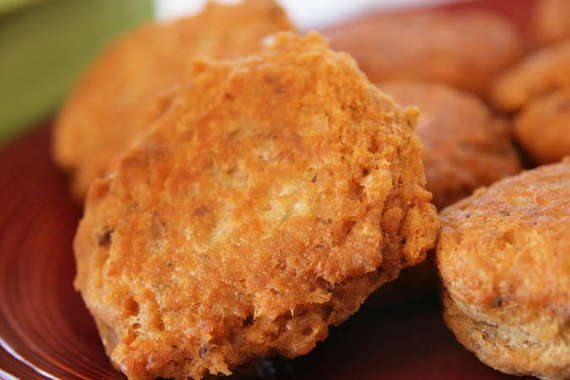
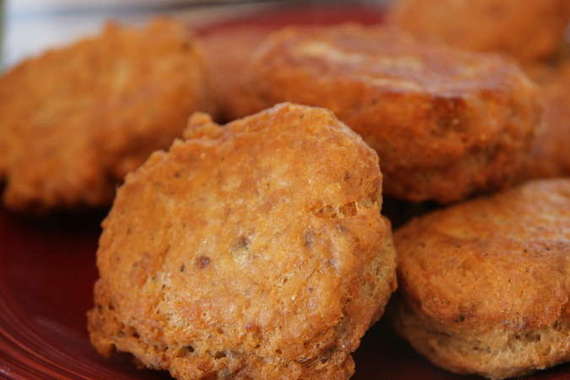
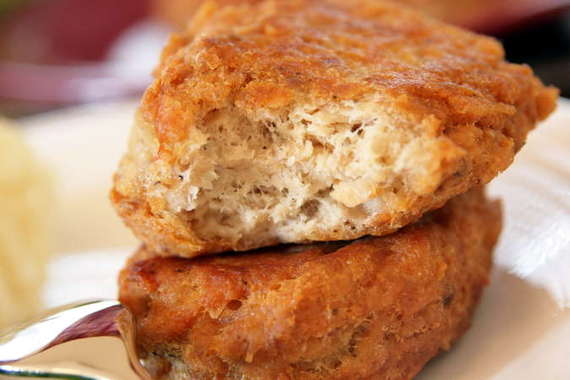
My mom used to make these a lot for us when I was growing up. They’re good, crunchy little salmon patties mixed with egg and flour and fried. I loved them with lots of ketchup – and mashed potatoes on the side was a must (and still is!)! I hadn’t had these in years, but finally decided to try my hand at making them for my hubby (he loves fish sticks, so I knew he’d go nuts for these!). They’re so simple to make – all you need is a can of salmon and the rest, you probably already have in your kitchen. I was so pleased with how these turned out – hubby loved them, and I know I’ll be making them a lot in the future!
Salmon Croquettes
1 15oz can pink salmon
1 egg
1 heaping tsp baking powder
1/2 c flour
chopped onion and garlic powder (optional. I used garlic powder and onion powder)
oil for frying
Heat a few tablespoons of vegetable oil in a large skillet. Reserve 1/4 c salmon juice in a measuring cup and set aside. Place salmon in bowl, add egg and mix well. Add flour, mixing thoroughly. Batter will be thick. Add baking powder in the salmon juice and beat with a fork until foam forms; measuring cup should be about 3/4 full (if it doesn’t foam, baking powder is old). Pour into salmon mixture and mix well. Form into small patties and drop into frying pan 4 at a time. Cook until golden brown on each side (only a couple of minutes per side). Let drain on paper towls. Serve hot with ketchup.
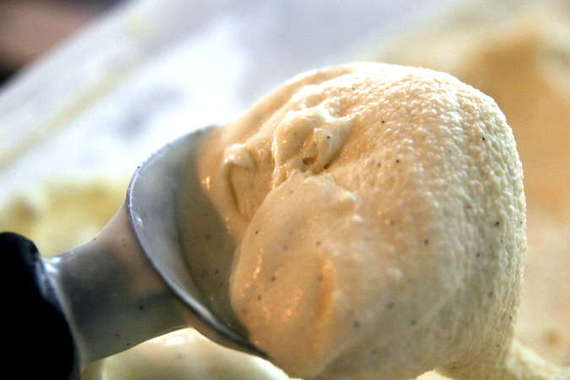
It seems like I’ve been making so much ice cream lately, I’ve got it coming out of my ears! Not that I mind, really…what better time than Summertime to have fun making all kinds of delicious homemade ice creams?! This time around it’s Dorie’s plain Vanilla – thick, smooth and creamy. I’ve been saving it for my mother and sister’s visit this week (it’s my sister’s birthday today!! Happy Birthday, big sister!!), so hopefully we can all dig in tonight after cake! I did manage to sneak a taste while I was taking pictures, and wowee – this is some tasty ice cream!! And believe me, it’s anything but plain! I put in a tiny little splash of Grand Marnier, and I think that really gave it a nice, rich flavor to compliment the vanilla. I think my mom and sister will really enjoy this!!
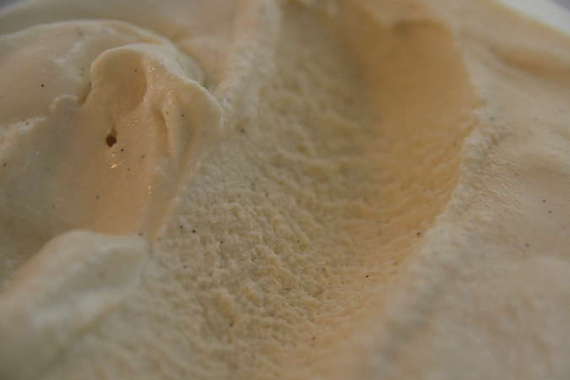
This weeks’ choice is brought to you by Lynne of Cafe LynnyLu – go check out her fantastic looking recipes and photos; while you’re at it, be sure and get the recipe for this delicious ice cream!
And, as I said a few days back, get ready for some new and exciting things here at Sing For Your Supper! Hopefully it will all come together soon!! Yipppee!!
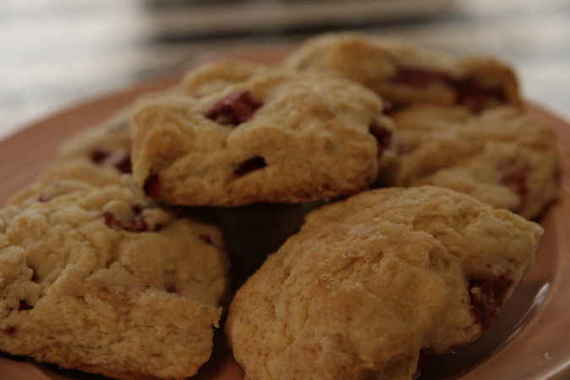
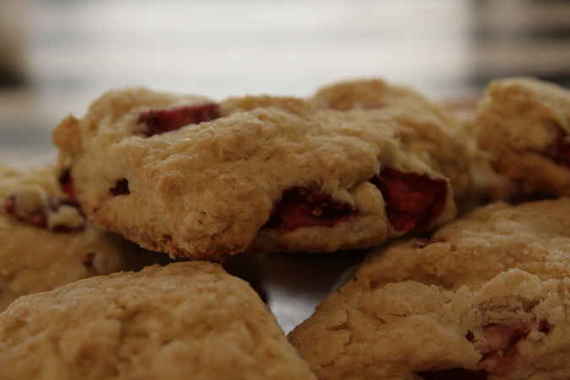
I actually made these scones months ago….these pictures have been sitting in my “to blog” file for ages now. I don’t know why I’ve waited until now to finally post them; I guess I just didn’t notice them or something. Silly me! This recipe comes from Katie over at Good Things Catered, and since she posted them (probably over a year ago) it seems like everyone has made them (she has that affect on people!). Yes, this is the same Katie from whom I got the famous “Easy Cheesy Beer Bread” – she’s good, I’m telling you!
These scones are full of fresh, juicy strawberries (thus their name, “Juicy Strawberry Scones”) and not overly sweet, so they’re perfect for breakfast or brunch with your coffee. I loved them smeared with melty butter as a late night snack! I even sent some to my hometown for my Great Grandmother, Baba to try, and she loved them! She really enjoys things like that, so I was thrilled when I heard back that she really enjoyed them. Give these a try for your next breakfast party, or even just a plain ‘ol Saturday morning…they’re perfect for any occasion!
Juicy Strawberry Scones
-Good Things Catered
2 1/4 – 2 1/2 c. all purpose flour (depending on how ripe your strawberries are)
1/4 c. granulated sugar, plus extra for sprinkling
1 Tbsp baking powder
1/4 tsp salt
1 stick (8 Tbsp) butter, chilled and cut into small pieces
1 egg
1/4 c. yogurt
1/4 c. milk
2 tsp orange zest
1 c. fresh strawberries, diced
Preheat oven to 350 degrees and line baking sheet with parchment.
In small bowl, combine egg, yogurt, milk, zest, whisk to combine thoroughly and set aside. In large bowl combine flour, sugar, powder, salt, and whisk to combine. Using pastry cutter or two knives, cut butter into flour until all pieces are smaller than pea-sized.
Add strawberries, and toss to coat. Add wet ingredients to dry and mix in lightly with fork until dough just comes together.
Turn dough out onto well floured work surface and pat into large ball. Cut dough in half. Shape half of dough into flat disk shape and cut into 8 slices.
Place on baking sheet and repeat with other half of dough. Sprinkle tops of scones with sugar and place in the oven.
Bake until turn slightly brown, about 25 minutes. Remove from oven and let cool on baking sheet for 10 minutes. Transfer to a wire rack and let cool (or eat right away!) Enjoy!
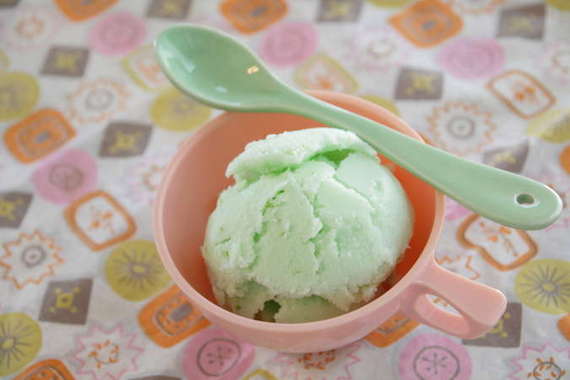
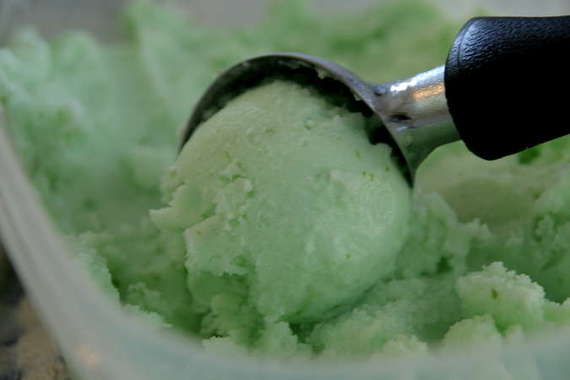
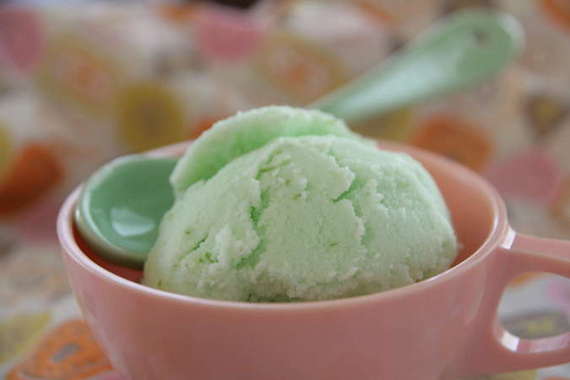
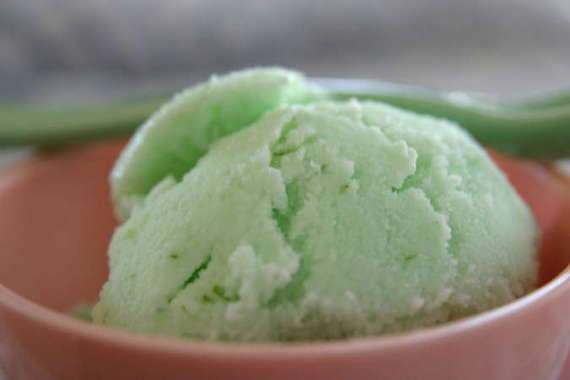
Mmm, lime sherbet…everybody loves it; it’s pretty, it’s refreshing, it’s delicious. But I never ate it as a kid; for years I thought I wasn’t allowed. How silly is that? It started when I was a little girl (I don’t know how old – probably somewhere around 6-8ish) and my grandmother (Nana), my sister and I were at our favorite ice cream shop. I was eyeing the pretty, bright green lime sherbet – it looked so good! I really wanted a big scoop, unfortunately, I had on a brand new dress, and Nana knew I’d end up with bright green sherbet all over it. So, she urged me to pick another flavor of ice cream instead. For whatever reason, since then, I always thought there was something wrong with the lime sherbet and that I shouldn’t eat it (I was a very gullable child…). It took years before I even tried it! Finally, once I did, I loved it! So tart and creamy!
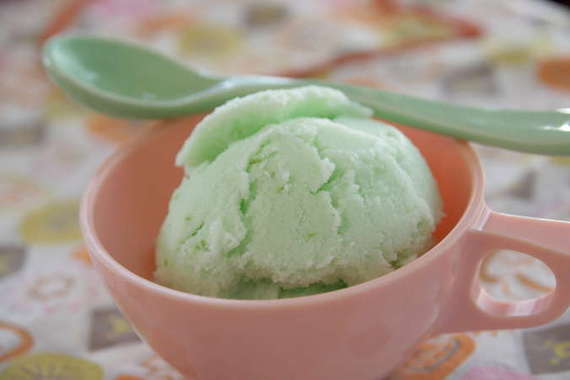
So, the other day, I found myself with a few leftover limes and decided lime sherbet would be the perfect way to use them up! I used David Lebovitz’s recipe for Lemon Sherbet, using limes instead, and it turned out great! I’m really enjoying his book, The Perfect Scoop – it’s so great to have in the summertime! In case you’re wondering why my sherbet is green, I added a few drops of green food coloring, just so it would look like the pretty lime sherbet I saw in the ice cream shop that time! I love the color!!
Lime Sherbet
-David Lebovitz – The Perfect Scoop
3 cups whole milk
3/4 cup sugar
1 lime, preferably unsprayed
6 tablespoons freshly squeezed lime juice (from 2 to 3 limes)
In a medium, nonreactive saucepan, mix 1 cup of the milk with the sugar. Grate the zest of the lime directly into the saucepan. Heat, stirring frequently, until the sugar is dissolved. Remove from the heat and add the remaining 2 cups milk, then chill thoroughly in the refrigerator.
Stir the lime juice into the milk mixture. If it curdles a bit, whisk it vigorously to make it smooth again. Freeze in your ice cream maker according to the manufacturer’s instructions. Makes about 1 quart (1 liter).
This was so refreshing and delicious. And loved that it’s so much lighter than ice cream, so I feel a little less guilty eating it. A perfect summer treat!