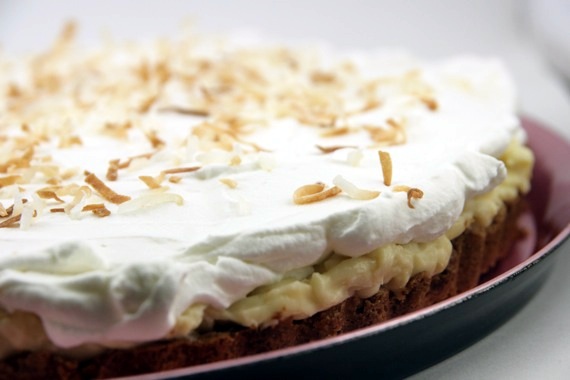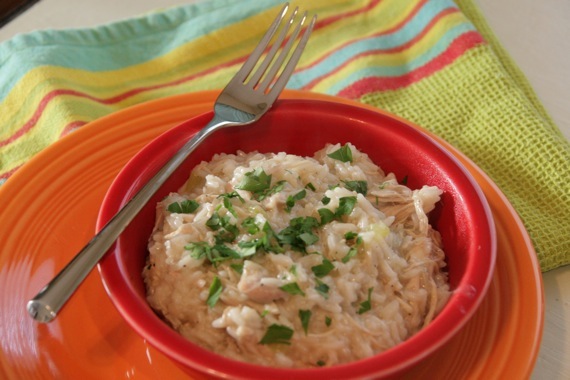
…or Chicken and Rice; whichever you prefer. I guess I should call it that since, clearly, I am not Spanish-speaking. But just saying something like, “I’m making Arroz con Pollo” sounds way more interesting (and yummy) than “chicken and rice”. Who wants to eat chicken and rice when you can eat Arroz con Pollo?! I got this recipe from Amy at She Wears Many Hats and it’s totally delicious!
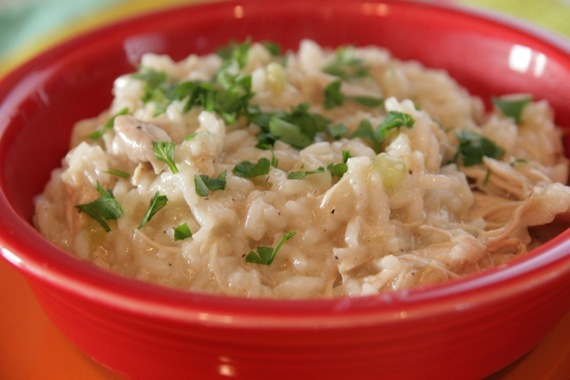
Honestly, the entire time I was making this I kept thinking (and laughing) about that episode of I Love Lucy where Lucy and Ethel switch jobs with Ricky and Fred. Ricky and Fred are in charge of cooking dinner while Lucy and Ethel are out working their new jobs (at the candy factory…love it!). Ricky suggests Arroz con Pollo and chocolate cake for dinner, and of course it all goes wrong…seriously one of my favorite Lucy scenes of all time!
Arroz con Pollo (Chicken and Rice)
-adapted from She Wears Many Hats
4 quarts (16 cups) water approx. (enough to cover chicken)
1 4 lb. (approx.) whole chicken
1-2 stalks celery; rough chopped
1 small sweet onion; diced
1 teaspoon pepper – divided
1 teaspoon salt – divided
1/2 teaspoon celery salt
1 1/2 teaspoons parsley
3 cups long grain white rice
In a large stock pot bring water and chicken to a boil. Cover and reduce to a simmer for at least 1-2 hours.
Once simmering is complete, remove chicken to cool in order to de-bone. Let broth continue to simmer and reduce. When cool enough to handle, de-bone chicken.
Remove all broth from pot (or use another pot) and put approximately 6 cups broth back into pot along with the rice, chicken, celery, onion, salt and pepper. Cover and simmer for 15 minutes.
After 15 minutes stir in another cup of broth. Cover and simmer for 5 minutes.
Continue to add broth, stir, cover and simmer for 5 minutes at a time until rice is done. Check for seasoning and add more salt and pepper as needed. Serves 6-8.
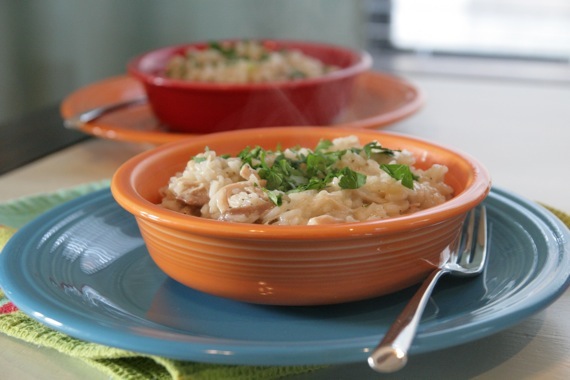

If you’re as big a fan of Easter food as I am, chances are you’ve had your Easter Sunday meal planned for a month or so now. However, I know that there are some people out there who don’t typically plan out their menus quite so early; or maybe don’t need a menu at all- just a side dish to take to mom’s house for lunch. Whatever your situation, this post is for you. I’ve compiled a bunch of my favorite “Easter-y” type dishes for those of you still looking for ideas.
If you’re hosting/attending an Easter brunch, these are some super easy, delicious ideas:
Asparagus, Mushroom and Bacon Quiche
Juicy Strawberry Scones
Blueberry Streusel Muffins or Blueberry Crumb Cake
Some of my favorite Easter side dishes:
Jalapeno Deviled Eggs
Creamy Pea Salad
Creamy Macaroni Salad
And of course, dessert (because she who brings dessert is always the most popular), my favorite category:
Coconut Cake – this is one of the top searched for items on my site!
Banana Cream Pie
Toasted Coconut Cream Tart
Boozy Strawberry Tart
Lemon Cake
So there you have it- some of my best Spring-inspired, Easter-friendly recipes. I hope I’ve given you some good ideas, whether you’re hosting your first Easter, going to mom’s house, or even if it’s just the two of you- any of these are perfect! Enjoy!
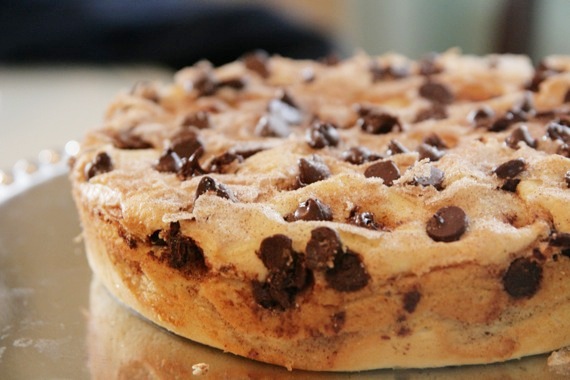
Sorry; once again, it’s been awhile since my last post. This time I was sick for a few days and on top of that, I pretty much just flat ran out of recipes to post. I haven’t cooked anything worth blogging in a few days; but all that’s about to change – with this cake!
I’ve had a hankering to bake a cake lately. Something big and tall and covered with tons of colorful frosting. But it just seems wrong to bake a giant cake for just the two of us- it would most likely be wasted. We really try not to eat too much sweets…………………….
…ok, that’s a lie. What would most likely happen is I would end up sitting on the kitchen floor at midnight shoveling handfuls of cake into my mouth like some kind of crazy primate. That’s why I won’t be making a big giant cake for just the two of us. But I’m not about to suppress my inner baking needs. So I got in the kitchen, cranked up my Dolly Parton Bluegrass and baked up a cake. A much smaller, simpler cake. Perfect for a weekend breakfast or an afternoon snack. Smitten Kitchen’s Cinnamon Chocolate Chip Sour Cream Cake. This took no time to throw together and only 40 minutes to bake. It’s surprisingly dense and slightly spongy, but really tasty. I love the combination of cinnamon and chocolate.
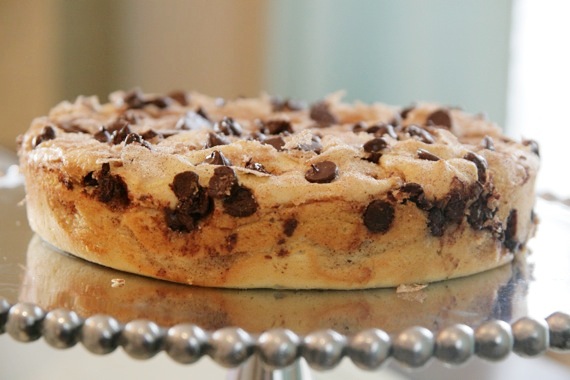
I was really glad I baked this yesterday – it’s nice to be able to bake a cake when you don’t have anything to celebrate, or need a dessert for an occasion. Just a simple, sweet little cake for the two of us to enjoy. Those are the best kind of desserts.
Cinnamon Chocolate Chip Sour Cream Cake
-Smitten Kitchen
1 stick unsalted butter at room temperature
1 1/2 cups sugar
3 eggs, separated
1 1/2 teaspoons vanilla extract
16 ounces sour cream
3 cups all-purpose flour
1 teaspoon baking powder
1 1/2 teaspoons baking soda
12 ounces chocolate chips
1/2 cup sugar
1 teaspoon cinnamon
Preheat oven to 350°F.
In a large bowl, cream butter and 1 1/2 cups sugar, then mix in the egg yolks and vanilla. Sift flour, baking soda and baking powder together into a separate bowl. Alternately add sour cream and then dry ingredients into butter mixture. Beat eggs whites until stiff, then fold into batter. Mix last 1/2 cup sugar and cinnamon together in a separate, small dish.
In a greased 9″x13″ pan, pour in half of the cake batter. Sprinkle the top with half of the cinnamon-sugar mixture and half of the chocolate chips. Pour remaining batter on top, sprinkling the top with the remaining cinnamon-sugar and chocolate chips. Bake for 40 to 50 minutes, or until a tester comes out clean.
*I halved the recipe and got a nice 9-inch cake; perfect for 2-4.
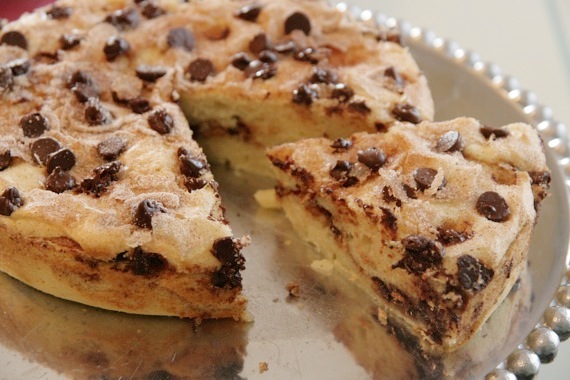
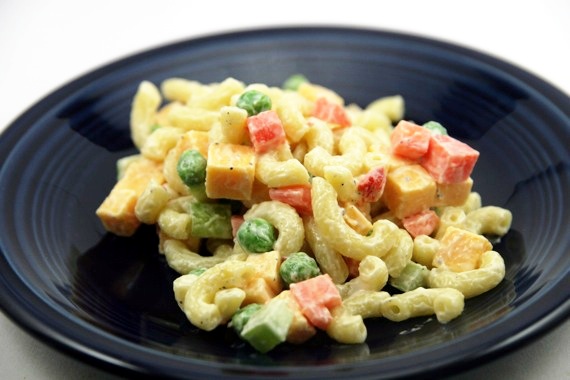
I realize I’ve sort of been MIA lately, but I have a good excuse – my sweet hubby took off Thursday and Friday to be with me and relax a bit (and wasn’t his timing impeccable? We’ve had nothing but NCAA tournament on for 4 days straight!). We’ve had such a wonderful 4 days together – we cooked together, played games (I’ve almost gotten to the point where I can beat him at Mario Cart…almost), took nice, long walks with Izzy, and he even helped me paint our dining room table! There’s nothing I enjoy more than spending time with my husband (especially when life is SO happy and care-free)! I just hate that he’s back at work now, and unfortunately, my Spring Break is over as well- it’s back to work tomorrow for me too. 🙁
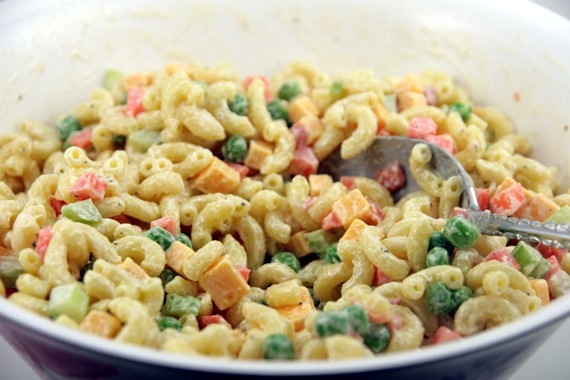
While we were enjoying our free time, we decided it would be nice to grill hamburgers and hot dogs; and one of my favorite things to serve with grilled burgers is macaroni salad. Mmmm! Macaroni salad is just one of those foods that puts me in a good mood. It’s crunchy, creamy, slightly tangy…I just love it! I just sort of “threw” this one together and it was actually one of the best tasting macaroni salads I’ve had! Our favorite part is definitely the little cubes of cheese – we loooove cheese! These measurements are just approximations, so be sure to taste as you go along and add additional seasoning or ingredients as needed to suit your tastes.
Creamy Macaroni Salad
1/2 pound macaroni, cooked, drained and completely cooled.
3 small carrots, diced
1 celery stalk, diced
1-2 Tablespoons jarred pimento
1/2 cup frozen sweet peas, thawed
1/2 cup cheddar cheese, cut into small cubes (we like more cheese, so I ended up using closer to 3/4 cup)
salt and pepper to taste (we like lots of black pepper)
1/2 cup mayonnaise
1/2 teaspoon dijon mustard
1/2 cup Creamy Italian salad dressing
Mix all ingredients in a large bowl. Taste for seasoning. Chill for at least 1 hour before serving.
Big news, people, BIG NEWS! My excellent friend Jessica and I have been secretly working on a big project these past few weeks, and now it’s finally time to let the cat out of the bag! You may remember the super-awesome Pie-making group, ‘You Want Pies With That?’ – for the past few months, it’s been abandoned; shut down. Well, *trumpet blast* Jessica and I are re-opening it! YAAAAY! It’s got a whole new look, new logo, new everything! We’re SO very excited to get things up and running again. The new theme should be posted (hopefully) by next week and we’ll be back in business! The group is open to anyone with a blog and a love of pie. So, be sure to add the site to your google reader or become a fan on our Facebook Fan Page…whatever it takes to get connected and be a part of our fun-loving group!
Click here to see the brand spankin’ new site! Tell all your friends and join in the pie-making action!
Unfortunately, this will be the last time I post anything for/about Tuesdays With Dorie. That’s right- I’m leaving the group. It’s super sad- I’ve been a member for about 2 years now! I can’t possibly tell you just how much I’ve grown and learned since joining TWD back in April 2008…I’ve become more knowledgeable in the kitchen, as well as discovering one of my greatest passions – baking. Being a member of Tuesdays With Dorie has shown me just how much I love being in my kitchen and baking (and just how much I adore Dorie Greenspan!) – so much so, that I hope to be able to do it for a living someday (hopefully sooner, rather than later!). Our group leader, Laurie, never dreamed her idea of baking something from Dorie Greenspan’s Baking From My Home To Yours once a week would take off and inspire 300+ other food bloggers to join in…the group is awesome and I am honored to have been a part of it for 2 years.
I’ve taken all of my Tuesdays With Dorie posts (starting all the way back with my first ever TWD post- homemade marshmallows!) and put them in a special category so they’ll be easier to find from now on. Take a look – there are some DARN good recipes in there, let me tell ya! My absolute favorite TWD recipes are the World Peace Cookies (to this day, my favorite cookie of all time), the Honey Peach Ice Cream, the Banana Cream Pie (and no, not just because it was my pick!), the Tall and Creamy Cheesecake and who can forget…the Gooey Chocolate Cakes; this one changed my life…seriously, the most amazing, satisfying dessert I’ve ever made. The pictures are crap, but the cakes…ohhhh the cakes….sheer bliss. If you haven’t tried any of these recipes- give them a try this week, you’ll be really, really glad you did. These are the best of the best, in my opinion!
So, I guess now it’s time to say goodbye, Tuesdays With Dorie – thanks for a fantastic 2 years!
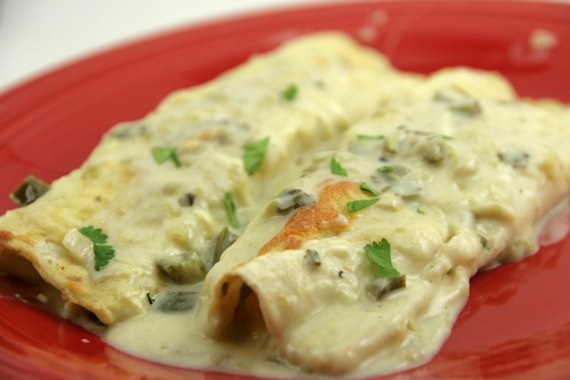
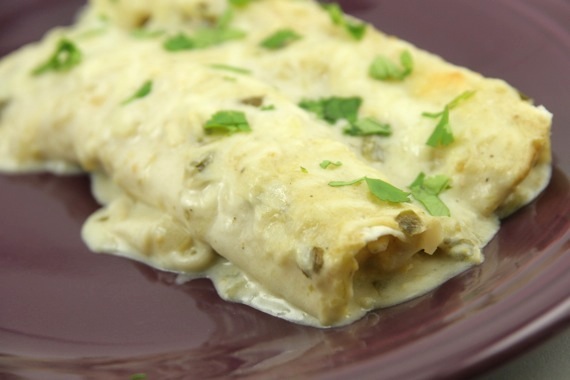
I realize that lately, I’ve made quite a few recipes that I claim to be “the best ever”. I guess I’ve just been really lucky with my choice of recipes here lately…what can I say? Apparently I have great taste! 😉 And here’s another one to add to that “Best Ever” category; the Homesick Texan’s Salsa Verde Sour Cream Enchiladas…these are pure gold, my friends. Pure. Gold. I have to be honest, when it comes to sour cream enchiladas, I’m not a big fan. They just always seem really bland to me, and I almost never order them at restaurants. But when I spotted these on The Novice Chef, something about them was just reaching out to me…“make me, Amy; make me!”. Thank the good Lord I did; after just one bite, hubby and I both deemed these the BEST enchiladas we’ve EVER had. That’s a pretty serious statement, y’all. Tex-Mex isn’t something we take lightly down here…it’s serious stuff. But these are seriously good enchiladas. I will most assuredly be making these over, and over, and over again.
Salsa Verde Sour Cream Enchiladas
-seen on The Novice Chef, originally from the Homesick Texan
4 boneless chicken breasts, cooked and shredded (I cooked mine in the crackpot for about 5 hours)
3 large cloves of garlic, minced
1 Jalapeno, seeded, minced
2 Tbsp butter
2 Tbsp all-purpose flour
2 cups chicken broth
2 cups sour cream (I used reduced-fat and it was still insanely good)
16 oz jar Medium Salsa Verde
1 & 1/2 tsp cumin
1/4 tsp cayenne
1/2 tsp salt
1/4 tsp white pepper
1/2 tsp garlic powder
1/4 cup cilantro, chopped
12 flour tortillas, small fajita size
1 cup shredded sharp cheddar
1 cup shredded Monterrey Jack
1/2 medium onion, diced
Preheat the oven to 350. Melt butter over medium-high heat. Saute onions and Jalapenos until soft and then add the garlic, cooking for 1 minute. Stir in the flour and let cook 1-2 minutes. Whisk in the chicken broth until smooth and let cook until bubbly. Stir in the sour cream, salsa, cumin, cayenne, salt, pepper, garlic powder and cilantro until the sauce is smooth. Remove from heat.
Spray/grease a 9×13 baking dish. Add 1 cup of sauce to the bottom of the pan. Add chicken and cheese to the center of each tortilla and roll, placing seam-side down in the dish. Pour the sauce over the enchiladas, top with leftover cheese, and bake at 350 for 25 minutes or until top is brown and bubbling.
Yields: 12-15 enchiladas
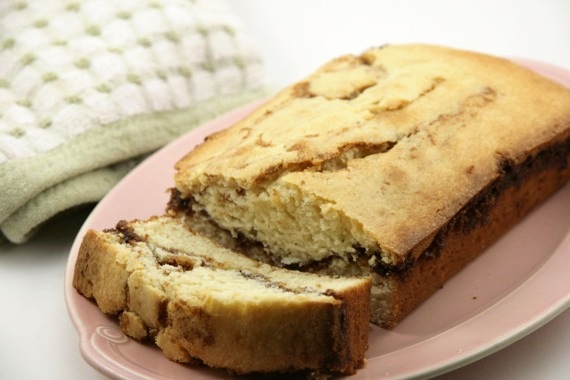
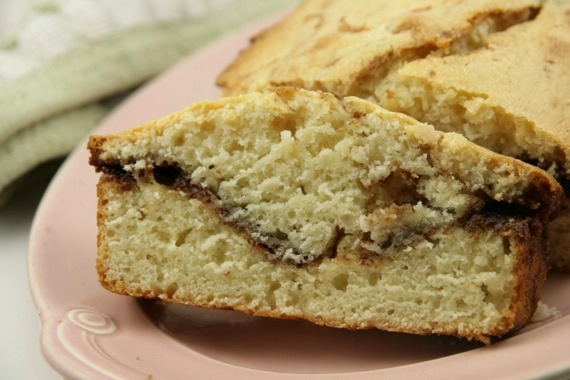
I recently saw this bread on Memoria’s blog, Mangio da Sola and knew immediately I wanted needed to try it. And boy am I glad I did – I found a winner! I actually ended up making this two weeks in a row we liked it so well! After making it twice, I discovered I had actually been doing it wrong (oops); instead of doing two layers of cinnamon/sugar, I just dumped it all in the middle. Well, I actually think I like it better that way – it makes for a nice, thick layer of gooey “cinnamony-ness”…mmmm, cinnamony-ness. Anyway, the bread part is actually more like a buttery, soft pound cake, and the layer of cinnamon/sugar adds the perfect amount of sweetness and flavor. We really loved this one…it will most definitely be in the regular rotation from now on! Great for company, too – absolutely perfect with morning coffee!
Cinnamon Swirl Bread
-adapted from Mangio da Sola
1/3 cup brown sugar
2 teaspoons ground cinnamon
1 cup white sugar
2 cups all-purpose flour
1 teaspoon baking powder
1/2 teaspoon salt
1 egg
1 cup buttermilk
1 teaspoon vanilla extract
1/3 cup cooking oil
Preheat oven to 350 degrees. Grease the bottom and sides of a 9″x5″x3″ loaf pan. Combine the brown sugar and cinnamon. Set aside.
Combine the 1 cup of white sugar, flour, baking powder and salt in a bowl or mixer bowl. In a separate bowl, beat egg. Stir in buttermilk, vanilla and oil. Make a well in the flour mixture and add the egg/buttermilk mixture. Stir just until mixed. Do not over-mix.
Pour half of the batter into loaf pan. Sprinkle with half of the cinnamon mixture. Repeat (obviously I didn’t do this and it turned out great). With a wide rubber scraper or spatula, swirl mixtures together with a down and up circular motion.
Bake for 40 to 50 minutes or until done. Cool in pan for about 10 minutes. Remove from pan and cool completely on a wire rack.
Look, it’s smiling at us! 🙂
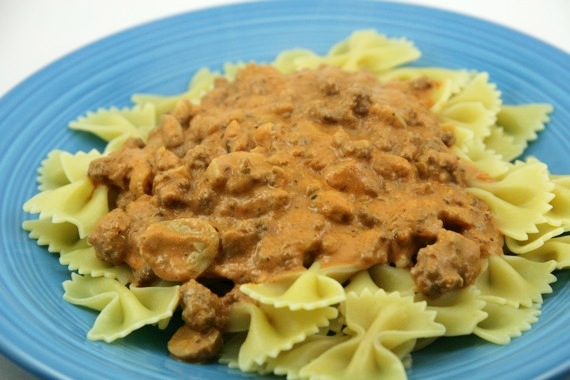
Ok, I know this picture is slightly less-than-appetizing (I discovered that no matter what color of plate I tried, this dish just wasn’t very photogenic), but trust me, this sauce is seriously good. And quick. And easy. Got store-bought marinara? Cream cheese? Ground beef??? Then you’ve got creamy bolognese! There’s an “Italian” restaurant in our hometown that my family would eat at practically every Sunday after church. Without fail, I would always order their pasta bolognese (actually not bolognese at all, but it was still really good!); basically, it was a really creamy, slightly spicy meat/mushroom sauce. The other night, while throwing this dish together, I happen to end up with a sauce almost identical to their “bolognese” completely by accident- yay! Oh, and in case you were wondering, this is real bolognese. And it’s good. Really good.
Creamy [Cheater] Bolognese
1 pound lean ground beef
1 jar of your favorite store-bought marinara sauce (I actually used the canned kind)
4 ounces cream cheese
1 small can sliced mushrooms, drained
freshly ground pepper to taste (I like lots!)
pinch Cayenne pepper
1 teaspoon sugar
1 pound pasta, cooked and drained
In a large skillet, brown and drain the beef. Stir in the marinara sauce, mushrooms, black pepper, cayenne pepper and sugar; mix well. Add the cream cheese and stir constantly until it melts into the sauce. Taste for seasoning. Toss with the cooked pasta and serve immediately.
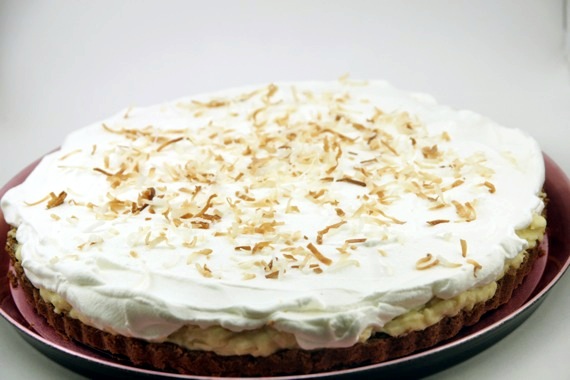
This tart was last week’s Tuesdays with Dorie pick, but since my mother was coming to visit for her birthday, I wanted to wait and make it then. And let me tell you, this tart is worth the wait! I don’t even like coconut cream pie, but this….oh, this is something so delicious and special. I absolutely loved it. We all did. Something about the combination of that salty/sweet/buttery crust with the thick, rum-infused pastry cream and the whipped cream on top is just pure heaven! My mom (the honored guest) said it was better than any coconut cream pie she’d ever had. That’s all the acclaim I needed! This one will definitely be re-visited again and again! This was chosen by Beryl of Cinemon Girl – I owe you one, Beryl! Thanks for one heck of a pick!! (I’m posting the recipe here since I’m posting so late- just thought I’d save time!)
Toasted Coconut Custard Tart
-Dorie Greenspan
For the Custard:
2 cups whole milk
1/2 cup sugar
6 large egg yolks
1/3 cup cornstarch
pinch of salt
2 tablespoons dark rum
1 teaspoon vanilla extract
3 1/2 tablespoons cold unsalted butter, cut into small pieces
1 cup shredded sweetened coconut, toasted
1 9-inch sweet tart shell, baked and cooled (recipe below)
For the topping:
1 cup cold heavy cream
3 tablespoons confectioners’ sugar, sifted
1 teaspoon dark rum
1/2 teaspoon vanilla extract
Bring milk to a boil. In a large saucepan, whisk together sugar, yolks, cornstarch and salt until well blended. Whisk in 1/4 cup of hot milk to temper the yolks, then whisk in the rest of the milk. Continue whisking over medium heat and bring to a boil. Whisk an additional 1 or 2 minutes then remove from heat. Whisk in rum and vanilla and let sit for 5 minutes. Then whisk in the butter, stirring until custard is smooth. Stir in the toasted coconut. Transfer to a container, cover the surface of the custard with plastic wrap and refrigerate until cold.
To make the topping, use a stand mixture with whisk attachment or a hand mixer to whip the cream to medium peaks. Add the confectioners’ sugar and beat to firm peaks. Whip in rum and vanilla.
To assemble the tart, whisk the custard vigorously to loosen it then scrape into the crust. Spoon the whipped cream over the tart and spread evenly to the edge of the custard. Sprinkle with additional toasted coconut.
Sweet Tart Dough
(makes one 9-inch crust)
1 1/2 cups all-purpose flour
1/2 cup confectioners’ sugar
1/4 teaspoon salt
1 stick plus 1 tablespoon very cold (or frozen) unsalted butter, cut into small pieces
1 large egg yolk
To make the dough: Put the flour, confectioners’ sugar and salt in the workbowl of a food processor and pulse a couple of times to combine. Scatter the pieces of butter over the dry ingredients and pulse until the butter is cut in coarsely – you’ll have pieces the size of oatmeal flakes and pea-size pieces and that’s just fine. Stir the egg, just to break it up, and add it a little at a time, pulsing after each addition. When the egg is in, process in long pulses – about 10 seconds each – until the dough, which will look granular soon after the egg is added, forms clumps and curds. Just before your reaches this clumpy stage, the sound of the machine working the dough will change – heads up. Turn the dough out onto a work surface.
Very lightly and sparingly – make that very, very lightly and sparingly – knead the dough just to incorporate any dry ingredients that might have escaped mixing.
To make a press-in crust: Butter the tart pan and press the dough evenly along the bottom and up the sides of the pan. Don’t be stingy – you want a crust with a little heft because you want to be able to both taste and feel it. Also, don’t be too heavy-handed – you want to press the crust in so that the pieces cling to one another and knit together when baked, but you don’t want to press so hard that the crust loses its crumbly shortbreadish texture. Freeze the crust for at least 30 minutes, preferably longer, before baking.
To partially bake the crust: Center a rack in the oven and preheat the oven to 375 degrees F. Butter the shiny side of a piece of aluminum foil and fit the foil tightly against the crust. Bake the crust 25 minutes, then carefully remove the foil. If the crust has puffed, press it down gently with the back of a spoon. Bake for another 3 to 5 minutes, then transfer the crust to a cooling rack; keep it in its pan.
