
I whipped this up a couple of years ago for a party and time and time again, it never fails. Always delicious, quick and refreshing -a real crowd-pleaser! This would be great for outdoor parties when you need something cold and not too heavy or sweet; it could also be dressed up as a cocktail for a nice dinner party. I just love it….
Sparkling Raspberry Lemonade Punch
1 12-ounce can frozen raspberry lemonade concentrate, thawed
1 bottle white wine (I like Chardonnay)
1 liter ginger ale
ice
fresh raspberries, lemons or limes for garnish
Stir all ingredients together in a large pitcher. Garnish each glass with fruit and serve.
*You could also add a little Chambord (raspberry liqueur) for a little extra raspberry flavor! Yum!
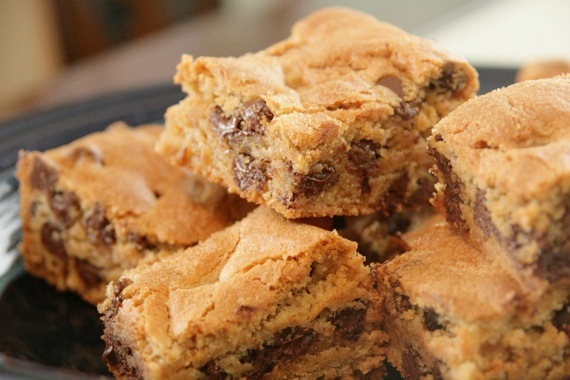
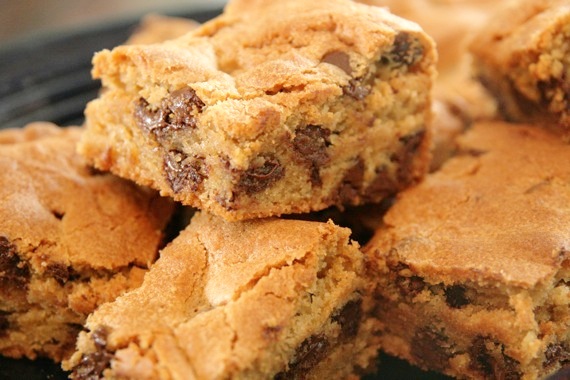
It was only a few days ago that I saw these on Bridget’s blog, Bake at 350 (one of my favorites!) and I immediately made them. My fellow opera choristers asked if I would make cookies for our hard-working chorus master as a gift for opening night; of course I decided these would be perfect. Everybody loves the combination of peanut butter and chocolate! Plus, I just love how simple and quick they are to make- mix all the ingredients, throw it in a pan and you’re done! And did I mention how delicious they are?! Oh boy….soft, chewy, slightly gooey from the chocolate chips and just a tad salty, which I just love. In fact, I was so impressed with these, I’m going to be making them (among lots of other goodies) for a friend’s housewarming party in a couple of weeks. These are just the perfect dessert to make when you’re craving something sweet, soft and chewy- so quick and easy and oh-so satisfying!
Peanut Butter Chocolate Chip Bars
–Bake at 350
6 tablespoons unsalted butter
1/2 cup peanut butter
1 cup sugar
1/4 cup light brown sugar, packed
2 eggs
1 teaspoon vanilla
1 cup flour
1/4 teaspoon coarse salt
1 teaspoon baking powder
1 cup chocolate chips (semi-sweet)
Preheat oven to 350. Lightly grease an 8 x 8″ pan (I doubled the recipe and used a 9 x 13 pan)
Whisk together the flour, salt and baking powder. Set aside.
Cream the butter and peanut butter together until smooth. Beat in the sugars until combined.
Add the eggs, one at a time, scraping down the bowl after each addition. Stir in the vanilla.
Stir in the flour mixture. Add the chocolate chips, stirring until combined.
Spread the batter into the prepared pan. Bake for about 30- 32 minutes. Cool completely before cutting.
***Oh, and don’t forget about the cute-as-a-button sprinkle contest I’m in! Vote for my ‘Bubble Bath’ sprinkle mix here!!
A couple of weeks ago, I entered a contest at Bake It Pretty where you create a custom mix of sprinkles, then give it a clever name. Isn’t that just the cutest idea ever?! I mixed some pretty, pearly pinks and whites together and came up with ‘Bubble Bath’. Well, today they told me I’m a finalist! Woo hoo! So now I need your votes- all you have to do is go to the website (link below), select my sprinkle mix (‘Bubble Bath’) then click ‘vote’. That’s it! I’d just love it if you would vote for me!!
Click HERE to vote- thank you SO much!! Here’s hoping!
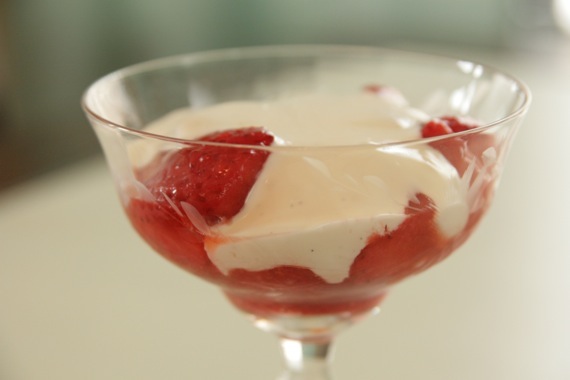
Awhile back I had some fresh strawberries I wanted to use up, but I didn’t want to do the usual strawberry shortcake. Looking around in my fridge, I noticed a block cream cheese, then I remembered I had just received a jar of delicious raw honey from BlakeMakes…this was turning into a yummy idea! I whipped up the cream cheese with the honey, a little sour cream, sugar, some vanilla paste and a splash of Grand Marnier and BAM! Instant (awesome) fruit topper! This would be fantastic tossed with a fruit salad, as a fruit dip, or like I did, just spooned over fresh strawberries. This is so amazingly simple and so amazingly TASTY. Whip some up this weekend!
Honey-Vanilla Cream
8 ounces cream cheese, softened
2 tablespoons sour cream
1 1/2 teaspoons sugar
1 1/2 teaspoons good quality honey
1 teaspoon vanilla paste or extract (you can get vanilla paste at specialty food stores or William Sonoma)
1 splash Grand Marnier (or any orange liqueur you like)
Combine all ingredients and chill until ready to use. Serve over fresh fruit or in fruit salad.
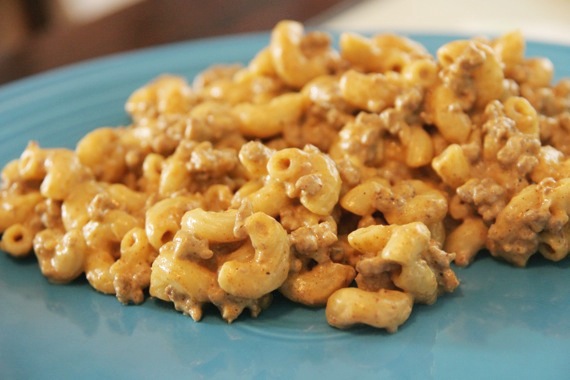
I need to come clean about something. A dirty little secret. Please don’t judge me…..I, Amy-the-food-blogger, like Hamburger Helper. (GASP!) Yep, it’s true. We both do, actually- of course, I would expect hubby to- I think HH was pretty regular in his house growing up. My mom hates it though, and never bought it when we were kids. Maybe once in a blue moon if I begged for it (which, I don’t really think I ever did)- so I didn’t really develop a fondness for it until college, where my roommate Courtney and I ate it quite often. Every now and then I’ll buy a box and make it for dinner – you gotta admit it IS pretty quick and easy when you’re in a pinch! However, recently, a fellow food blogger (and all-around awesome gal!) Ashley, of Delish posted her recipe for Creamy Taco Mac- pretty much exactly like Hamburger Helper, except much better for you (and just as quick and easy!)! I made it immediately and we both loved it! Hubby especially thought it was great (woo hoo!). I’ll never need to buy the boxed stuff again! Thanks, Ashley!
Creamy Taco Mac
– adapted from Delish
1 lb. lean, ground beef
8 oz dry pasta + 1 cup reserved pasta water
1 can (14.5 oz) petite diced tomatoes
4 Tbsp mild taco seasoning (one packet)
3 oz cream cheese
1 cup sour cream
salt & pepper
cheddar cheese
Bring a large pot of salted water to boil and cook pasta per directions. Reserve one cup of pasta water.
Over medium heat, brown ground beef and drain off fat. Add taco seasoning and diced tomatoes. Allow to simmer over low heat for 5 minutes. Add cooked pasta, reserved water, cream cheese and sour cream. Give it a good stir until cheese is melted and incorporated. Simmer over low heat for 2-3 minutes. Season with salt & pepper, as desired. Top off with cheddar cheese for extra cheesy goodness.
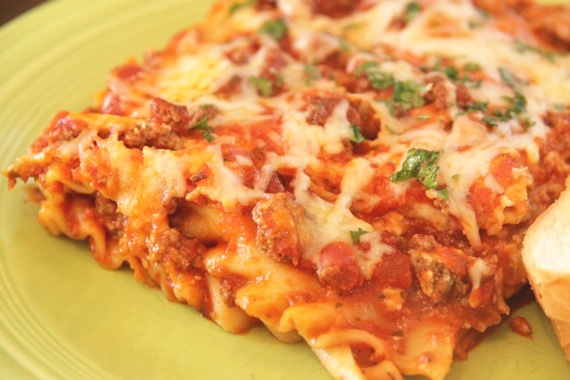
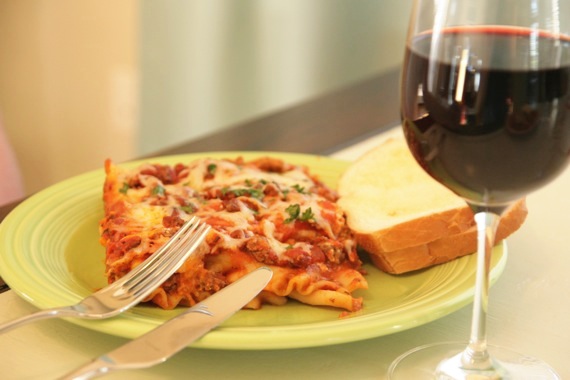
Ok, say you want really delicious, hearty lasagna for dinner but you don’t have hours and hours to spend on it – this one’s for you! This is my Nana’s recipe for lasagna and it’s been a family favorite throughout the years. It’s just perfect for busy moms and hard-working people who don’t have the luxury of spending lots and lots of time in the kitchen for dinner. Since you don’t have to cook the noodles beforehand, you can whip it up in practically no time and put a really delicious meal on the table for your kids or your hard-working man (I know my hard-working man really appreciates this- he loves a good lasagna!)! This was perfect for us because I was able to make it for dinner one night, then hubby could have the leftovers for his dinner on the nights I was gone for opera rehearsals (it makes a big ‘ol pan full!). If you don’t like the thought of using store-bought tomato sauce, by all means, use homemade. This is a perfect meal because it’s really comforting, simple and hearty- a real comfort meal in half the time! Give it a try!
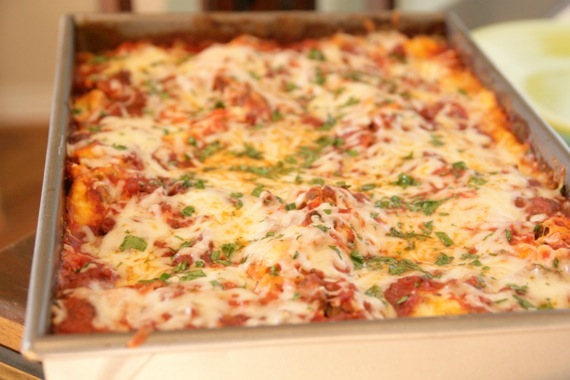
Nana’s Lasagna
1 lb. lean ground beef
32 oz. spaghetti sauce (I used one 16-oz. jar Prego Traditional and one 16-oz. jar Prego Basil and Garlic)
1 1/2 cups water
2 cups (16 oz.) ricotta cheese
2 cups shredded mozzarella cheese (plus more for the top)
1/2 cup grated parmesan cheese
2 eggs
1/4 cup fresh parsley, chopped
1 tablespoon salt
1 teaspoon pepper
2 cloves garlic, minced
1 8-oz. pkg. lasagna noodles- uncooked
Preheat oven to 350 degrees. Brown meat and drain off fat. Add spaghetti sauce and water. Simmer for 10 minutes. Set aside. Combine ricotta, mozzarella, parmesan, eggs, parsley, salt, pepper and garlic and set aside. In a greased 9×13 pan, pour approx. 1/2 cup meat sauce; cover with a layer of lasagna noodles. Cover with approx. 1 1/2 cups meat sauce; spread half of cheese mixture over the sauce (don’t worry if the layers mix a tiny bit). Repeat layers. Top with the remaining meat sauce. Cover with foil and bake for 55-60 minutes. Remove foil and top with remaining mozzarella cheese; bake for an addition 5-10 minutes. Let stand for at least 10 minutes before serving.
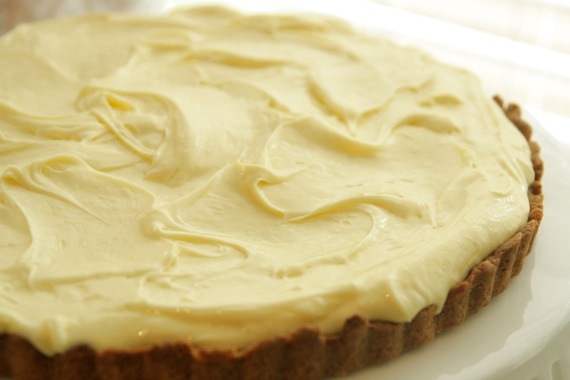
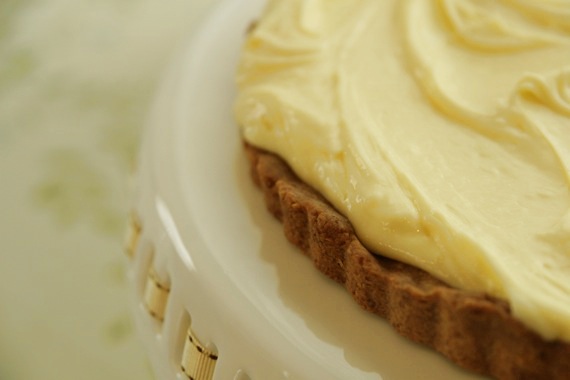
Back in 2008 when I first got my copy of Baking From My Home To Yours by Dorie Greenspan (aka: my idol), I took a pile of little sticky notes and went through the whole book marking the recipes I couldn’t wait to try. And of course, Dorie’s Lemon Cream Tart, the one she deems, “The Most Extraordinary Lemon Tart” was among the pages stuck with bright pink sticky notes. Well, here it is 2010 and I’m just now getting around to making this. Shame on me! I guess the reason it took so long is because the recipe calls for 2 1/2 sticks of butter…YIKES! For just hubby and me, that’s waaaaay too much butter! So, this Mother’s Day, I got my chance! We were having my family over for our annual Mother’s Day Brunch (but this year, we just did lunch) and my mom loves lemon desserts, so I decided this was the perfect opportunity to try the recipe out.
Unfortunately, the lemon cream took well over 45 minutes to make…you’re supposed to cook it (stirring constantly, mind you) until it thickens and reaches 180 degrees. I stirred and I stirred, then I stirred some more….then some more. At this point I was thinking one of those ridiculous Robo-stirrers would be ideal, then finally just decided to take it off the heat whether it was ready or not. Turned out fine in the end, but BOY, what a pain! The end result is a thick, creamy, extremely buttery lemon cream that tastes amazing on top of my favorite tart crust. I was really glad I made it, because everyone really liked it, but honestly, I’m not sure this one will be on the list for “go-to, no-fail” recipes. But for a special occasion like Mother’s Day, and a special mom like mine, it was perfect. Anything for Mommy! 🙂
Dorie Greenspan’s Lemon Tart
1 9-inch tart shell, fully baked and cooled (recipe below)
1 cup sugar
finely grated zest of 3 lemons
4 large eggs
1/2 cup freshly squeezed lemon juice (from 4 to 5 lemons)
2 sticks plus 5 tablespoons unsalted butter, at room temperature and cut into tablespoon-sized pieces
Getting Ready: Have an instant-read thermometer, a strainer and a blender (first choice) or food processor at hand. Bring a few inches of water to a simmer in a saucepan.
Put the sugar and zest in a large heatproof bowl that can be set over the pan of simmering water. Off the heat, rub the sugar and zest together between your fingers until the sugar is moist, grainy and very aromatic. Whisk in the eggs, followed by the lemon juice.
Set the bowl over the pan, and start stirring with the whisk as soon as the mixture feels tepid to the touch. Cook the lemon cream until it reaches 180 degrees F. As you whisk—you must whisk constantly to keep the eggs from scrambling—you’ll see that the cream will start out light and foamy, then the bubbles will get bigger, and then, as it gets closer to 180 degrees F, it will start to thicken and the whisk will leave tracks. Heads up at this point—the tracks mean the cream is almost ready. Don’t stop whisking or checking the temperature, and have patience—depending on how much heat you’re giving the cream, getting to temp can take as long as 10 minutes.
As soon as it reaches 180 degrees F, remove the cream from the heat and strain it into the container of the blender (or food processor); discard the zest. Let the cream stand, stirring occasionally, until it cools to 140 degrees F, about 10 minutes.
Turn the blender to high (or turn on the processor) and, with the machine going, add the butter about 5 pieces at a time. Scrape down the sides of the container as needed as you incorporate the butter. Once the butter is in, keep the machine going—to get the perfect light, airy texture of lemon-cream dreams, you must continue to blend the cream for another 3 minutes. If your machine protests and gets a bit too hot, work in 1-minute intervals, giving the machine a little rest between beats.
Pour the cream into a container, press a piece of plastic wrap against the surface to create an airtight seal and refrigerate for at least 4 hours or overnight. (The cream will keep in the fridge for 4 days and, or tightly sealed, in the freezer for up to 2 months; thaw it overnight in the refrigerator.)
When you are ready to assemble the tart, just whisk the cream to loosen it and spoon it into the tart shell. Serve the tart, or refrigerate ‘until needed.
Sweet Tart Dough
-Dorie Greenspan
1-1/2 cups all-purpose flour
1/2 cup confectioners’ sugar
1/4 teaspoon salt
1 stick plus 1 tablespoon (9 tablespoons)
very cold (or frozen) unsalted butter, cut into small pieces
1 large egg yolk
Put the flour, confectioners’ sugar and salt in a food processor and pulse a couple of times to combine. Scatter the pieces of butter over the dry ingredients and pulse until the butter is coarsely cut in—you should have some pieces the size of oatmeal flakes and some the size of peas. Stir the yolk, just to break it up, and add it a little at a time, pulsing after each addition. When the egg is in, process in long pulses—about 10 seconds each—until the dough, which will look granular soon after the egg is added, forms clumps and curds. Just before you reach this stage, the sound of the machine working the dough will change—heads up. Turn the dough out onto a work surface and, very lightly and sparingly, knead the dough just to incorporate any dry ingredients that might have escaped mixing.
To press the dough into the pan: Butter a 9-inch fluted tart pan with a removable bottom. Press the dough evenly over the bottom and up the sides of the pan, using all but one little piece of dough, which you should save in the refrigerator to patch any cracks after the crust is baked. Don’t be too heavy-handed—press the crust in so that the edges of the pieces cling to one another, but not so hard that the crust loses its crumbly texture. Freeze the crust for at least 30 minutes, preferably longer, before baking.
To bake the crust: Center a rack in the oven and preheat the oven to 375 degrees F.
Butter the shiny side of a piece of aluminum foil and fit the foil, buttered side down, tightly against the crust. (Since you froze the crust, you can bake it without weights.) Put the tart pan on a baking sheet and bake the crust for 25 minutes. Carefully remove the foil. If the crust has puffed, press it down gently with the back of a spoon. For a partially baked crust, patch the crust if necessary, then transfer the crust to a cooling rack (keep it in its pan).
To fully bake the crust: Bake for another 8 minutes or so, or until it is firm and golden brown. (I dislike lightly baked crusts, so I often keep the crust in the oven just a little longer. If you do that, just make sure to keep a close eye on the crust’s progress—it can go from golden to way too dark in a flash.) Transfer the tart pan to a rack and cool the crust to room temperature before filling.
**This post is going to be pretty short and sweet- I have an opera rehearsal soon and this ridiculously hard music isn’t going to memorize itself!!
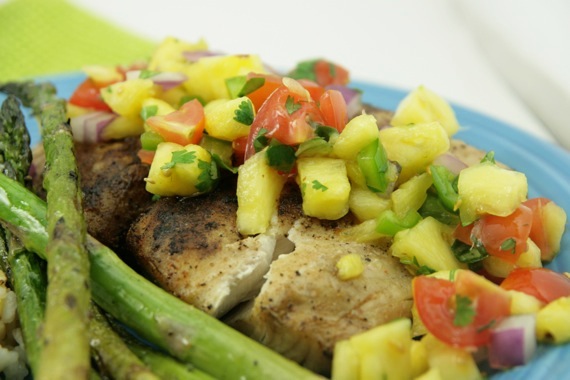
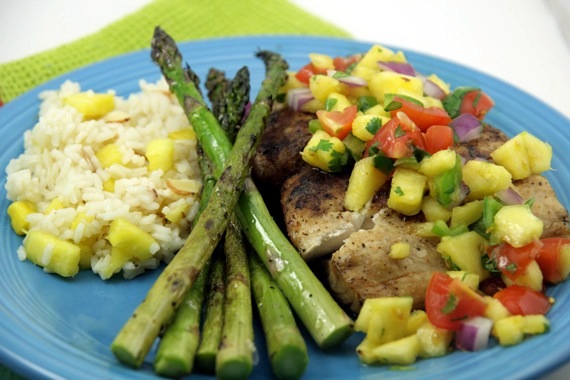
The other night I decided to be brave and figure out how to cut a fresh pineapple. Can you believe that I had never sliced a pineapple?? They’re just so darn intimidating- all those spikes and scary looking leaf things… But, honestly it’s not hard at all! I couldn’t believe just how simple it was! So with my new-found pineapple cutting skills, I decided to make a fresh pineapple salsa to go on top of grilled fish. YUUUUMMM! So hubby grilled up some Mahi-Mahi and asparagus and I made some pineapple-almond rice and it turned out to be a pretty great meal! However, I love fresh pineapple so much, I ended up eating so much of it that my poor tongue went raw and swelled up! Eeek! So be careful not to eat too much of the stuff…no matter how delicious it is! You don’t want to sthtart thalking like thith. Not fun. Or attractive. Just ask my husband. 😉
Fresh Pineapple Salsa
1 cup fresh pineapple, cut into small chunks
1/2 cup cherry tomatoes, cut into small chunks (measure after chopping)
1/4 cup chopped red onion
1 small jalapeno pepper, seeded and diced
handful chopped fresh cilantro
juice of 2 limes
1/2 teaspoon salt
Mix all ingredients in a bowl, taste for seasoning and chill for at least 1 hour. Serve over grilled fish, pork chops or chicken. Serves 2.
Thanks to everyone who entered my CSN $60 giveaway!! I was so shocked at just how many of you said you’d like to go back in time to visit the 1950’s! More than 80% of you – wow! Who knew so many of us were longing to be ’50’s housewives! 🙂 Anyway, on to the good stuff- the winner of the gift card is….

Congratulations, Amy O!! You’ve got yourself 60 bucks to spend on any of CSN’s online stores! Yay!!! Thanks again, to all of my wonderful readers- y’all are GREAT!
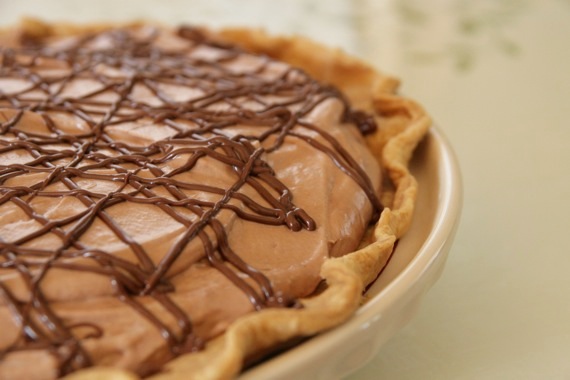
One question: are you ready for this??? Are you ready for the sheer awesomeness?? Love brownies? Love Nutella? Love pie??? How about a Brownie-Nutella Mousse Pie?! Golly, I’m getting excited all over again just thinking about it! This pie will seriously blow your mind- it did ours! In fact, it was so delicious, I felt the need to immediately text my sister to tell her just how awesome it was.
I wanted to try this idea out because I love to spread Nutella on my leftover brownies (yum) and I had seen this recipe floating around – I decided to sort of combine the two and ended up with the Brownie-Nutella Mousse Pie….thank you, Pie Gods. Thank you. The Nutella mousse in itself is out of this world – I had to force myself to stop eating with a spoon! The cream cheese really gives it a fantastic, rich flavor. And combine that with a brownie??? Pure heaven. You simply MUST try this.
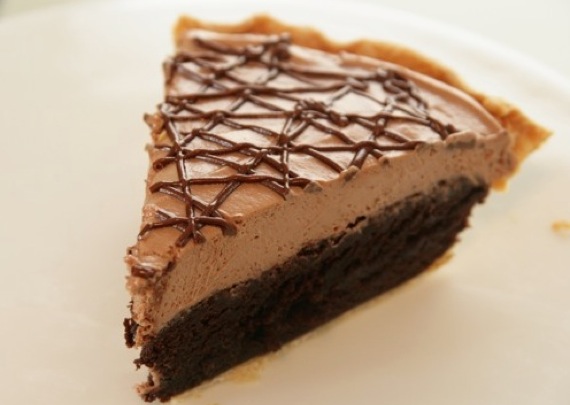
Blow Your Mind Brownie-Nutella Mousse Pie
1 9-inch pie crust, unbaked
1 box brownie mix (or homemade)
5 ounces cream cheese, softened (this is slightly more than half of an 8-oz block)
1/2 cup Nutella, plus more for drizzling
1/2 pint heavy whipping cream
2 tablespoons sugar
1 teaspoon vanilla
Preheat oven to 350 degrees. Make brownie batter as directed on the box and pour into a prepared pie crust. Bake for 35-45 minutes, or until a toothpick comes out clean. Let cool completely.
Using a mixer, whip the cream, sugar and vanilla until stiff peaks form. Transfer to another bowl and set aside.
In the same mixer bowl, mix Nutella and cream cheese until well combined. Spoon in 1/3 of the whipped cream and gently fold in. Repeat with remaining whipped cream- be careful not to stir- it won’t be as light and fluffy. Chill the mousse until the brownie layer is completely cooled.
When the pie is cooled, spread the Nutella mousse evenly over the brownie layer. Drizzle with remaining Nutella (either microwave it on low heat for a few seconds or heat it on the stovetop over low heat to thin it out slightly.) If you want, you can use a piping bag with a #3 tip to do this, or use a plastic bag with the tip snipped off. Serve and enjoy the brownie-Nutella awesomeness!!
**Don’t forget about my $60 giveaway– 3 more days to enter!!**


