Today is the first official day of Summer- did you know that? And in honor of the occasion, it’s a whopping 101 degrees here in Texas today (big shocker- it’s been in the triple digits for a while now…). Hubby and I went out running errands this weekend and nearly melted- it’s HOT. We immediately came home and jumped in the pool. And had a drink or two. 😉 When it’s hot like this, there’s nothing better than floating in the pool with a fruity drink in your hand, while listening to some cool, Caribbean music (my all-time favorite summer music is this CD– we listened to it non-stop on our honeymoon and now it’s our pool-time music of choice!). There are so many great Summery drinks out there- some of our favorites are Piña Coladas, Margaritas (hubby’s all-time favorite drink), and practically anything with coconut rum (lately, I’ve been making one with equal parts Sprite, pineapple juice and coconut rum- delish!). I’ve been wanting to try this Carolina Sangria for awhile now since I saw it in Southern Living a few weeks ago, and yesterday was the perfect opportunity. We had my parents over for Father’s Day and I decided to use them as guinea pigs (again!). My dad absolutely loved it- he said it was every bit as good as the “Paradise Punch” they had in Belize a few years ago! Yay! Looks like I’ve found another perfect Summer drink to add to our regular list!
Carolina Peach Sangria
-adapted from Southern Living Magazine, June 2010
1 (750-milliliter) bottle white wine (I used Chardonnay)
3/4 cup vodka
1 cup peach nectar
6 tablespoons thawed frozen lemonade concentrate
2 tablespoons sugar
1 small (6-oz) can pineapple-banana-orange juice
1 cup club soda, chilled
Combine all ingredients in a large pitcher. Chill until ready to serve. Garnish with peach slices if desired.
First off, I want to thank you all for the birthday wishes! I feel like my readers and my food blogging buddies are my real life friends- it means so much to be able to share my special day with all of you! I had a fantastic birthday; my sweet hubby treated me like a queen and I loved every minute of it (you gotta take advantage of it whenever it comes around, girls!)! And the piece of chocolate cake that was as big as my head (seriously!) that I had at dinner was the cherry on top of a great day!
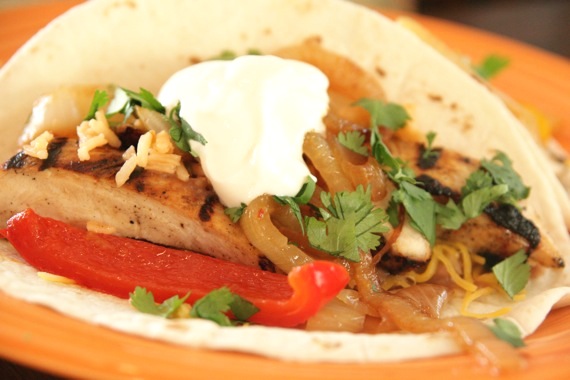
Now on to the good stuff- fajitas! Sometimes I feel like the only Tex-Mex I ever fix anymore is fajitas; but we just love them so much it’s hard to stray away from them! Normally when I make fajitas, I use steak and cook them in a large skillet with beer, salsa and a few other “secret” ingredients- they’re pretty hard to beat, if I do say so myself! However, when we go out to our favorite Mexican restaurant, Joe T. Garcia’s, I always, without fail, order their chicken fajitas. They’re slightly sweet, spicy and amazingly tender and juicy. So when I saw this recipe for grilled chicken fajitas that called for brown sugar, I knew I had to try them! The finished product was excellent and we really enjoyed them- they weren’t quite as good as Joe T’s, but hey, no one could EVER live up to Joe T’s standards! I suggest you give these chicken fajitas a try next time you’ve got a hankering for good Tex-Mex; you won’t be disappointed!
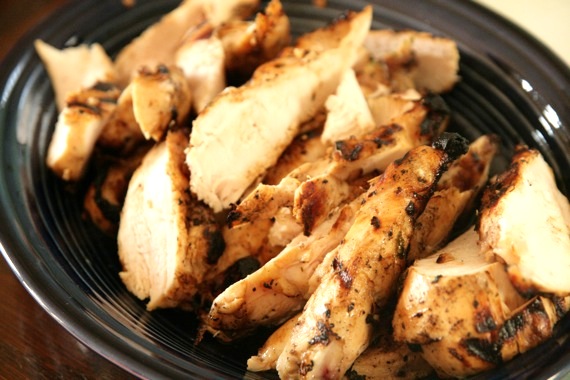
Grilled Chicken Fajitas
–The Way the Cookie Crumbles, originally from Cooks Illustrated
1/3 cup juice from 2 to 3 limes
6 tablespoons vegetable oil
3 medium garlic cloves, minced
1 tablespoon Worcestershire sauce
1 1/2 teaspoons brown sugar
1 jalapeno, seeds and ribs removed, minced
1 1/2 tablespoons minced fresh cilantro leaves
table salt and ground black pepper
3 boneless, skinless chicken breasts (about 1 1/2 pounds) pounded to 1/2-inch thickness
1 large red onion, peeled and cut into 1/2-inch-thick rounds (do not separate rings)
1 large red bell pepper, quartered, stemmed, and seeded
1 large yellow bell pepper, quartered, stemmed, and seeded
8-12 (6-inch) flour tortillas
In a medium bowl, whisk together the lime juice, 4 tablespoons oil, garlic, Worcestershire, brown sugar, jalapeno, cilantro, 1 teaspoon salt, and 3/4 teaspoon pepper. Reserve 1/4 cup marinade in a small bowl; set aside. Add another teaspoon salt to the remaining marinade. Place the chicken in the marinade; cover with plastic wrap and refrigerate 15-30 minutes. Brush both sides of the onion rounds and the peppers with the remaining 2 tablespoons oil and season with salt and pepper.
Remove the chicken from the marinade and place it smooth side down on the grill over medium-high heat; discard the remaining marinade. Place the onion rounds and peppers (skin side down) on the cooler side of the grill. Cook the chicken until it’s well browned, 4 to 5 minutes; using tongs, flip the chicken and continue grilling until it’s no longer pink when cut into with a paring knife or an instant-read thermometer inserted into the thickest part registers about 160 degrees, 4 to 5 minutes longer.
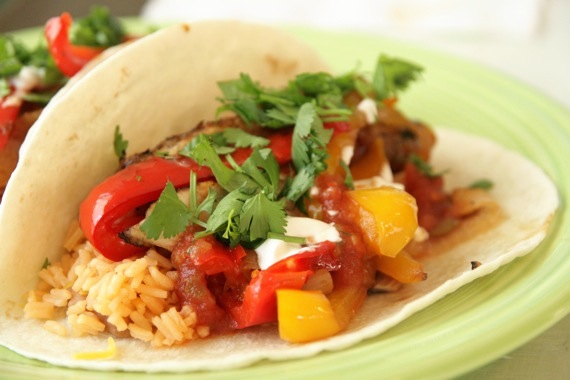
Separate the onions into rings and place them in a medium bowl; slice the bell peppers lengthwise into 1/4-inch strips and place them in the bowl with the onions. Add 2 tablespoons reserved unused marinade to the vegetables and toss well to combine. Slice the chicken into 1/4-inch strips and toss with the remaining 2 tablespoons reserved marinade in another bowl; arrange the chicken and vegetables on a large platter and serve with warm tortillas. Serve with rice, refried beans, sour cream, grated cheese, salsa and additional cilantro if desired.
Guess what?! Today is my birthday! 26 years old…hard to believe! It seems like only a year or so ago I was just getting my driver’s license (and promptly crashing into another car…)! I think I’m going to miss 25; don’t get me wrong, there are a few episodes I’m gladly leaving behind (and good riddance!), but for the most part, 25 was a great year. However, I’ve already made up my mind that 26 is going to be the best year YET! I’ve got a phenomenal husband, the world’s happiest, sweetest doggy, a wonderful home, and a loving family- what more do you need in life (well, besides cookies and Mozart)?!
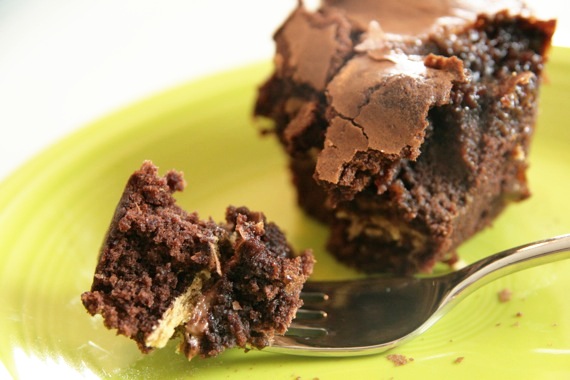
So in honor of my birthday, I’m posting these brownies- they’re fun, completely over-the-top and possibly just a little too much; just like me! 🙂 My good friend Andrea and her sweet dog, Mia came over yesterday for a day by the pool and I decided that was the perfect time to give these brownies the test-run. The verdict? Absolute heaven! I mean, how you possibly go wrong with these- brownie batter, graham crackers, whole Hershey bars and marshmallows topped with more brownie batter?!! GENIUS! You’re going to love these!
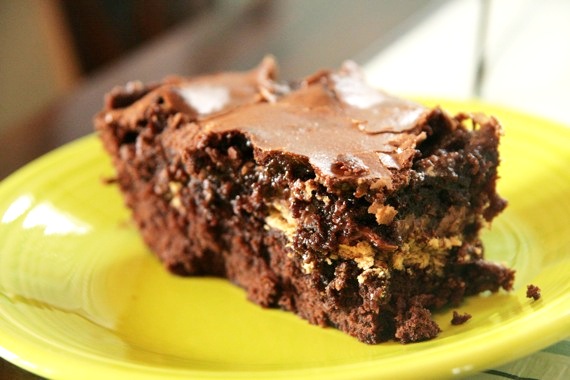
S’Mores Stuffed Brownies
–Picky Palate
1 box brownie mix (and whatever other ingredients you need to make the brownies according to the box)
graham crackers
Hershey bars (around 5 or so)
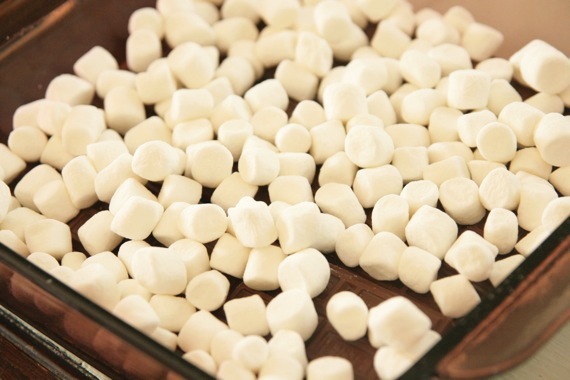
mini marshmallows (about 1 1/2 cups)
Preheat the oven to 350 degrees. Make brownie batter according to box instructions. In a greased 9×9 pan, layer half of the brownie batter, top with whole graham crackers (a single layer), then Hershey bars, then marshmallows; top with remaining brownie batter and spread evenly over the marshmallows. Bake for 40-55 minutes, or until the brownies start to pull away from the edges a bit. Inserting a toothpick won’t be much help, due to the melted Hershey bars. Let cool for at least 30 minutes before serving.
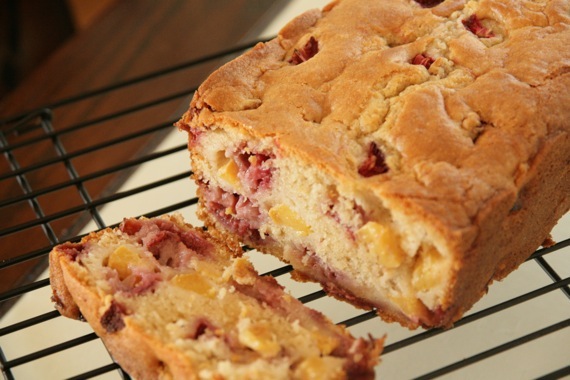
It seems like I’ve been posting a lot of quick bread recipes lately- I just couldn’t help myself, though. There have been so many fantastic recipes floating around! Especially this one- fresh strawberry bread, courtesy of Jamie of My Baking Addiction. As soon as I saw it, I knew I had just found the perfect recipe for my stash of fresh strawberries. I also had 2 ripe peaches just begging to be used, so I threw those in too. Merciful heavens, this was some delicious bread! So moist and full of bright, fresh flavors- the strawberries and peaches were really prominent. This was just delightful; and so quick and easy to throw together. Thank goodness too, because this past weekend I dessert catered my first party (woot, woot!), so things were pretty insane for a while around here! I’m really glad I took the extra time to make this- it was a much welcomed snack amidst all the craziness!
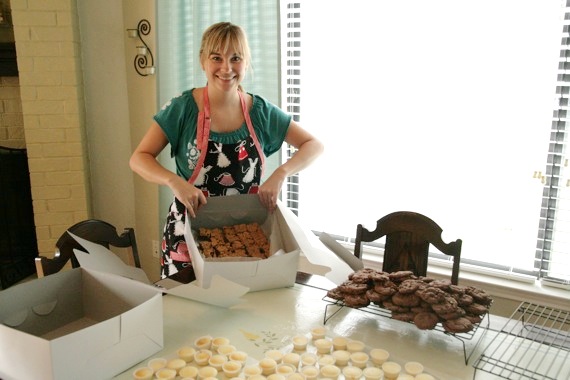
About to pack everything up and deliver 3 kinds of goodies to a party!
Fresh Strawberry-Peach Bread
-adapted from My baking addiction
1/4 cup butter (half a stick), softened
1/4 cup vegetable oil
1 cup sugar
4 ounces cream cheese, softened
2 eggs
1 teaspoon vanilla extract
2 cups flour
2 teaspoons baking powder
1/2 teaspoon baking soda
1/2 teaspoon Kosher salt
1/2 cup buttermilk
3/4 cup strawberries, chopped
3/4 cup fresh peaches, chopped
Grease and flour a 9×5 inch loaf pan.
With electric mixer cream butter, sugar and cream cheese until fluffy. Add eggs one at a time. Mix in vanilla.
In separate bowl, mix flour, baking powder, baking soda and salt. Blend flour mixture with butter mixture just until blended. Add buttermilk and only stir until just combined; do not over mix.
Carefully fold in strawberries. Dough mixture will be thick.
Bake in a 350 degree oven for 50 to 60 minutes.
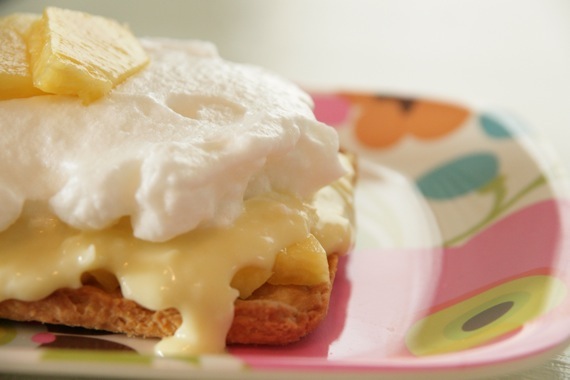
This month over at ‘You Want Pies With That?‘, the theme is “Summery Drinks”, chosen by Suz of You Can’t Eat What? and Sara of Cupcake Muffin. We were supposed to create a pie or a tart inspired by our favorite drink to sip by the pool during the summertime. My kind of theme!! It didn’t take long for me to figure out what kind of drink I’d be inspired by….I *love* piña coladas!! Creamy, smooth and “coconut-y” with a hint of dark rum. Bliss. I knew immediately that I’d use Dorie Greenspan’s recipe for Toasted Coconut Cream Tart as a base- that filling is insanely delicious!!! I sort of played around for awhile, then eventually came up with a delicious piña colada tart; the only thing I’d change for next time is topping it with whipped cream instead of meringue, as well as using canned crushed pineapple instead of fresh, since it’s a little sweeter. My custard was a little runny (I think I probably put in too much rum- oops!) but it still tasted amazing!
Piña Colada Tart
-adapted from Dorie Greenspan
2 cups whole milk
1/2 cup sugar
6 large egg yolks
1/3 cup cornstarch
pinch of salt
2 tablespoons dark rum
1/2 teaspoon vanilla extract
1 tablespoon pineapple juice
3 1/2 tablespoons cold unsalted butter, cut into small pieces
1 cup shredded sweetened coconut
2 cups chopped pineapple (fresh or canned- I used fresh, but next time I’ll probably use canned because it’s a little sweeter)
1 9-inch sweet tart shell, baked and cooled (recipe below)
Bring milk to a boil. In a large saucepan, whisk together sugar, yolks, cornstarch and salt until well blended. Whisk in 1/4 cup of hot milk to temper the yolks, then whisk in the rest of the milk. Continue whisking over medium heat and bring to a boil. Whisk an additional 1 or 2 minutes then remove from heat. Whisk in rum, pineapple juice and vanilla and let sit for 5 minutes. Then whisk in the butter, stirring until custard is smooth. Stir in the coconut. Transfer to a container, cover the surface of the custard with plastic wrap and refrigerate until cold.
Sweet Tart Dough
(makes one 9-inch crust)
1 1/2 cups all-purpose flour
1/2 cup confectioners’ sugar
1/4 teaspoon salt
1 stick plus 1 tablespoon very cold (or frozen) unsalted butter, cut into small pieces
1 large egg yolk
To make the dough: Put the flour, confectioners’ sugar and salt in the workbowl of a food processor and pulse a couple of times to combine. Scatter the pieces of butter over the dry ingredients and pulse until the butter is cut in coarsely – you’ll have pieces the size of oatmeal flakes and pea-size pieces and that’s just fine. Stir the egg, just to break it up, and add it a little at a time, pulsing after each addition. When the egg is in, process in long pulses – about 10 seconds each – until the dough, which will look granular soon after the egg is added, forms clumps and curds. Just before your reaches this clumpy stage, the sound of the machine working the dough will change – heads up. Turn the dough out onto a work surface.
Very lightly and sparingly – make that very, very lightly and sparingly – knead the dough just to incorporate any dry ingredients that might have escaped mixing.
To make a press-in crust: Butter the tart pan and press the dough evenly along the bottom and up the sides of the pan. Don’t be stingy – you want a crust with a little heft because you want to be able to both taste and feel it. Also, don’t be too heavy-handed – you want to press the crust in so that the pieces cling to one another and knit together when baked, but you don’t want to press so hard that the crust loses its crumbly shortbreadish texture. Freeze the crust for at least 30 minutes, preferably longer, before baking.
To bake the crust: Center a rack in the oven and preheat the oven to 375 degrees F. Butter the shiny side of a piece of aluminum foil and fit the foil tightly against the crust. Bake the crust 25 minutes, then carefully remove the foil. If the crust has puffed, press it down gently with the back of a spoon. Bake for another 3 to 5 minutes, then transfer the crust to a cooling rack; keep it in its pan.
To assemble: Spread the chopped pineapple on the cooled crust and top with custard. Top with meringue or whipped cream. Chill until ready to serve.
Ok, I know for a fact that there are LOTS of us out there; hard-working people who’s passion in life is baking, baking and more baking. We’ve baked and decorated cakes for our co-workers, made cookies for our friends’ baby showers, catered parties with trays and trays of beautiful baked goods, and maybe even won a few baking contests (hehe!). We’re bakers. We’ve worked hard and have finally developed a sense of pride and accomplishment in what we do. Now it’s getting closer and closer to being time to take that next (and giant) step forward: opening a bakery. If you’re anything like me, you might be wondering how the heck this thing works. How hard is it? How much money will I make? What if I suck? (Ok, you might not be wondering that– maybe that’s just me!)
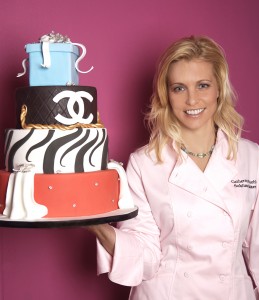
Photo: Catherine Ruehle, Sublime Bakery
I’ve had the (freaking sweet!) opportunity to do an interview with Catherine Ruehle, owner and head honcho at the Sublime Bakery in Fort Worth, Texas. As some of you may remember, I won a cookie baking contest back in December and the Sublime Bakery started selling my winning cookies. I had the pleasure of having lunch with Chef Catherine and getting to know her; and she graciously agreed to give me this interview- how cool is that? I thought it might be a big help to those of us who aspire to open our own bakeries someday. Catherine has recently been on TWO Food Network Cake Challenges (they’ll be airing soon!), has worked with David Tutera, and her cake business is among the best in the Dallas-Fort Worth Metroplex. And now we get to “hang out” with her for a few! Cool! A lot of these questions came straight from you- I asked the girls on a popular cooking forum what questions they’d like to ask a professional baker and they came up with some great ones! I threw them in there with a few of my own and I think we came up with a pretty good interview! Here goes:
Just how crazy are the hours? I think so many of us have these grand ideas of strolling into the bakery around 8 AM, popping a few cakes in the oven, greet a steady flow of happy customers until around 5 or so, then call it a day. How realistic is that? Yeah, well, that’s not very realistic, but it depends on how your business is structured and how many people are sharing the work load. When I first opened I worked from 5am to 8pm 6 days a week. Now that I have more staff, we don’t have the pastry case for walk in, and we open 2 hours later each day, I work from 8am to 5pm on Tuesday and Wednesday, a bit later on Thursday, a LOT later on Friday (sometimes past midnight to get the wedding cakes done for Saturday), and Saturdays vary depending on deliveries. But, I also put in at least 3 hours at home every day after work (on the computer) and I always have a LOT to do on my “days off” as well. When it’s all said and done, I usually work 70-80 hours a week. If you’re not prepared to live your work then you just shouldn’t consider opening a shop.
What do you think is the most important tip for successful baking? Start with the best ingredients and make everything from scratch, every day. Don’t skimp for the sake of a couple of pennies profit, don’t cut corners. Most important, LOVE what you do and hire others who love it too. If you don’t love it the product will suffer, guaranteed! Funny story: a while back, just out of the blue, we were having trouble with our cakes sticking really badly in the cake pans. The cakes were breaking when we turned them out because they were sticking so bad. It was such a pain, we tried everything and just couldn’t figure out why this was happening all of a sudden. Then we had a “staffing change” and someone who was really unhappy left the bakery. Like a miracle, the cakes stopped sticking the very day she left and haven’t stuck again since. True story.
Now, this one is very important: Chocolate or Vanilla- which is better? Personal preference is for Chocolate 🙂 (Good woman!)
I know you can’t give away very much information about your recent Food Network Challenge debut, but if you could sum up the experience in one word, what would it be? There is not one word that could possibly express my experience at Challenge. It was the most amazing professional experience of my life, without a doubt! My competitors are now my friends, I have Kerry Vincent on speed dial! It’s stressful, it’s emotionally and physically exhausting but it’s also exhilarating. It was 3 days of absolute heaven for me (I’m genetically inclined toward competition). I am DYING to watch the episode to see what they edit out and what they keep. It is a TV show after all, so you never know what they will make of it!
I know the main attraction at Sublime Bakery is the custom made cakes, but aside from that, what would you say is your number one item? I’ve heard great things about the S’Mores bars! Yes, the S’Mores are big. We also do a lot of gluten free and vegan cupcakes and bakery cakes. And our cheesecake lollipops are a big seller as well.
I think a lot of us really have no idea what goes into starting a baking business (I’m definitely including myself in that!). How difficult was it getting your bakery started? Yikes. That’s a loaded question. The hardest part is dealing with the city for permits and such. It’s a nightmare, I won’t sugar coat it. You need a contractor who’s done it a million times and even then it will be a nightmare. It will cost you at least twice what you budget and you’ll run at least a month late for your opening. Count on it. It’s a lesson in patience and perseverance and it you can get through that it’s good practice for running the business! Oh yeah, and don’t expect to pay yourself for a while, no matter how good you are and how successful your start up is. It takes time.
It seems like styles are constantly changing when it comes to custom cakes- what would you say are the latest trends right now? We’re doing more and more 3-D cakes which makes me very happy because they’re my fave. Clients are also wanting really personal cakes. For example, even our wedding couples are including sculpted figures of their pets or they’re wanting to include personal elements that reflect their hobbies and interests. Color is always trending, right now we’re seeing a lot of greens and purples.
What training/experience would you say is necessary/helpful for those that want to open a bakery? Training is always good but passion and a boat load of cash are absolute necessities.
Any favorite stories/experiences about owning a bakery? How much time do you have? 🙂
What do you do with any leftover stuff that doesn’t sell? Personally, if it were me, I’d most likely end up in the kitchen floor, shoving my face full of day-old cake! But somehow I doubt you do that! Well, one of the reasons we stopped the pastry case is because I couldn’t stand having product left over at the end of the day, even if it was just a couple of bars and cupcakes. Everything is special order now so we have no waste! I would usually give leftover product to my neighboring businesses and of course I’d take some home to my kids!
Ok, last one: Any advice for aspiring bakery owners? Show no fear and work like a dog!!
Wow- very, very helpful info! Thank you SO much for taking the time to give us all a little insight!! I really hope this has been helpful to some of you aspiring bakery owners! You can become a fan of Sublime Bakery on Facebook, or follow on Twitter to keep up with Catherine and all the cool things she’s taking part in!
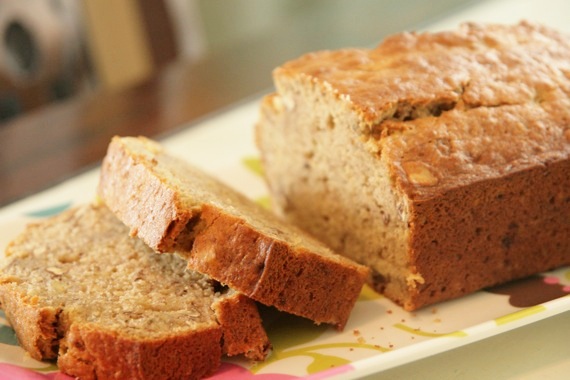
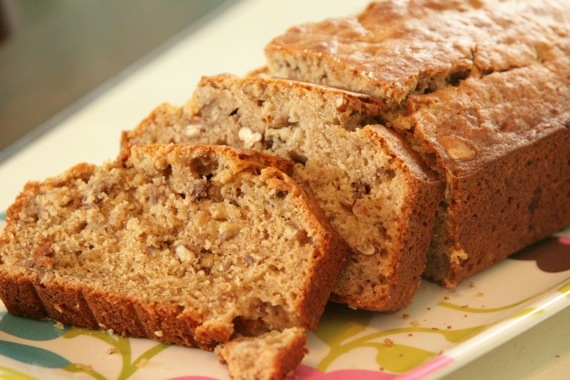
Boy, just try to say that title 5 times fast! Maybe we ought to just call it ‘B4’ instead…..ok, maybe not. Sorry, don’t know where that came from, exactly. Anyway, a mere 3.2 seconds after I saw this on Julia’s blog, Fat Girl Trapped in a Skinny Body, I immediately printed it out and set out to make it. Frankly, I get tired of the same old banana bread recipes; I needed something new. And browned butter?? Um, yes, please! I love the stuff so much I could pour it over my cereal in the morning! It’s that good. You can’t imagine the beautiful, glorious aromas wafting through the house while this is baking- it’s enough to drive a girl crazy! I can’t wait to find other great recipes that use browned butter…especially since I don’t think people will take too kindly to browned butter over Cheerios. Don’t think the public is quite ready for that one yet….
Browned Butter Banana Bread
–Fat Girl Trapped In A Skinny Body
1 stick butter
2 cups flour
3/4 cup brown sugar
1 tsp baking powder
1/4 tsp baking soda
1/2 tsp salt
4 bananas
1/2 cup chopped pecans
2 eggs
1 tsp vanilla extract
Preheat the oven to 350 degrees and grease an 8 inch loaf pan.
In a medium saucepan over high melt the butter. Once it is melted lower the heat to medium and swirl the butter around the pan instead of stirring it. It will take about 5 minutes for it to brown. Occasionally swirl it. You will notice when it turns brown because it literally, turns brown. Remove the pan from the heat and allow to cool while getting everything else ready.
In a large bowl sift the flour, sugar, baking powder, baking soda and salt.
In another bowl whisk the eggs then add the mashed bananas, vanilla and the semi-cooled butter.
Add the liquid to the dry mixture. Mix just until incorporated, don’t over mix. Pour the batter into the greased loaf pan.
Bake at 350 degrees for 60-70 minutes, until it is browned on top and a fork inserted comes out clean. Cool for at least 15 minutes in the pan before cutting and serving.
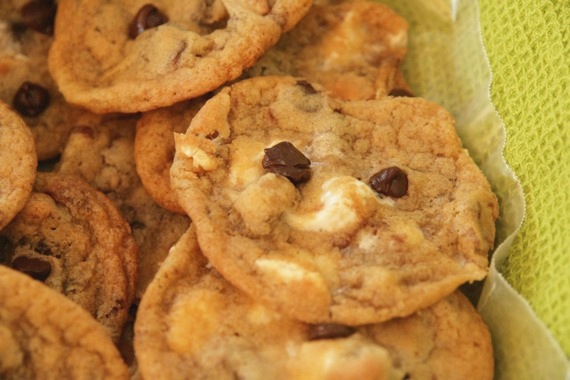
People really love cookies. I’ve come to that conclusion rather quickly. There’s no better way to instantly become the most interesting person in the room- show up with an arm full of freshly baked, homemade cookies and immediately, you’ve become everyone’s favorite person. People really love cookies. I discovered this months back, when I started bringing cookies to work with me and my colleagues went crazy for them. And then again recently, when I would bring baskets of cookies to opera rehearsals and performances (singers love free food!). The cookies would literally last about 10 minutes before being completely demolished. I was immediately everyone’s favorite cast member. I even got a marriage proposal (sorry Dan, I’m taken!). Every night when I would walk into the dressing room, some of the other ladies would eagerly look at me to check and see if I was toting baked goods. Like I said- people really, really love cookies.
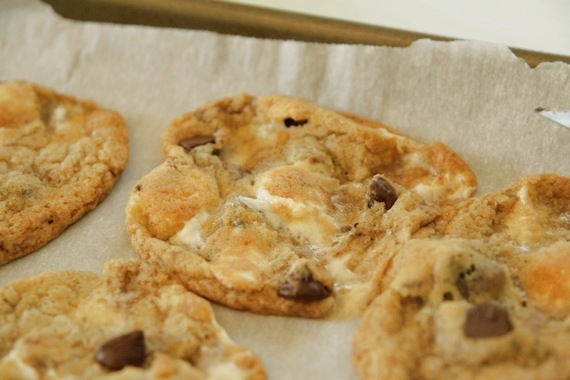
I think these were everyone’s overall favorites. Lots of people wanted the recipe, so here it is y’all! I had some chocolate covered graham crackers that I wanted to use in some way, plus some marshmallows, so I instantly thought of S’Mores cookies. Everybody likes S’Mores! I used Dorie Greenspan’s chocolate chip cookie recipe, then added in the chopped up chocolate covered graham crackers and marshmallows and voila! S’Mores cookies! My only complaint was that the graham cracker taste wasn’t quite strong enough- next time I’ll definitely add more. But overall, these were a smash hit, and I have to agree with my cast members- they were pretty darn tasty! Now that all the operas are over (thanks everybody, for a great season!!!), I won’t be making cookies for everybody anymore, but hopefully my fellow singers can come here and get the recipes and make some for themselves!

(Here’s a picture from the opening night of Don Giovanni-sorry it’s fuzzy, it was taken with my iPhone)
Chocolate Chip S’Mores Cookies
-adapted from Dorie Greenspan
2 cups all-purpose flour
1 teaspoon salt
3/4 teaspoon baking soda
1 cup unsalted butter, at room temperature
1 cup sugar
2/3 cup packed light brown sugar
2 teaspoons pure vanilla extract
2 large eggs
1 cup semi-sweet chocolate chips
1 cup chopped chocolate covered graham crackers (store-bought is fine)
1 cup mini marshmallows
Center a rack in the oven and preheat the oven to 375 degrees F. Line two baking sheets with parchment or silicone mats.
Whisk together the flour, salt, and baking soda.
Working with a stand mixer, preferably fitted with the paddle attachment, or with a hand mixer in a large bowl, beat the butter at medium speed for about 1 minute, until smooth. Add the sugars and beat for another 2 minutes or so, until well-blended. Beat in the vanilla. Add the eggs one at a time, beating for 1 minute after each egg goes inches. Reduce the mixer speed to low and add the dry ingredients in 3 portions, mixing only until each addition is incorporated. On low speed, or by hand with a rubber spatula, mix in the chocolate, graham crackers and marshmallows.
Spoon the dough by slightly rounded tablespoonfuls onto the baking sheets, leaving about 2 inches between spoonfuls.
Bake the cookies- one sheet at a time and rotating the sheet at the midway point- for 10-12 minutes, or until they are brown at the edges and golden in the center; they may still be a little soft in the middle, and that’s just fine. Pull the sheet from the oven and allow the cookies to rest for 1 minute, then carefully, using a wide metal spatula, transfer them to racks to cool to room temperature.
Repeat with the remainder of the dough, cooling the baking sheets between batches.
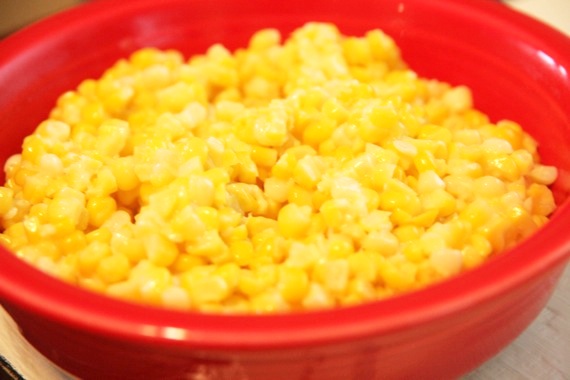
I love fresh corn. It’s one of my very favorite vegetables- so sweet, crunchy and fresh tasting. Yum. My favorite way to eat it is grilled- my hubby does a mean grilled corn on the cob! But I think this is my second favorite way to serve it- creamed. Now I know what you’re thinking, and no, this is nothing like those cans of mysterious, mushy, runny creamed corn. This is how my Great-Grandaddy, Pop, used to make it and it’s so simple and fast- and completely and utterly delicious. The only thing is, you simply must use fresh corn. Canned or frozen is absolutely NOT the same. Got it? Ok, here we go:
Classic Creamed Corn
5-6 ears of fresh corn, shucked (make sure to remove all the silk too)
2 tablespoons butter
salt to taste
splash heavy cream
In a medium skillet (cast iron is best, but not necessary), melt the butter over medium heat.
In the meantime, in a large bowl, slice the corn kernels off of each cob, then with the back (dull side) of your knife, apply pressure and scrape off all the juices from the cob- this is where all the good flavor comes from!
Add the corn and juices to the hot skillet and cook for 5-10 minutes, stirring occasionally, until the corn is beginning to soften just a bit. Don’t cook it too long- you want it to have a nice crunch to it. Add the salt and heavy cream. Serve immediately. Enjoy!
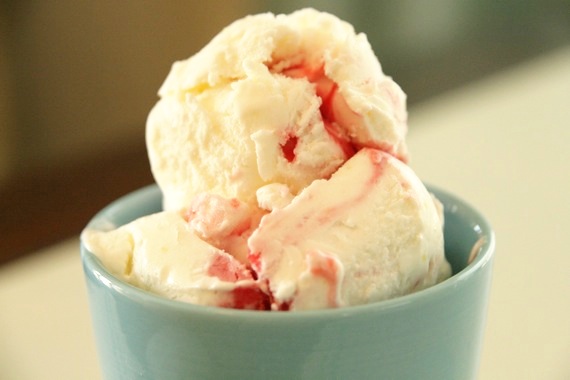
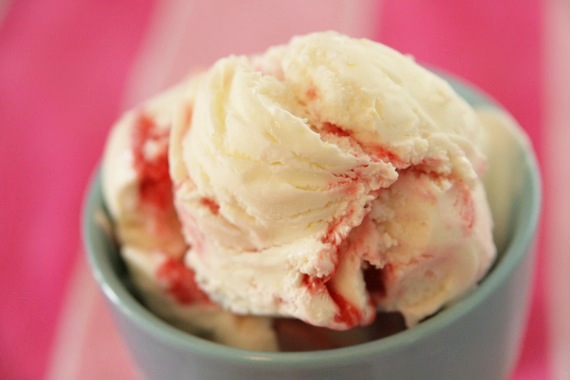
Why, hello summer! Thanks for showing up this year. I’m just thrilled that you’re here (however, I’m not so much thrilled about the sunburn you gave me yesterday…just sayin’). It’s officially HOT outside. Like, already in the upper 90’s this week. Our pool has pretty much reached bathtub temperatures. Is it just me, or did summer just sort of come out of nowhere? A couple of weeks ago it was rainy, windy and slightly chilly even….then BAM! Sweltering heat. No warning. Good thing I have an ice cream maker- take THAT, summertime! Ice cream makes everything better. Especially cheesecake ice cream. Especially cheesecake ice cream with strawberry puree swirled in it! This is David Lebovitz’s recipe and it’s rich, thick, incredibly creamy and oh-so satisfying in the summertime heat. Trust me- make it. Your sweating husband will thank you.
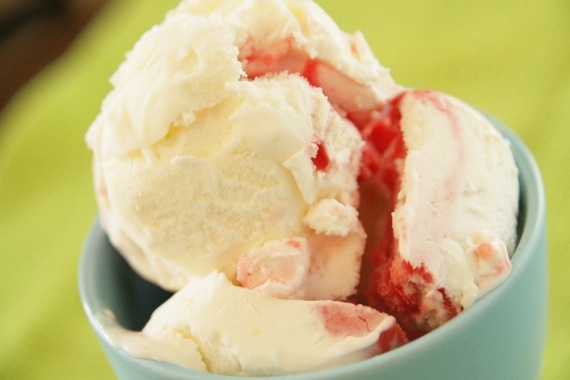
Strawberry Cheesecake Ice Cream
–The Perfect Scoop by David Lebovitz
8 ounces cream cheese, cut into small pieces
1 lemon
1 cup sour cream
1/2 cup half and half
2/3 cup sugar
pinch of salt
Zest the lemon directly into a blender or food processor, then add the cream cheese, sour cream, half and half, sugar and salt and puree until smooth.
Chill the mixture thoroughly in the refrigerator, then freeze it in your ice cream maker according to the manufacturer’s instructions.
Strawberry Sauce
1 1/2 pounds strawberries, rinsed and hulled
1/4 cup sugar
1 teaspoon freshly squeezed lemon juice
Puree the strawberries with the sugar and lemon juice in a food processor until smooth. Press the puree through a strainer to remove the seeds.
To finish the ice cream:
Place half of the ice cream in a container, then spoon in some of the strawberry sauce; repeat layers, then gently swirl with a spoon. Store in the freezer until ready to serve.
