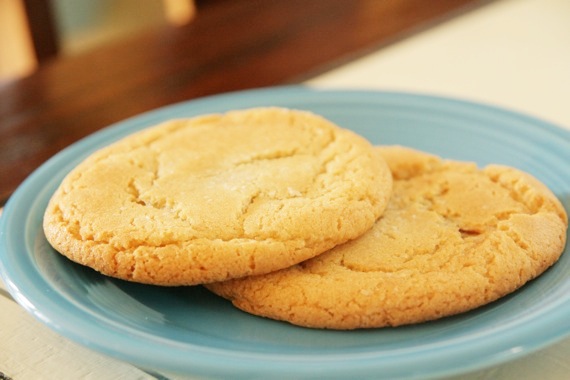
You see these cookies? They look like pretty average, plain ‘ol cookies, don’t they? Well. You’re in for a treat, my friends, because these are NO average cookies! These have a special secret lurking within…just waiting to be discovered. All it takes is one bite………….
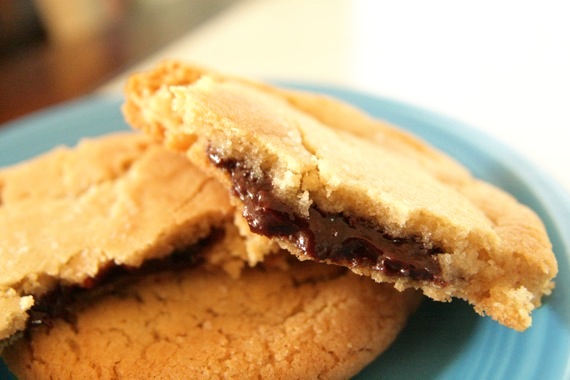
Aaaaand BOOM, BABY!! Gooey, warm, flowing chocolate right in the center! One bite and suddenly you’re in heaven. Chocolate heaven. The cookie is warm, soft and chewy; and when it’s accompanied by the soft, melty chocolate in the center, it’s just pure bliss. I got the idea for these the other night while trying to sleep (that happens a lot- most people count sheep; I think up cookie ideas)- I was thinking about how much I love chocolate chip cookies, and somehow I ended up with these in mind. They’re really, really simple to make – just whip up some quick ganache (chocolate and heavy cream), then whip up your favorite chocolate chip cookie dough (sans chocolate chips), stuff the dough with the ganache and you’re done (practically). Unfortunately I couldn’t think up a really clever, delicious-sounding name for these (although hubby suggested I call them “Transformer Cookies”, since there’s more than meets the eye……yep, that’s who I married, folks) – but I think Chocolate Ganache-Stuffed Cookies will do nicely.
Chocolate Ganache-Stuffed Cookies
1 batch chocolate chip cookie dough, without the chocolate chips (any recipe you want- I used this one)
1/2 cup heavy cream
1 cup (approx. 6 oz.) chocolate chips
pinch of sugar
salt for sprinkling
Preheat oven to 350 degrees. Heat heavy cream and sugar in a small pan over medium heat until boiling; pour over the chocolate chips. Let sit for a few seconds then stir to combine. Chill for at least one hour.
Make the cookie dough according to desired recipe. Chill.
To assemble: using a small cookie scoop or a spoon, scoop out some dough- flatten with the palm of your hand and place a small spoonful of ganache in the center. Cover with another scoop of flattened dough and seal the edges (you’ll have a small disk), then gently roll into a ball. Place on a baking sheet lined with parchment paper. Sprinkle with sea salt. Place each cookie at least 2 inches apart on cookie sheet.
Bake for 12-15 minutes, or until cookies are golden brown. If you’re like me, you’ll eat them hot out of the oven, but my husband likes them better when they’re completely cooled. Enjoy!
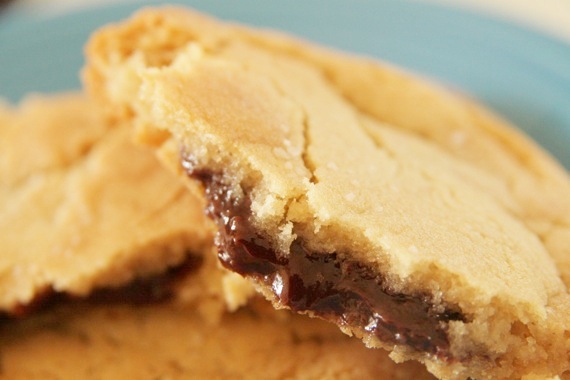
These cookies are seriously the best thing to come out of my oven in a long time- they’re perfectly, wonderfully, simply delicious!
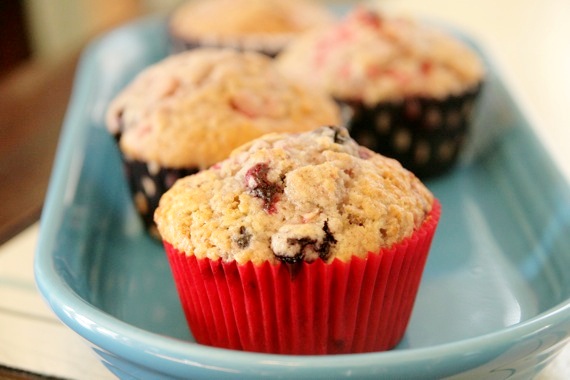
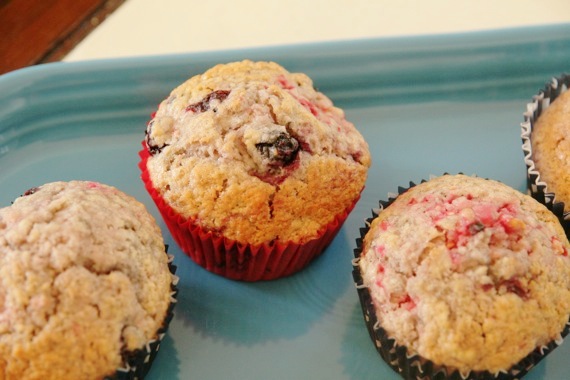
There’s a store near our house that sells locally grown fresh fruits, vegetables and grains (and organic groceries) and every summer they’re literally bursting with ripe, delicious summer fruits and veggies. I go all the time and stock up on berries, peaches, corn on the cob, watermelons, etc. Every summer, I’m up to my ears in fresh berries and I love it! Luckily, I just happen to have some delicious blueberries, raspberries and blackberries and immediately, Ina Garten’s recipe for Tri-Berry Muffins pop into my head. What a fantastic way to use all three berries!
Unfortunately, my sweet hubby has been in Miami for two days training for a new software. Big time bummer (thank heavens he comes home tonight! Yippee!!). I had been planning all week to bake him something delicious to take on the plane (besides his travel-size bag of mini-Oreos), and these muffins were the perfect thing! Great for a snack and breakfast!
Tri-Berry Muffins
-adapted from Ina Garten, Barefoot Contessa At Home cookbook
3 cups all-purpose flour
1 tablespoon baking powder
1/2 teaspoon baking soda
1/2 teaspoon kosher salt
1 teaspoon ground cinnamon
1 1/4 cups milk
2 extra-large eggs, lightly beaten
2 sticks unsalted butter, melted
1 cup fresh blueberries
1/2 cup fresh raspberries
1/2 cup fresh blackberries, sliced in half
1 1/2 cups granulated sugar
Preheat oven to 375°F. Line muffin tins with paper liners.
Sift flour, baking powder, baking soda, salt and cinnamon together in a large bowl. Stir with your hand (or a whisk) to be sure the ingredients are combined. In another bowl, combine the milk, eggs and melted butter.
Make a well in the middle of the dry mixture, pour the wet mixture into the well, and stir until just combined. There will be some lumps but don’t overmix the batter. Add the blueberries, raspberries, blackberries and sugar and stir gently to combine (*be really careful when you do this, otherwise the batter will turn blue!)
Using a large spoon or scoop, spoon batter into the muffin cups to fill the liners. Bake for 20 to 25 minutes, until a cake tester comes out clean and the tops are nicely browned.
Yield: 16 to 18 muffins
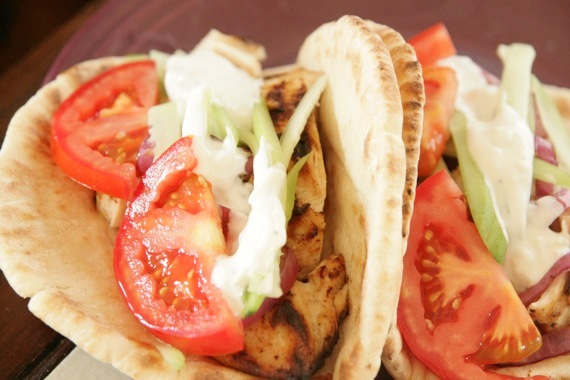
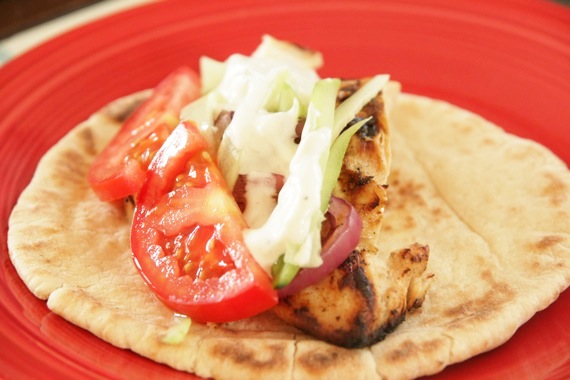
Those of you who have followed me for awhile know how much I looooove Greek food. Anything even remotely “Greek-tasting” is a winner in my book! Especially Gyros (pronounced “yee-rohz”). Oh man, oh man…I could go on and on about Gyros. The first one I ever tasted (ever heard of, actually) was in Vienna. Street vendors were selling them everywhere and that giant, rotating slab of meat looked pretty good to me, so I tried it. The meat was juicy, spicy and ohmigosh-so flavorful, and it was topped with a cool, cucumbery yogurt sauce, called Tzatziki; all served up in a warm, soft pita bread with tomatoes, onions and cucumbers. Heaven in hand-held form. I was absolutely smitten from there on. Since then, I’ll eat a Gyro every chance I get! And now, luckily, I can make them at home anytime I like! I just happen to see this recipe over at Made By Mel, who saw it on Elly Says Opa! (the queen of Greek food!) and turned around and made it that night! Like I said earlier, typically, Gyros are made with lamb or beef or both, but this recipe calls for chicken, which makes it so quick and easy!
The Tzatziki is especially delicious- almost like a garlic-y (much, much lighter) Ranch dressing. If you have any left over, it makes a great dip for veggies or a nice sauce for grilled chicken or steak. It’s so versatile!
Chicken Gyros
-seen on Made by Mel, originally from Elly Says Opa!
2 Cloves Garlic, smashed
Juice of 1 Lemon
2 teaspoons Red Wine Vinegar
2 tablespoons Extra Virgin Olive Oil
2 heaping tablespoons Plain or Greek Yogurt
1 tablespoon Dried Oregano
1 pound boneless, skinless chicken breasts
Salt and Pepper
Tzatziki (see below)
sliced tomatoes
sliced red onions
Pita Bread
Whisk together the garlic, lemon juice, vinegar, oil, yogurt, and oregano in a bowl. Add the chicken and rub the marinade in. Cover and refrigerate for at least an hour.
Preheat the grill to medium heat (or broiler, or pan on the stove). Sprinkle the chicken with salt and pepper on both sides, and then grill until cooked through, about 5 minutes per side, depending what size/type chicken you are using. Allow the chicken to rest for a few minutes before slicing into strips.
Meanwhile, heat your pitas in a fry pan, in the toaster or spray with a bit of oil and place right on a gas burner. Top the pita with the chicken, tzatziki, tomatoes and onions. *I grilled my onions since I don’t really like them raw- it added a great layer of flavor! (I also added some thinly sliced cucumbers)
Tzatziki
16 oz. of plain or Greek yogurt (preferably not fat free)
1/2 hothouse cucumber or 1 regular cucumber, peeled and seeded
2-3 cloves garlic, minced
1/2-1 teaspoon white wine vinegar
salt and pepper
squeeze of fresh lemon juice
drizzle of extra virgin olive oil
Strain yogurt using a cheesecloth over a bowl for several hours or overnight to get out as much moisture as possible. (Since I was using Greek yogurt which was already quite thick, I skipped this step and it came out the perfect consistency)
Shred the cucumbers and then wrap in a towel and squeeze to remove as much moisture as possible. Don’t skip this step!
Mix together the strained yogurt, shredded cucumbers, garlic, vinegar and lemon juice. Add salt and pepper to taste. It’s best to refrigerate for 30 minutes or more before serving, so flavors can meld.
Drizzle a little olive oil over the top.
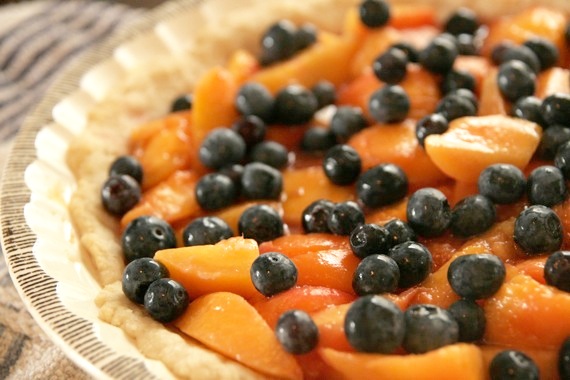
I absolutely, positively adore peaches. I can’t get enough of them. I guess it stems from my love of peach cobbler, or maybe it’s just because of their sweet, juicy, slightly tart nature. The best fruit, in my opinion. So naturally, when Erin of Milk and Honey, chose “Summer Fruit” for this month’s ‘You Want Pies With That?’ theme, I knew immediately that I would make a peach pie. No contest. In fact, I’ve been waiting a LONG time to make this pie! I saw this recipe on Taste of Home a loooong time ago, and have been waiting until peaches were in season to make it! Finally, the time came- thank my lucky stars! This is one FABULOUS pie. And I’m not just saying that- WOWEE! One bite and I knew I had a real winner of a recipe on my hands. The filling is thick and rich, but not at all too sweet. The topping is crisp, crumbly and slightly scented with cinnamon- it’s what gives a lot of the sweetness to the pie. YUM. I’ll most definitely be making this over, and over, and over again! I’m absolutely thrilled to submit this to July’s ‘YWPWT’ challenge!
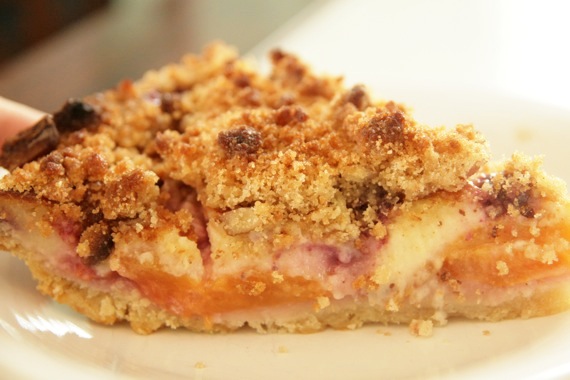
Peach-Blueberry Sour Cream Pie
-adapted from tasteofhome.com
Pastry for single-crust pie (9 inches)
3 cups sliced peeled peaches
1 cup fresh blueberries
2 tablespoons peach preserves or jam (I used plum)
1 cup sugar
1 cup (8 ounces) sour cream
3 egg yolks
1/4 cup all-purpose flour
1 teaspoon vanilla extract
TOPPING:
1/2 cup all-purpose flour
1/2 cup packed brown sugar
1/4 cup sugar
3 tablespoons chopped pecans
1/2 teaspoon ground cinnamon
1/4 cup cold butter, cubed
Line a 9-in. pie plate with pastry; trim and flute edges. In a large bowl, combine peaches, blueberries and jam. Transfer to pastry. In a small bowl, whisk the sugar, sour cream, egg yolks, flour and vanilla. Pour over peaches.
Bake at 425° for 30 minutes (keep an eye on it because it will brown quickly around the edges- you may need to cover them with foil if they’re getting too brown). Meanwhile, in a small bowl, combine the flour, sugars, pecans and cinnamon. Cut in butter until crumbly; sprinkle over pie.
Bake for 15-20 minutes or until a knife inserted in the center comes out clean and topping is golden brown. Cover edges with foil during the last 15 minutes to prevent over-browning if necessary. Cool completely on a wire rack for 3 hours before serving. Store in the refrigerator. Yield: 8 servings.
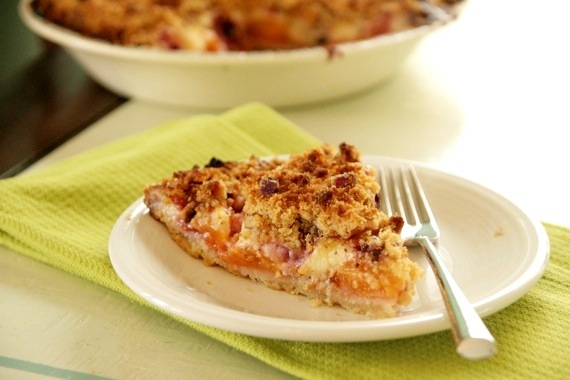
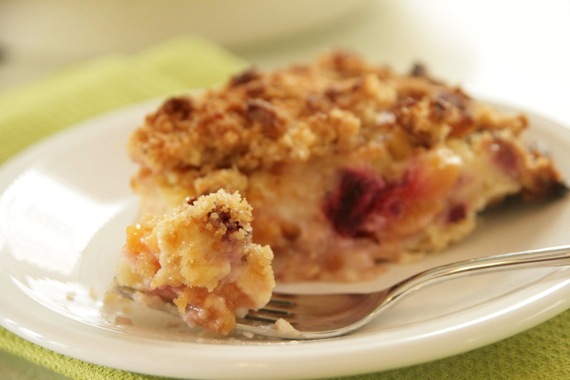
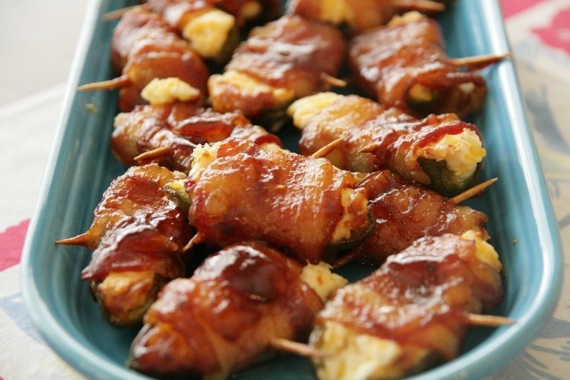
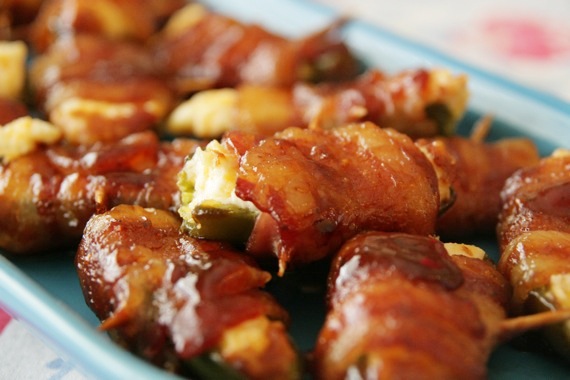
My mom made these for our 4th of July party. They’re insanely good. So good I was lying in bed around midnight that night wishing I had another one. I’m not sure what else to say here- those are the cold hard facts. Make these. Make them soon.
BBQ Bacon-Wrapped Jalapenos
20 fresh jalapenos, cut in half and seeded
2 blocks of cream cheese, at room temperature
1 cup shredded cheddar cheese
1 pound bacon, cut into thirds
BBQ sauce
toothpicks
Preheat the oven to 375 degrees. In a large bowl, mix the cream cheese and cheddar cheese. Spread some of the cheese mixture in each jalapeno half. Wrap each piece with a slice of bacon and secure with a toothpick. Brush with BBQ sauce, and place on a baking sheet lined with foil. Bake for 20-30 minutes, or until bacon is nicely browned.
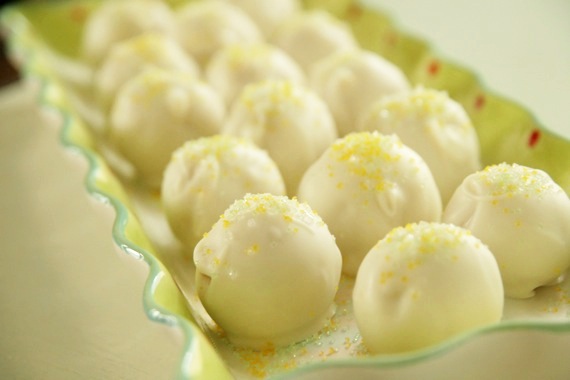
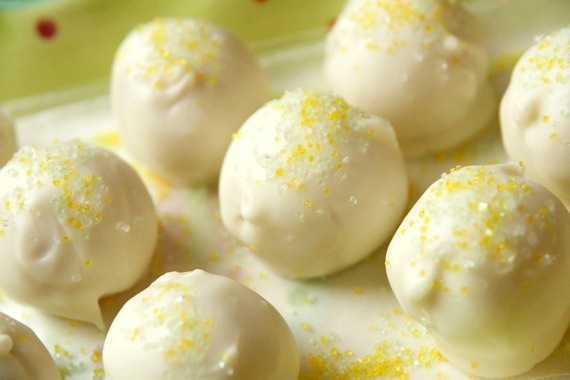
No doubt you’ve heard of cake balls, and Oreo truffles, and cookie dough truffles; and most likely, you’ve even made your own cake balls, Oreo truffles, etc. I know I’ve definitely made my fair share of all kinds. And that’s exactly what these are- more ‘dessert balls’. But these are oh-so much better than the run-of-the-mill Oreo truffles or cake balls! You all know how Oreo truffles work- crushed up Oreos, cream cheese and chocolate coating. These are essentially the same thing, except made with freshly baked sugar cookies and the zest and juice of lemon and lime. I must say….pretty darn tasty. These taste like key lime pie- they’re super tart, chewy and insanely rich. As soon as my hubby got home from work, I immediately shoved one into his mouth and his exact response was, “oh my gosh, these are AWESOME!!!” My family was inclined to agree- since there were so many, my grandmother took them to my aunt and uncle’s house where they were quickly devoured (so I’m told). They even passed the test of all tests- my cousin Ethan loved them. If Ethan loved them- they’ve got to be good! I have big plans to try these in all kinds of flavors- strawberry, peach, maybe even apricot. But for now, the lemon-lime is the flavor of choice!
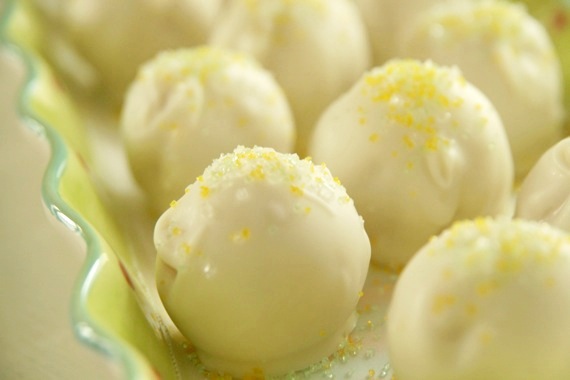
Lemon-Lime Sugar Cookie Truffles
1 batch of sugar cookie dough (I used a store-bought mix, but you can use any recipe you like!)
zest and juice of 1 large lemon and 1 large lime
1 1/2 blocks cream cheese (12 ounces) at room temperature
1 package white chocolate candy coating
colored sprinkles or coarse sugar, for garnish
Preheat oven to 350 degrees. Prepare the cookie dough as directed on package or recipe; add in the zest and juice of the lemon and lime and mix well. Spread the cookie dough in a greased 9×9 baking dish and bake for 30-40 minutes, or until cookies are fully baked. Cool completely.
When cookies are cooled, using your hands, remove from the dish and crumble into the bowl of a stand mixer or food processor (small chunks are fine). Add in the cream cheese and mix until the cookie crumbs and cream cheese are completely mixed together. Roll into 1-1 1/2 inch balls and refrigerate for at least 1 hour.
When the balls are thoroughly chilled, melt the white chocolate candy coating in the microwave, or over a double boiler. Carefully dip each ball into the white chocolate and turn to coat. Remove with a tooth pick and set on a cookie sheet lined with wax paper. Top with sprinkles. Repeat until all the balls are coated. Store in the refrigerator.
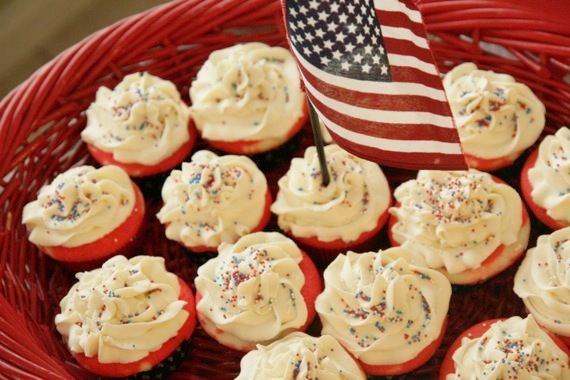
The 4th of July is such a great holiday, I think. I mean, aside from the whole “winning our independence” thing, which is obviously the most important, this is such a fun-loving, happy holiday. Who doesn’t love grilling/eating hot dogs, watching baseball, setting off fireworks and being with friends and family? That’s what it’s all about, to me. When I was a kid, we had a lake house where we would spend every single 4th of July- we’d sit out on the boat dock eating watermelon and shooting off fireworks. I always loved the sparklers. Some of my very happiest memories come from those 4th of July celebrations out at the lake house. Such good times. This year (like last year), we’re going to a baseball game – baseball, hot dogs and fireworks- is there anything more American? We just love it! In honor of the good ‘ol 4th – I decided to get a little patriotic in the kitchen and bake up some red, white and blue cupcakes. Nothing fancy, just simple white cake with a kick-butt buttercream. As always, I chose Dorie Greenspan’s recipe for her perfect party cake- it never fails. I also went with the standby Magnolia Bakery buttercream and topped it off with some patriotic sprinkles. Happy 4th of July, everybody- ENJOY!
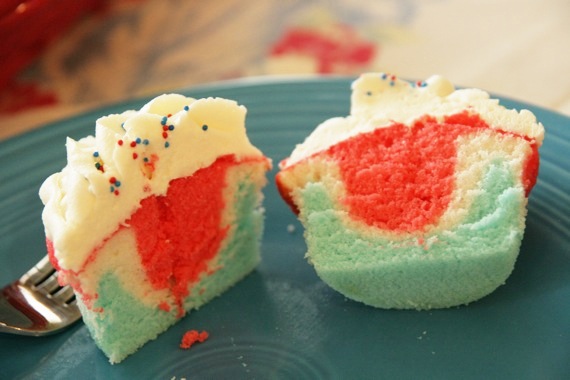
Red, White and Blue Cupcakes
-Dorie Greenspan’s Baking From My Home to Yours
2 1/4 cups cake flour
1 tablespoon baking powder
1/2 teaspoon salt
1 1/4 cups buttermilk
4 large egg whites
1 1/2 cups sugar
3 teaspoons grated lemon zest
1 stick (8 tablespoons) unsalted butter, at room temperature
1 teaspoon pure vanilla extract
Center a rack in the oven to 350 degrees. Fill cupcake pans with cupcake liners.
Sift together the flour, baking powder and salt.
Whisk together the buttermilk and egg whites in a medium bowl.
Put the sugar and lemon zest in a mixer bowl or another large bowl and rub them together with your fingers until the sugar is moist and fragrant. Add the butter and, working with the paddle or whisk attachment, or with a hand mixer, beat at medium speed for a full 3 minutes, until the butter and sugar are very light. Beat in the extract, then add one third of the flour mixture, still beating on medium speed. Beat in half of the buttermilk-egg mixture, then beat in half of the remaining dry ingredients until incorporated. Add the rest of the buttermilk and eggs, beating until the batter is homogeneous, then add the last of the dry ingredients. Finally, give the batter a good 2-minute beating to ensure that it is thoroughly mixed and well aerated. Using a small spoon, fill each cupcake liner 1/2 full with the batter.
Bake for 15 to 20 minutes, or until the cupcakes are well risen and springy to the tough – a toothpick inserted into the centers should come out clean. Transfer the cupcakes to cooling racks and cool completely before frosting them.
Vanilla Buttercream
-Magnolia Bakery
1 cup (2 sticks) unsalted butter, softened
6 to 8 cups confectioners’ sugar
1/4 cup milk
1 1/2 teaspoons vanilla extract (I used a good Mexican vanilla and it was fantastic!)
Place the butter in a large mixing bowl. Add 4 cups of the sugar and then the milk and vanilla. On the medium speed of an electric mixer, beat until smooth and creamy, about 3-5 minutes. Gradually add the remaining sugar, 1 cup at a time, beating well after each addition (about 2 minutes), until the icing is thick enough to be of good spreading or piping consistency. You may not need to add all of the sugar. Use and store the icing at room temperature because icing will set if chilled.
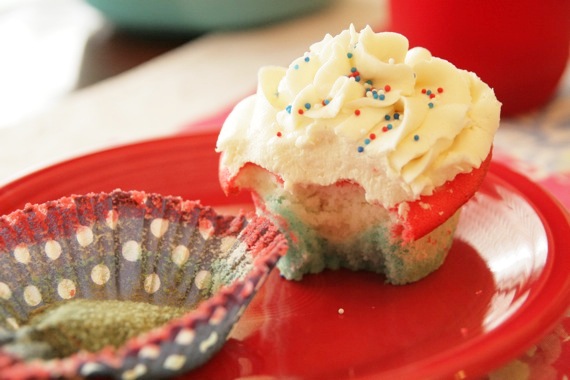
**For red, white and blue cupcakes- separate the cake batter into 3 different bowls. Add blue food coloring (I use gel) to one bowl, the red to another, and leave the third bowl as is. Fill each cupcake liner with a small, even layer of blue, then white, then red on top. Mine didn’t exactly come out perfectly straight- I ended up with more of a “wobbly” effect, but it really doesn’t matter as long as you get the three colors! I thought it looked kind of fun, actually! 🙂
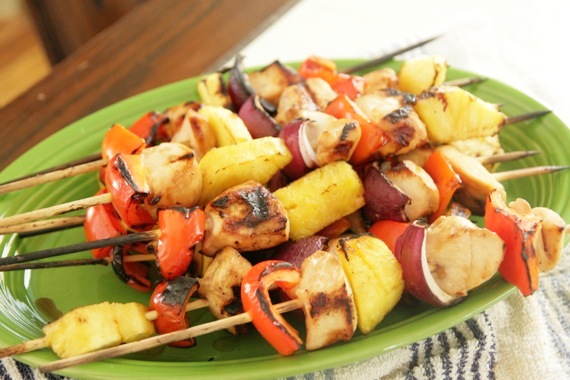
In the Summertime, you grill. Period. If you don’t know how to grill, you better learn, because as far as I’m concerned, it’s not Summer without grillin’. Of course, that’s just my own personal opinion; I have lots of them. Probably way too many. Just ask my hubby. Or my mom. Or my second grade teacher.
Honestly, one of my favorite grilled things to eat is chicken breast marinated in my favorite marinade, Lime Ponzu. It’s so amazingly simple, and the chicken turns out so sweet and juicy. We were having company recently and I thought the Ponzu marinated chicken would be great to serve along with my grilled corn salad and pineapple rice. Then I took it a step further and thought, “why not do a Ponzu shish-kabob with red peppers, red onions and pineapple?” Perfect! So that’s what we did and boy am I glad! Those kabobs were amazing! The chicken was perfectly tender and juicy, and the peppers, onions and fresh pineapple paired so well with the Ponzu- almost kind of a “Hawaiian” flavor. Totally delicious! We’ve made them twice since then! If you’re looking for a great grilling meal- look no further, because these are as easy as they come, yet really, really flavorful and delicious!
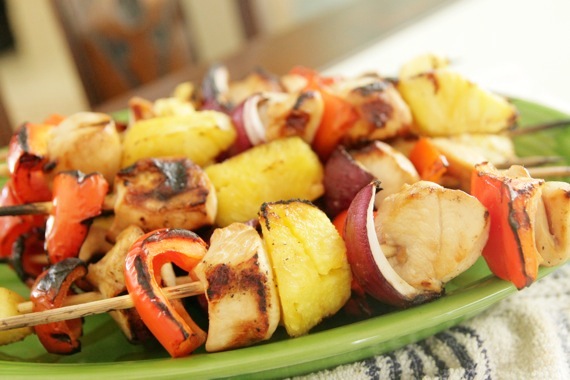
Easy Grilled Chicken Shish-Kabobs
4 boneless, skinless chicken breasts, cut into 1 1/2-inch cubes
1/2-3/4 cup Lime Ponzu (You can find this in the Asian section of the grocery store, next to the soy sauce)
3 red peppers, cut into 1 1/2-inch pieces
1 large red onion, cut into 1 1/2-inch pieces
1 fresh pineapple, cut into 1 1/2-inch chunks
freshly ground black pepper to taste
skewers (wooden or metal- if you use wooden, make sure to soak them in water for at least 30 minutes before grilling so they won’t catch on fire)
Place the cut up chicken in a large ziploc bag with the marinade. (*Save 2 or 3 tablespoons of the Ponzu for later use.) Refrigerate for at least 1-2 hours.
Take out the chicken and dispose of the marinade. To assemble the kabobs, place the red pepper first, then the chicken, then the pineapple, then the onion, then repeat with the same order. Try to fit two of everything on each skewer. You’ll end up with around 12-14 skewers.
Grill the kabobs over medium-high heat for about 8-11 minutes, turning 3 or 4 times, until the chicken is cooked through. Occasionally brush with the reserved marinade and season with the pepper. Remove from heat. Serve with rice and a cold salad and enjoy! Serves 4-6.
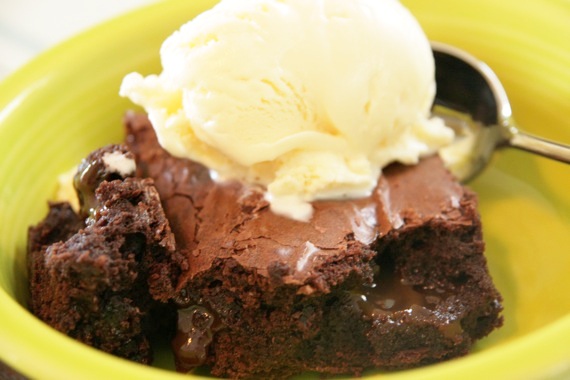
Are you ready for sheer deliciousness? A miracle in brownie form? How about a nice gooey, warm, chewy brownie with a layer of melty, slightly salty, sweet caramel? Sound good? What if I told you it was one the easiest things you could possibly make? Awesome, right?! Well it really is! This weekend we had some opera friends of mine, Christian and John over for lunch; I knew I wanted to make something easy, yet delicious, and Christian told me I had great legs, so I made him these brownies. Compliments get you really far in my house. 😉
When I say these are easy, I’m not kidding around- basically, if you have a brownie mix and a jar of caramel, you’re all set. I almost feel like I’m cheating posting this recipe- but since these were so delicious I just had to share them with you! The recipe comes from Susan of She’s Becoming Doughmesstic; she makes her own homemade caramel, which I’m sure is just delicious, but since I was pressed for time, I opted for the jarred stuff (which is great!). Believe me when I tell you these are insanely delicious! Melt-in-your-mouth delicious! Especially with a scoop of vanilla ice cream on top! Give them a try this week!
Salted Caramel Brownies
–She’s Becoming DoughMessTic
Make the Caramel: (*Or just cheat like I did and use the jarred kind- Hershey’s works great!)
1/2 cup heavy cream
1 teaspoon sea salt
1 cup sugar
2 tablespoons light corn syrup
1 teaspoon Vanilla
1/4 cup sour cream
In a small saucepan, combine the cream and the salt. Simmer over very low heat until the salt is dissolved. set aside.
In a medium saucepan combine the sugar and corn syrup carefully. They will not combine well until the sugar begins to melt. Cook over high heat until an instant-read thermometer reads 350 degrees, 6 to 8 minutes. Without a thermometer, just pull the sugar off the heat when it is a medium goldish brown – it will continue to cook in the heat of the pan. Better to pull it too early than too late. Remove from the heat and let cool for one minute.
Add the cream mixture and the vanilla to the sugar mixture. Whisk in the sour cream. Let the caramel cool to room temp, then follow the brownie instructions. Transfer to an airtight container and refrigerate any leftover caramel. It makes a great ice cream topping or tastes great straight out of the jar.
Now prepare the brownies.
For the brownies:
1 box Fudgy Brownie Mix
2 Large Eggs
1/2 cup Butter, Melted
2 Tablespoons Water
Preheat oven to 325 degrees.
Combine the box mix with eggs, melted butter, and water.
In a greased 8×8 pan, pour a little over half of the brownie batter and bake for 18 minutes. Remove from the oven and pour in the caramel. If you’re using jarred caramel, be sure to sprinkle with salt- about a teaspoon. On top of the caramel, add the rest of your brownie batter. If it doesn’t pour smoothly, just plop it in and swirl it around a little bit. Return to the oven and bake for another 18-22 minutes. Brownies will still appear a little shaky, due to the caramel, but they will firm up once cooled. Do not overbake.
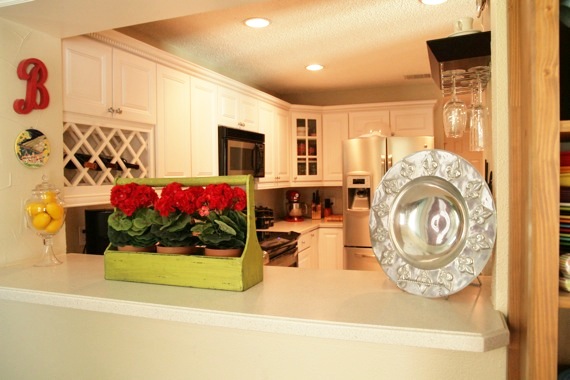
I absolutely love it when food bloggers post pictures of their kitchens on their blogs- I love to see other people’s kitchens and get an inside look at where it all happens! It’s so much fun to see personalities come to life through that person’s kitchen style; the way they decorate, what colors they love, what kind of gadgets they like to use, what cookbooks they display, etc. So I decided that after 2 years of food blogging, it was about time you all got to see where it all happens! So……welcome to my kitchen!
Looking in from the entrance to the dining room. The kitchen is right off of the dining room and a lot of the time I end up using the tables as extra counter space or a cookie/cake cooling station.
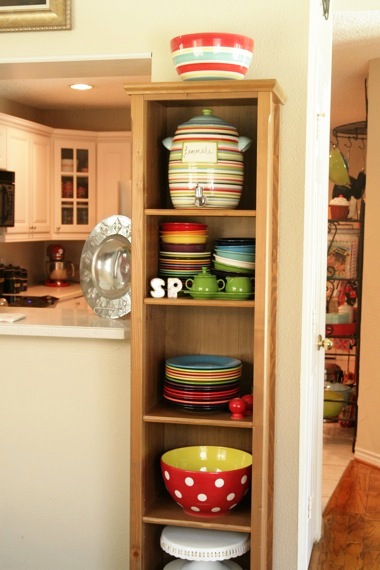
I love this shelf! This is where I keep all my Fiestaware plates and bowls- and lots of other colorful odds and ends!
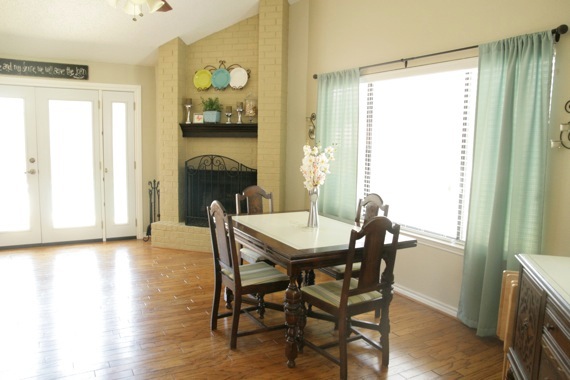
This is the dining room. We don’t have a breakfast area, really; just one big area with two small sections (sort of). This is the table I take all my pictures on, and it’s my great-grandmother’s furniture- it’s been in the family a long time!
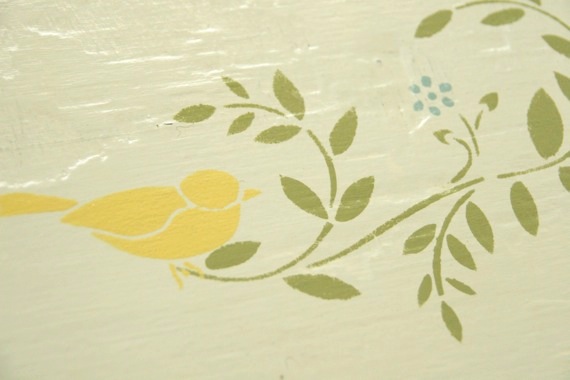
Close-up of the dining room table. I just painted it- it used to be black and white striped (which you’ve probably noticed in all of my old pictures- there were always stripes in the background!)
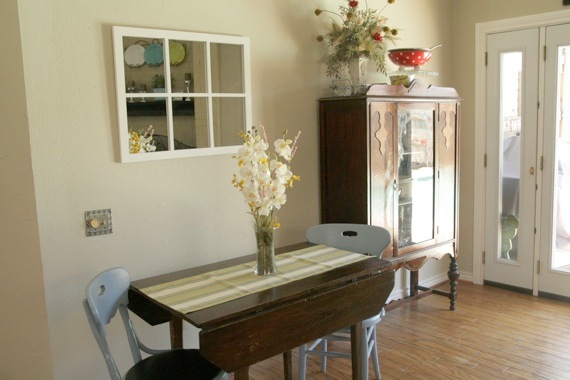
The “breakfast area”- sort of. Basically just the other half of the dining room. The kitchen is just off to the left there.
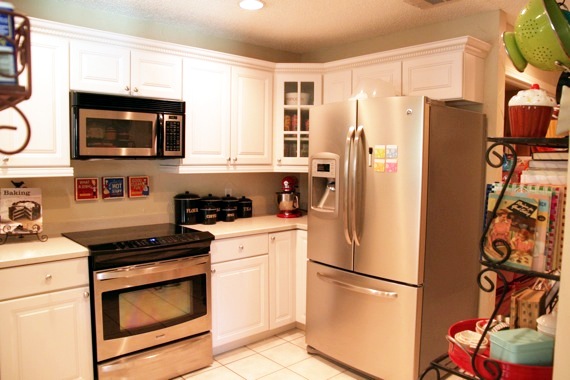
And here we are, finally- the kitchen!
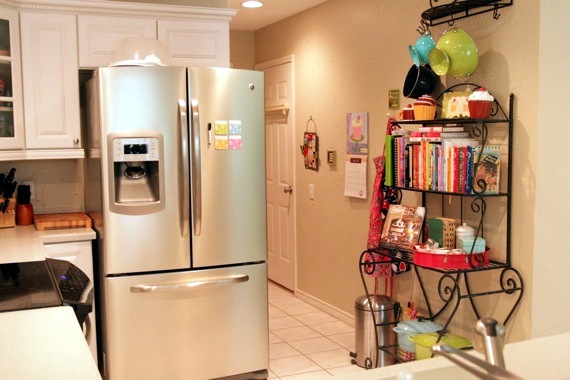
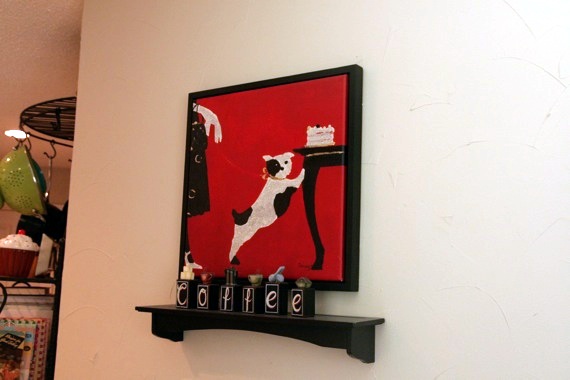
My favorite picture in the house!
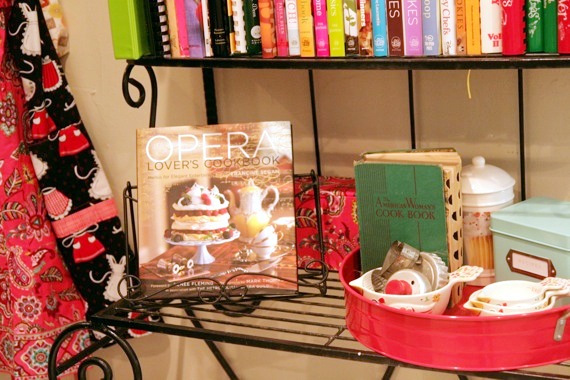
The American Woman’s cookbook (the green one) is the first cookbook my great-grandmother bought as a 19 year-old bride over 80 years ago. And in the background is my new apron (the pink one) that hubby gave me for my birthday last week!
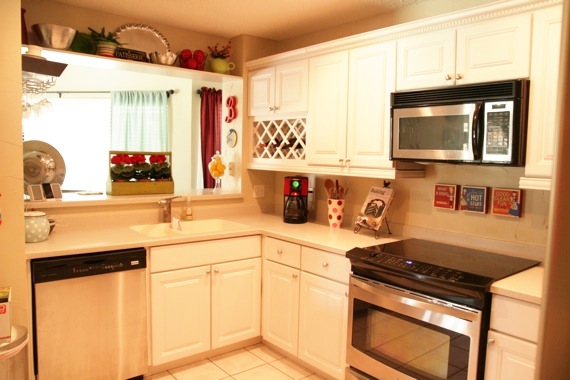
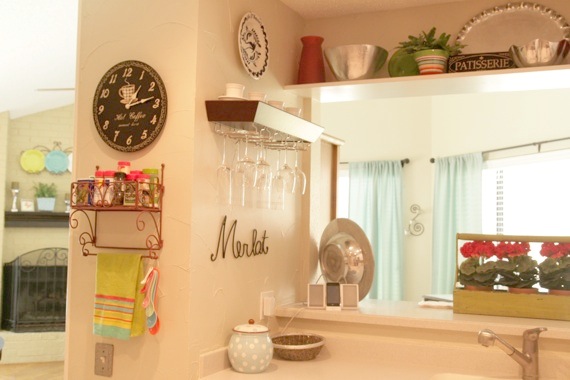
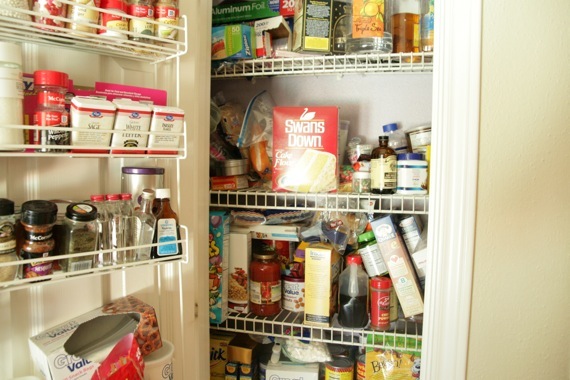
The smallest pantry known to man…*sigh*
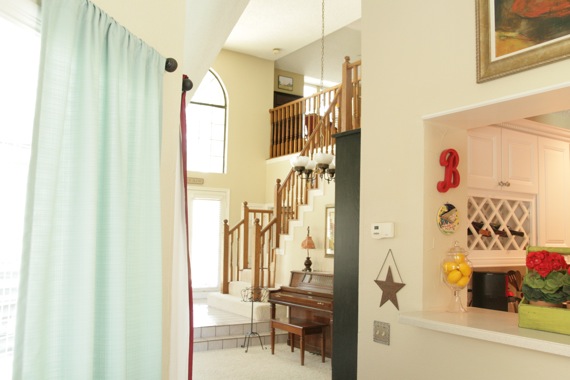
Looking into the living room from the dining room
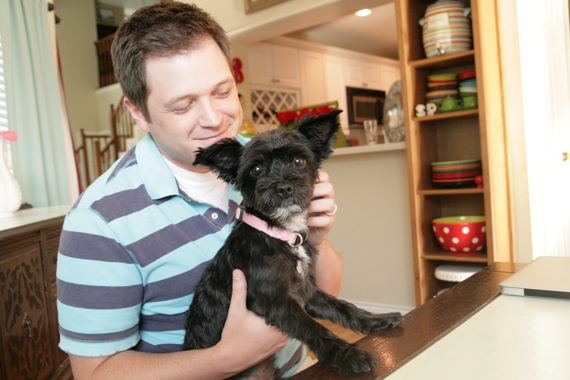
And of course, my kitchen wouldn’t be nearly as happy and full of love if these two characters weren’t in it!
So there you have it- my cozy little kitchen (…and dining room)! This is where it all happens- the good, the bad and (definitely), the ugly! I really hope you’ve enjoyed the “tour”!


