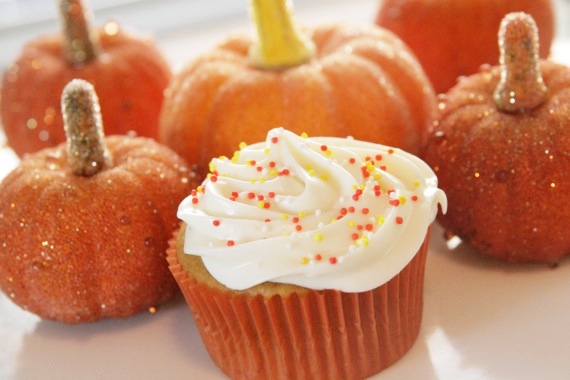
This has been a great couple of days – first off, I received my copy of Dorie Greenspan’s new cookbook, Around my French Table a couple of days ago (Weeeeeee!!), yesterday was the first official day of Autumn, and today I celebrate 4 years of marriage to the man of my dreams (happy anniversary Sweetie! I love you!!!). What a great week!! Also, I was lucky enough to find four cans of pumpkin at the grocery store the other day! Hallelujah!!! So naturally, the only logical thing to do was make pumpkin spice cupcakes! Yippee!! My awesome new boss/coworker, Albert asked if I’d be willing to make cupcakes for the 4th and 5th period girls’ choirs last week. And of COURSE I said yes, those girls are all totally sweet and fun! Albert pretty much let me pick what to make, but he did request these pumpkin cupcakes with cream cheese frosting as well. Done and DONE!
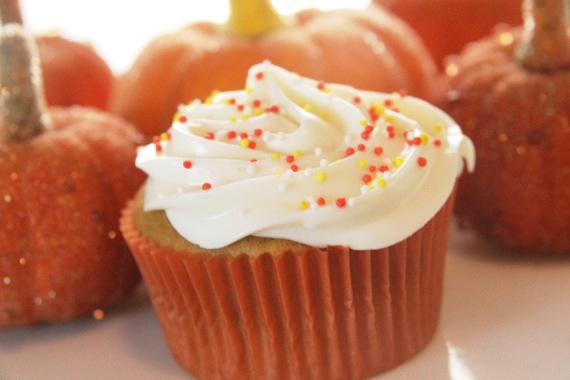
Let me just tell you: these are SO delicious! So moist and fluffy with just the right amount of spice; and the tangy cream cheese frosting really completes the whole cupcake. A winner, for sure! I LOVED these and so did the girls- I made these along with my Perfect Chocolate Cupcakes and the pumpkin ones were the first to disappear! I can’t wait to make these again- they’re the absolute perfect Fall cupcake, hands down!
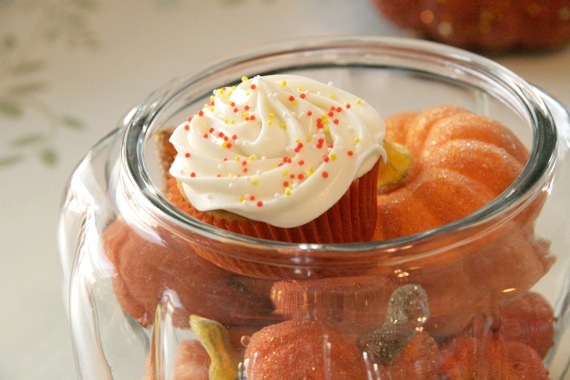
Spiced Pumpkin Cupcakes
-Martha Stewart’s Cupcakes
*Makes 32 cupcakes
4 cups cake flour (not self-rising), sifted
1 teaspoon baking soda
1 Tablespoon + 1 teaspoon baking powder
1 teaspoon salt
2 teaspoons ground cinnamon
1 Tablespoon ground ginger
1 teaspoon freshly grated nutmeg
1/4 teaspoon ground cloves
1 cup (2 sticks) unsalted butter, room temperature
2 1/2 cups packed light-brown sugar
4 large eggs
1 cup buttermilk
1 1/2 cups canned pumpkin (not pie filling)
cream cheese frosting (recipe below)
Preheat oven to 350°F. Line standard muffin tins with paper liners. Sift together flour, baking soda, baking powder, salt and spices.
With an electric mixer on medium-high speed, cream butter and brown sugar until pale and fluffy. Add eggs, one at a time, beating until each is incorporated, scraping down sides of bowl as needed. Reduce speed to low. Add flour mixture in three batches, alternating with two additions of buttermilk, and beating until just combined. Add pumpkin; beat until just combined.
Divide batter evenly among lined cups, filling each three-quarters full.
Bake, rotating tins halfway through, until golden brown, 15 to 18 minutes. Transfer tins to wire racks to cool 10 minutes; turn out cupcakes onto racks and let cool completely. Cupcakes can be refrigerated up to 3 days in airtight containers.
Frost with cream cheese frosting and top with Fall-themed sprinkles, if desired.
Cream Cheese Frosting
-Dorie Greenspan’s Baking from My Home to Yours
8 ounces cream cheese, room temperature
1 stick unsalted butter, at room temperature
3-4 cups confectioners’ sugar, sifted
1 tablespoon fresh lemon juice
1/2 teaspoon vanilla extract
Working with a stand mixer, preferably fitted with a paddle attachment or with a hand mixer in a large bowl, beat the cream cheese and butter together until smooth and creamy. Gradually add the sugar (start with 2 cups, then gradually add more until you get the desired consistency. It needs to be thick enough to spread or pipe) and continue to beat until the frosting is velvety smooth. Beat in the lemon juice and extract. Refrigerate until needed.
And lastly, I just wanted to thank you all for your sweet comments, votes and support throughout the Project Food Blog competition so far. It means so much to me to have your support and encouragement – really. Voting ends tonight (I think at 6:00…maybe), so if you haven’t had a chance yet, I’d love your support! Thanks again, for being such wonderful readers! I love you all! 🙂 And now, I must rush off and get ready for my dinner date with a VERY handsome fella!

So, it’s that time. As promised, here’s a reminder to vote for me in the Project Food Blog competition. Now would be a great time for you to send this to all your buddies, family members…well, you get the idea- anyone you can think of!!
Why should you vote for me?? Well for starters, because we’re buds. I love you all like family- you’ve shared in my successes, failures, parties, holidays, good news and bad news.
You were there when we adopted Izzy and bought our first house.
You’re sweet comments and encouragement have gotten me through some of the hardest times in my life.
And now I need you again. I need your votes. Here’s how to do it: Just head over to Foodbuzz, click “Join Foodbuzz” in the top right corner, sign up (I promise, you won’t be getting junk mail!), then go HERE (that’s ME!!) and vote. It takes, like, 2 seconds, really!
Please, please, pretty please?? It would really mean so much to me. Really. Thank you SO, SO, SO much!!!!
Please don’t forget to tell all your friends!! 🙂
And now begins the start of a new and exciting adventure I like to call, “What the Heck Was I Thinking?!”…..
Most of you know by now that I’ve entered myself in Foodbuzz’s Project Food Blog. If you’re not familiar, it’s basically like The Next Food Network Star or Top Chef, except for food bloggers (I know what you’re thinking and yes, apparently I am insane). There are 10 challenges and over 1,800 food bloggers. This week is the first challenge. So, yeah…I’m gonna need your votes. I’m also gonna need your friends’, families’, students’, bosses’, coworkers’, pen-pals’, pets’, neighbors’, dentists’ and ex-spouses’ votes. And anyone else you can think of. If you don’t mind 🙂 (don’t worry- I’ll remind you when to vote!).
So, the first Project Food Blog challenge is to describe what defines me as a food blogger and why I think I should win. When you think about it, that’s kind of a tough question. What defines me as a food blogger? Jeez, my husband, my love of opera and singing, my family, my love of food and baking?? These are all good answers but none of them are really spot-on. I guess when you get right down to it, the one thing that defines me and my blog is, well…me. Where I come from, how I got here and all of the things in my happy life that make me who I am.
In college, I was a vocal performance major. I had big plans to start my opera career in NYC after graduating. Seriously. I know it’s cliché, but that was my dream. I never cared about food or cooking. I thought women who had big families and cooked and took care of their husbands and homes were crazy. Why would they choose that life? They were missing out on their own career.
My Junior year, though, everything changed when my eyes were opened and I finally took notice of a shy, sweet guy I had grown up with. I told him I was in love with him on Thanksgiving day 2004. We were engaged 2 months later. So much for NYC. My dreams had completely changed and I was utterly and beautifully happy.

At first, when Joel and I were newly married, I still wasn’t a very good cook. I made a lot of spaghetti and “dinners-in-a-box”. Then slowly but surely, as my cooking skills improved, I started realizing, there wasn’t much that made me happier than putting a good, homemade meal on the table for my hard-working husband each night. I started taking pride in my cooking. More and more, Joel and my family and friends would comment on how good a dish was, or how rich and delicious a cake would taste. I realized that this is what I loved and was meant for. I was never meant to run off to NYC and have a busy opera career (I still sing with an opera company chorus and teach voice lessons, and that’s just enough for me). I was meant to love a gentle, sweet man and take care of his home, cook him meals, and maybe have his children someday. I had become one of those women I hated. And I was thrilled. I’m still thrilled. I love baking, cooking and having family around my table. That’s what it’s all about for me. This is where I’m meant to be. This is why I blog. Instead of just having my husband at my table, I have thousands now. I get to share my food on a daily basis with my friends, family and thousands of strangers (now friends) who share my love of cooking and eating. I love getting comments from old elementary school teachers or ladies from my hometown church telling me they loved my last recipe and are so proud of me. My recipes are nothing fancy- just simple, down-to-earth dishes that anyone can make at home. I love getting emails from readers saying thank you for a great dish, or how much they love my recipes. This is why I blog. I have pride in where I come from and I want to share it with everyone I can.

The reason I should win Project Food Blog? Well, that’s really for you to decide. Just like every other contestant here, my passion is food and cooking. Writing about my kitchen successes and disasters is therapeutic and I think I’m fairly decent at it. I love the fact that I can write a silly little post about peanut butter and jelly cupcakes (they ARE really good, though!) and thousands of people actually want to read about it…that’s pretty amazing to me. Some mean kids stole my diary once, but other than that, I don’t recall anyone ever really wanting to read something I wrote. What simply started out as a hobby has grown into a passion. I enjoy this. Tremendously. I enjoy taking pictures of my food, writing about it, sharing my experiences with you…I enjoy it all.

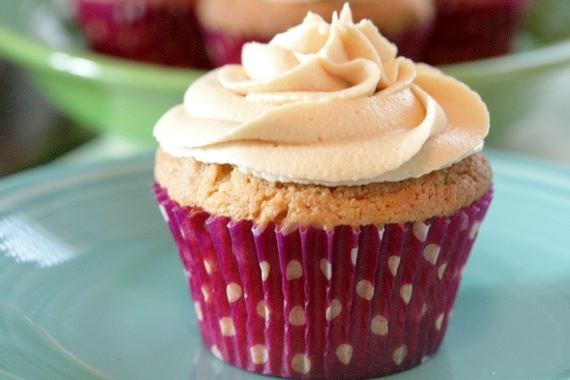
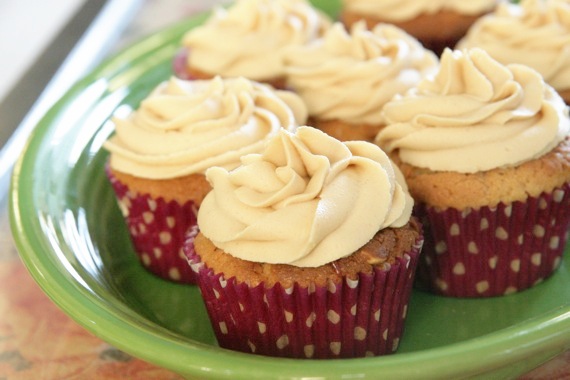
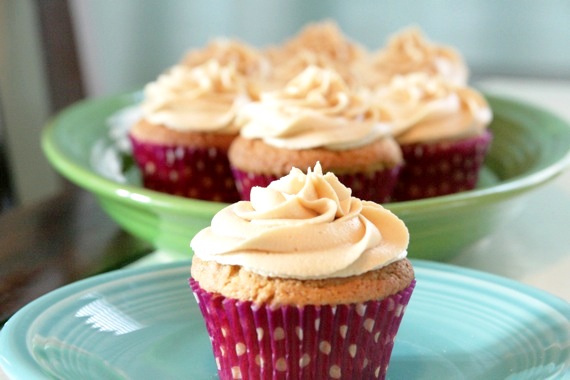
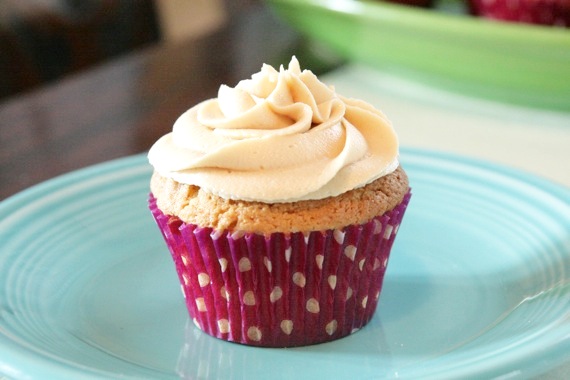
Ok, I know I said that these were my favorite cupcakes, and they ARE practically perfect and amazingly delicious……however, I can’t keep my feelings a secret any longer. I’m sorry, Perfect Chocolate Cupcakes, I’ve met someone else. That’s right, these peanut butter and jelly cupcakes are my new favorite. There, I said it! Phew! I feel so much better now!
I’m sort of a peanut butter and jelly fiend…I love it. I eat it all the time and never get tired of it. I ate it as a kid. I ate it practically every single day in college and I eat it now. Last night, hubby went to the baseball game with some guys, so I was all alone for dinner and thinking to myself how much I love peanut butter and jelly (that’s right- I really do sit and think about things like that quite often), and decided right then and there to make these cupcakes. A star was born. I used Martha Stewart’s recipe for the cupcakes and filled the centers with plum jam (my favorite!), then topped it all off with a creamy, dreamy peanut butter frosting. I. Am. In. Love. So are my coworkers. I took these to work and came home with an empty box- they were a huge hit with everybody! Something about the combination of the peanut butter frosting with the tart, fruity jam….a total match made in heaven. Do yourself a huge favor and try these ASAP!!
Peanut Butter and Jelly Cupcakes
-adapted from Martha Stewart’s Cupcakes
1 3/4 cups all-purpose flour
3/4 tablespoon baking powder
1/2 teaspoon salt
1/4 teaspoon baking soda
1 1/2 sticks unsalted butter, softened
1 1/3 cups sugar
2/3 cup creamy peanut butter (believe it or not, I used reduced fat and you totally CAN’T tell a difference!)
3 large eggs
1/4 cup sour cream
1 cup chopped peanuts
2 tablespoons milk
1/2 teaspoon pure vanilla extract
1 cup jam (your favorite flavor- I use plum)
Peanut Butter Frosting (recipe below)
Preheat oven to 350 degrees. Line standard muffin tins with paper liners. Whisk dry ingredients in a large bowl. Cream butter, peanut butter and sugar with a mixer until light and fluffy. Add eggs, 1 at a time, beating after each addition.
Reduce speed to low. Mix in the sour cream, vanilla, milk and peanuts. Add dry ingredients slowly. Scrape sides of bowl. Divide batter among muffin cups, filling each 2/3 full.
Bake cupcakes until testers inserted into centers come out clean, about 20 minutes. Let cool in tins on wire racks. Cupcakes will keep, covered, for up to 3 days. Makes approx. 18 cupcakes.
Peanut Butter Frosting
-adapted from Martha Stewart Cupcakes
1 stick unsalted butter, at room temperature
1 cup creamy peanut butter
2 tablespoons cream cheese, softened
1/3 cup powdered sugar
1 teaspoon vanilla extract
Cream the butter, peanut butter and cream cheese together until smooth. Add in the powdered sugar. Stir in the vanilla. Use immediately or refrigerate until needed.
To assemble:
When cupcakes are cooled, using a small paring knife, cut out a small hole in the top of each cupcake; discard crumbs. Fill a piping bag fitted with a round tip (I used a Wilton #12) with the jam. Insert the tip into the center of the cupcake and squeeze the jam inside (you’ll want to apply a decent amount of pressure) until the hole is filled. Repeat until all the cupcakes are filled. Pipe or spread the peanut butter frosting on each cupcake (I used a star tip). Refrigerate until ready to serve.
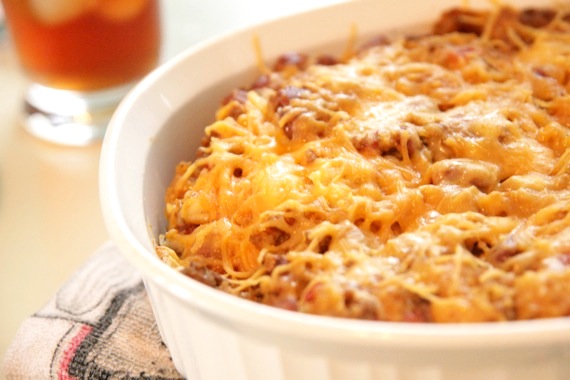
Here’s another one of my mom’s recipes. She’s made this one for as long as I can remember and my family has always loved it! Mexican Casserole. It’s super easy to make and always a crowd-pleaser. If you ever need a dish for a large crowd, I’d recommend this one- you can double or triple the recipe and even make it ahead of time. My mom makes a big one and freezes the leftovers- it keeps beautifully! Perfect for potlucks, Mexican-themed dinner parties or even Sunday Night Football!
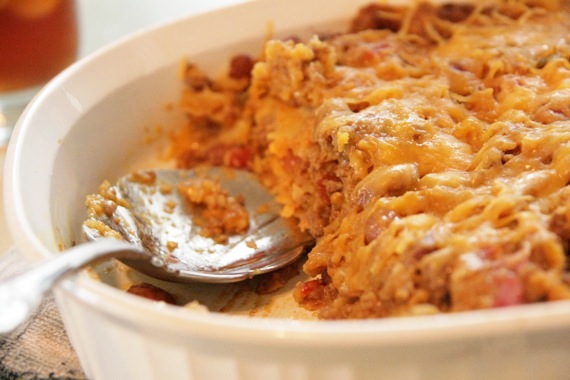
My Mom’s Mexican Casserole
1 pound lean ground beef
1 can Ranch Style beans
1 10-12 ounce bag tortilla chips, crushed
1 can Ro-tel tomatoes
1 small onion, chopped
2 cups shredded cheddar cheese, divided
1 package taco seasoning
1 can cream of chicken soup
1/2 cup water
sour cream and salsa for serving
Preheat oven to 325 degrees. In a large skillet, brown meat and drain off fat. Stir in beans, tomatoes, onion, taco seasoning, soup and water. Simmer over medium-low heat until everything is well combined and heated through.
Grease a 9×13 casserole dish. Put down a layer of crushed tortilla chips, followed by a layer of the meat/bean mixture, then half of the cheddar cheese. Repeat layers. Cover with foil and bake for 20-30 minutes, or until bubbly.
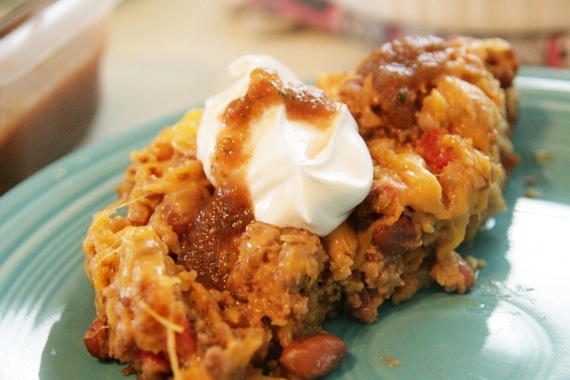
Let sit for 5-10 minutes before serving. Top with sour cream and salsa. Enjoy!
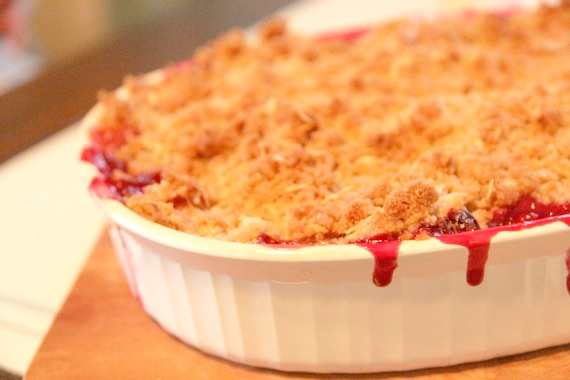
First of all, I know this is a terrible picture, but I just HAD to share this recipe with you!! We had our good friends Sean and Shelby (and their little boy Colin and dog Fancy) over for dinner the other night and I served this for dessert – WOW, was it good! Once again, Ina Garten doesn’t disappoint- this is her recipe and it’s delicious! The top was so crunchy and buttery and the inside was thick and gooey (YUM). I even cut back on the butter and sugar and it was still SO rich and sweet! Served with a scoop of vanilla ice cream, it just doesn’t get much better…..
Plum Crunch
-adapted from Ina Garten
3 pounds black plums, pitted and quartered
1/2 cup sugar
1/4 cup all-purpose flour
juice of half a lemon
For the topping:
1 1/2 cups all-purpose flour
1/2 cup granulated sugar
3/4 cup light brown sugar, lightly packed
1/2 teaspoon kosher salt
1 cup oatmeal
12 tablespoons (1 1/2 sticks) cold unsalted butter, diced
Vanilla ice cream, for serving
Preheat the oven to 375 degrees F.
For the fruit, in a large bowl, combine the plums, sugar, flour, and lemon juice. Pour the mixture into a 12 by 8-inch shallow baking dish.
For the topping, combine the flour, granulated sugar, brown sugar, salt, oatmeal, and butter in the bowl of an electric mixer fitted with the paddle attachment. Mix on low speed until the mixture is crumbly and the butter is the size of peas. Scatter evenly over the plum mixture.
Bake the plum crunch for 40 to 45 minutes, until the plums are bubbling and the top is browned. Serve warm or at room temperature with ice cream.
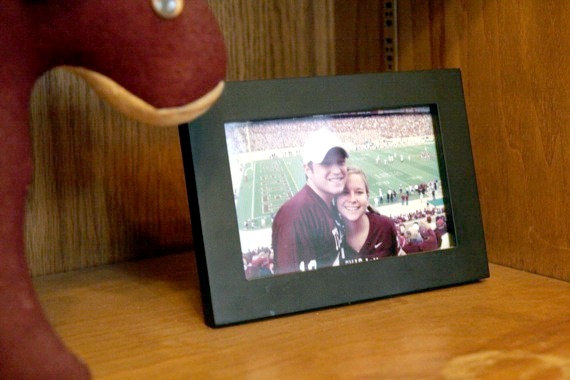
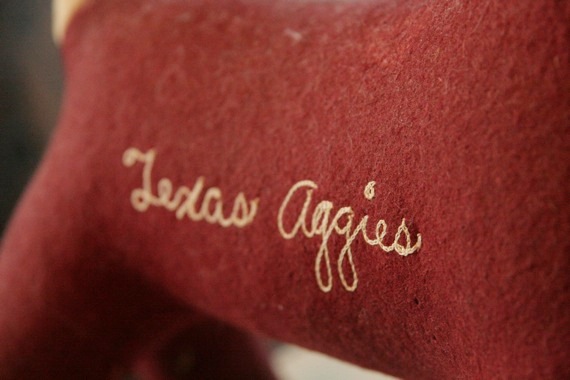
The weather is (slowly) changing from boiling hot to cool and crisp, every Saturday from here until Thanksgiving will be taken up with us either road-tripping to College Station, Tx or glued to the T.V., there’s an obscenely large, menacing maroon and white flag flying proudly in our front yard, and my husband has turned from being a mature, respectable man into a squealing 8 year-old child. This can only mean one thing: it’s Aggie football season, indeed. Yes, friends, my husband and I are Aggies. Big ones. My hubby went to school there and even though I didn’t (there’s no music program to speak of, hardly), I come from a family of proud Aggies. Therefore, every September, we get serious about Fightin’ Texas Aggie Football.
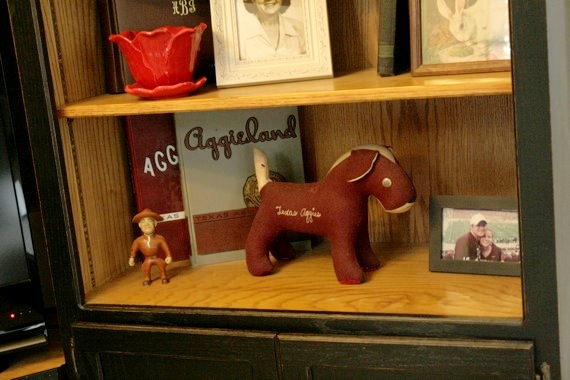
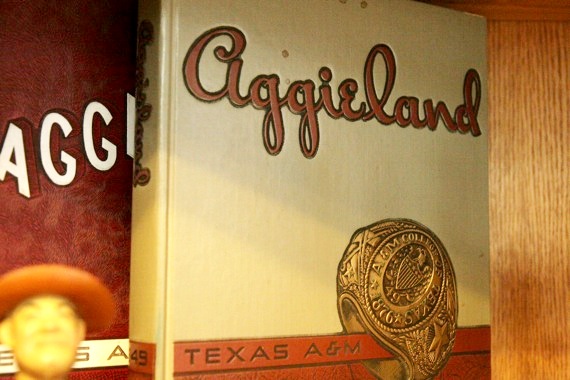
This is our “Aggie shelf” in the living room- these were my granddad’s belongings from his days at A&M – yearbooks, (very old) stuffed animals and lots, lots more. We’re so proud to display his things in our home; Joel, especially.
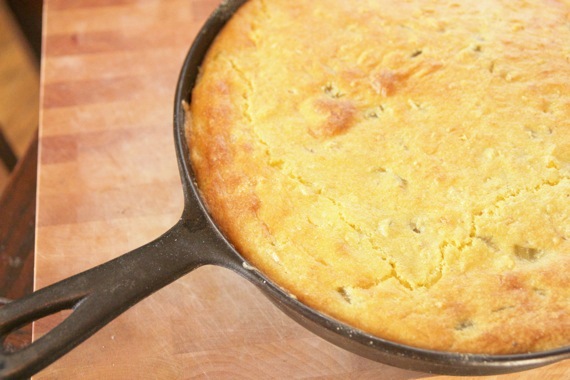
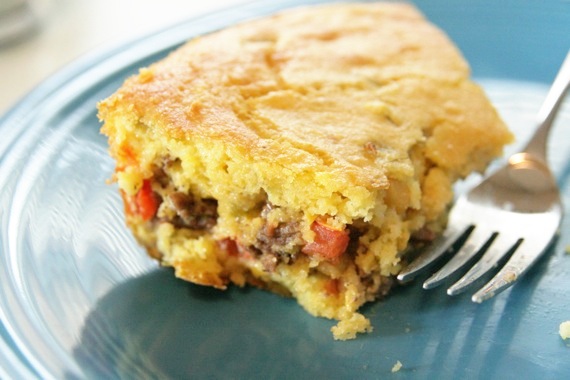
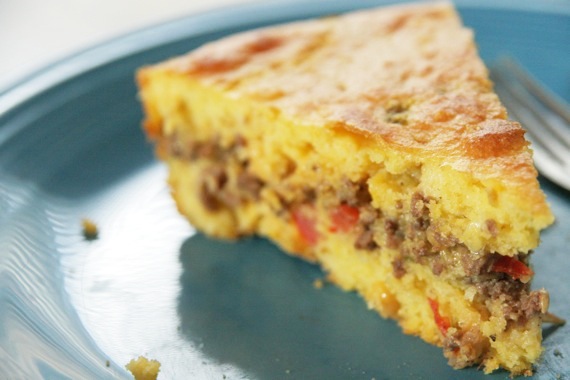
Football food is SO good (which, by the way, if you love it as much as I do, check out my “Football Food” tag! Lots of game-day goodies in there!). There’s nothing better than having some friends over to watch the game and eat good food – like this pie! It’s an old family favorite that gets made a lot around football season. I love the layer of spicy beef and cheddar cheese- it has SO much flavor! The good news is, this keeps really well in the fridge- just pop the leftovers back in the oven for 10 or 15 minutes and it’s just as moist and flavorful as it was the first day- maybe even better!
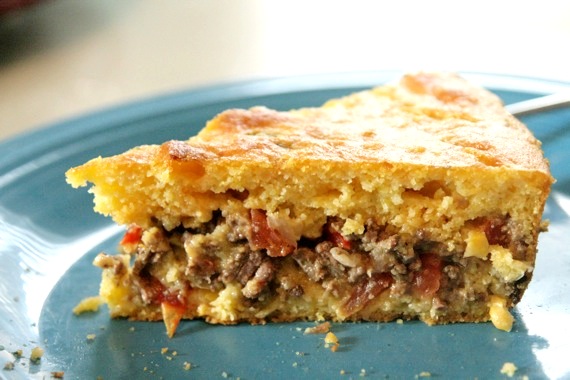
Game-Day Mexican Cornbread Skillet Pie
1 1/2 cups cornmeal
1 teaspoon salt
2/3 cup oil
1 cup sour cream
3 teaspoons baking powder
1 can cream style corn
2 eggs, slightly beaten
1 small can green chiles
2 cloves garlic, minced
1 onion, chopped
1 red bell pepper, chopped
2 roma tomatoes, seeded and chopped
1 pound lean ground beef
1 teaspoon cumin
1 teaspoon chili powder
1 teaspoon black pepper
1 teaspoon salt
dash cayenne pepper
1 cup shredded cheddar cheese
Preheat the oven to 350 degrees. Mix the first 8 ingredients in a bowl and set aside. In a medium pan, saute the onions, garlic and peppers over medium-high heat until soft. Add in the ground beef and cook through. Drain off grease and stir in the tomatoes, cumin, chili powder, black pepper, salt and cayenne pepper. Remove from heat.
Grease a cast iron skillet (or any oven-safe skillet) and sprinkle the bottom with a little cornmeal. Spread half of the cornbread mixture, followed by the beef mixture. Top with the cheddar cheese, then spread the remaining cornbread mixture over the top. Bake for 45-50 minutes, or until golden brown. Enjoy in front of the T.V. while cheering for your favorite football team! Serves 4.
Recipe source: Sing For Your Supper original (though technically I guess I can’t take credit since my mom has been making it for years!)
Gig ‘Em and God Bless! 😉
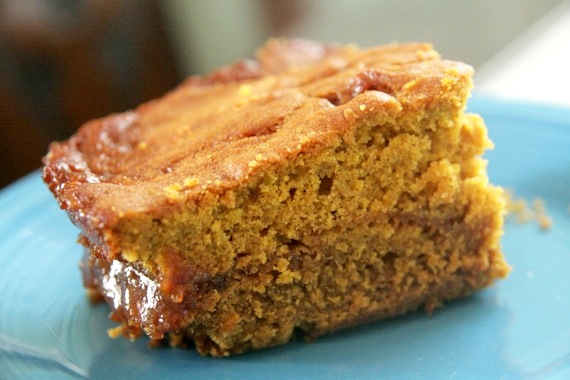
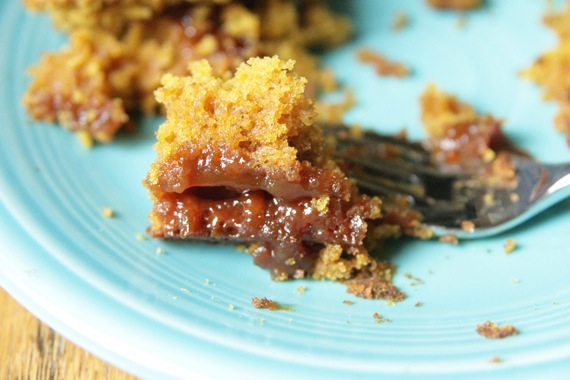
WHEW! Boy, has it been a long week! Sorry I’ve waited so long to post something new…this was the first week of voice lessons at the high school and it’s been just a wee bit busy lately. I’ve been dealing with schedules and All-State audition music and emailing parents. BUT, regardless of being super go, go, go all the time- it’s been a great week and I’m excited to be starting another great school year. Also, the weather has been almost bearable lately – we’ve actually gotten some rain and cool breezes (woah!). I put a little pumpkin pie spice in my coffee and burned a cinnamon-pumpkin candle last night and it ALMOST felt like Fall! How about that?! 🙂 Yesterday, I was lucky enough to find canned pumpkin at the grocery store, so naturally, I stocked up. As soon as I got home, I made these blondies. Sheer deliciousness. Every year I forget how much I adore Fall-flavored baked goods. Anyway, remember these salted caramel brownies? That’s where I got the idea for these pumpkin blondies. I’ve made regular pumpkin blondies before, but I thought adding a layer of salted caramel would be extra special! I have to admit, I’m patting myself on the back a little bit after tasting these….it’s pretty hard to beat pumpkin blondies stuffed with gooey salted caramel. Hello Fall, I love you.
Salted Caramel Pumpkin Blondies
1/2 – 3/4 cup caramel sauce, however much you want, really (homemade is great, but store-bought is just fine too)
2 cups all-purpose flour
1 tablespoon. pumpkin pie spice
1 teaspoon baking soda
1 teaspoon salt, divided
2 sticks (16 tablespoons) unsalted butter, at room temperature
1 1/4 cups brown sugar
1 large egg
2 teaspoons vanilla extract
1 cup pumpkin puree
Preheat the oven to 350° F. Butter a 9×9-inch baking dish. In a medium bowl, combine the flour, pumpkin pie spice, baking soda and 1/2 teaspoon of the salt. Stir together and set aside.
In the bowl of an electric mixer fitted with the paddle attachment, beat together the butter and sugar on medium-high speed until light and fluffy, about 2 minutes. Beat in the egg and vanilla until well combined. Mix in the pumpkin puree. With the mixer on low speed add the dry ingredients and mix just until incorporated.
Pour half of the batter in the prepared pan and smooth out evenly. Bake for 10 minutes. Remove from oven and drizzle the caramel in an even layer and sprinkle with the other 1/2 teaspoon of salt (feel free to leave the salt out if you’re not a fan of salted caramel). Carefully drop spoonfuls of the remaining batter over the caramel and smooth out as best you can (it doesn’t have to be perfect). Return to oven and bake for an additional 30 minutes, or until a toothpick comes out clean and the top is golden brown.
Let cool for at least 15 minutes before serving. Makes around 9 squares.
-recipe for basic pumpkin blondies from Annie’s Eats
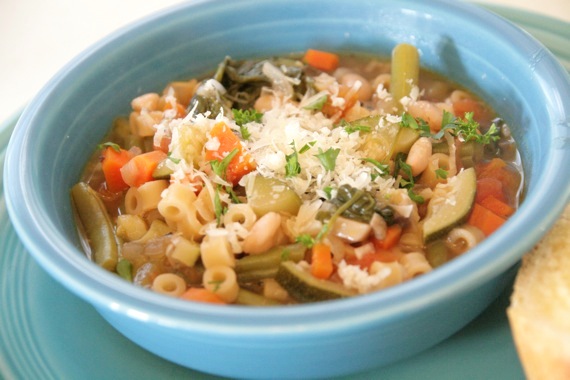
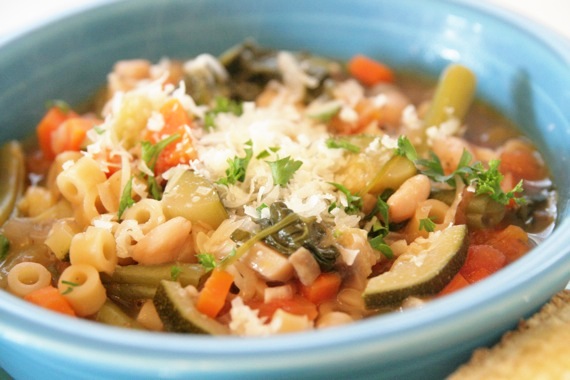
It’s that odd time of year again. The period where it’s definitely NOT cool, fall weather yet, but I’m sick to death of summer and want warm, comforting meals. I’m tired of ice cream and popsicles and watermelons. I want fall food. I want sweet potatoes and pumpkins and SOUP! Well, today, I gave myself the best of both worlds! I managed to satisfy my craving for cool weather food, while still taking advantage of summer vegetables. I decided to make a hearty, delicious minestrone using veggies that are still in season. A great success! I went to Sprouts and loaded up on fresh summer vegetables- fresh green beans, tomatoes, zucchini, spinach- tons of goodies! This was a really delicious pot of soup! Plus there’s plenty for our dinner tomorrow night too (I go back to start teaching the kiddos tomorrow, so coming home to a ready-made meal will be quite nice!). Give this one a try- it’s definitely satisfying and comforting, yet really fresh and bright!
Minestrone with Summer Vegetables
2 tablespoons olive oil
1 medium onion, chopped
2 cloves garlic, minced
*4 roma tomatoes, peeled, seeded and chopped (alternatively, you can use one 14-oz. can)
3 carrots, chopped
2 cups fresh green beans, trimmed (snap off the ends, then snap in half)
2 medium zucchini, chopped
1 cup mushrooms, chopped
1 bunch fresh spinach, thoroughly washed and roughly chopped
1 can Cannellini beans, drained
1/4 cup parsley, chopped
1 cup ditalini pasta (any small pasta is fine)
1/4 cup dry red wine (you can leave this out if you want)
3 cups chicken broth
1 cup water
1 tablespoon salt
2 teaspoons pepper
1 bay leaf
Heat the olive oil in a large stock pot over medium heat. Add in the onion and cook for 3-4 minutes. Add in the garlic and cook for one minute more. Add in the tomatoes, carrots, green beans, zucchini, mushrooms, chicken broth, water, wine, salt and pepper, and bay leaf. Bring to a boil, then reduce heat. Cook for 10 minutes. Stir in the spinach, cannelloni beans and pasta. Cook for 15-20 minutes, stirring occasionally, then check for seasoning. Add more salt and pepper if needed. Stir in the parsley at the last minute. Remove the bay leaf. Serve.
Top with fresh grated parmesan cheese, a drizzle of olive oil and parsley. Enjoy!
*To peel the tomatoes, cut a small ‘x’ in the bottom and place in a pot of boiling water for about 1 minute. Remove from water and immediately place in a bowl of ice water to stop the cooking. The peels should come right off.
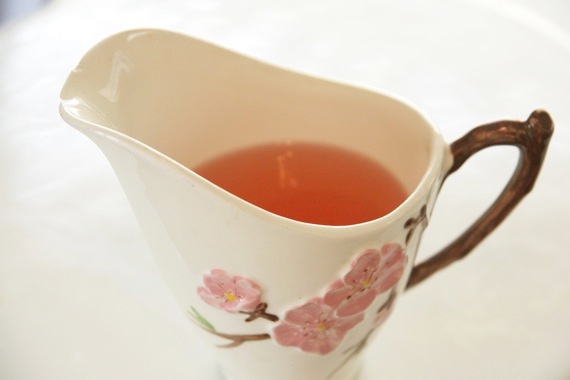
One of my great loves is peach tea. There’s just not much better than sipping a cold, crisp glass of iced tea with the subtle kiss of peach on a hot summer day! For awhile now, I’ve been making my own. It’s so amazingly simple- all you need is a little peach simple syrup. Make one batch and add a little to individual glasses, or just dump the whole thing in a large pitcher for a crowd. You can also use it for tons of other things- drizzle it over a warm pound cake just out of the oven, flavor mixed drinks with it, brush a little over the tops of cupcakes before icing them to keep them moist…the list goes on! There are so many great uses for simple syrup, and this peach flavored one is definitely a keeper!
Peach Simple Syrup
1/2 cup sugar
1/2 cup water
2 peaches, pitted and sliced
In a small saucepan over medium-high heat, stir together the water, sugar and peaches. Bring to a boil. Reduce heat and stir until sugar is completely dissolved. Remove from heat and let cool completely.
When the syrup is cooled, line a strainer with a paper towel (this will help catch all the peach fuzz and small bits) and strain the syrup into a storage container. Refrigerate until needed.
*This recipe only makes a small amount (enough to flavor one pitcher of tea), so I’d recommend doubling it if you want to use it for multiple things. Never hurts to have too much! 🙂 It will keep in the refrigerator for a couple of weeks at least!
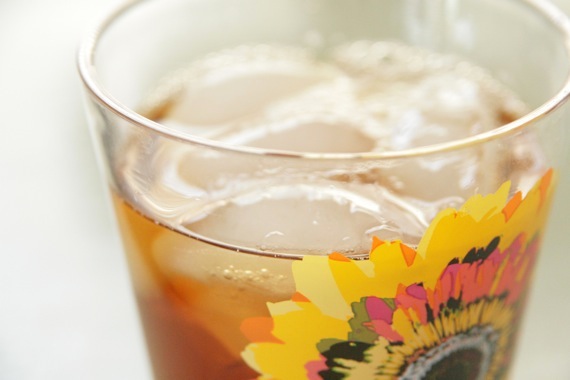
Mmmm, yummy peach tea!!!


