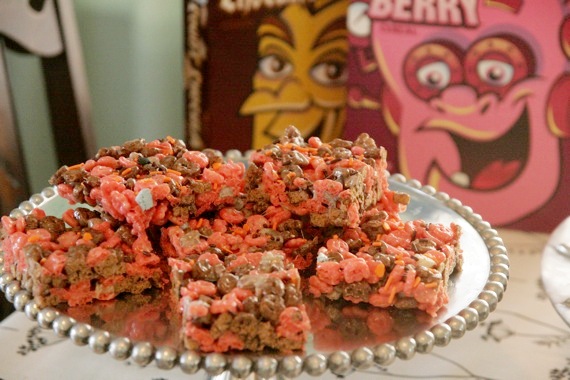
There are certain things that just seem make the Halloween season a little happier for me. Like Halloween Oreos, candy corn (even though I don’t eat it- it just looks nice in my candy dish), the cute little Pillsbury cookies with the jack-o-lantern and ghost designs, and last but not least, Count Chocula, Franken Berry and Boo Berry cereals. Around here, you can only get them around Halloween (which is unfortunate, because I’d certainly like to enjoy them year round!). I was lucky enough to find a couple of boxes of Count Chocula and Franken Berry at Target the other day and I was so excited I decided to use them for something extra special- Halloween krispie treats!
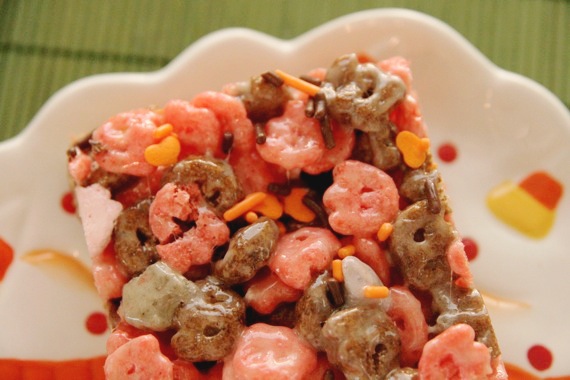
These were so chewy-gooey-yummy and a cinch to make- all you need is marshmallows, butter and cereal (exactly the same as Rice Krispie Treats, but better!), and maybe some cute Halloweeny sprinkles, for good measure. These would be a perfect treat to make with the kiddos and they’re a delicious, simple dessert for a last minute get-together or Halloween party!
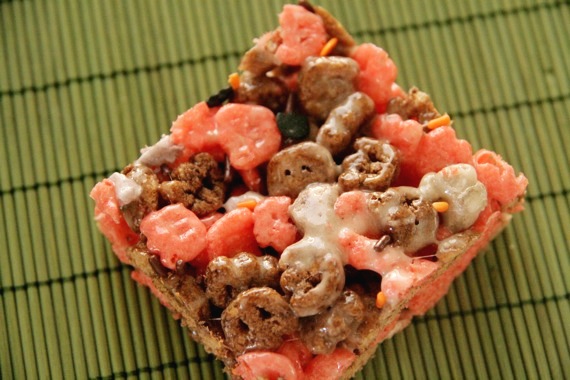
Halloween Krispie Treats
-recipe adapted from www.ricekrispies.com
3 tablespoons butter
4 cups miniature marshmallows
6 cups Count Chocula and Franken Berry cereal
In large saucepan melt butter over low heat. Add marshmallows and stir until completely melted. Remove from heat.
Add cereal. Stir until well coated.
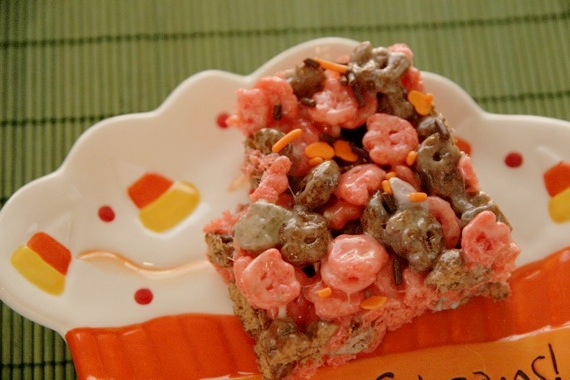
Using buttered spatula or wax paper evenly press mixture into 13 x 9 x 2-inch pan coated with cooking spray. Cool. Cut into 2-inch squares. Best if served the same day.
Hey- did you like these sweet nachos I posted?? They were pretty awesome, huh? Well, if you did, now is the time to head over and VOTE for me! I’d really love it if I could make it on to Round 5! 🙂
And personally, I think anyone who is insane enough to post a picture of themselves shoving their face full of (awesome) food deserves a vote or two. Just sayin’.

VOTE NOW!! (please….)
Here I am again (and honestly, I just can’t believe it!), thanking you all for your continued support through Project Food Blog. I’m just blown away by your unfailing sweet, generous comments, encouragement and your votes. You are all truly wonderful readers…I am SO lucky to have you!! THANK YOU!!!
Ok, so here’s the challenge for Round 4: Sure, you can take a pretty picture. But your task here is to go above and beyond and use photography to create a step-by-step, instructional photo tutorial. It could be anything from how to bone a chicken to how to make your favorite recipe, but your photos need to guide the reader through the steps.
Honestly, at first, I thought this challenge would be a cinch. “Eh, what’s a few extra pictures?” However, it didn’t take long (about 12 seconds) for me to discover one very simple factor: step-by-step photos are HARD. For an A.D.D girl, something as simple as taking a few extra photos of the cooking process can be DAUNTING. I found myself running all over the kitchen, dining room and living room trying to get lists together, compiling my ingredients, writing down every single step of each recipe and trying to get my camera settings figured out (it takes awhile to do step-by-step photos, and your lighting is changing constantly- if you don’t change your camera settings accordingly, your pictures will absolutely start to suck). So needless to say, this has been the hardest challenge for me BY FAR. But, I barreled through and got it done- and came out with two totally awesome and delicious recipes to share with you! Yay me!!
For this challenge, I decided to do the kind of food that makes me happy (and my hubby!)- nachos. It was a very BIG game day in Texas today- the Aggies were playing a big game (who am I kidding, every game is a big game at our house!), then the Rangers with a playoff game after that. Needless to say, we needed game day food and we needed it bad. Just one kind of nacho wouldn’t be enough. I decided on two different kinds: Tequila Lime Chicken Nachos and Bananas Foster Nachos (yes, bananas foster- and let me just say….I’ve come up with a doozy.) So let’s open with recipe #1! This is how my family makes nachos- just layer on your favorite flavors. It’s great with seasoned ground beef, shredded chicken, or even meatless! I decided shredded chicken with a little tequila and lime juice would be perfect (and it was!)! Let’s get started!
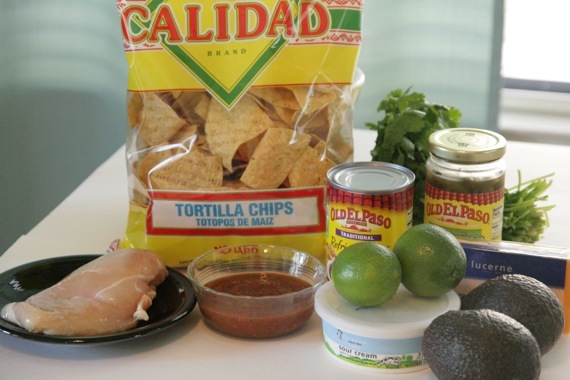
You’ll need: 1 chicken breast, tortilla chips, a can of refried beans, shredded cheddar cheese, cilantro, jalapeno peppers, limes, sour cream, guacamole and salsa, salt and pepper and tequila (not pictured…oops).
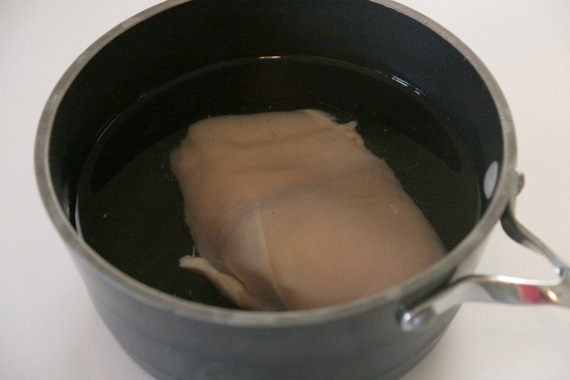
Put the chicken in a small pot, cover with water and bring to a boil. Cook for about 10-15 minutes, until the chicken is cooked through.
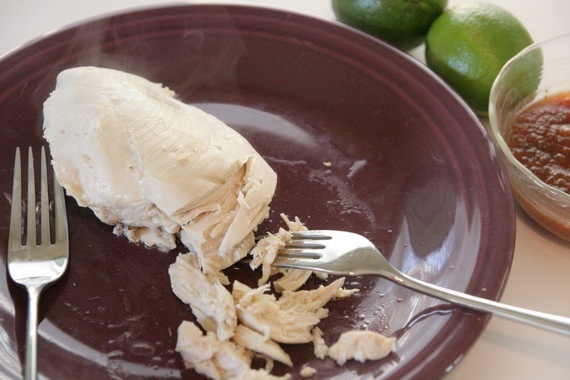
Remove from water and shred with two forks. Toss with 1 tablespoon tequila, the juice of one lime and salt and pepper to taste. Set aside.
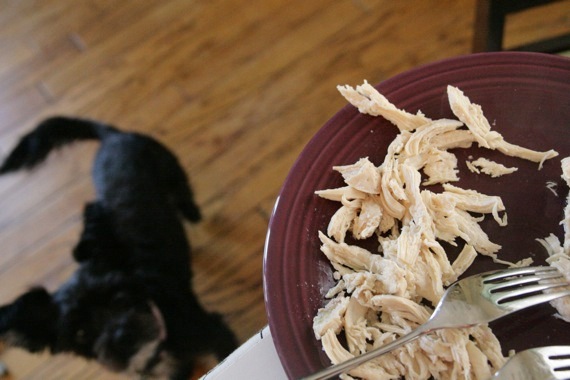
But before you season your chicken, be sure to give your sweet doggy a little tidbit. 😉
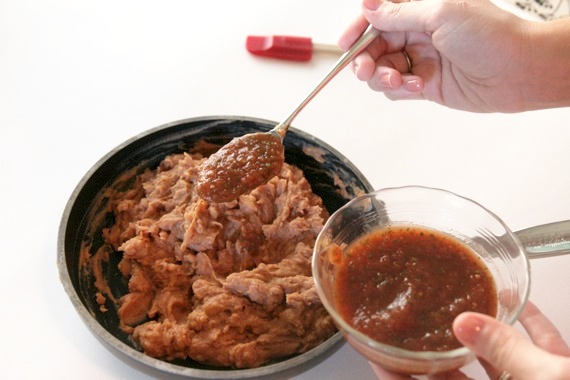
Put your refried beans in a small skillet, stir in 1 (rounded) teaspoon of salsa and a splash of the juice from your jarred jalapenos (trust me, it’s good! Plus, it helps thin it out a little bit so it’s easier to spread). Cook the beans over medium-low heat, until heated through. Set aside.
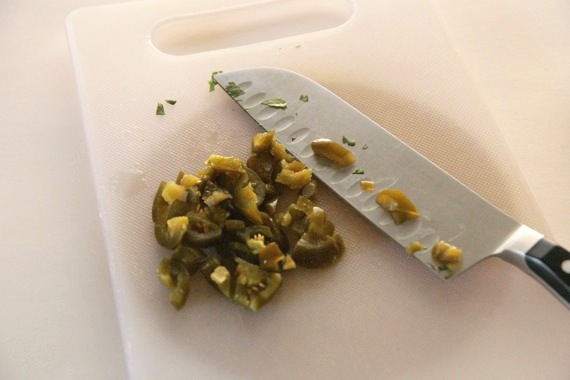
Chop 8-10 slices of the jalapenos.
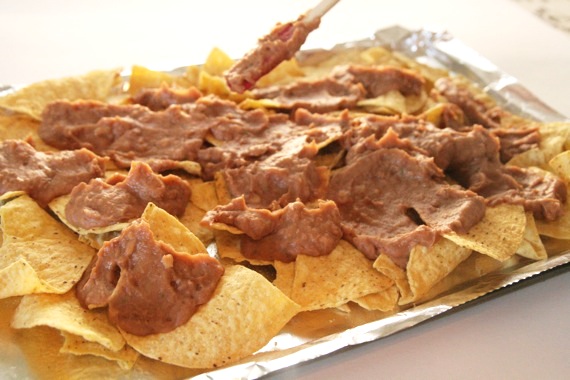
Spread out some tortilla chips on a baking sheet lined with foil and top with the beans. Just spoon some on, then gently spread it out with a small spatula.
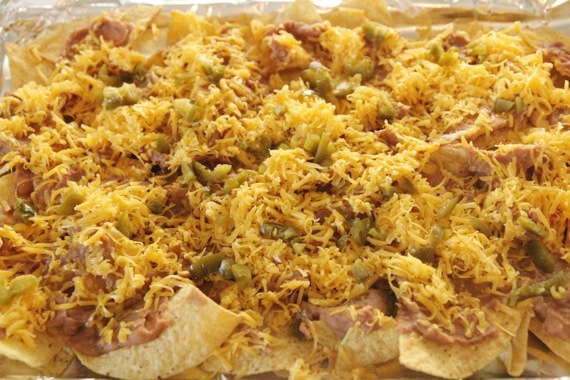
Top with the shredded cheese and the chopped jalapenos.
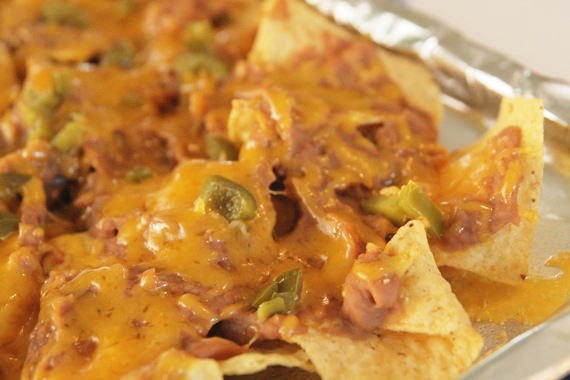
Bake it in a preheated 350 degree oven for about 5 minutes, until it looks all gooey and delicious, like this.
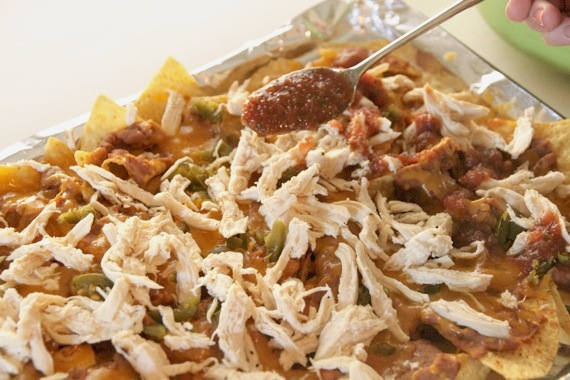
Top with the chicken then spoon on some of your salsa.
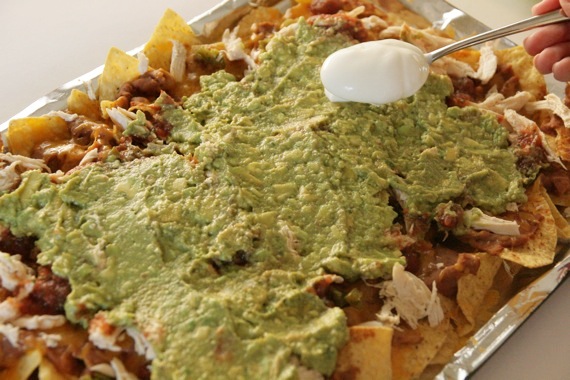
Spread the guacamole over the top, then dollop with sour cream.
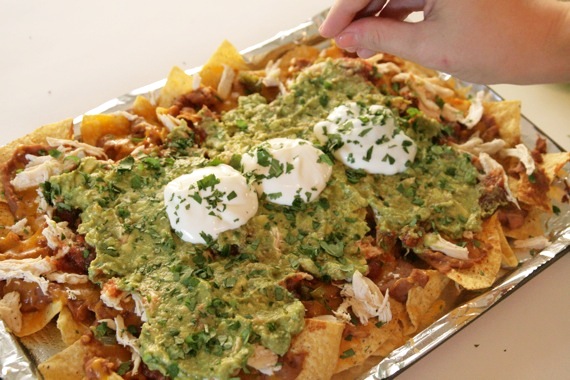
Sprinkle with the chopped cilantro.
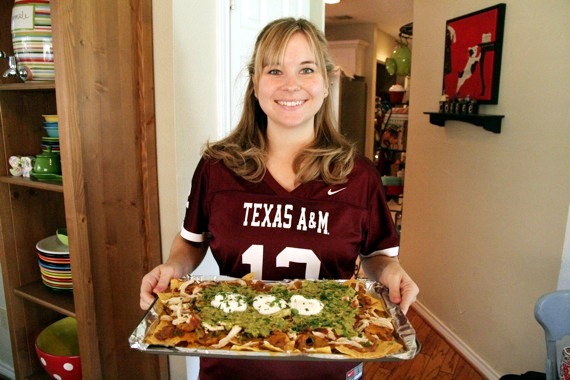
And….ENJOY!!
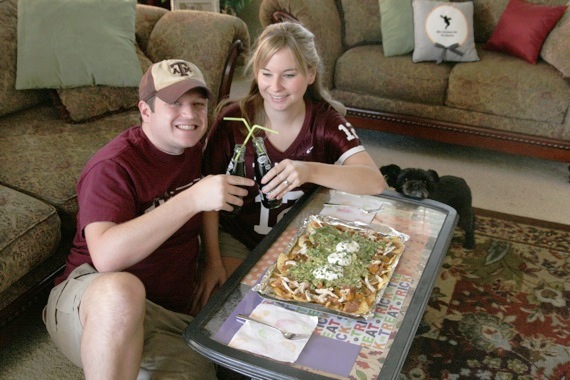
Game Day nachos are best enjoyed with cold Dublin Dr. Pepper…Mexican Coke would be excellent as well. 😉
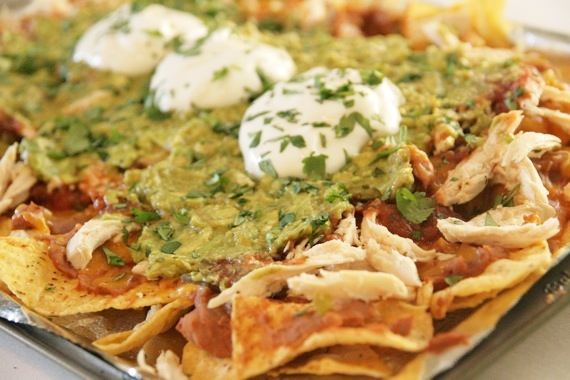
These nachos are seriously GOOD (and they serve a whole boat-load of people!). They’re packed with so many different layers of flavor- the chicken is so moist and the hint of tequila really adds a lot! This is seriously, the perfect game day food! But those aren’t the star of today’s meal….these Bananas Foster Nachos are BY FAR, some of the BEST dessert food I have ever had. Seriously. An explosion of awesome in your mouth. So rich…so gooey…so amazing! I can’t wait to show them to you! Here we go- hold onto your hats…this is gonna be good.
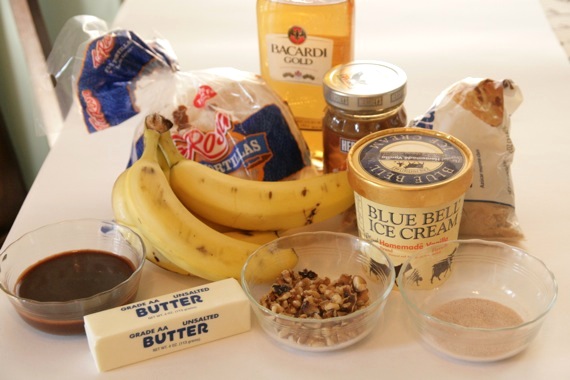
You’ll need: flour tortillas, rum, caramel sauce (by all means, make homemade if you want to- I chose not to today), brown sugar, bananas, vanilla ice cream, chopped toasted walnuts, cinnamon/sugar, butter and hot fudge (I use this recipe).
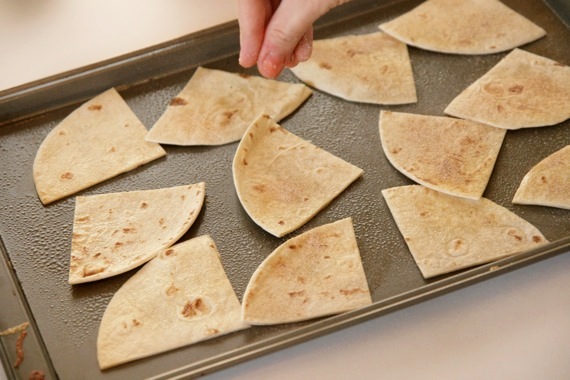
Start by cutting 3 tortillas into quarters. Arrange on a greased baking sheet and spray with butter spray. Sprinkle with cinnamon/sugar. Bake in a 350 degree oven for about 10-12 minutes, until crisp. Set aside.
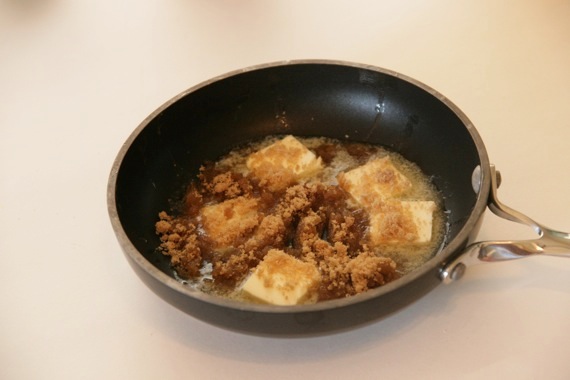
In a small saucepan, melt half a stick (4 tablespoons) butter, 2 tablespoons brown sugar and 1 teaspoon cinnamon.
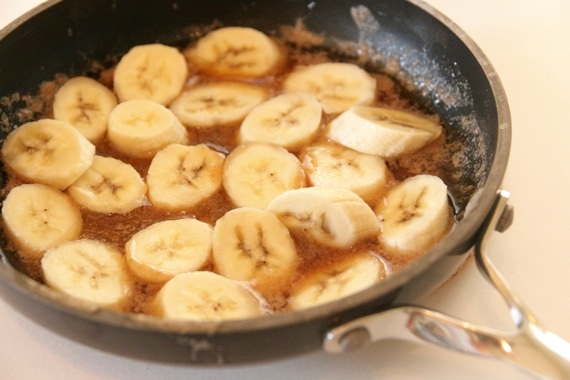
Place three sliced bananas in the pan, gently stir, then add in 2 teaspoons rum. Cook over medium-high heat for about 3 minutes. You still want the bananas to have some texture, so be sure not to overcook them.
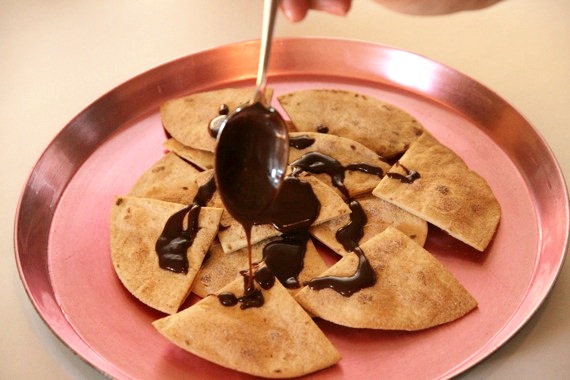
Arrange the tortilla wedges on a platter and drizzle with hot fudge (not too much- this dish can get RICH quick!).
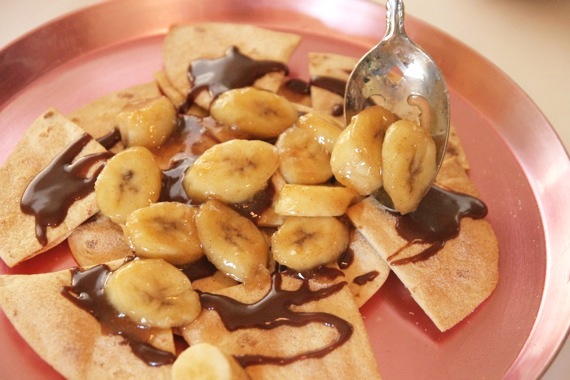
Top with the bananas. Wow. This is looking good already!
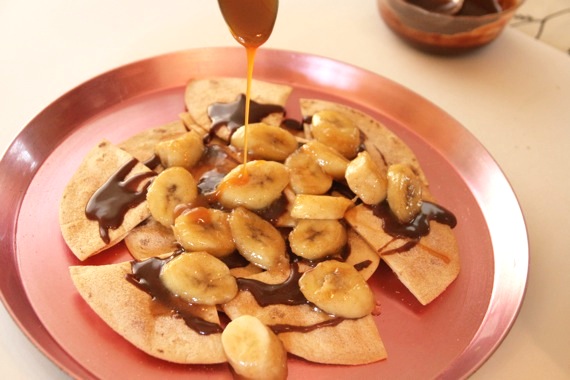
Drizzle with the caramel sauce. Try not to lick the spoon.
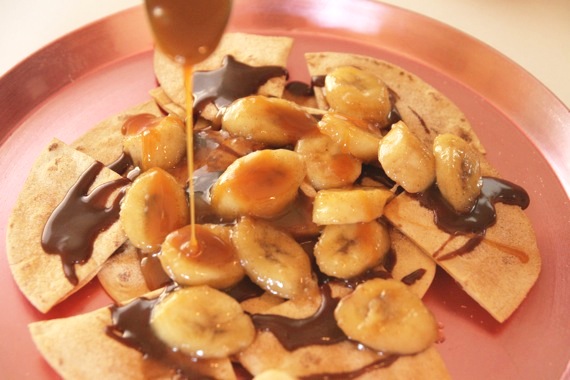
Seriously. Don’t lick that spoon.
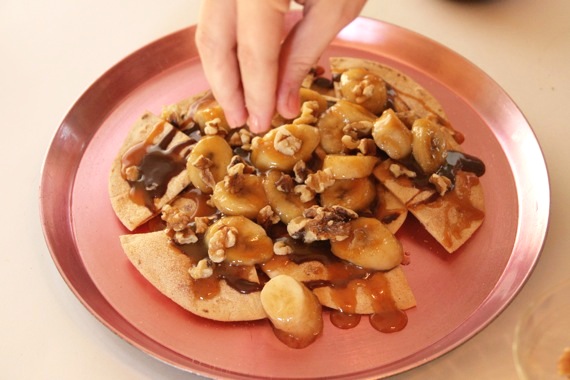
Sprinkle with the toasted walnuts.
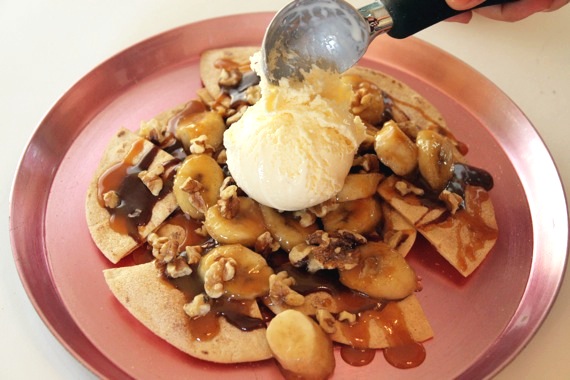
And finally, top with a couple of hearty scoops of vanilla ice cream. Holy cow.
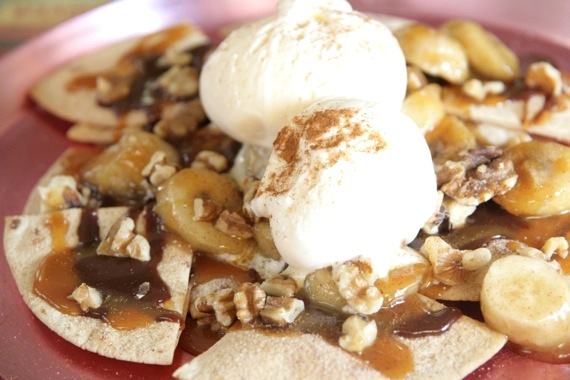
Go ahead and sprinkle with a teensy tiny bit of cinnamon.
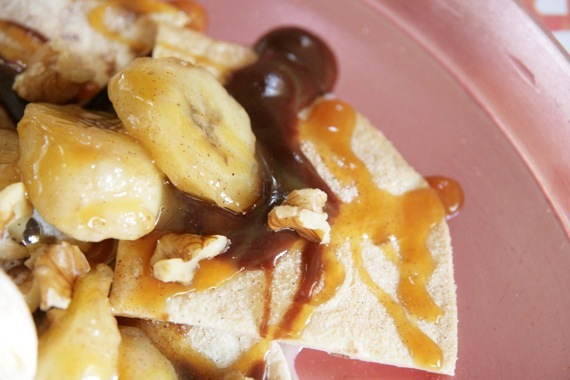
OMIGOSH, OMIGOSH, OMIGOSH….

Take a bite…and find yourself on a short trip to “Delicious-Gooey-Yum-Yum-Land”. A truly magical place….

Oh yeah…he’s there too…welcome, honey. Welcome.
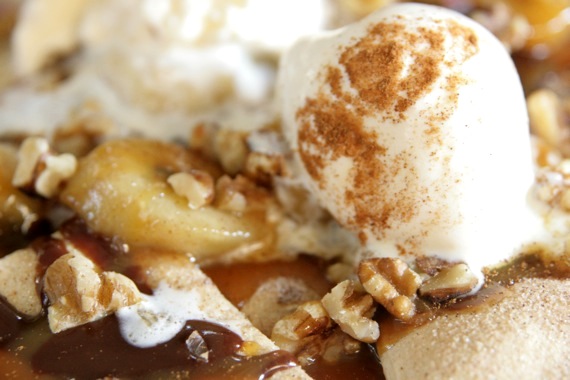
You’re welcome.
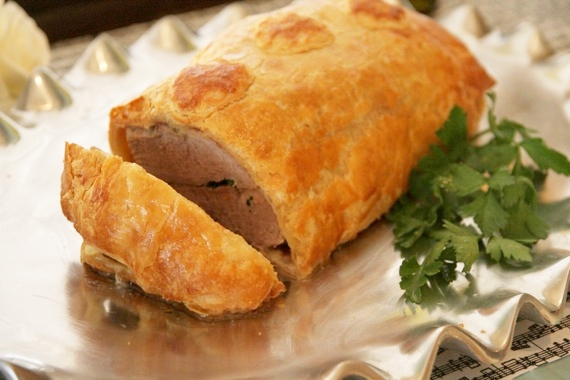
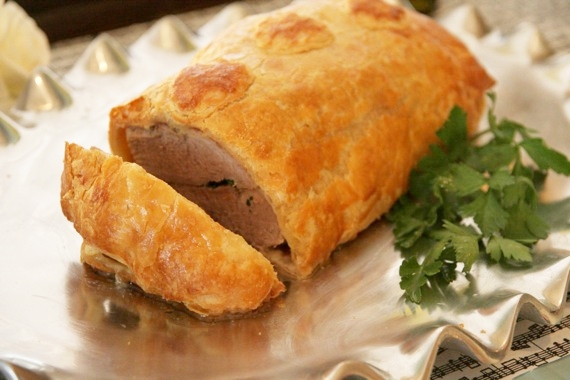
Here’s the main dish I served at my luxury dinner party the other night. This was everyone’s favorite dish. Honestly, I wasn’t quite sure at first how this would turn out, but the end result was impressive, elegant and most importantly, delicious! The pastry keeps the pork incredibly moist and juicy and the fresh parsley gives a nice bright flavor that really adds to the dish. It’s amazingly simple to put together and doesn’t take long to cook- a perfect dish for an elegant dinner party!
Stuffed Pork Wellington
-adapted from Texas the Beautiful Cookbook
2 pork tenderloins of equal size (about 2 1/2 – 3 pounds all together)
salt and freshly ground pepper
1 teaspoon dried rosemary, chopped
3/4 cup fresh parsley, chopped
2 tablespoons butter, softened
2 tablespoons grated parmesan cheese
extra 2 tablespoons butter
1 sheet frozen puff pastry, thawed
1 egg+ 1 splash heavy cream, beaten together, for egg wash
Flatten pork tenderloins between two pieces of plastic wrap and season with salt and pepper.
Mix together the parsley, 2 tablespoons of softened butter, parmesan, rosemary and salt and pepper to taste (essentially, you’re making a paste).
Spread mixture on one of the tenderloins, top with the other tenderloin and press together firmly. Tie into place with white string.
Heat the other 2 tablespoons of butter in a skillet and brown the tenderloins well on both sides (about 2 minutes per side) over medium-high heat. Remove, allow to cool slightly and remove string.
Flour a large surface and a rolling pin and roll the puff pastry out into a rectangle large enough to wrap around the tenderloins. Place the tenderloins on the pastry, moisten the edges with the egg wash and press firmly together to enclose the tenderloins completely. If desired, make decorations from any surplus pastry, moisten and press into place on top. Brush all over with egg wash.
Arrange on a baking sheet lined with parchment paper and bake in a preheated 400 degree oven for 20 minutes. Reduce heat to 350 degrees and bake for an additional 20 minutes (if pastry is browning too quickly, place a foil tent over it). Let rest for 10 minutes before cutting. Serve hot, cut into thick slices. Serves 4-6.
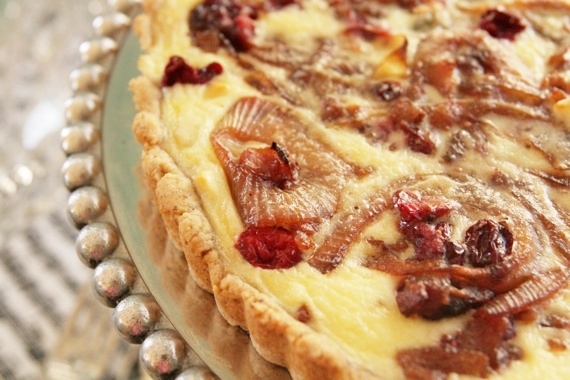
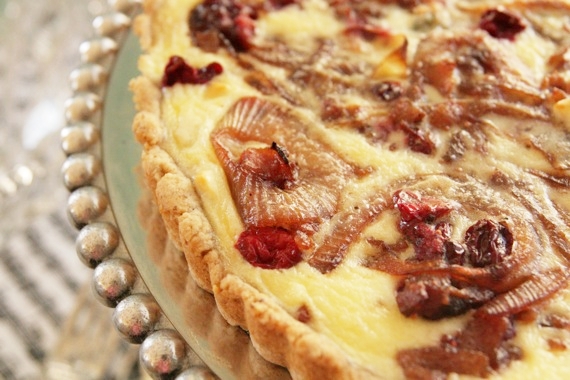
I made this for my Project Food Blog ‘Luxury Dinner Party’ and it was a HIT! I know the combination might seem a bit weird for some, but believe me when I tell you it’s totally delicious!! Hubby and I first tried this at the Dallas State Fair, of all places (weird, right?) about 4 years ago. There was a local chef there doing a cooking demonstration and this was the dish she made for us. When it came time to taste it, I took a sample, only because I didn’t want to hurt her feelings- but the truth was, I hated onions and wasn’t eager to try this at ALL. Finally I decided to get over my childishness and just go for it- thank goodness I did, because I discovered a winner of a recipe that day. There’s something about the tartness of the cranberries that pairs so well with the bacon and sweet caramelized onions. And the gorgonzola adds just a hint of extra flavor- it’s SO amazing!! This would be a perfect dish to add to your Thanksgiving table this year!
Needless to say, this was an enormous hit at my dinner party the other night- and since posting pictures from my party, this is the recipe everyone can’t wait to get their hands on. Well here it is, folks: a delicious Caramelized Onion-Cranberry Tart with Bacon and Gorgonzola – enjoy!!
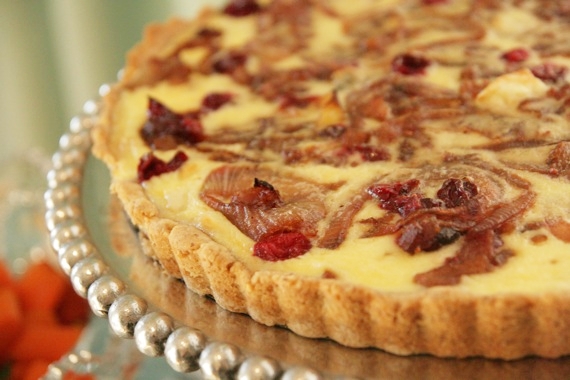
Caramelized Onion-Cranberry Tart with Bacon and Gorgonzola
–Kathleen’s Sky Diner in Dallas, TX
For the crust:
1 cup flour
2/3 cup walnuts, roughly chopped
1 tablespoon sugar
1/2 teaspoon salt
1/2 teaspoon dry mustard
pinch cayenne pepper
6 tablespoons butter, cold and cubed
1 tablespoon milk
In a food processor, pulse dry ingredients; add butter until ingredients are the size of small peas. Add milk and pulse just until dough comes together in a ball. Do not overprices.
Press dough into a 9-inch tart pan with removable bottom until even and smooth. Prick crust with a fork and freeze for 30 minutes or refrigerate at least 2 hours or overnight.
Bake chilled crust at 375 degrees for 15 minutes, or until golden brown. Make filling.
Filling:
4 slices bacon, cut into small pieces
2 small-medium onions, thinly sliced
1/2 teaspoon salt
1/4 teaspoon pepper
1 cup cranberries (fresh or frozen- if frozen, don’t worry about thawing)
2 tablespoons sugar
2 eggs
3/4 cup heavy cream
1/3 cup crumbled gorgonzola cheese (blue cheese would work as well)
In a saucepan over medium heat, sauté the bacon until crisp. Drain bacon on paper towels and pour off all but 3 tablespoons of fat. Add the onions to the pan and cook for 15-20 minutes, until soft and caramelized. Add cranberries and sugar and continue to cook on low heat until cranberries begin to ‘pop’ (they will literally pop in the pan!); season with salt and pepper; add the bacon back in and set aside.
In a bowl, whisk eggs and heavy cream together until smooth. Place the onion/cranberry mixture in the bottom of the cooked crust, crumble the gorgonzola on top, then pour the egg mixture last. Bake tart at 350 degrees until golden brown and center is set, about 20-30 minutes. Serve warm or cold.

Please vote for my mommy. I wore my fancy pearls and everything!
Sincerely,
Izzy
**Yeah, I totally just played the cute dog card (what? I need votes, ok?!). If you enjoyed my luxury dinner party, click here to vote! And THANK YOU for being awesome!! http://www.foodbuzz.com/project_food_blog/challenges/3/view/1155
Wow, I’m completely flattered and honored to be one of the 200 food bloggers chosen to move on to Round 3 in Project Food Blog. Thank you, thank you, thank you (again) for your votes and encouragement! I seriously LOVE you guys!!!
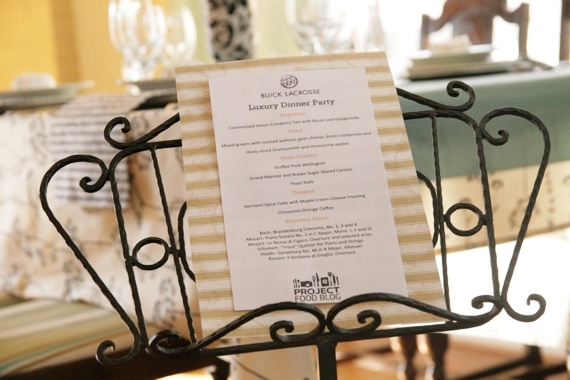
And now, on to Challenge #3: Luxury Dinner Party. The next challenge is to hold a party for your friends and family. Whether you’re an experienced host or an entertaining newbie, get creative and host a luxurious dinner party where your guests will discover new tastes and exotic flavors. Share your hosting secrets with readers, like how to cook for a crowd, plan a menu, or involve guests in the prep.
New and exotic flavors, huh? Now that’s challenging, especially since my blog is anything BUT new and exotic. My blog is just….me. Nothing fancy, cutting edge or by any means exotic; just fun, simple and full of bubbly personality. That’s me. I was so nervous when I read the challenge…“Luxury?!?!” My brain immediately started going off in SO many different directions. Until I realized, “this challenge isn’t about what Martha Stewart or Ina Garten would do…it’s about me and my blog. What I would do.” So just exactly what kind of dinner party would Amy throw, do you ask? A simple one. With delicious, comforting flavors, good wine, good company, and most importantly- good music.
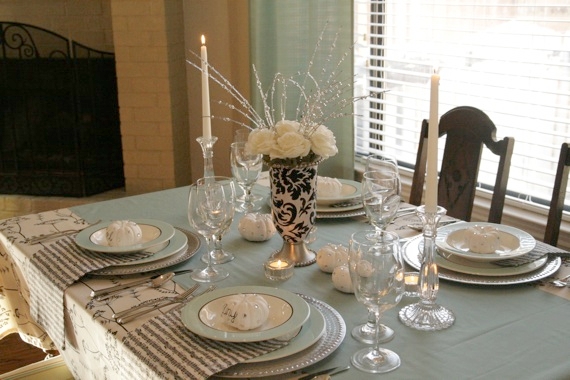
“To eat, to love, to sing, and to digest; in truth, these are the four acts in this opera buffa that we call life, and which vanishes like the bubbles in a bottle of champagne.”
-Gioacchino Rossini
Food and music have always gone hand-in-hand. In my opinion, we couldn’t survive without either. Great composers such as Gioacchino Rossini and Franz Schubert thought so. Schubert used to host musical dinner parties once a week – he and his closest friends would sit down together and enjoy a delicious meal, followed by a few hours of good music. What a perfect evening! Rossini was the ultimate foodie and was said to have cried only three times in his life; the first after a disastrous opera premiere, the second when he heard Niccolo Paganini play the violin, and the third when a picnic basket containing his favorite dish, turkey stuffed with truffles, fell overboard during a boat outing.* Rossini took opera and food very, very seriously. So do I. That’s why I’m combining two of my greatest loves into one fantastically delicious, music-inspired dinner party! Come in and join us!
*taken from my Opera Lovers Cookbook
A supper beckons us! The best ever! The choicest delicacies are always eaten and drunk here!
-from the opera Die Fledermaus, by Johann Strauss
First up on the menu is a Caramelized Onion-Cranberry Tart with Bacon and Gorgonzola. I can’t even begin to describe how delicious this is- the tart cranberries contrast so nicely against the sweet caramelized onions, smokey bacon and salty gorgonzola. An absolute crowd-pleaser.
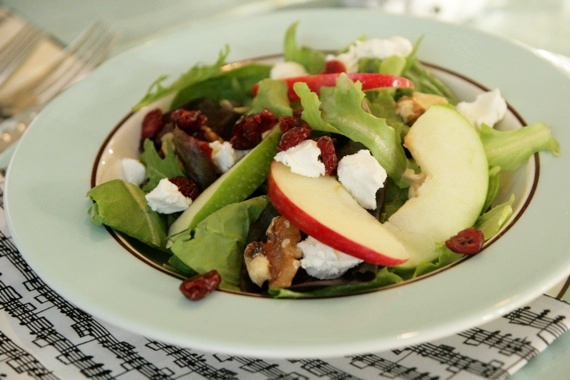
I served a simple salad of mixed greens with toasted walnuts, goat cheese, dried cranberries and thinly sliced Grannysmith and Honeycrisp apples. Honeycrisp apples are pretty much my favorite flavor of Fall, so I just had to incorporate them into this meal!
The main dish is a Stuffed Pork Wellington. Tender, juicy pork loin is simply stuffed with parsley and fragrant rosemary, wrapped in flaky, buttery puff pastry and baked until golden. My first time making this- a definite keeper!! This was everyone’s favorite dish!
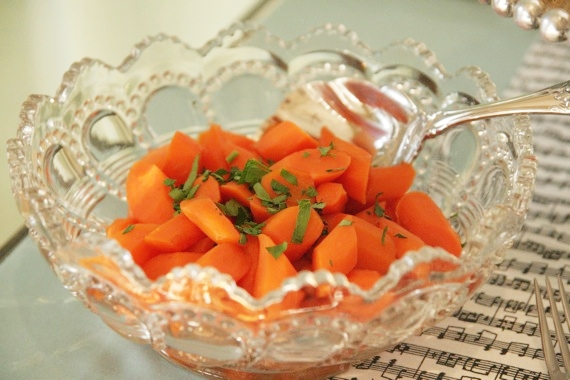
I made a simple side dish of Grand Marnier-Brown Sugar Glazed Carrots. Cooked carrots are tossed with orange zest, Grand Marnier, a little brown sugar and a pinch of ground cloves. Finish off with a sprinkling of parsley and you’ve got one easy, delicious side dish! These would be perfect served at your Thanksgiving dinner!
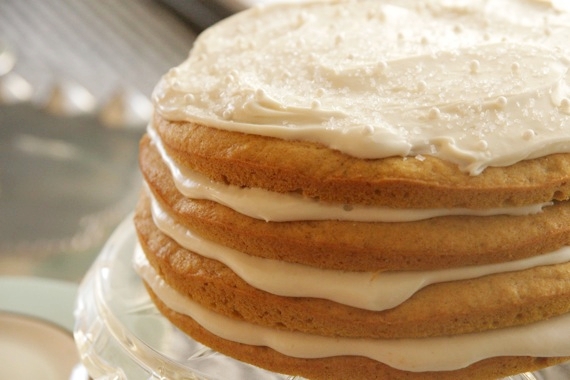
And my favorite part, dessert: a yummy Vermont Spice Cake with Maple Cream Cheese Frosting. Nothing fancy, just a rich, comforting cake with pumpkin and warm Autumn flavors. A Fall favorite! Enjoyed with a cup of cinnamon-orange coffee, this is one fabulous end to a great dinner party!
Music to dine by:
Bach: Brandenburg Concerto, No. 2, 3 and 4
Mozart: Piano Sonata No. 1 in C Major, Movements I, II and III
Mozart: Le Nozze di Figaro: Overture and selected arias
Schubert: “Trout” Quintet for Piano and Strings in A Major
Haydn: Symphony No. 46 in B Major, Menuet
Rossini: Il Barbiere di Siviglia: Overture (this may be a little “jaunty” for a dinner party, but I thought it only fitting to include Rossini in our evening, as I know he so would’ve enjoyed.)
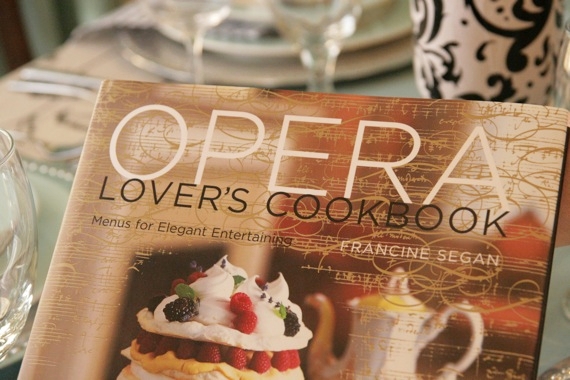
Selected Wine:
MacMurray Vineyards Chardonnay 2008 – crisp and dry, this pairs beautifully with pork. A wonderful accompaniment to a wonderful meal!

Since this was a luxury dinner party, Izzy insisted on dressing for the occasion.

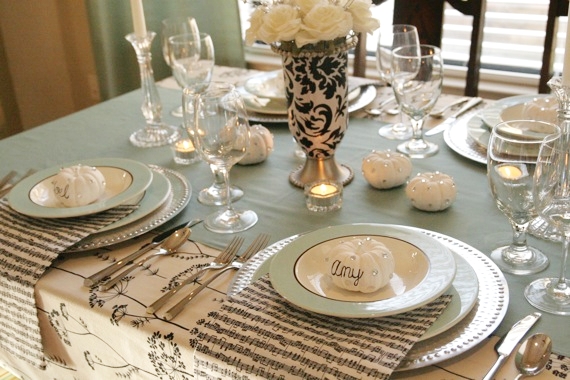

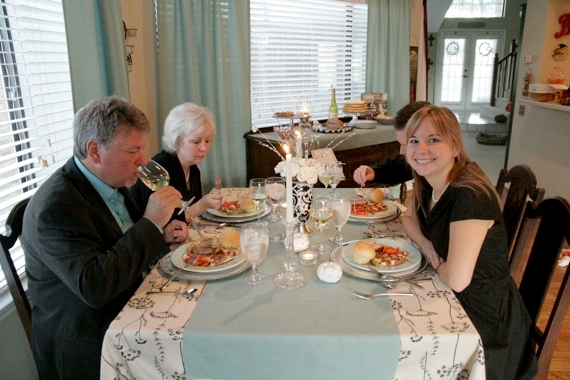
My guests enjoyed a perfectly wonderful dinner party! Thanks so much for coming, y’all!!
While everything pretty much did go off without a hitch, the preparation itself wasn’t exactly a walk in the park. It takes lots of work and planning to throw a successful dinner party. Here’s a “behind the scenes” look just for you. This is for all of you out there who think perfect dinner parties just “magically” happen. They don’t.
Here’s the first hour of prep- not too bad, things are going according to schedule. Everything is smooth sailing.
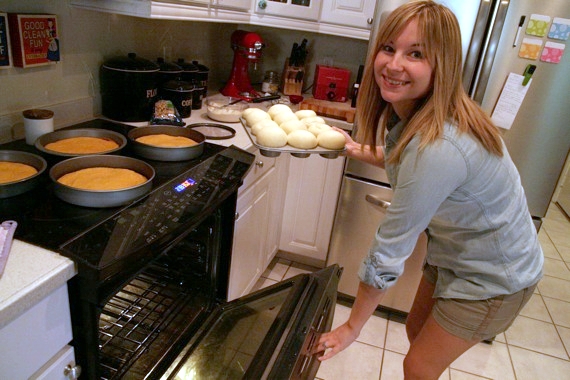
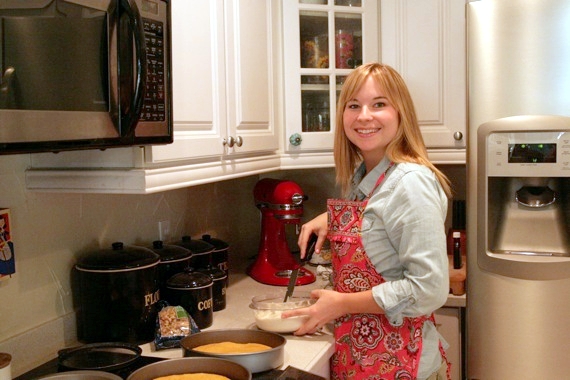
But after dropping a stack of six (extremely heavy!) plates on your toe, cutting yourself with the lid of a plastic tub (who does that?!), and spilling pork juice all down your front, things start to look like this:

The most important thing to remember is: stay calm. A calm, relaxed host is a good host. You can do this!

It’s always important to have a wingman to help with the mountains and mountains of dishes any dirty dishes along the way.
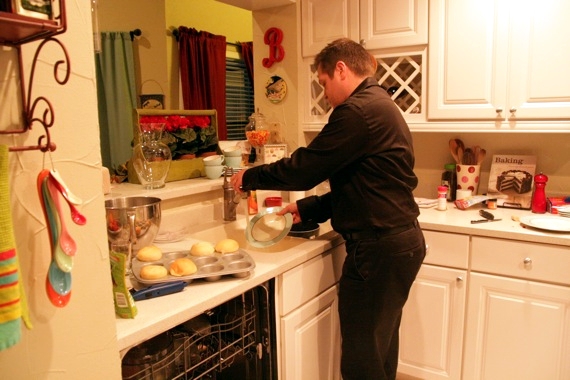
It’s very important to have a tripod for your camera. That way you can take perfectly staged shots, like this one:
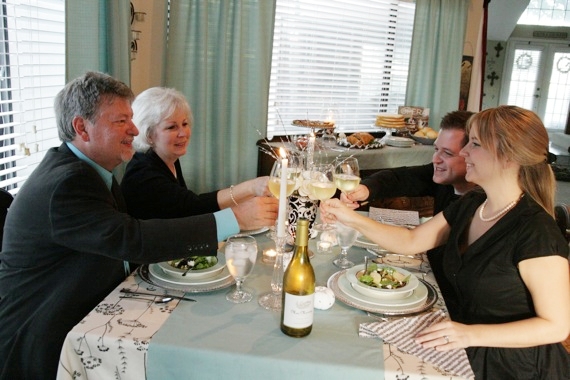
In the end, what really matters is that you stay calm and don’t reveal to your guests what went down before they arrived. Sure, even though you worked your rear end off the entire afternoon, yelled at your husband a few times and had a mini meltdown in the kitchen floor- no one needs to know about it. The important thing is that you answer the front door calm and collected, enjoy the delicious food and have a great time with your guests. They’ll never know you didn’t exactly keep it together in the hours leading up to the party. Relax! Have a good time and most importantly…have a nice big glass of wine!
Now pat yourself on the back- you did it! Congratulations!

Every year around this time I start to get reeeeally excited. Not just because it’s Fall and it’s the best season of the year, but because I can start getting out my Halloween decorations!! Yay!! Those of you who have followed my blog since the beginning know I have a (big) thing for Tim Burton’s The Nightmare Before Christmas (big as in, it’s my all-time favorite movie second only to The Little Mermaid). I collect anything Nightmare Before Christmas related- Christmas ornaments, snow globes, tiny little figurines – I have it all, and I leave it out from Halloween through Christmas. That’s the beauty of it- my two favorite holidays, all in one totally awesome movie!

Besides my freaking sweet collection of Nightmare Before Christmas stuff, I also have lots of other Halloween decorations (not the scary kind- the cute, homey kind), and I look forward to pulling it all downstairs every single year. I got it all out this week. And now my house is decorated with pumpkins, candy corn, cute jack-o-lanterns and (duh) my freaking sweet collection of Nightmare Before Christmas stuff. So, I had to celebrate the occasion. This sort of thing definitely calls for cupcakes. Delicious orange-scented cupcakes. Yum. The batter tastes like creamsicles! They’re slightly grown up due to the Grand Marnier in both the batter and the frosting and the orange flavor isn’t totally overpowering, so they’re just right, in my opinion!

Orange-Scented Cupcakes
-adapted from Dorie Greenspan’s Baking From My Home to Yours
*Makes 24 cupcakes
2 1/4 cups cake flour
1 tablespoon baking powder
1/2 teaspoon salt
3/4 cups whole milk
1/2 cup orange juice
1 tablespoon Grand Marnier, or any orange liqueur you like
4 large egg whites
1 1/2 cups sugar
1 stick (8 tablespoons) unsalted butter, at room temperature
1 1/4 teaspoons pure vanilla extract
Center a rack in the oven to 350 degrees. Fill cupcake pans with cupcake liners.
Sift together the flour, baking powder and salt.
Whisk together the milk, orange juice, liqueur and egg whites in a medium bowl.
Put the sugar and butter in the bowl of a mixer and, working with the paddle or whisk attachment, or with a hand mixer, beat at medium speed for a full 3 minutes, until the butter and sugar are very light. Beat in the extract, then add one third of the flour mixture, still beating on medium speed. Beat in half of the milk-egg mixture, then beat in half of the remaining dry ingredients until incorporated. Add the rest of the milk and eggs, beating until the batter is homogeneous, then add the last of the dry ingredients. Finally, give the batter a good 2-minute beating to ensure that it is thoroughly mixed and well aerated. Using a small spoon, fill each cupcake liner 1/2 full with the batter.
Bake for 15 to 20 minutes, or until the cupcakes are well risen and springy to the tough – a toothpick inserted into the centers should come out clean. Transfer the cupcakes to cooling racks and cool completely before frosting them.
Vanilla-Orange Buttercream
1 stick butter, at room temperature
3-4 cups powdered sugar
2 tablespoons orange juice
splash Grand Marnier
1 teaspoon vanilla
pinch salt
Place the butter in a large mixing bowl. Add 1 cup of the sugar and then the orange juice, Grand Marnier and vanilla. On medium speed of an electric mixer, beat until smooth and creamy, about 3-5 minutes. Gradually add the remaining sugar, 1 cup at a time, beating well after each addition (about 2 minutes), until the icing is thick enough to be of good spreading or piping consistency. You may not need to add all of the sugar. Refrigerate until needed.

So, here we are again…voting time for Project Food Blog, Round 2: The Classics! I would REALLY love it if you voted for me…..so would my husband…..

(**I can’t be held accountable for my actions…or choice of artwork….I wrote this late at night and my brain was slightly fried. Sorry.)
Click HERE to vote for me and my totally awesome Tong Sui (and don’t worry, I promise I won’t sic my husband on you…probably.)

Sorry about the ‘Yee Haw‘ in the title….I get a little excited sometimes and the Texan in me really comes out. Yeah, so WOW, I was lucky enough to advance to Round 2 of Project Food Blog!!! But only thanks to YOU. If it hadn’t been for your support, encouraging comments and votes, I totally wouldn’t even be here! So THANK YOU from the bottom of my heart!
In this round of Project Food Blog, our mission is to cook outside of our comfort zones and recreate a classic dish from another culture. The kicker? It can’t be French or Italian. They wouldn’t want to make it too easy on us, now would they? 😉 I knew this would be a challenging order, because when you get right down to it…..I’m boring. There, I said it. The majority of my food is American, Mexican, Italian and Cajun, with the occasional Greek thrown in to annoy my mother, who hates Greek food. In all honesty, it’s not often that I step outside of my comfort zone at all. I’m a “play-it-safe” kind of girl. But not anymore. Today I turn over a new leaf. I kick the old, “boring” Amy to the curb and let the new, adventurous, perhaps even slightly dangerous Amy in the kitchen. Who knows what that Amy will come up with! She’s pretty awesome. My husband digs her.
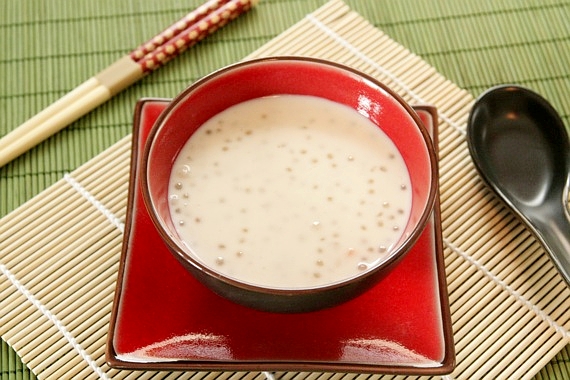
So, after lots of careful thought (I went down the Indian, Israeli, Greek and Moroccan paths, but ultimately, was left cold), I decided to do a Tong Sui (translation: ‘sweet water’), a delicious Cantonese dessert soup (sounds good, right? Well it is…trust me!). To be honest with you, the only “Asian” food I’ve ever made is Kung Pao Chicken…………….*cricket*, *cricket*…………….I know. I’m ashamed. Everyone knows that doesn’t count. So I thought, “what better culture to choose from?!” I was first introduced to this yummy, sweet soup 4 years ago at our friend Billy Wu’s house. Every year, he hosts a huge BBQ that my husband fondly refers to as “The WuBQ” (and looks forward to year round). There’s a plethora of every food imaginable, and I was lucky enough to sample a dish that would intrigue me for years to come. Billy’s mother is a wonderful cook and loves sharing her Chinese culture with everyone (she once convinced my poor husband to try a smoothie made with Durian, the funkiest, smelliest fruit known to man). She opened the lid to a large pot filled with a rich, coconuty soup and invited me to try a bowl. “Why not?”, I thought – it smelled good enough. One bite and I was hooked. It was sweet, creamy, slightly thick and filled with rich coconut milk, tapioca pearls and taro. I went home that night thinking about the soup. I’ve thought about it ever since.

Upon doing some research, I found out that Tong Sui is Asian comfort food. Like our chocolate pudding or macaroni and cheese, a nice big bowl of this is like a big, warm hug. Very common. Billy’s mom makes it all the time and his whole family loves it. I love it too. Which is why I’m diving in head-first and making my very own traditional Tong Sui! Billy’s mom was sweet enough to give me her own personal recipe and I’m honored to be able to recreate it here!

Tong Sui (Cantonese dessert soup)
-makes a large pot; enough for 6-8 people
**Kam Kwai gave me her list of ingredients and her method of cooking. Just like so many of my grandmother’s recipes, measurements are just approximations- you can add as much or as little of everything as you want.
3 cups water, plus more for boiling the tapioca and barley
approximately 3/4 cup small tapioca pearls
1/2 cup pearl barley
1 small sweet potato, peeled and diced into centimeter-sized cubes (Kam Kwai uses Taro- similar in texture to sweet potato- but the ones at the Asian market were big, long and furry and frankly, they scared me a bit so I used sweet potatoes)
1 12-oz. can coconut milk
1 12-oz. can evaporated milk
1/2 – 1 cup sugar (this isn’t meant to be too sweet, but if you prefer it sweeter, feel free to use the full cup of sugar)
1 teaspoon salt
pinch ginger
pinch cinnamon
1 teaspoon vanilla extract
*the cinnamon and vanilla isn’t traditional, but I wanted to put my own spin on it
In a medium pot over high heat, bring 1 1/2 cups water and pearl barley to a boil. Reduce heat to low and cook covered for 40-45 minutes, until the barley is tender.
In a separate pot, bring another 2 cups water to a boil. Add in the tapioca pearls and cook for 10-12 minutes, until clear and cooked through.
In a large stock pot, bring the 3 cups water and diced sweet potato to a boil. Cook for 10 minutes until the sweet potato is tender. Stir in the cooked barley, coconut milk, evaporated milk, sugar, salt, cinnamon, ginger and vanilla. Lastly, stir in the tapioca. Taste for sweetness and add more sugar and spices as needed. Remove from heat. Serve and enjoy!
*Tong sui can be enjoyed warm or cold.
I had lots of fun making this soup- it’s so different and unusual compared to the things I normally make. That’s why I’ve enjoyed this challenge so much. Not only have I succeeded in cooking a delicious dish from a completely different culture, I made my first ever trip to the Asian market! Now THAT was an experience! I’ve discovered so many wonderful ingredients and ideas that I would have never even considered trying before. Like I said, that was the old, boring Amy! Who knows what I’ll try next- Billy also gave me a great recipe for sweet dumplings to make for Chinese New Year! Bring it on! I’m a new woman!
