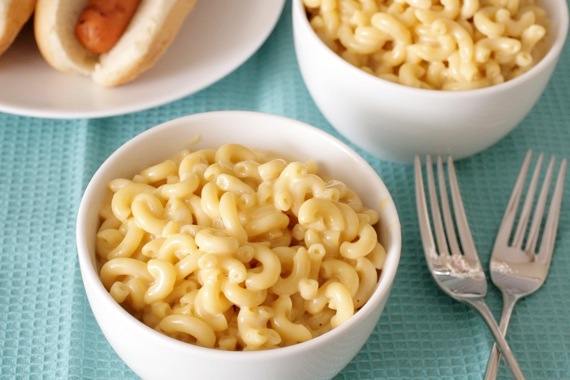
If you were to ask 10 people what the quintessential American side dish is, I’m betting at least 6 or 7 of them would say ‘mac and cheese’. I’m pretty certain it’s most people’s favorite comfort dish. Think about it, when you’ve had a rotten, tiring day and want something easy and comforting for dinner, what do you turn to? For me, no doubt, it’s mac and cheese. Something about that cheesy, gooey goodness makes me feel like a million bucks after just one bite. All my stress melts away. While I do, indeed love the stuff from the blue box, I have to admit, nothing beats homemade. This is a spin on how my mom used to make it, with cheddar and Velveeta cheeses. Yum, yum, yummy!
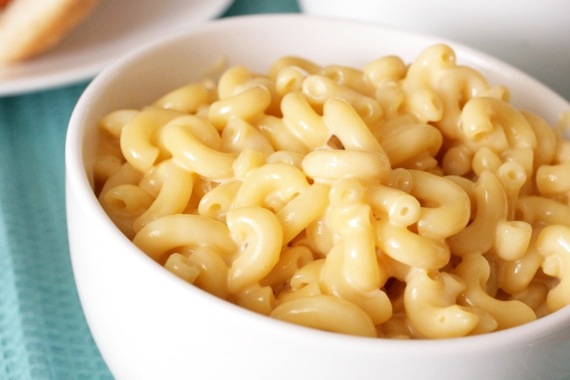
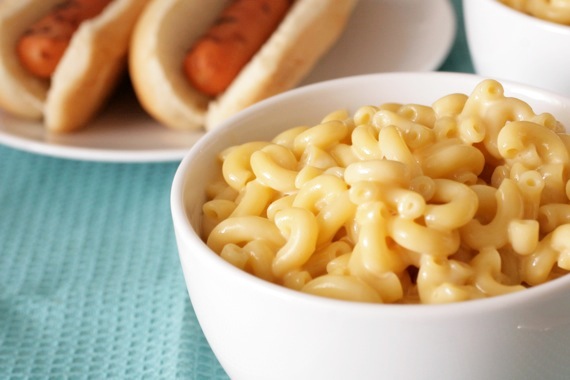
Classic Macaroni and Cheese
1 pound elbow macaroni pasta
2 tablespoons butter
2 tablespoons flour
1/2 teaspoon ground mustard
salt and pepper
1 12-ounce can evaporated milk (feel free to use reduced fat milk)
1 cup shredded cheddar cheese
8 ounces Velveeta cheese, cubed
Boil the pasta until al dente then drain and set aside.
While pasta is boiling, make the sauce. Melt the butter in a large pan over medium heat. Stir in the flour, ground mustard, salt and pepper and whisk for 1 minute. Slowly pour in the milk and whisk constantly until it thickens. Add the cheeses and stir until melted.
Pour the sauce over the macaroni and stir to coat. Serve immediately.
Recipe source: adapted from my mom’s recipe (I’m not certain where the original recipe came from)
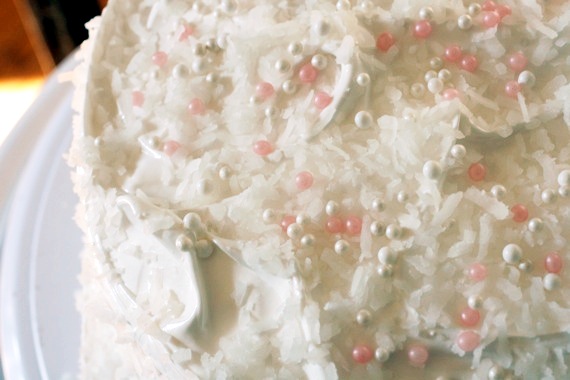
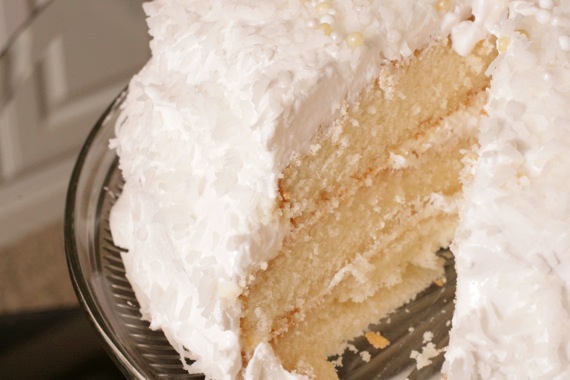
This is a very special, nostalgic cake for my family. It was my great-grandmother, Baba’s favorite go-to cake recipe. The Lady Baltimore Cake. It’s dainty, delicate, feminine and beautiful to look at. It starts with a light, tender white cake, filled with a delicate orange marmalade filling, spread with a fluffy marshmallowy frosting and sprinkled all over with sweetened coconut. Baba made this cake for special occasions, birthdays, holidays, etc. My mother’s birthdays were made so special because Baba would always make her this cake. And finally, after years of being too scared to try it for myself, I made it for my mother’s birthday last week. I love making something that Baba used to make- it’s almost as if it transports me through time and I’m standing next to her in her kitchen, baking alongside her.
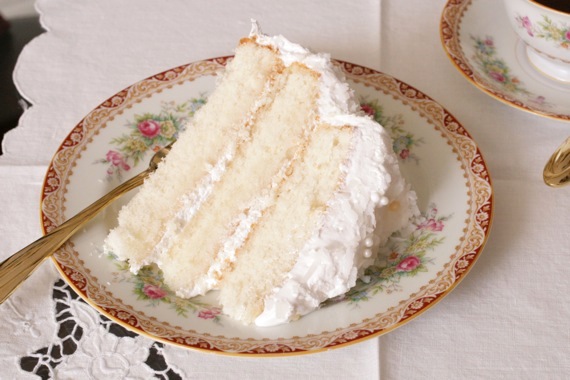
Food is so powerful. One taste can bring back old friends, memories, and family. Glancing at an old, hand-written recipe can bring back smells and emotions and feelings from your childhood. Eating at your mom’s table, no matter your age, can make you feel safe and happy. Sharing a dessert with your husband can make you feel so loved and secure. And baking a cake from a book that your great-grandmother once used links you to something you can’t quite explain. I was so happy to make this cake for my mother, because for one short moment, we both got to be with Baba again. This is a very special cake. One I hope to be making for years and years to come.
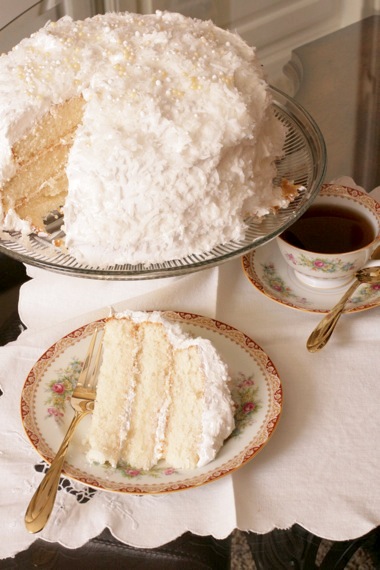
(That’s Baba’s china my mom let me use in the pictures- we thought it only fitting! Isn’t it gorgeous?)
The cake portion of this recipe is very similar to Dorie Greenspan’s Perfect Party Cake (my favorite white cake recipe), which is why it’s so light and fluffy. However, I noticed something odd while reading over the frosting portion of the recipe; no butter. NO butter?! What?! But I trudged on, thinking to myself, “Baba used this recipe a ton, so it must be right!” Upon actually making it, I realized it’s basically a marshmallow frosting. YUM! The frosting takes a little extra time and effort but in the end, it’s worth every second. I couldn’t get Joel to stop eating it! If you ever need an impressive cake for a special occasion, try the Lady Baltimore Cake- it’s different from your run-of-the-mill white cakes and really looks beautiful on a cake stand. It would really be perfect for showers, actually.
Lady Baltimore Cake
3/4 cup butter, at room temperature
2 cups sugar
grated zest of one lemon
3 cups cake flour
3 teaspoons baking powder
1/2 teaspoon salt
1/2 cup milk
1/2 cup water
1 1/2 teaspoons vanilla
6 egg whites
Preheat oven to 350 degrees and line 3 9-inch cake pans with parchment paper and grease generously.
Cream butter, sugar and lemon zest together until light and fluffy, about 2 minutes. Sift flour, baking powder and salt together and set aside.
Combine milk, water and vanilla. Add small amounts of flour mixture to creamed butter mixture, alternately with milk mixture, beating until smooth after each addition.
Beat egg whites until stiff and gently fold into batter. Pour into prepared pans and bake for 20-25 minutes, or until a toothpick inserted into the center comes out clean. The cakes shouldn’t get very brown on top. Allow to cool for 10 minutes in the pans, then transfer cakes to wire wracks to cool completely.
For the Orange Marmalade Filling:
3/4 (18-ounce) jar orange marmalade
1 tablespoon fresh orange juice
1 tablespoon fresh lemon juice
1 teaspoon Grand Marnier (or any orange liqueur), optional
Heat the marmalade, orange juice and lemon juice in a small saucepan over medium heat just before it reaches boiling point. Remove from heat and stir in the Grand Marnier. Strain out the peels and allow to cool to room temperature.
For the Frosting:
3 cups sugar
1 cup water
1/4 teaspoon cream of tartar
3 egg whites
1 teaspoon vanilla
sweetened, flaked coconut, for garnish
Using a mixer, beat egg whites until stiff.
Boil sugar, water and cream of tartar in a small saucepan over medium-high heat until it reaches 238 degrees on a candy thermometer, or until a small amount of syrup will form a soft ball when dropped into very cold water (this is what’s known as “soft ball stage”).
With the mixer running, slowly pour the hot syrup over the egg whites and continue to beat until the mixture is of spreading consistency (this could take up to 10 minutes; don’t be alarmed if your mixture is runny, just keep beating and eventually it will thicken up.). Add vanilla.
To Assemble:
Spread half of the orange marmalade filling in the center of the bottom cake layer, leaving an inch border around the outside (when you add the frosting, the marmalade will spread). Gently spread some of the frosting over the marmalade and place second cake layer on top. Repeat with the other half of the marmalade filling and more frosting, then place the third cake layer on top. Frost the whole cake with the frosting (be generous, the recipe makes a TON of frosting!) and sprinkle generously with coconut. Refrigerate until 30 minutes to one hour before serving.
Recipe source: adapted from Baba’s favorite, The American Woman’s Cookbook
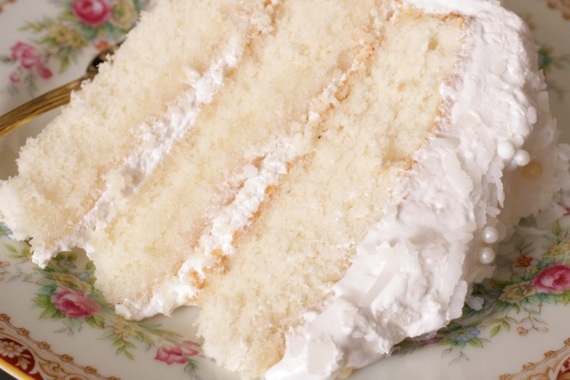
I hope this cake made your birthday extra-special, mommy! I love you!
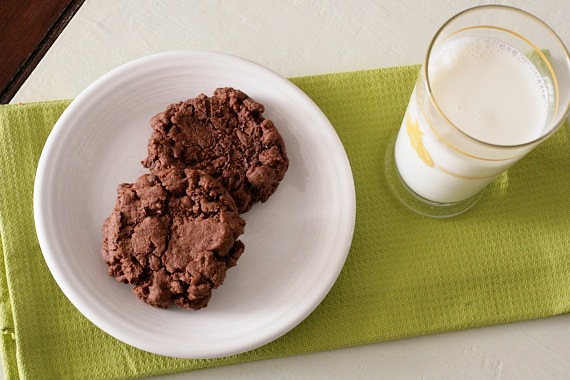
Are you ready for a chocolate explosion in your mouth?! These big, fat, gooey, chocolaty cookies are just that- an explosion of chocolate awesomeness. Annie posted these awhile back and I immediately thought, “oh, please let me have all the ingredients to make these cookies!” Sure enough, these are the BEST kind of cookies- the kind that require very few ingredients, all of which you most likely already have in your pantry/fridge! I LOVE cookies like that! The dough takes no time to throw together (and tastes AMAZING- seriously. I’m not a huge raw cookie dough eater, but this dough was irresistible!), and the cookies themselves are just melt-in-your-mouth delicious. I highly recommend these – they’ll satisfy any emergency chocolate craving in less than 20 minutes, and they’d also be wonderful for parties, get-togethers or after school snacks. Or co-workers. Mine couldn’t leave these alone; we all kept taking turns microwaving ours for a few seconds for optimum gooeyness. That’s a must, by the way. These cookies are best when warm- WITH milk!
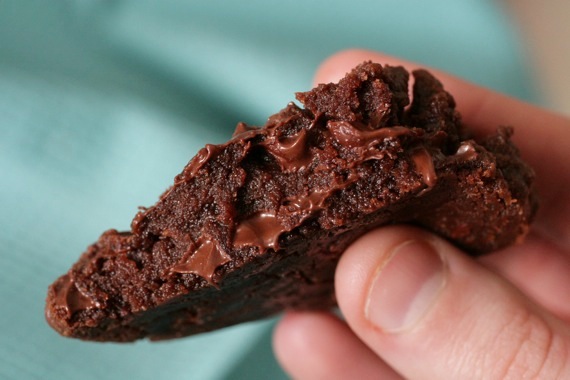
Thanks to Joel for his wonderful hand modeling skills. Nobody can hold a cookie like he can. 🙂
Giant Double Chocolate Cookies
1 cup (2 sticks) cold, unsalted butter, cubed
1 1/4 cup sugar
2 large eggs
1/2 cup dark cocoa powder
2 1/4 cups all-purpose flour
1/4 teaspoon coarse salt
1 teaspoon baking powder
2 1/2 cups semi-sweet chocolate chips
Preheat the oven to 350˚. Line baking sheets with parchment paper or silicone baking mats. In the bowl of an electric mixer, combine the butter and sugar. Beat together on medium-high speed until light and fluffy, 2-3 minutes. Blend in the eggs one at a time, scraping down the bowl as needed. Mix in the cocoa powder until well blended. Add the flour, salt and baking powder to the bowl and mix on low speed just until incorporated. Fold in the chocolate chips with a spatula. Transfer the dough to a work surface and knead briefly by hand to be sure the ingredients are well combined.
Divide the dough into 4 ounce portions (or divide into 12 equal pieces). Roll each portion of dough into a ball and flatten just slightly into a disc. Place on the prepared baking sheets, a few inches apart. Bake 16-20 minutes. Let cool on the baking sheets 5-10 minutes, then transfer to a wire rack to cool completely.
Makes 12 very large cookies.
Recipe source: Annie’s Eats; originally seen on My Baking Addiction, inspired by Levain Bakery
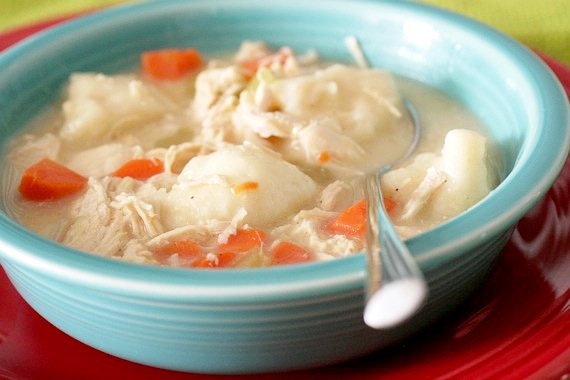
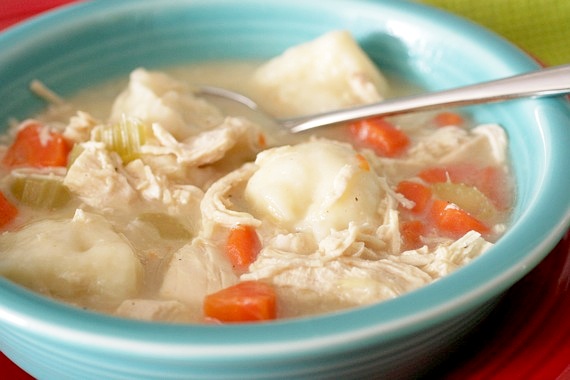
You’ve seen these chicken and dumplings here before. In fact, according to my StatPress, it’s one of the most searched for items on my blog. Funny, isn’t it? I guess people really appreciate recipes with good shortcuts! I have to be honest- this really is a truly delicious, easy, family-pleasing recipe; but it’s been buried in my archives for almost 2 years now (with some really, really bad pictures). I think it needs a little freshening up, don’t you? So here it is, the same great recipe, re-shot and re-submitted for your approval!
“Cheater” Chicken and Dumplings
1/4 cup olive oil
4 boneless, skinless chicken breasts
1 medium onion, diced
2 cups diced carrots
1 cup diced celery
1 cup dry white wine
1/2 tablespoon salt (plus more to taste)
1/2 tablespoon fresh ground pepper (plus more to taste)
6 cups chicken stock
5 frozen biscuits (such as Pillsbury Grands Frozen Biscuits), thawed enough to cut into pieces
Pat the chicken dry and season with salt and pepper. Heat half of the olive oil (1/8 cup) in a large pot or Dutch oven over medium-high heat. Sear the chicken, turning the pieces so that all sides are slightly brown, about 3 to 4 minutes for each side. Remove the chicken pieces and place on a paper towel-lined plate. Add the remaining 1/8 cup of olive oil to the pot, along with the onions. Saute the onions until they’re soft, about 6 minutes. Add the carrots, celery, and white wine. Scrape up any brown bits from the bottom of the pot. Saute, stirring frequently, for another 6 minutes. Add the chicken back to the pot. Cover the meat and vegetables with chicken stock. Bring to a boil. Reduce heat to medium-low and simmer, partially covered, for 90 minutes. (This step is especially flexible. If your liquid is reducing too much, you may need to add more chicken stock. If the dish is too liquidy, turn up the heat and to reduce the stock more. The idea is to end up with a consistency of a very thick stew.) If the broth is not as thick as you would like, remove one cup of the broth into a measuring cup and whisk in 1 tablespoon of corn starch. Return the broth to the pot and stir. Remove chicken pieces with tongs and allow them to cool. Shred into small pieces. Return to the pot. Cut the frozen biscuits into thirds. Drop the pieces onto the top of the chicken and vegetable mixture. Cover and cook on medium-low heat for 8-10 minutes, until the dumplings are cooked through. Serve immediately.
**Alternatively, you can cook your chicken in a crockpot, shred it, then add it in with the vegetable/wine/broth mixture. If you do this, you won’t need to simmer everything for 90 minutes- 20 or 30 would be plenty- just long enough to cook the vegetables until soft. This is what I’ve always done and it comes out perfect everytime!
Recipe source: adapted from The Bitten Word
Today I have a very special post for you. I’ve been thinking about it and planning it for months and I’m tickled pink to finally get to post it! Today I’m hosting a virtual wedding shower for my dear friend, Kelsey. Though we’ve never actually met in person, she’s been one of my closest blogging friends for almost 3 years now and I just know someday we’ll get the long-awaited chance to meet. She’s a wonderful, encouraging, sweet girl, so naturally, when she first announced months ago that she and Michael were getting married, I decided I just HAD to throw her a virtual shower!
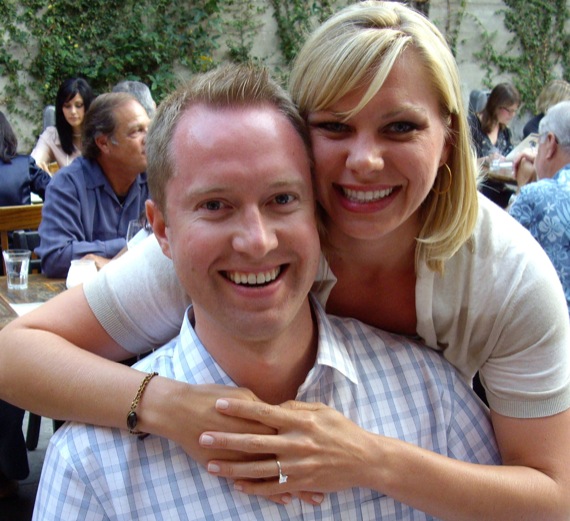
(What a cute couple! I love this picture- they look so perfectly happy and in love!) This is going to be so much fun- we’ve got some wonderful girls with awesome blogs participating and I’m just thrilled! The wedding is March 11th (only 9 days away- eeeek!!) and knowing Kelsey like I do, I have NO doubt it’s going to be the most gorgeous wedding! She and Michael are seriously one of the CUTEST couples ever and though I’ve never actually met either of them in person, I just know they’re going to have a beautiful and happy marriage! Cheers, Kelsey and Michael!
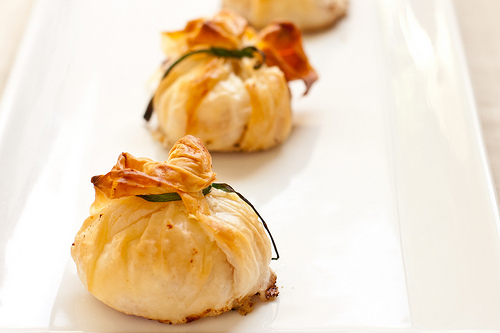
First up, Shawnda of Confections of A Foodie Bride made these adorable Phyllo Purses with Goat Cheese. Oozy goat cheese and crispy pancetta filling wrapped in phyllo “purses.” These look seriously amazing…too bad this is just a “virtual” shower, because I’d sure love to get my hands on two or three of these!
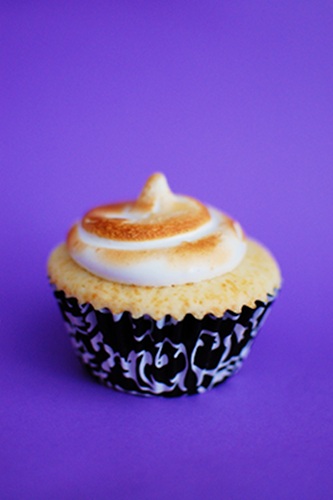
Jen of Beantown Baker baked these sweet Lemon Meringue Cupcakes. Tender yellow cupcakes filled with creamy lemon curd and topped with toasted marshmallow meringue frosting – YUM! I’m definitely going to have to try these myself one day!

These bright and festive Peach and Strawberry Bellinis come from Courtney of Cook Like A Champion. What’s a shower without a festive drink to enjoy? These fun and feminine drinks can be made with any kind of fruit, but strawberries and peaches really give them a great color! I’m especially excited about these, because they coordinate with my own dish!
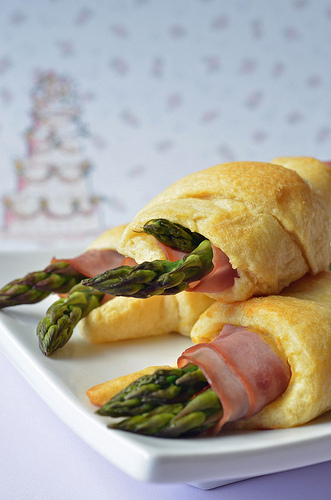
Nikki of Pennies On A Platter contributed these yummy looking Dijon Ham and Asparagus Roll-Ups. These flavorful roll-ups combine the best of both worlds with your sandwich and vegetable options! Just a few easy steps and you’ve got an elegant appetizer perfect for a bridal shower! These look beautiful on a platter and they’re perfect finger food to boot!

Lindsay of Peace, Love and French Fries put together what she calls her “Indulge Salad” – a copy cat recipe from one of her favorite restaurants, this super simple salad has it all – a little creaminess from the goat cheese and avocado, a nice crunch from the pistachios, and topped with an easy homemade Italian dressing. Feels like an indulgence, but we get to save all of our calories for dessert! This is my kind of salad!
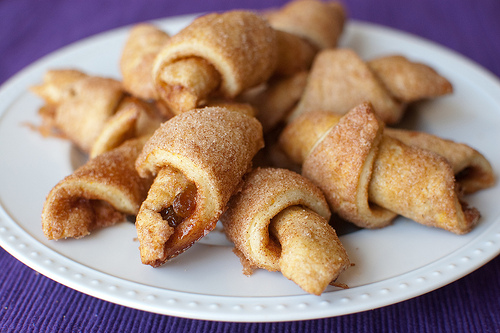
Josie of Pink Parsley Catering made Cinnamon Crescents as her contribution. With cinnamon-y sweet flavor reminiscent of a churro, these crescents are made from a yeasted dough, coated in cinnamon and sugar and filled with plump golden raisins. These look absolutely delicious, Josie!

Brady of Branny Boils Over made Pink Pizza with Acorn Squash, Caramelized Onions and Beet Greens. Crisp whole wheat pizza dough topped with sweetened acorn squash, caramelized onions, steamed beet greens, and ricotta cheese. Pink pizza crust? How cool is that?! Kelsey LOVES pink, so I know she’s sure to love this pizza!
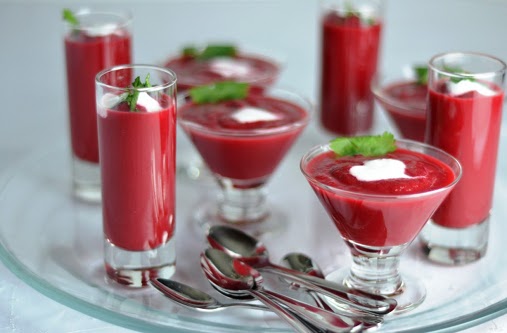
Cara of Cara’s Cravings put together this gorgeous Spiced Beet Soup– a beautiful, deep red color with a taste of warm Asian spices. I don’t know about you, but this is definitely the most beautiful looking soup I’ve ever seen! I love the dollop of creme fraiche on the tops; so colorful and vibrant!
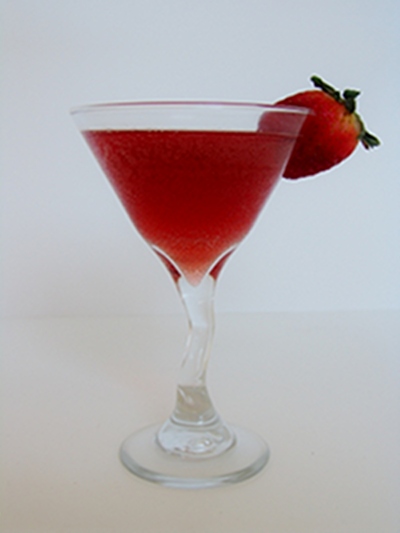
Here’s another fun and fruity drink contributed by Karen of Loves To Eat. Karen made this fizzy Champagne Cocktail using cranberry juice, orange liqueur, fresh lime juice and bubbly champagne – sounds fabulous! A delicious way to toast Kelsey and Michael!
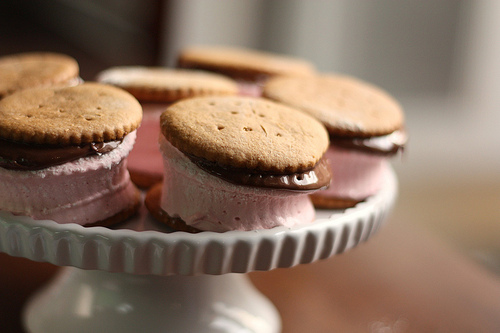
Amy of The Nifty Foodie put together these adorable Homemade S’mores. She sandwiched homemade mixed berry marshmallows and sweet, gooey nutella between crisp, homemade graham crackers- a fantastic treat for Kelsey’s shower! I personally love that the marshmallows are pink – so girly and feminine!
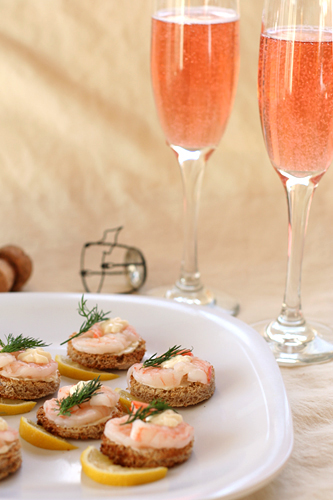
These gorgeous looking Shrimp Canapes come from Bridget of The Way the Cookie Crumbles. These little toasts topped with salted butter, shrimp, fresh dill and mayonnaise are simple but delicious and absolutely perfect for a bridal shower!
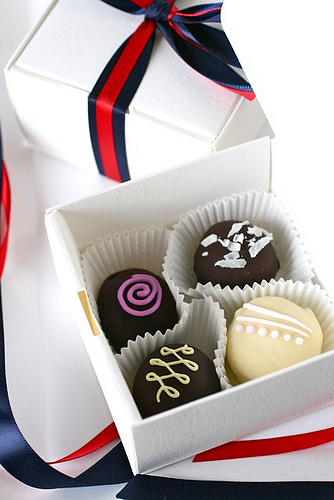
Annie of Annie’s Eats made these adorable Assorted Truffles as party favors. Coconut, lemon chiffon, blackberry, and strawberry cheesecake truffles in sweet little boxes tied up with ribbons coordinating with Kelsey and Michael’s wedding colors. How cute is that?! Annie, I’ll send you my address so you can ship me a box of these! 😉
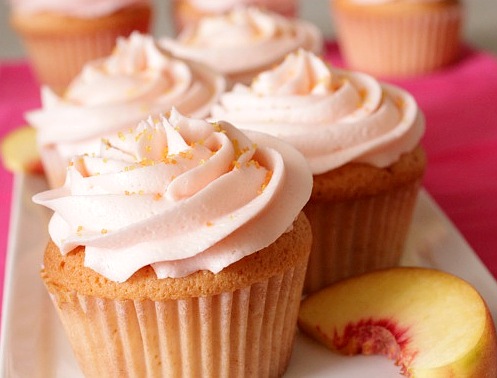
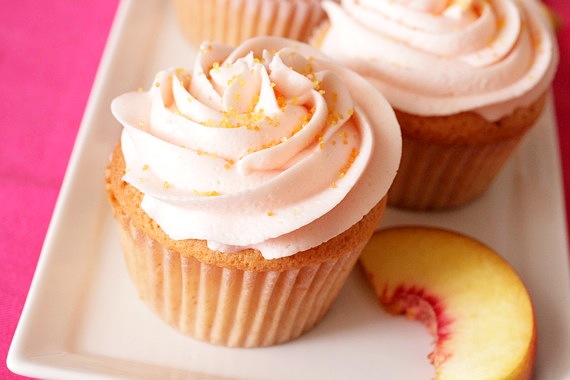
For my own contribution, I made these Peach Bellini Cupcakes. Moist champagne cake with peach schnapps and bits of diced peaches baked in and topped with a peachy champagne buttercream frosting. Kelsey told me she loves peach bellinis and that she and her sister shared many a bellini over the years (Kelsey, she’s here with us today, sharing in your happiness – I know it.). I’ve always been a big fan of champagne cake and wanted to jazz it up a bit – the addition of peaches and peach schnapps really adds a nice flavor! Kelsey, it’s too bad this was only a virtual shower and that you don’t get to actually taste any of these beautiful dishes, but feel free to come visit me and I’ll make you all the peach bellini cupcakes you can eat! 🙂
I’d like to thank each and every blogger who took the time to submit such gorgeous, scrumptious looking recipes for Kelsey’s shower- I know she definitely appreciates and I do too! I am so blessed to have such a wonderful group of food blogging friends- hugs to each of you!
To see Kelsey’s take on the shower, visit her blog!
Peach Bellini Cupcakes
1 cup (2 sticks) unsalted butter, at room temperature
2 cups sugar
1 teaspoon vanilla
6 egg whites
3 cups all purpose flour
3 teaspoons baking powder
1/2 teaspoon salt
3/4 cup champagne
1/4 cup peach schnapps
1 small peach, peeled and diced
Peachy Champagne Frosting
3/4 cup (1 1/2 sticks) unsalted butter, at room temperature
4 cups powdered sugar
1/4 cup champagne
1 tablespoon milk
1 teaspoon peach schnapps
1 teaspoon vanilla
2-3 drops red food coloring, if desired
Preheat oven to 350 degrees. In a medium sized bowl combine flour, baking powder and salt. In a mixing bowl beat together butter and sugar for 3-5 minutes until light and fluffy. Add vanilla, then beat in egg whites one at a time.
Add in flour mixture and champagne/schnapps mixture (I mixed the peach schnapps in with the champagne) in three alternating additions, beginning and ending with the flour mixture. Gently stir in the diced peaches. Pour batter into cupcake liners, filling 2/3 full. Bake for 25-30 minutes, or until toothpick inserted into center comes out clean.
To make the frosting beat together the butter and vanilla. Add powdered sugar in one cup increments, then add champagne, milk, peach schnapps and food coloring. Frost cupcakes once they have completely cooled. I also sprinkled with a little orange and yellow sugar, for decoration.
Makes 2 dozen cupcakes.
Recipe source: champagne cupcake recipe from Baking Junkie, originally from Booze Cakes. The addition of peaches and peach schnapps was my idea.

CONGRATULATIONS, KELSEY AND MICHAEL!!!!!
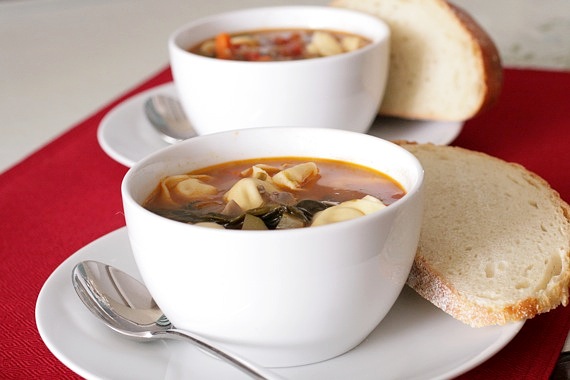
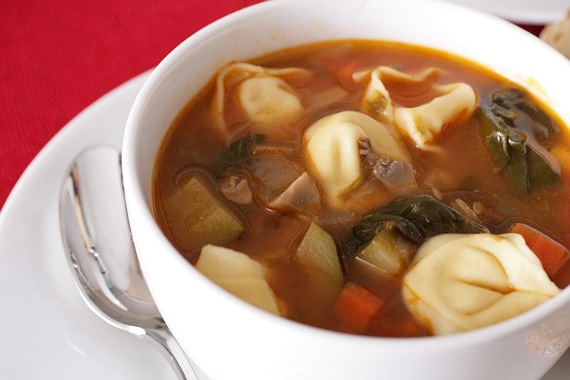
I just can’t believe that with the many pots of soup I’ve made over the years, this hasn’t been one of them. I mean, how could I discount such a delicious concept? Cheese-filled pasta in soup?! Brilliant! This couldn’t have been easier to make and it’s so hearty and filling. I really love all the chunky vegetables along with the soft, cheesy pasta…this was so delicious and comforting. All you need is a little crusty bread and you’ve got a delicious, healthy meal! And the leftovers are even better! I made this soup weeks ago during all the horrible, snowy weather we were having and it was comforting and so yummy! I’m so happy this thought popped into my head- we’ve discovered a new favorite!
Vegetable Tortellini Soup
2 tablespoons olive oil
1 small onion, chopped
1 clove garlic, minced
3 carrots, peeled and chopped
1/2 cup red wine
1 can diced tomatoes
1 medium zucchini, chopped
1 bunch fresh spinach, rinsed and roughly chopped
7-8 cremini mushrooms, cleaned and chopped
4 cups vegetable or chicken broth
1 package (12 oz.) cheese tortellini (found in the refrigerated section)
salt and pepper
In a large pot, heat the olive oil over medium-high heat. Add in the chopped onion and carrots. Cook for 5-7 minutes, until vegetables are starting to soften, then add in the garlic and cook for 1 minute more. Stir in the wine and scrape off any bits from the bottom of the pan. Add in the tomatoes, zucchini, salt and pepper and broth; bring to a boil then reduce heat and cook for about 20 minutes, until all the vegetables are soft. Stir in the fresh spinach, mushrooms and tortellini. Cook for 15 minutes more. Serves 4.
Recipe source: Sing For Your Supper
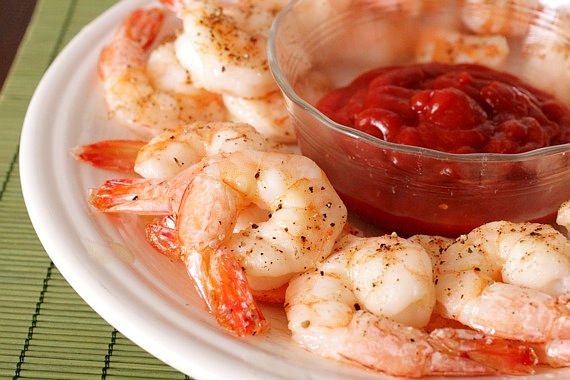
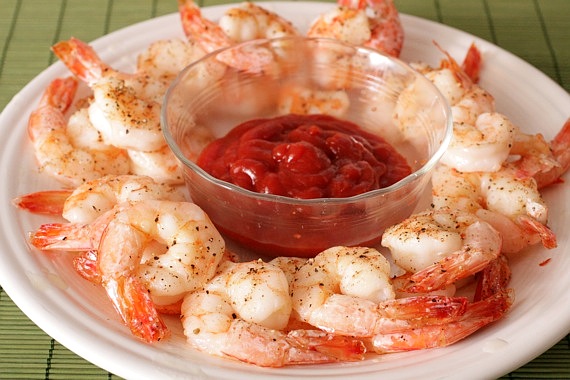
This is one of those great, impressive easy-as-can-be appetizers that make you look like a rock star, but really took you less than 10 minutes to throw together. Aren’t those the greatest?! I like to keep a stack of fast, easy appetizer recipes handy for when I need to put something together in a hurry, and roasted shrimp cocktail is definitely one of them! It’s great for get-togethers, or if you’re hosting a nice dinner party, or maybe if you just want a nice, no-fuss appetizer for a quiet dinner at home for you and your sweetie. Everybody loves shrimp cocktail, but I feel like it gets a little tiresome after awhile; this is the perfect way to make it interesting again! Give it a try at your next party- your guests will love it!
Roasted Shrimp Cocktail
2 pounds (12 to 15-count) shrimp
1 tablespoon good olive oil
1/2 teaspoon kosher salt
1/2 teaspoon freshly ground black pepper
Preheat the oven to 400 degrees F.
Peel and devein the shrimp, leaving the tails on. Place them on a sheet pan with the olive oil, salt, and pepper and spread them in 1 layer. Roast for 8 to 10 minutes, just until pink and firm and cooked through. Set aside to cool.
Serve with cocktail sauce for dipping.
Recipe source: Ina Garten
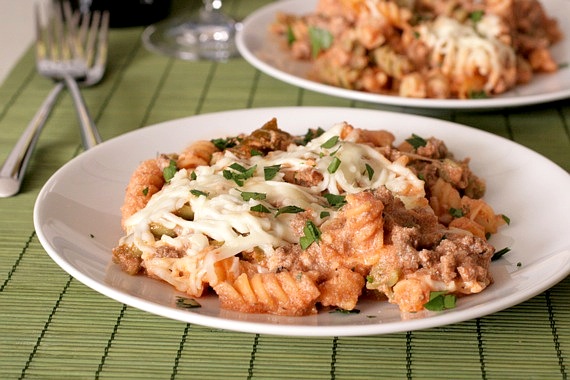
Everybody loves lasagna but they don’t always have the time to put one together. Let’s be frank- it’s a slight pain in the butt. Not hard. Just a little time-consuming. I ran across this problem last week while trying to think up a quick dinner; lasagna sounded SO delicious, but I just didn’t have the time to whip one up. That’s where this pasta comes in. It’s totally quick and easy (we’re talking under 30 minutes to make!) and has all the delicious components of lasagna…without any of the trouble! The most time-consuming part is browning the beef and boiling the pasta – easy peasy! This is another extremely weeknight-friendly dish, and I think we could all use a few more of those! Try this next time you’ve got a craving for lasagna but don’t have the time! It won’t disappoint!
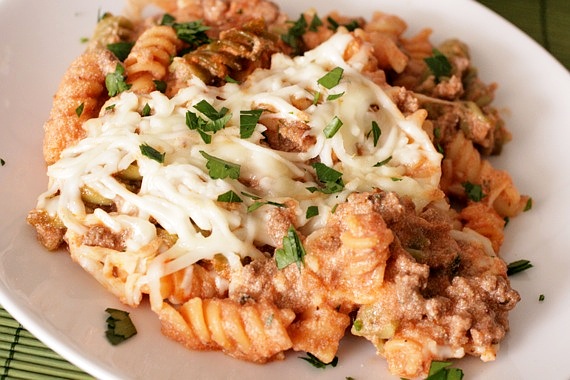
Rotini Lasagna
1 pound lean ground beef
1 pound (16 ounces) rotini pasta (any short pasta you have will work)
1 28-ounce jar spaghetti sauce (of course homemade is great too)
1/2 cup water
1/2 teaspoon salt
1 15-ounce container ricotta cheese
1/4 cup chopped fresh parsley
1/2 cup shredded mozzarella cheese
Preheat oven to 350 degrees. Brown and drain beef in a large skillet. Stir in spaghetti sauce, water, salt, ricotta cheese and parsley.
Cook the pasta according to package directions and drain. Stir into beef mixture. Pour into a greased 9×13 baking dish and top with the mozzarella cheese. Bake for 15 minutes. Top with additional parsley, if desired and serve.
Recipe source: inspired by a recipe seen on The Pioneer Woman via Tasty Kitchen
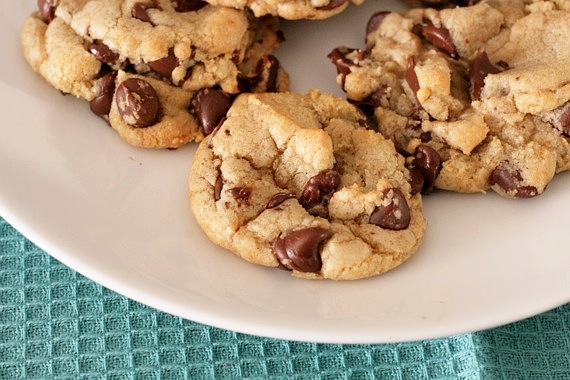
Joel, our friends, my parents, grandparents, co-workers, neighbors, brother-in-law, opera friends….these are all the people who claim these to be their all-time favorite chocolate chip cookies. That’s not something to be taken lightly. These cookies have been hastily featured on here before, but they most certainly did NOT receive the full respect and attention they deserve. Now, I know I’ve definitely made my fair share of chocolate chip cookies through the years, but just bare with me while I share just one more (for now!)- the BFCCCCs (Big, Fat, Chewy Chocolate Chip Cookies). I’ve honestly never made these for anyone who didn’t immediately say they were the best they’ve ever had, and I’ve made these a floppity-gillion times. That’s big. For me, it’s sort of a toss-up (and also depends largely on what mood I’m in) between these and the famous NY Times chocolate chip cookies. But for whatever reason, when I make chocolate chip cookies, it’s usually these. 🙂 I realize the cookies in my pictures are not exactly “big and fat”- I prefer my cookies on the smaller side, so I always use a standard cookie scoop instead of the heaping 1/4 cup-size scoop it calls for.
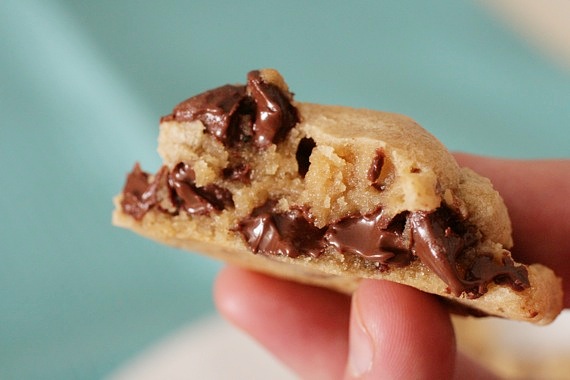
You see that? That’s heaven in cookie form, right there! There’s not much better in life than a warm chocolate chip cookie and a glass of milk. Honestly. Now, I can’t actually tell you where this original recipe started. It bares a striking resemblance to the Cook’s Illustrated recipe, but with a few minor changes; yet the original recipe I first found was from allrecipes.com. Who knows. What I do know is, it’s delicious.
Big, Fat, Chewy Chocolate Chip Cookies
2 cups, plus 2 tablespoons all-purpose flour
1/2 teaspoon baking soda
1/2 teaspoon salt
1 cup unsalted butter, melted and slightly cooled
1 cup packed brown sugar
1/2 cup white sugar
1 tablespoon vanilla extract
1 egg
1 egg yolk
1 1/2 cups semisweet chocolate chips
Preheat the oven to 325 degrees. Line cookie sheets with parchment paper. Sift together the flour, baking soda and salt; set aside.
In a medium bowl, cream together the melted butter, brown sugar and white sugar until well blended. Beat in the vanilla, egg, and egg yolk until light and creamy. Mix in the sifted ingredients until just blended. Stir in the chocolate chips by hand using a wooden spoon.
Drop cookie dough 1/4 cup at a time onto the prepared cookie sheets. Cookies should be about 3 inches apart.
Bake for 15 to 17 minutes in the preheated oven, or until the edges are lightly golden (If you’re making smaller cookies like mine, bake them for about 10 minutes). Cool on baking sheets for a few minutes before transferring to wire racks to cool completely. Makes approximately 12-14 very large cookies or 36 smaller cookies.
Recipe source: allrecipes.com
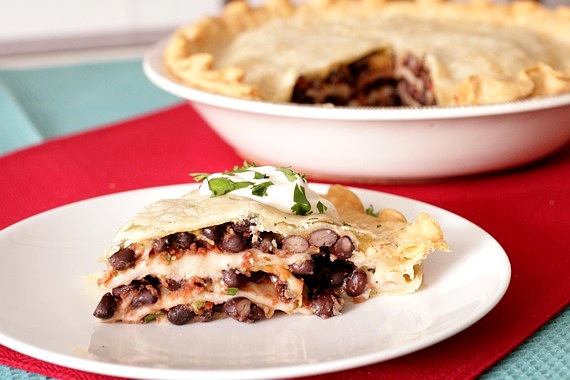
Here’s another winning recipe from my sweet coworker, Janna. She hosted us all for a Christmas party this year and served ALL KINDS of delicious food- including this black bean pie. I have to admit, when she first told me about it, I was a little curious about the ingredients; I wasn’t sure it sounded like something I’d like. However, after one taste, I was hooked! It’s the easiest dish in the world to whip up- canned black beans, salsa, cheese, tortillas and pie crust- that’s it! This is one of those perfect weeknight meals for when you need to feed your family in a hurry. It would be a new and fun alternative to “taco night”! It’s delicious and we both love it! Thanks, Janna, for another delicious recipe!
Black Bean Pie
2 9-inch pie crusts
2 cans black beans, drained and rinsed
1 cup salsa (your favorite store-bought brand or homemade)
3/4 cup shredded cheddar cheese
2 flour tortillas
cilantro (optional)
Preheat the oven to 350 degrees. Press one of the pie crusts in the bottom of a pie plate.
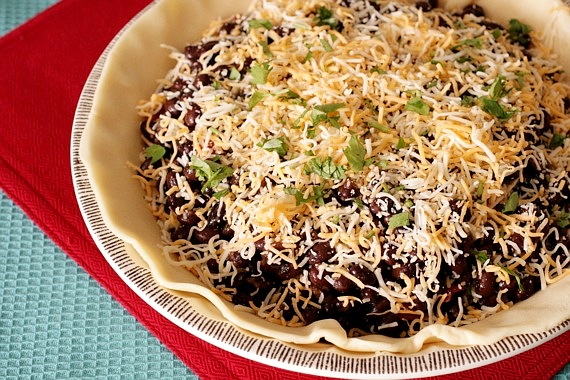
In a large bowl, combine the beans and salsa. Spread 1/3 of the mixture in the bottom of the pie plate. Top with 1/3 of the cheese and a sprinkling of cilantro, then one of the flour tortillas. Repeat with another 1/3 of the bean mixture, cheese and cilantro and tortilla. Finally, spread the last of the bean mixture, cheese and cilantro. Top with the 2nd pie crust and seal the edges. Make 4 small slits in the center of the crust with a small knife.
Bake for 30-40 minutes, or until crust is golden brown. Serve with sour cream and additional cilantro, if desired.
Recipe source: my friend Janna, who got it from her mother


