Well, it looks like we all survived the Christmas hustle and bustle! I hope you all had as wonderful a Christmas as we did! Although there was lots of driving involved, we had so much fun with our families and ate SO much good food! Joel and I certainly enjoyed our last Christmas as a twosome, but we couldn’t help but dream of next year’s Christmas and how special it will be with Cassidy! 🙂
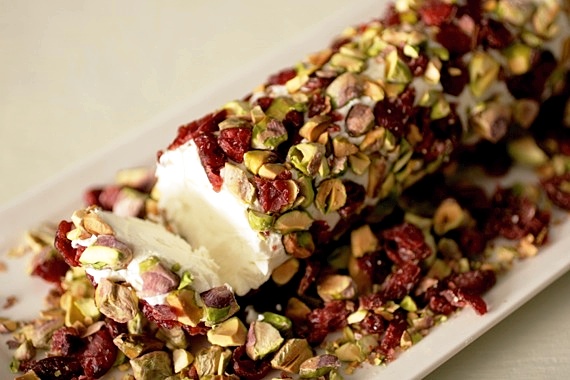
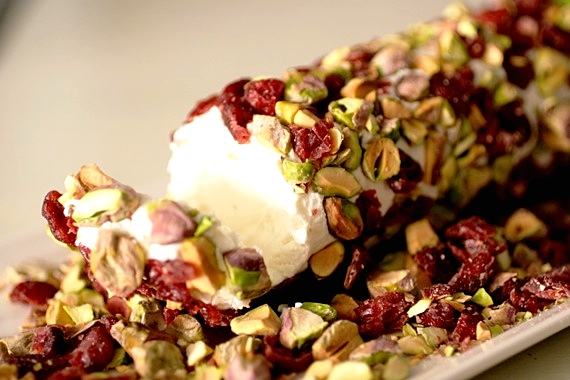
And now that Christmas is over, it’s time to start thinking about yummy New Year’s Eve snacks! Joel and I always have lots of different snack foods on New Year’s Eve instead of a big meal. We enjoy just staying home and enjoying a nice, quiet evening just the two of us (all that is sure about to change, huh?!). I’m thinking this year we’ll definitely be snacking on this appetizer for sure! I tried it just over a week ago when we had my parents and grandparents over for a nice meal (like we do every year before Christmas). I wanted a quick, easy, delicious appetizer that would require as little work as possible so I’d have more time for the rest of the cooking. I’ve had this recipe saved on Pinterest for weeks and weeks now and it turned out to be exactly what I was looking for. SO good! We all crowded around it and couldn’t stop eating it! The combination of the toasted pistachios and sweet cranberries was just ideal. I’ll be using this recipe again and again! If you’re headed to a party this New Year’s Eve or even just staying in like we do, this appetizer is just perfect! I hope you enjoy it as much as we did!
Goat Cheese Log with Pistachios and Cranberries
1 8-ounce log goat cheese
1/2 cup pistachios, shelled
1/2 cup dried cranberries, roughly chopped
sliced baguette or crackers for serving
In a small pan over medium-high heat, toast the pistachios until fragrant; about 3-5 minutes, stirring occasionally. Let cool.
Combine the pistachios and cranberries in a plate and roll the goat cheese log in the mixture until completely coated. Place on a serving dish and sprinkle the remaining pistachio/cranberry mixture around the log. Allow to sit out at room temperature for at least 15 minutes before serving so the cheese will soften nicely and become more spreadable. Serves approximately 6-8.
Recipe source: Real Simple

We hope you have a wonderful, merry Christmas and a happy New Year! We certainly have a lot to look forward to this January!!! Enjoy lots of yummy food and homemade goodies and being with family and friends!
Love,
Amy, Joel, Izzy and Cassidy (coming soon!)

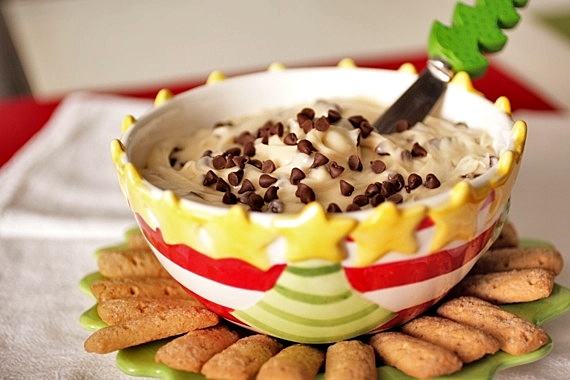
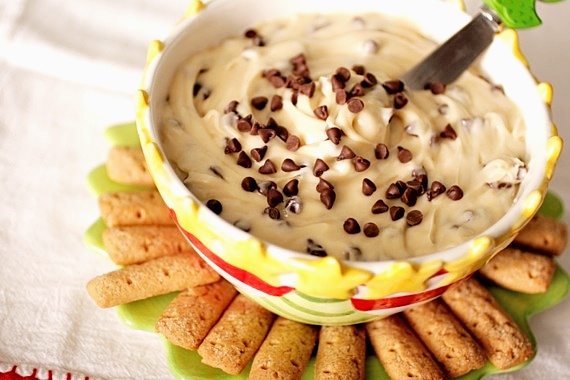
Going to a party soon? Need something quick, easy and delicious to bring along? I highly recommend this chocolate chip cookie dough dip! I mean, who doesn’t love cookie dough? It’s a big-time crowd pleaser, it’s easy and it can be ready in no time! I took this to a friend’s party this past weekend and it was a huge hit! I’m telling ya…you need to make this!
Chocolate Chip Cookie Dough Dip
1/2 cup butter
1/3 cup brown sugar
1 8-ounce block of cream cheese, softened
1 cup powdered sugar
1 teaspoon vanilla extract
1/2 teaspoon kosher salt
3/4 cup mini chocolate chips, plus extra for sprinkling
In a small saucepan, melt the butter over medium heat. Whisk in the brown sugar until it dissolves and the mixture starts to bubble. Stir in vanilla and set aside to cool.
In a separate bowl, cream the cream cheese and powdered sugar together for 60 seconds. With the mixer on low speed, add in brown sugar and butter mixture, then the salt. Mix until combined. Stir in the mini chocolate chips.
Garnish with additional mini chocolate chips. Serve with animal crackers, nilla wafers or graham crackers.
Recipe source: barely adapted from What Megan’s Making; originally from How Sweet It Is
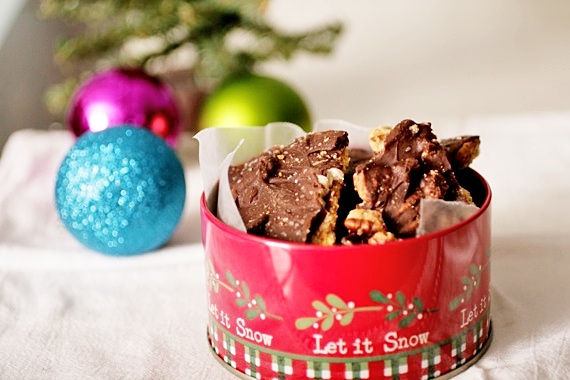
There’s officially less than a week until Christmas! Where has the time gone?! I feel like I didn’t get to take part in quite as much Christmas baking as I wanted to this year, but under the circumstances, I think I did pretty ok! I have about a month until Cassidy’s due date and have officially reached the “beached whale” point of my pregnancy. Joel is really enjoying making jokes at my expense (at least he makes up for them in foot rubs!). I think the month is going to absolutely FLY by and she’ll be here before we know it! We’re pretty darn anxious to meet her, too! 🙂
We had a party this weekend and I wanted to make something really delicious to munch on besides my usual M&M cookies for dessert. By now, you’re all well aware of my undying love for Pinterest, and naturally, that’s where I went for Christmas goodie inspiration! I’ve had my eye on these salted caramel pecan bars for weeks now and couldn’t wait to make them! I’ve made the famous Saltine Cracker Toffee, which we all loved and this is very similar. It’s sugary sweet with a nice toastiness from the pecans and a subtle saltiness that I just LOVE! All in all, a big hit at the party! Oh, and super easy to throw together, too!
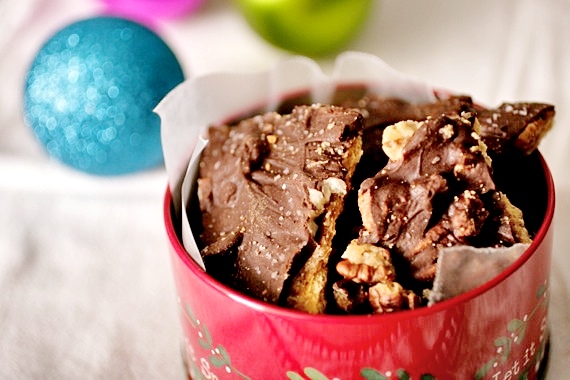
Salted Caramel Chocolate Pecan Bars
1 cup chopped pecans
12 whole graham crackers
1 cup firmly packed brown sugar
3/4 cup (1 1/2 sticks) butter
2 tablespoons whipping cream
1 teaspoon vanilla extract
1 cup semi-sweet chocolate chips
kosher salt
Preheat oven to 350°. Bake pecans in a single layer in a shallow pan 10 minutes or until toasted and fragrant, stirring halfway through.
Line a cookie sheet with aluminum foil and lightly grease. Arrange graham crackers in a single layer in prepared pan, slightly overlapping edges.
Combine sugar, butter, and cream in a medium-size heavy saucepan; bring to a boil over medium heat, stirring occasionally. Reduce heat and continue to cook until sugar is dissolved. Remove from heat, and stir in vanilla and pecans. Pour butter mixture over crackers, spreading to coat.
Bake at 350° for 8-10 minutes or until lightly browned and bubbly. Remove from oven and sprinkle with chocolate chips. Let sit for 5 minutes until chocolate is melted, then spread evenly over the caramel layer. Sprinkle with salt. Let cool. Chill for at least 30 minutes, then break or cut into pieces when ready to serve. Makes about 40 pieces.
Recipe source: Eat. Drink. Smile.
I know my posts have been a little more sparse lately and I apologize! Joel and I volunteered to sing with our hometown church choir’s Christmas program over the weekend, so the past few weeks have been extremely hectic! It was pretty cool getting to hear my daddy sing a solo, though! 🙂
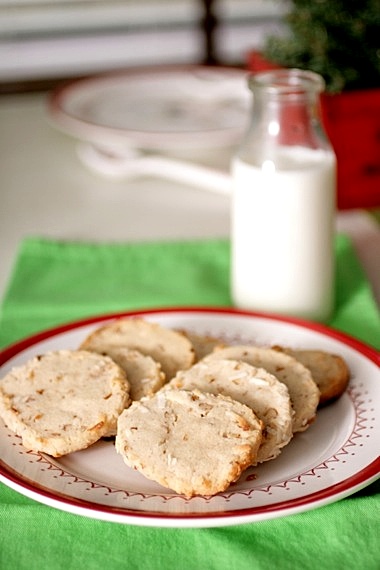
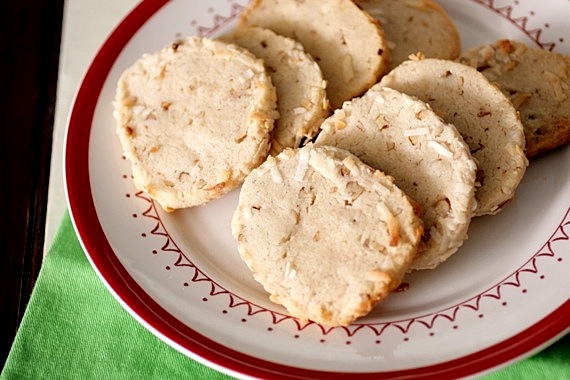
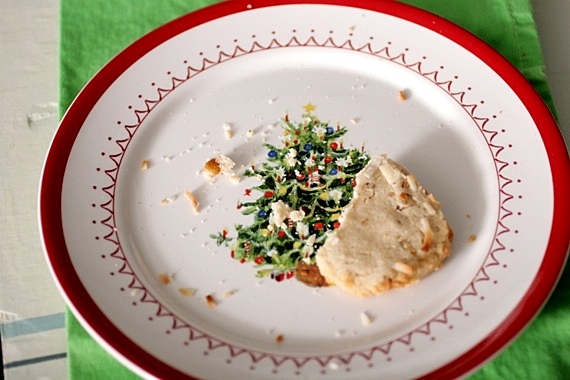
With all the craziness going on lately I haven’t gotten much of a chance to do as much Christmas baking as I would’ve liked. However, I recently had a free afternoon and jumped on the chance to bake up something yummy and festive! These cookies are a version of my mom’s favorite Christmas cookies, Santa’s Whiskers, which normally have candied red and green cherries in them (so pretty!), but I didn’t have any on hand, so those will have to wait for another time! We decided these were very reminiscent of pecan sandies – very crunchy and shortbread-like in texture – and I added a healthy dose of cinnamon to give them a little more flavor. The edges of the cookies are rolled in coconut before baking, so the coconut flavor isn’t overpowering, but still very prominent. I think these would be awesome with a cup of hot cocoa– the perfect Christmastime treat!
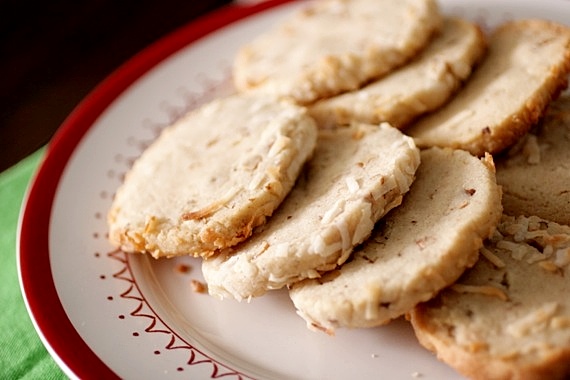
Coconut Pecan Sandies
1 cup (2 sticks) butter, softened
1 cup sugar
2 tablespoons milk
1 teaspoon vanilla extract
2 1/2 cups flour
1/2 teaspoon salt
1/2 teaspoon cinnamon
1/2 cup pecans, finely chopped
3/4 cup sweetened flaked coconut
In the bowl of an electric mixer fitted with a paddle attachment, beat butter and sugar together on medium speed until light and fluffy; about 2 minutes. Blend in milk and vanilla.
Slowly stir in flour, salt, cinnamon and pecans. Form dough into 2 8-inch rolls and roll in the flaked coconut. Wrap in plastic wrap and chill for at least 2 hours. Cut into 1/4 inch slices and place on an ungreased baking sheet. Bake at 375 for 11-12 minutes, until lightly browned. Makes approximately 40 cookies.
Recipe source: my mom (this is a very old family recipe, given to my mom just after she and my dad were married!)
P.S. Here’s a little tip- during all of your holiday baking this year, don’t forget to use real butter! Margarine or butter “spread” just won’t work as well as the real thing and you’ll most likely end up with flat cookies that spread too much. Real butter gives you a tender, flaky, more flavorful cookie that just can’t be equaled! Happy baking!

Can I just brag for a second? Because, um….I nailed it. I set out to make a rich, thick, chocolaty homemade hot cocoa and I. Freaking. Nailed. It. Ok, bragging done.
Joel and I are both huge fans of hot cocoa, but lately, I’ve found myself wanting more than just the powdery packet mixed with milk. Even though I normally add a candy cane and a giant marshmallow, I always end up wanting something more. I don’t know why in the world I haven’t made homemade hot cocoa before, but I can assure you, I will NOT be going back to the packets. Ever. This hot cocoa is velvety, thick, insanely rich and out-of-this-world chocolaty. I’m in love.

Thick and Rich Homemade Hot Cocoa
1 (12-ounce) can evaporated milk
4 ounces chopped bittersweet or semisweet chocolate (chocolate chips work fine too)
1/4 cup sugar
1/4 teaspoon salt
1 scant teaspoon instant coffee powder or espresso powder
1 teaspoon vanilla extract
Whisk the milk, chocolate, sugar, salt and coffee powder in a small saucepan over medium heat until the chocolate is completely melted and everything is combined. Stir in the vanilla. Cover and cook on low heat for 7-8 minutes more, stirring occasionally. Turn the heat off and let the hot cocoa sit (still covered) for 5 minutes before serving to allow it to thicken. Serve immediately. Serves 2.
**Some of you might want to thin it out with a little extra milk or water- it’s VERY rich! 😉
Recipe source: Sing For Your Supper original

I hope everyone enjoyed a happy Thanksgiving with friends and family! We sure did! Although, I learned the hard way that being 8 months pregnant and eating one’s weight in turkey and dressing (and cranberry sauce…and mashed potatoes…and green bean casserole…and 3 kinds of pie…) isn’t the smartest idea (I literally thought I was going to pop!). Instead of being sociable with the rest of the women, I snoozed with the men folk in front of the TV. It was worth it, though- I LOVE Thanksgiving food!
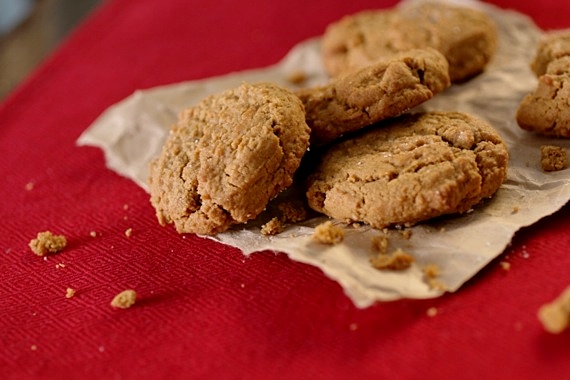
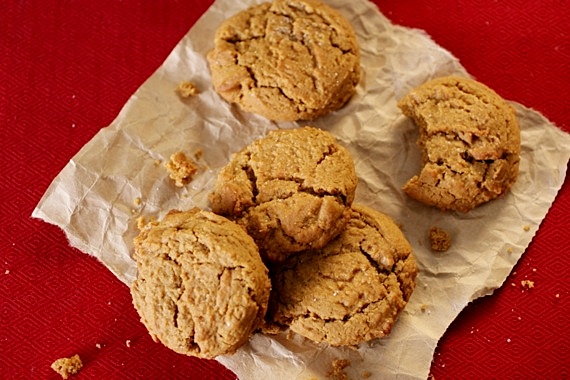
But now it’s onto more important things, like baking Christmas goodies! I couldn’t wait to get home, get in my kitchen and start baking! I made these gingerbread cookies a couple of years ago, but rolled them out into gingerbread men and decorated them. As fun as that was, I’m not a fan of having to wait for the dough to chill, then roll it out, then cut out the shapes…then repeat 10 times. This time, all I wanted was a chewy, spicy gingerbread cookie I could bake in minutes and enjoy right away! And these are sooooo good! Especially if you’re a huge gingerbread cookie fan like I am! They’re crispy around the edges but have a wonderful chewiness that’s downright addicting! I think I polished off about 6 of these in one sitting! I have tons of leftover dough, so I know I’ll be baking lots more of these in the coming weeks!
Soft and Spicy Gingerbread Cookies
1 cup butter (2 sticks), softened
1 cup sugar
1 cup molasses
1 egg
4 cups flour
1 teaspoon salt
1 1/2 teaspoons baking powder
1/2 teaspoon baking soda
1 teaspoon cinnamon
1 1/2 teaspoons ground cloves
2 teaspoons ground ginger
1 teaspoon nutmeg
Preheat oven to 350 degrees. In the bowl of a stand mixer fitted with the paddle attachment, cream together butter and sugar until light and fluffy; about 1 minute. Add the egg and molasses and combine.
In a separate bowl, combine flour, salt, baking powder, baking soda, cinnamon, cloves, ginger and nutmeg. Slowly and gradually blend into the butter mixture until smooth.
Using a cookie scoop or a spoon, scoop dough out into 1 1/2 inch rounds onto a cookie sheet lined with parchment paper. Space cookies about 2 inches apart. Bake for 10-11 minutes. Let cookies cool for 10 minutes on the cookie sheet, then remove to a cooling rack to cool completely. Makes approximately 4 dozen cookies.
Recipe source: adapted from allrecipes.com
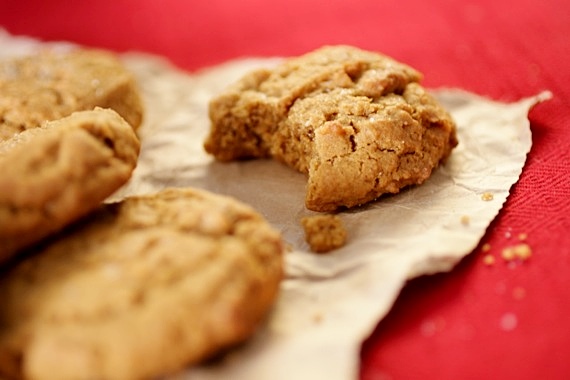

Thanksgiving is only 4 days away. So why am I posting a Christmas recipe? Well, you can really make this wassail anytime of the year, but we just happen to make it at Christmas (my mom has made it every year since 1982!), thus making it “Christmas wassail”. I happen to think this would be a wonderful addition to any Thanksgiving day celebration- guests could sip on it while they mingle and wait for the meal, or it could be served after the meal with pie. Joel and I decided to put up our Christmas tree this past weekend instead of the day after Thanksgiving and I made a giant pot of this wassail to sip on while we decorated. Let me tell you, this stuff is WAY better than any holiday candle, potpourri or scentsy burner you can find! It permeates the entire house and makes it smell heavenly while it simmers! It’s one of my very favorite things and I can’t imagine the holiday season without it! Whether you make this for tree decorating day (the best day of the year!), your family Thanksgiving or just a random evening, I hope you enjoy it as much as my family does!
Christmas Wassail
2 quarts apple juice or apple cider
1 48-ounce can pineapple juice
juice of 2 lemons
1/2 cup sugar
1/2 teaspoon allspice
4 or 5 cinnamon sticks
15-20 cloves, pushed into an orange or apple
Mix all ingredients in a large pot or dutch oven. Cover and cook on low for 2 hours.
*Alternatively you can cook it in a slow cooker on high for 2 hours.
Recipe source: my mom

Throughout my years of blogging, I’ve had the honor of participating in several virtual showers for some of my closest blogging friends. And it just so happens it’s time again for another virtual shower- except this time…it’s MINE! Yippee!!! My sweet, sweet friend Kelsey of Apple A Day offered to throw me a baby shower waaaay back when I first announced we were expecting and I’ve been looking forward to it all this time! She’s gathered up a fantastic group of my favorite bloggers and they’ve all made goodies in honor of our sweet baby girl: Cassidy Grace (I figured it was about time to debut her name on here!). I am so excited about this and LOVE each and every one of these girls so much! Here we go:
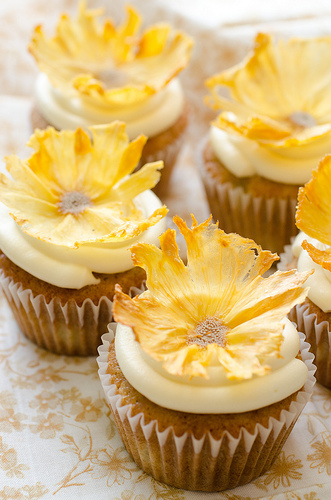
First up, Nikki of Pennies On A Platter made these (*stunning*) Hummingbird Cupcakes. For those of you who have never had the pleasure of tasting a hummingbird cupcake before, it’s a moist cake studded with bananas, pineapple and coconut, topped with luscious cream cheese frosting. Sounds good, right? And I love the gorgeous dried pineapple slices on top- what a gorgeous cupcake!

Jessica of The Novice Chef made these decadent Triple Chocolate Malt Cookies. Look at all that chocolaty goodness (and I love the sweet little pink bows!)! I’ve never actually had cookies with malt powder in them before, so I’m reeeeally wishing this shower wasn’t virtual! Jess, mind driving a couple dozen of these over to Texas?? I’ll leave the porch light on for ya! 😉
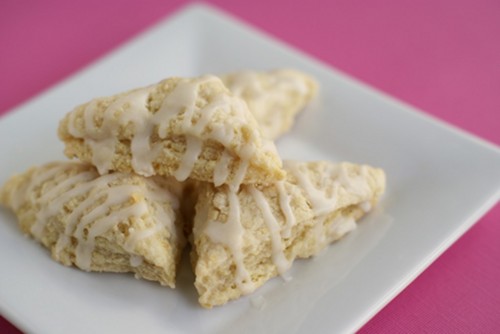
Ashley (another Aggie- Whoop!) of Delish (who has her own new little one!) made these yummy Glazed Key Lime Mini Scones. I have a love for all things ‘mini’ and these look seriously dangerous- I could see myself popping these babies like popcorn! Key lime happens to be one of my favorite flavors, so I will definitely be trying these soon!

My good buddy Amy of The Nifty Foodie made these awesome looking Yellow Cupcakes with Strawberry Swiss Meringue Buttercream. In case you’re wondering, Swiss meringue buttercream is no ordinary frosting; it’s smooth, velvety and extra special. In my opinion (and many other food bloggers), it’s the most luxurious of all frostings! I’m loving the specks of fresh strawberry in the frosting, too- just beautiful!
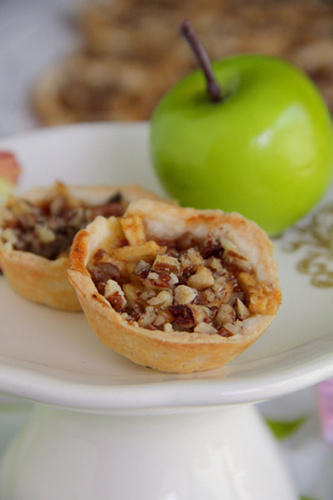
Next up, Krystal of Mrs. Regueiro’s Plate made these adorable Salted Caramel Apple Bites. Umm…YUM! I recently went through a phase where all I wanted was caramel apples (true story…), so these are especially tempting! Like little bites of fall! And with Thanksgiving just around the corner, I’m thinking these would make an excellent addition to any Thanksgiving dessert spread!
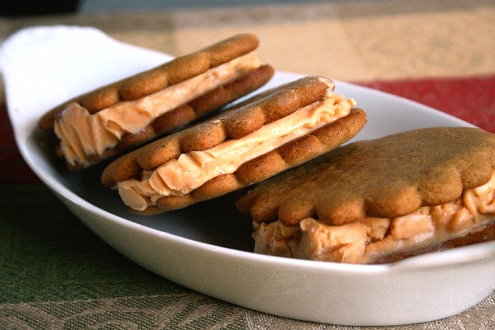
Brady of Branny Boils Over made these sweet little Gingerbread and Pumpkin Ice Cream Sandwiches. The great thing about having baby showers in the fall is the awesome fall-themed treats you get to have! Gingerbread and pumpkin go so well together, so I can only imagine how yummy these taste! And I love the pretty scalloped edges!
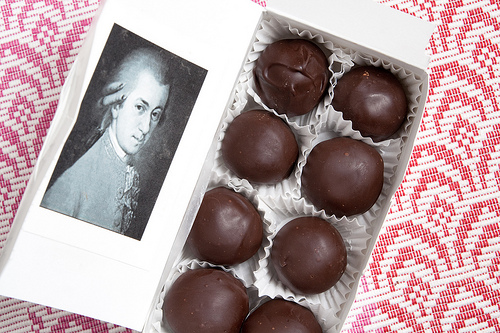
Suzanne of Koko Cooks made these (freaking sweet!) Mozart Balls. Suzanne is a fellow musician, so she gets my love for Mozart. (though, she’s probably not as much of a freak about it as I am…) 😉 And since there’s a chance Cassidy could be born on Mozart’s birthday (her due date is 2 days before…think I can hold her in until then??), I think these are the perfect treats for my baby shower! For those of you who don’t know, Mozart chocolate is HUGE over in Europe- they’re sweet little balls of chocolate, marzipan and pistachio. Even Izzy discovered she has a love for Mozart chocolate (so much so, we had to pay $400 to keep her from OD’ing on the stuff after she snuck around and found my stash a couple of years back…).
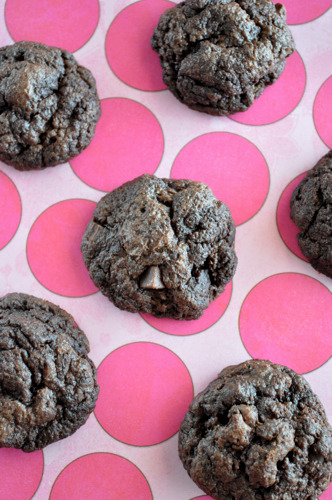
Up next, my good friend (in real life as well as blogging) Jessica of My Baking Heart made Chocolate Gooey Butter Cookies. Ok, that title alone is enough to make me start drooling! Anything with the words ‘chocolate’, ‘gooey’ and ‘butter’ in it is an automatic winner in my book! Jess and I have been friends long enough that she knows me and my love for all things gooey and chocolaty! Nailed it, Jess! 🙂
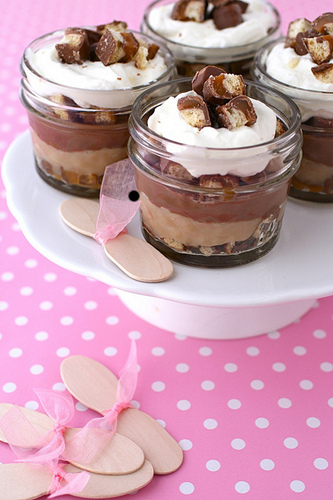
Annie of Annie’s Eats made these sinful looking Twix Trifles. I definitely have a weak spot for Twix and I’m almost too embarrassed to admit I stashed away a bag of mini Twix at Halloween that disappeared all too quickly. I’m loving those luscious, chocolaty layers and the sweet pink bows on the spoons! A perfect baby shower treat (although, now I’m seriously craving Twix!). Gosh, too bad all my Halloween candy is long gone….
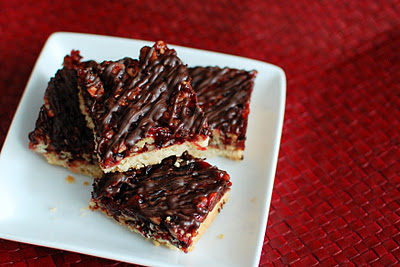
Jen of Beantown Baker made these delicious looking Cranberry Turtle Bars. Chocolate, cranberry, pecans and a buttery crust??? What a knockout! This is another dessert that would really wow people at Thanksgiving (I’m getting so many great ideas here!). I’ll take 5, please! 🙂
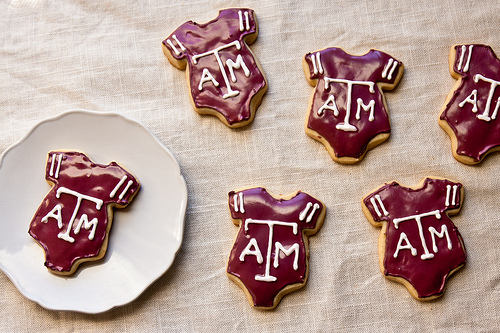
OMG, y’all…up next…..the BEST cookies ever! Fellow Texan, Shawnda of Confections of a Foodie Bride made these adorable A&M Onesie Cookies. I’m so touched (especially since I know how much she hates A&M!) 😉 and totally in awe of how awesome these are. Joel loved these too! We already have a fair amount of A&M onesies, stuffed animals and cheerleader outfits, so why not add cookies to the list?!
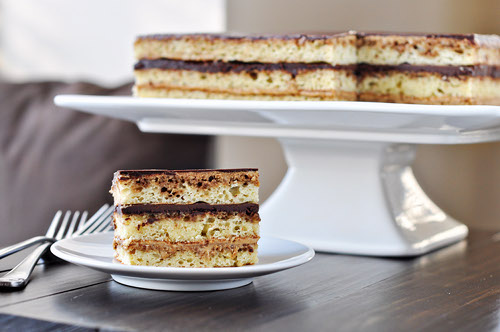
Courtney of Cook Like a Champion (also a mommy-to-be of a sweet baby girl!) made me this gorgeous Opera Cake. How sweet is that? Opera cake is an almond sponge cake moistened with espresso syrup and filled with layers of espresso buttercream (yum!) and chocolate ganache. An absolute delicacy and Courtney was SWEET enough to make one for me! I am just DYING for a slice of this!

And finally, my sweet friend Kelsey of Apple A Day made these luscious Buttermilk Cupcakes with Pomegranate Cream Cheese Frosting. Oh man. Pomegranate cream cheese frosting?? YES, please! These look moist, rich and absolutely delicious; and the sugar pearls add an elegant finishing touch. What a classy looking cupcake! A perfect finale for my virtual baby shower. Kelsey, you sure know how to put together a perfectly beautiful virtual baby shower! 🙂
I am so fortunate to have the BEST blogging friends out there- friends who really know me and know my favorite foods, interests and hobbies. Friends who take time out of their busy lives and schedules to participate in a virtual shower for me. Having friends like that is sweeter than the sweetest buttercream frosting, folks! I’m really, really blessed. 🙂
Kelsey, I can’t thank you enough for your kindness in putting all this together- you are SUCH a wonderful friend and I can’t wait for us to (finally!) meet in person someday (soon, ok?!). And to each and every fabulous blogger who participated, THANK YOU! Your special treats made my mouth water and I’m sitting here wishing I could taste every single one of these goodies in person! I’m feeling very loved right now…. thank you, all!
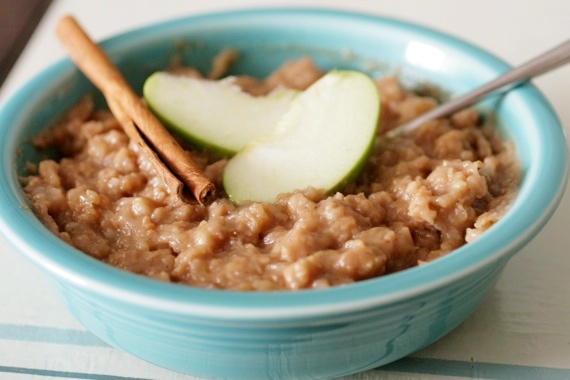
My house is an absolute wreck. A disaster zone. A nightmare. We’re still in the big middle of renovations (we should be long-since finished by now, but you know how these things go…), so all of our furniture is piled in the middle of rooms, half of our carpet is rolled up and disgusting looking, our stairs don’t even have carpet on them, so all that’s there is ugly, torn up padding and tack strips, and up until last night there was a layer of dust 1 inch thick covering every surface of my kitchen and dining room. And on top of all that, we just had a baby shower recently, so there’s baby stuff all over the place and nowhere to put it! It’s. A. Mess. Luckily, (hopefully…) everything will be finished by the end of this week (please, Lord!). So, with all this madness, stress and clutter everywhere, you can imagine I haven’t done much cooking. And by much, I mean practically none. That’s where the beauty of this recipe comes into play. You throw your oats, water, spices and fruit in the slow cooker and let it do its’ thing overnight. In the morning, you’ve got hearty, delicious oatmeal waiting for you. No standing over the stove stirring involved. It’s a beautiful thing. Not to mention really, really delicious. Give this a try this week- your family will love it!
Overnight Apple Cinnamon Oatmeal
1 cup steel cut oats**
3 1/2 cups water
1 medium-large apple, peeled and chopped (I like Honeycrisp or Pink Lady)
1 1/2 teaspoons ground cinnamon
1/4 teaspoon nutmeg
1/4 cup brown sugar
Spray a slow cooker with non-stick spray and place the oats, water, apple, cinnamon, nutmeg and brown sugar inside. Stir to combine. Cover, set to low, and allow to cook overnight (about 8 hours). In the morning, stir the oatmeal one last time before serving. Serve with milk and additional brown sugar if desired. Serves 4.
**you don’t have to use steel cut oats, but it’s highly recommended -the texture will be mushier with regular oats since they cook for so long.
Recipe source: adapted from allrecipes.com


