
Well, our sweet Cassidy Grace is finally here! She’s only a week old and we’re already totally and completely smitten (of course, we were smitten at first glance!). She has my hair (red!), eyes and smile, and Joel’s dimples (yay!) and cheeks. She’s just gorgeous! I went in to be induced last Tuesday morning, but ended up having to have an emergency c-section (our girl was just too big!) and Cassidy was born at 8:09 PM. Of course that’s the shortened version and maybe I’ll write the long version soon, but for now all you need to know is that SHE’S HERE! And she’s absolutely perfect…

We were in the hospital 4 days and had a wonderful experience there. Cassidy had so many visitors and wonderful presents! Everybody’s doing great now, although it’s a big adjustment and there’s lots of learning as we go! Even though we’re completely sleep-deprived, Joel and I are the happiest we’ve ever been and our little girl is the greatest blessing we could have ever received!


Thank you, everyone, for your prayers, support and encouragement throughout these nine months. It’s been an incredible journey and my life will forever be changed in the best possible way. I can’t wait to watch this little girl grow (just as long as she does it as slowly as possible!) 🙂

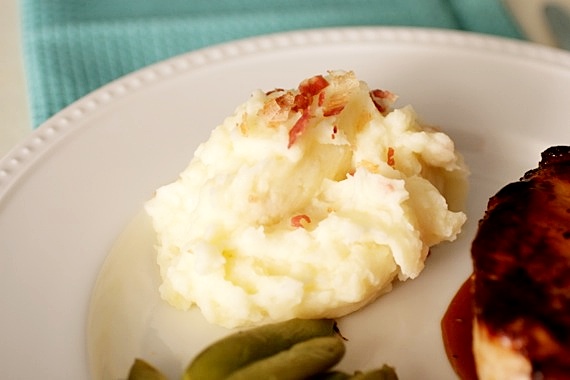
Recently, when I posted these pork chops, you may have noticed the yummy looking mashed potatoes on the plate. As much as I loved those pork chops, the potatoes were my favorite- they were mixed with lots of butter, tangy goat cheese and crisp, smoky bacon- a real winner! My mom likes to add cream cheese to her mashed potatoes when she wants a “fancier” feel, and we’ve always loved them, so when I had tons of delicious goat cheese to use up I thought it might be a nice spinoff of my moms’ idea. It certainly was! This is my new favorite way to eat mashed potatoes! Next time you have some goat cheese laying around just begging to be used, try this recipe- you’ll love it!
Bacon-Goat Cheese Mashed Potatoes
4-5 medium sized Yukon Gold potatoes, peeled and roughly chopped
2 tablespoons butter
3 ounces goat cheese
3/4 cup milk
salt and pepper
4 or 5 slices cooked bacon, crumbled
In a medium pot, cover the potatoes with water and cook over medium-high heat for 15-20 minutes until tender. Drain the potatoes and add in the butter, goat cheese, milk and salt and pepper. Using a potato masher, stand mixer or hand mixer, mash the potatoes until fluffy and free of lumps. Stir in the bacon and check for seasoning. If your potatoes are thicker than you’d like, add in more milk. Serves about 2.
Recipe source: Sing For Your Supper original
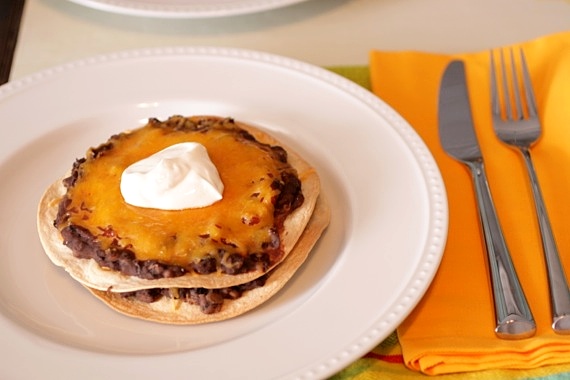
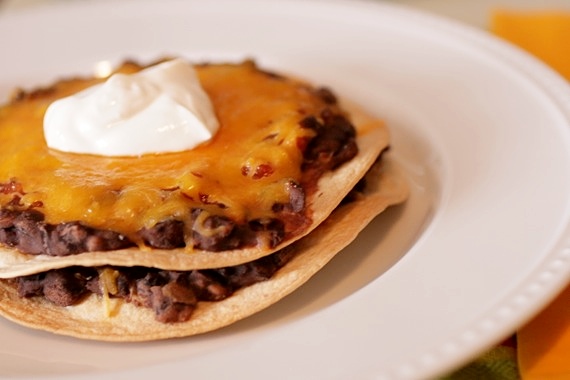
This is one of those last minute, throw together meals that just happened to turn out to be a huge success (even if it doesn’t look all that appetizing). I had a can of black beans, a jar of salsa, some flour tortillas and cheese just sitting around waiting to be used, so I whipped up these super quick Mexican pizzas. They were excellent as is, but some shredded chicken or ground beef, cilantro, green onions and fresh tomatoes would have really made it awesome! I’m definitely going to play around with these again and see what yummy versions I can come up with!
Mexican Pizzas
1 can black beans, drained and rinsed
4 flour tortillas
approximately 1/2 cup shredded cheddar cheese (or as much as you’d like)
1 cup salsa
salt and pepper
sour cream
Preheat the oven to 350 degrees. Spray the tortillas with butter or olive oil spray and bake for about 3-5 minutes on each side until golden and crisp.
In a small saucepan, mash the black beans with the back of a fork or a potato masher (it doesn’t have to be perfectly smooth- some lumps are just fine. In fact, I prefer it that way!). Spoon in approximately 1/4 cup of the salsa, salt and pepper and cook over medium heat until heated through.
To assemble: Spread some of the beans on a tortilla. Top with salsa and cheese. Top with a second tortilla and repeat (ending with the cheese). Repeat with the remaining two tortillas (so you’ll end up with 2 pizzas). Bake for about 5 minutes, until cheese is melted. Top with sour cream. Serves 2.
Recipe source: Sing For Your Supper original
Our poor, neglected nursery has just been sitting upstairs for a couple of months now with only the bare essentials set up. I’ve been feeling so guilty about not having it finished (especially when people keep asking us, “do you have the nursery all set up?”….no, no we don’t. We’re bums.). But my sweet parents came to visit this weekend and helped us get everything finished! Yay! Daddy and Joel hung shelves, curtains and did some other odd jobs while my mom and I put together the last bits of decorations. We’re SO happy with the finished product and can’t wait to get Cassidy all settled in! I thought you might like to take a little peek inside:

We didn’t go with a theme, really; just lots of bright, happy colors. The walls are painted a light grey, just like the rest of the house. The furniture came from Pottery Barn Kids, courtesy of my in-laws. The bedding is also Pottery Barn Kids, which was a gift from my mom, sister and good friend Chris.


I found these shadow boxes waaay back in the summer on sale for $1 each at Hobby Lobby (they each had an ugly white letter in the middle). My sister and I pried the backs off, took out the letters and glued in different colors of scrapbook paper. My mom and I found the little pictures and gerber daisy on the gift wrap aisle of Walmart (the little pictures are actually gift tags, but I think they work perfectly here!).

The little birdy is my favorite. 🙂

The rocking chair comes from Joel’s great-grandmother. We had it reupholstered and my mom sewed a cute little pillow to go with it. The curtains (not shown) are made from the same fabric. I found the lamp at Home Goods (my all-time favorite store!) and I’ve had the table for years. We painted it a bright blue to compliment the yellows and pinks.

A close-up of the rocker and my mom’s pillow- isn’t that cute?! It’s super comfy too!

The changing table, initials we got at Anthropologie and a shelf that my mom painted and brought for us to use.

Well, that’s an in-depth look at our little cupcake’s nursery! I hope you enjoyed getting to take a peek inside- I’m so happy it’s finally finished and that I could share it with you! 🙂
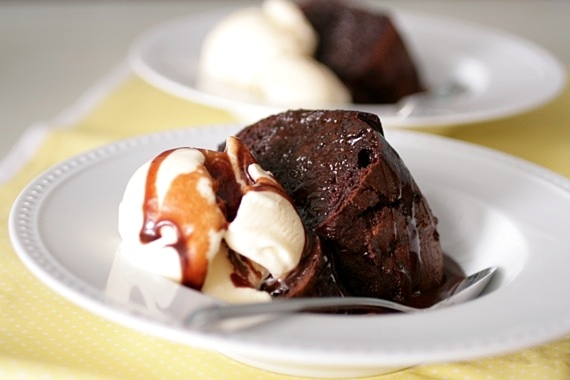
**Disclaimer: I am NOT one of those women who believes any sort of food, herbal remedy or old wives’ trick can induce labor. I fully believe my little girl will come when she is good and ready, thus making the idea of this cake completely bogus in principal, but nevertheless, good for a chuckle.
Evening primrose oil, castor oil, spicy foods, raspberry leaf tea…I’ve heard of just about every trick out there to induce labor. Of course I believe they’re all complete horse pucky. So naturally, when I was reading on a popular baby discussion forum about all these women baking and eating these so-called “labor cakes” to induce labor, I laughed out loud. Of all the ridiculous notions….yeah sure, a boxed mix chocolate cake is going to kick-start my labor…riiiight. However, I sat there and got to thinking about a warm, gooey, chocolaty cake fresh from the oven and just couldn’t resist. While I don’t believe any amount of chocolate will convince Cassidy to get a move on, any excuse to shove my face full of cake is good enough for me. So I made myself a labor cake. Following the recipe exactly (box mix and all). And it was dang good. Did Cassidy come? Nope. Did I enjoy my cake and go to bed with a smile on my face? You bet.
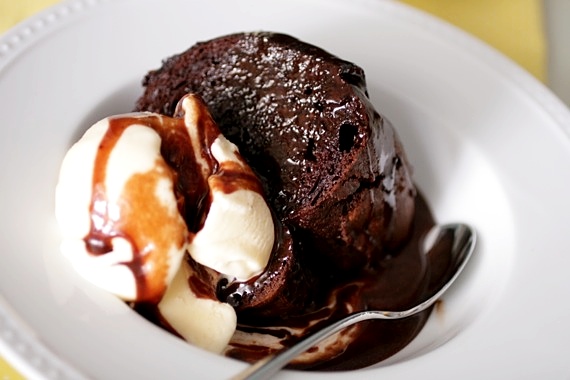
“Labor Cake” (A dressed up chocolate cake)
1 box Devil’s Food Cake mix
1 small package chocolate pudding mix
1 cup sour cream
3 eggs
1 1/3 cups water
1/2 vegetable oil
1 12-ounce package mini chocolate chips
Mix all ingredients in a large bowl and pour into a greased bundt pan. Bake at 350 degrees for 45-55 minutes, until a toothpick inserted comes out clean.
To make mine extra chocolaty, I topped it with my grandmother’s fudge icing:
Nana’s Fudge Icing (adapted to be a thin glaze rather than a thick frosting)
1/2 cup cocoa powder
1 1/2 cups sugar
3/4 cup (1 1/2 sticks) butter
1/2 cup milk
1/2 teaspoon salt
1 teaspoon vanilla
Heat all ingredients except vanilla in a small saucepan over medium heat. Stir until mixture is melted and beginning to thicken. Remove from heat and add vanilla. Let sit for about 5 minutes before serving.
Cake recipe source: www.justmommies.com
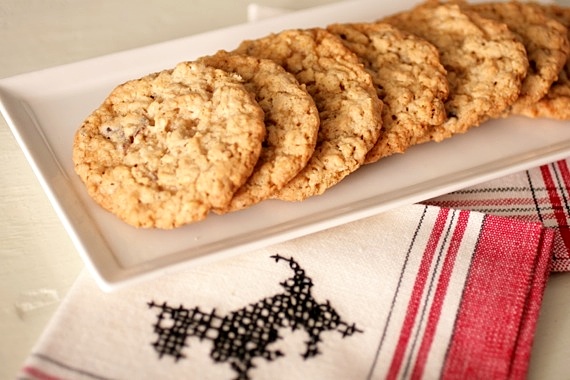
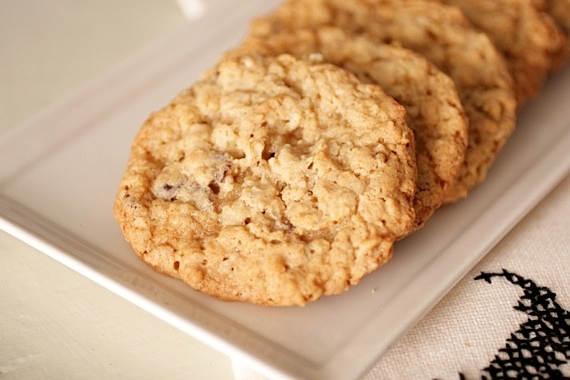
To me, oatmeal raisin cookies are the ultimate comfort cookie- now, don’t get me wrong, chocolate chip cookies are about as close to perfection as you can get, but when I need a smile I crave a good, chewy oatmeal cookie. Oatmeal cookies are grandmotherly to me. Just something about them makes me feel all warm and fuzzy, as if I were sitting at Nana’s kitchen table. Especially these. They’re super chewy, soft and have that perfect sweetness that makes them hands down, my all-time favorite oatmeal cookie. I made a big batch last week when it was a particularly cold, drizzly night. They absolutely hit the spot (…and I may have eaten 7 or 8). These are a spin-off of my award winning Toasted Oatmeal Cookies with Golden Raisins, Pecans and Coconut – only a much, much simpler, bare essentials version. Sometimes I don’t want all that extra stuff- just a simple oatmeal raisin cookie. I finely chop the raisins since I’m not a big raisin fan, but I like the chewiness and sweetness they add to the cookie- I find this makes the absolute perfect oatmeal raisin cookie! Give them a try this week- you’ll love them!
*P.S. Don’t you just love my “Izzy” napkins? My mom gave them to me for Christmas!
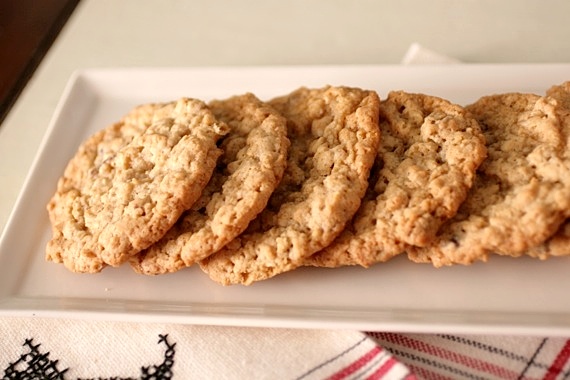
Oatmeal Raisin Cookies
1 1/2 cups old-fashioned oats
1 cup all-purpose flour
1/2 teaspoon baking soda
1/2 teaspoon baking powder
rounded 1/2 teaspoon salt
1/2 cup (one stick) plus 2 tablespoons unsalted butter, softened
1/2 cup packed brown sugar
1/2 cup granulated sugar
1 large egg
1/2 tablespoon half and half
1 teaspoon vanilla extract
1/2 teaspoon cinnamon
1 cup raisins, finely chopped (you can leave them whole if you want; I just prefer the texture with them chopped)
Preheat oven to 350 degrees. Combine oats, flour, baking soda, baking powder, salt and cinnamon in a bowl. Set aside.
In a stand mixer fitted with a paddle attachment (or using a hand mixer), cream both sugars and butter until light, fluffy and smooth. Add egg, half and half and vanilla and blend until smooth. Gradually stir in the oat mixture, then the raisins. Drop dough onto a cookie sheet lined with parchment paper in rounded spoonfuls (or use a cookie scoop) about 2 inches apart. Bake for about 10-12 minutes or until edges of cookies are golden brown. Transfer to a wire rack for cooling. Makes approximately 2 dozen.
*Cookies will spread quite a bit, so be sure to space them at least 2 inches apart on the cookie sheet.
Recipe Source: Sing For Your Supper original
Happy Friday, friends! Hopefully you all have something fun and exciting planned for the weekend. Joel and me? Well, I suppose we’ll be out and about, scrambling to make the most of our last days sans baby- shopping, eating out, going to a movie…you know, all those things we certainly won’t be able to do for awhile in just a mere couple of weeks. Two weeks. 12 days, to be exact. Just two weeks and our lives will be changed forever. Unless of course, our daughter is anything like me and decides to be difficult…
By the looks of things, Cassidy won’t be coming early (I know, I know- anything can happen, but….); I’ve made zero progress over the last 2 weeks. Zero. I’m trying not to get discouraged by this and living my life as I normally would; however, it’s hard when all I think about is baby-baby-baby 24/7.
It’s also hard because while I know I don’t necessarily look half bad, I feel like this:

A swollen, fat, grumpy mess. It also doesn’t help that my mood swings are more violent and erratic than ever (poor Joel….). HOWEVER, I am amazingly lucky to still be comfortable (for the most part), able to sleep well at night, energetic and in general, in great mental shape for being 38 (almost 39) weeks pregnant. Thank the Good Lord. I can honestly say that I’ve really enjoyed being pregnant (well, except for the 1st trimester) and I may even miss it a little.
We’ve just about got everything done- the bassinet is set up, clothes are washed and hung up, my freezer and pantry are stocked and ready to go, the car seat bases are set up in each of our cars…I’d say we’re ready for our little girl! Now we just need to get used to the idea that in 2 weeks, we’ll be parents. Though, I’m not sure there’s much that can be done to prepare for that. Is anybody really ever ready for something that huge?
So in these next two weeks as you go about your normal business, if you have a little spare time, I ask that you think of me, Jabba the Pregnant, and maybe send some good vibes or a quick prayer our way. Being first time parents is not only exciting, but a little scary and we’ll need all the help we can get! Also, any advice or tips you can offer is always, always appreciated! Thanks for taking the time to “listen” and thanks for being great readers! I’ll keep you posted! 🙂
Amy
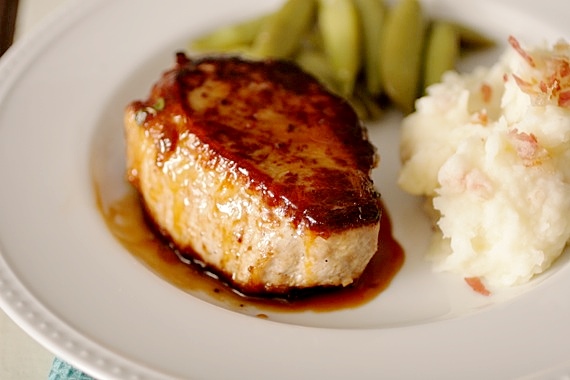
A few weeks ago, Joel and I were able to score some awesome looking, thick-cut, boneless pork chops at the store, so we stocked up. I originally had plans to use them for different things, but actually ended up using them all for this recipe- in less than a month’s time! The first time I made this, it was for my family right before Christmas. I seared the chops on both sides, finished them in the oven, whipped up a quick pan sauce with apricot jam and fresh thyme…and WOWEE, what a meal! We all loved it! It wasn’t even 3 weeks later before I was pulling the remaining pork chops out of the freezer to make this meal again! I just couldn’t stay away! It’s just too easy, too quick and too delicious NOT to be making all the time!
Apricot Glazed Pork Chops
4 boneless, thick-cut pork chops
2 tablespoons vegetable oil
salt and pepper
1/2 cup apricot jam or marmalade
2 or 3 sprigs fresh thyme
fresh lemon juice
Preheat oven to 400 degrees. In a large oven-safe skillet (cast iron works best), heat the vegetable oil over medium-high heat until it begins to ripple slightly and smoke. Season the pork chops with salt and pepper and place in the skillet (be careful not to move the chops once you set them in the pan). Cook for about 3-5 minutes, until you have a nice sear; turn the chops over and cook for an additional 3-5 minutes.
Place entire pan in the oven and cook the chops for approximately 20-25 minutes** until an internal temperature of 160 degrees has been reached (alternatively, you can cut into one to check for doneness, but I prefer using a meat thermometer for more accurate results. Plus, cutting into the meat lets all the good juices run out!)
When the pork chops are done, remove them from the pan and cover them with foil. Set aside. Place the pan over low heat and whisk in the apricot jam, thyme and salt and pepper. Depending on how much cooking juices you were left with in the pan (you’ll want at least 1/4 cup of liquid from the chops), you may want to add a little chicken broth or water to thin it out (start with a couple of tablespoons and go from there). Check the sauce for seasoning, then finish with a squirt of fresh lemon juice.
To serve, spoon the sauce over the pork chops. Serves 4.
**Depending on the thickness of your pork chops, you may require less or more cooking time. Mine were around 2 inches thick so it took a full 25 minutes, but if yours aren’t quite as thick as that, start checking them at 15 minutes for doneness.
Recipe source: Sing For Your Supper original
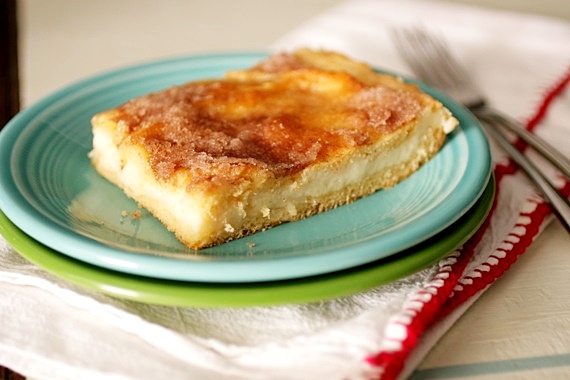
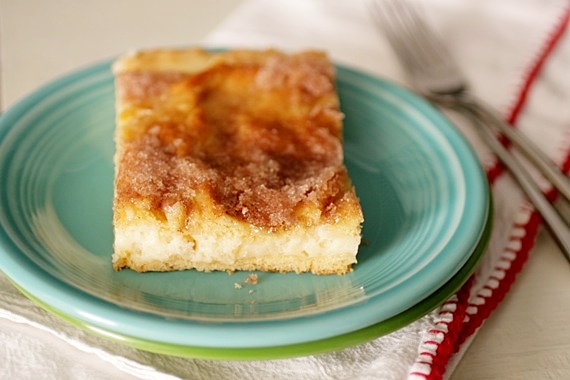
Let me start off by stating a few things: 1.) Happy New Year! 2.) Those of you who have resolved to eat healthier, lose weight, etc, just click away now, because this recipe is neither healthy nor diet-friendly. In fact, it’s pretty much just butter and cream cheese. And sugar. 🙂 3.) There’s really nothing about this recipe that makes it a “cheesecake” in any way, except maybe the abundance of cream cheese (in fact, it’s more along the lines of a cheese danish), but that’s what the recipe is called, so for propriety’s sake, I’ll continue calling it “sopapilla cheesecake”.
A few weeks ago, at our friends’ Christmas party, the hostess pulled something freshly baked out of the oven. The sweet, cinnamony smell immediately caught my attention and I was first in line to try a plateful. At first glance, it looked like some sort of cobbler covered in cinnamon-sugar, but with one bite I knew what I was eating- the sopapilla cheesecake I had seen plastered all over pinterest. Crescent rolls, cream cheese, butter, sugar. That’s it. And I have to admit, it was stinking delicious. My big pregnant self ate two helpings. Then I immediately came home and made one of my own for my parents to try. Embarrassingly easy, shamefully fattening and ridiculously yummy. A pregnant woman’s dream dessert.
Sopapilla Cheesecake
2 cans Pillsbury crescent rolls
2-8oz blocks cream cheese, at room temperature
1 1/2 cups sugar
1 teaspoon vanilla extract
1 teaspoon cinnamon
6 tablespoons butter, melted
Spray a 9 x 13 pan with cooking spray. Unroll and press 1 can crescent rolls into the bottom of the baking dish press the seams together.
In a separate bowl blend the cream cheese, 1 cup sugar and vanilla; spread evenly over top of dough. Unroll the second can of crescent rolls and place on top of the cream cheese mixture pressing seams together again. Pour the melted butter over top layer of crescents.
Mix the reaming 1/2 cup of sugar and cinnamon together. Sprinkle cinnamon-sugar mixture generously over the top. Bake at 350 degrees for 25-30 minutes until bubbly and browned. Allow to cool before serving (personally, I like it better warm, so I let mine cool for only 15 or 20 minutes before serving). Serves 8.
Recipe source: barely adapted from Real Mom Kitchen, via Mommy’s Kitchen
As 2011 comes to a close, I thought I’d go ahead and jump on the “my best recipes of the year post” bandwagon that everyone does this time of year. It’s a good way for you to take a peek at some of my favorites in case there were any you might have missed, and it’s fun for me to get to look back and reflect on a whole year of food! This was actually pretty easy for me- although we’ve loved everything I’ve posted, there were definitely some clear favorites. Let’s take a look!
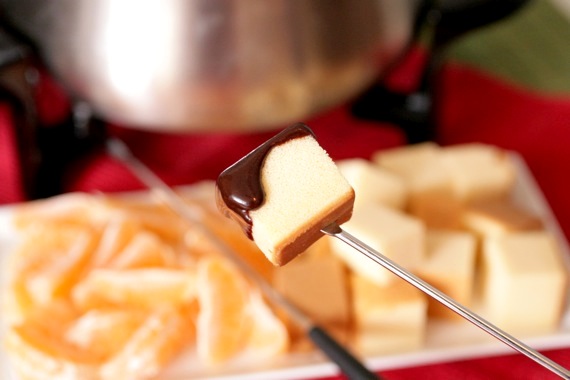
First up, Fudgy Chocolate Fondue. I have made this fondue every year of my married life (and even before then!) without fail! Not only is it incredibly easy to make, it’s incredibly FUN to eat! It’s so good with all kinds of fruit, pound cake, cheesecake bites and even cream puffs (the ones you can buy in the freezer section are perfect for this!).
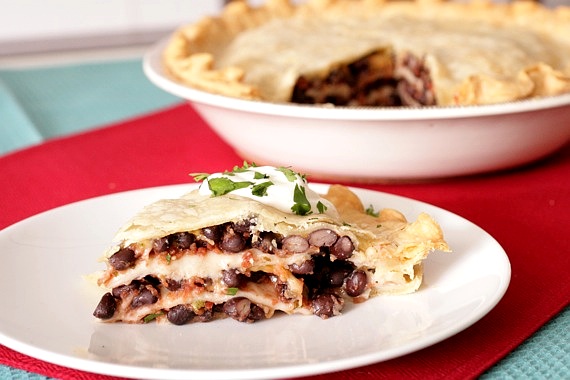
Black Bean Pie is next on the list. I’ve made it a number of times this year and we never seem to get tired of it. It’s a great vegetarian option and comes together in 30 minutes or less! You can’t beat that for an easy, delicious dinner!

You KNOW the Homemade Sushi Tutorial had to be on here. Not only did Joel and I have a blast making this (and eating it- yum!), we discovered making sushi at home is really easy and a heck of a lot cheaper than going out to a pricey sushi bar! Plus, you can watch us make idiots out of ourselves on video (the bloopers reel is my favorite!). 🙂

Next up- Homemade Pink Raspberry Marshmallows. There’s really no contest between homemade and store bought marshmallows- the homemade ones are infinitely better! I loved these because they were pink (duh!), fun to make and made my hot cocoa taste like a dream! If you’re intimidated to try making homemade marshmallows at home, don’t be! They can seem a little daunting, but in reality, they’re very simple and FUN!
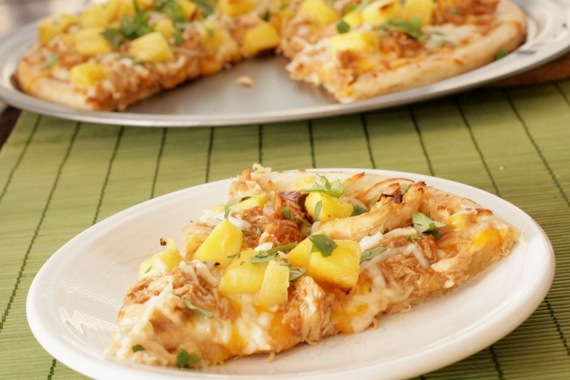
Man, oh man, do I love this BBQ Chicken and Pineapple Pizza! The combination of the tangy BBQ chicken, fresh pineapple and cilantro is just totally awesome. I haven’t made it as much as I would’ve liked since I have to take it easy on the cheese nowadays, but believe me when I tell you, this is GOOD!
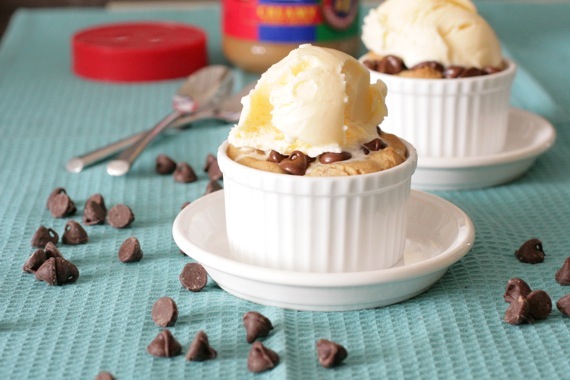
These Peanut Butter-Chocolate Cookie Cups were awesome. Warm, gooey peanut butter cookie, topped with melty chocolate chips and cold, creamy vanilla ice cream. Need I say more??
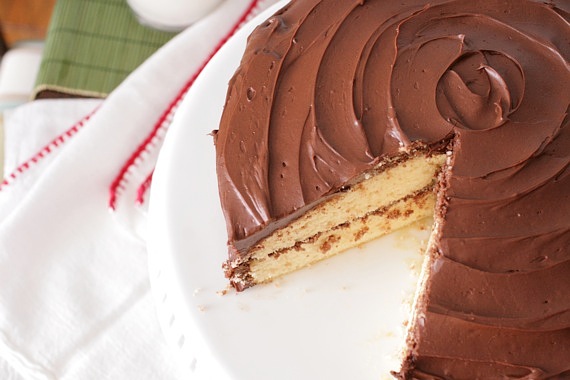
Next up is my all-time favorite recipe for yellow cake – Old Fashioned Yellow Cake with Chocolate Frosting. Believe me when I tell you, this is the BEST, most moist, buttery, fluffy yellow cake I’ve ever eaten. I made this cake for just Joel and me and it was GONE in less than 2 days. I. Love. It.
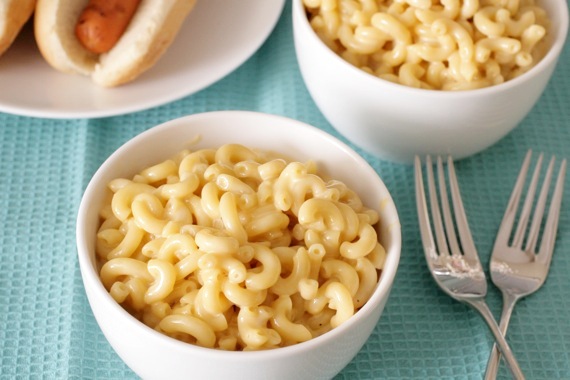
Classic Mac and Cheese made with cheddar and Velveeta cheeses. Is there anything better? Really? If I knew today was my last day on earth, I’d probably request this mac and cheese and freshly baked chocolate chip cookies for my last meal.
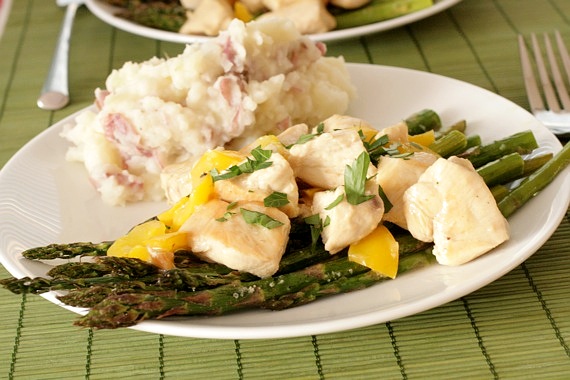
This Lemon Chicken with Asparagus is a favorite in our house. It’s such a simple dinner, but it’s so satisfying and flavorful. In fact, sitting here typing this, I’m craving it again like crazy! This may have to be on the menu this week!
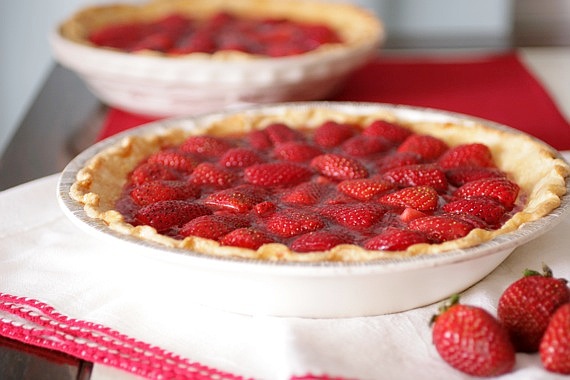
I made this Fresh Strawberry Pie for Easter last year and discovered an all-time favorite dessert in the process. If you’re a strawberry lover like me, this pie is perfect for you! Every bite is jam-packed with fresh, juicy strawberries. This is heaven with a little fresh whipped cream on top!
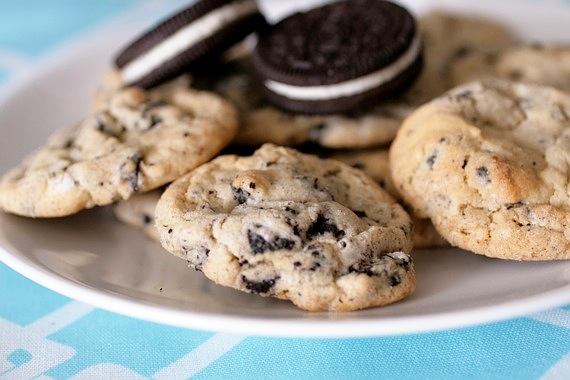
Next up are these Cookies and Cream Cookies– my two favorite cookies come together to form one awesome super-cookie! Oreo chunks are stirred into a simple chocolate chip cookie dough and baked to perfection! An ideal cookie, if I do say so myself!
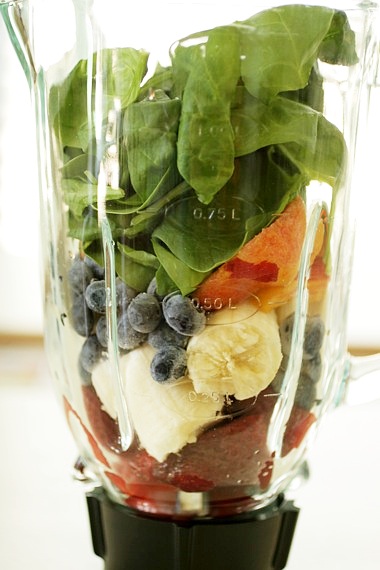
When I was first pregnant, back in early June (before the crippling 24-hour sickness set in…), I made these Green Monster Smoothies like crazy! They’re a fantastic way to get your vitamins and minerals and seriously taste great! Mine included bananas, strawberries, blueberries (which made for a very unappetizing color, unfortunately!), peaches and fresh spinach along with a little Greek yogurt and honey. An excellent option for breakfast or lunch! Try it! You’ll love it!
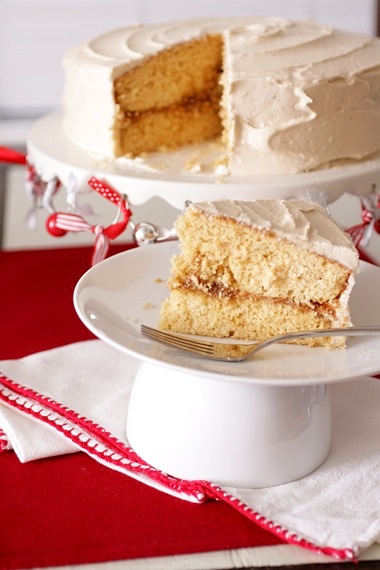
Southern Caramel Cake. Yum, yum and YUM! Although some people were very vocal about what their idea of a caramel cake should be, this is MY idea of the perfect caramel cake and I was so proud of it. Not to mention it was one of the best tasting things I’ve ever put in my mouth. If you have trouble with the caramel filling (as I did the first two times), feel free to use a jarred caramel sauce instead- it’ll still be fantastic.

I can’t even tell you how much Joel and I both adore this Chicken Tortilla Soup. It’s SO quick and SO easy….and SO flavorful! I could go on and on! And did I mention it’s ready in 15 minutes? You just can’t beat that.

Up next are these Soft Frosted Sugar Cookies. These hold a special place in my heart because I made them to celebrate and announce the good news when we found out we were having a little girl (such a happy day for us!). Not to mention, these taste just like the soft, sugary Lofthouse cookies you can buy at the store that we’re all so fond of! Yum!

I just have to include this Cheesy Pepperoni Bread! It’s so easy, I almost feel guilty…almost. 😉 With all kinds of big football games coming up on TV, this would be a perfect snack to serve at a watching party! Very guy-friendly! Although, I can’t think of anyone who doesn’t love bread filled with gooey cheese and spicy pepperoni!
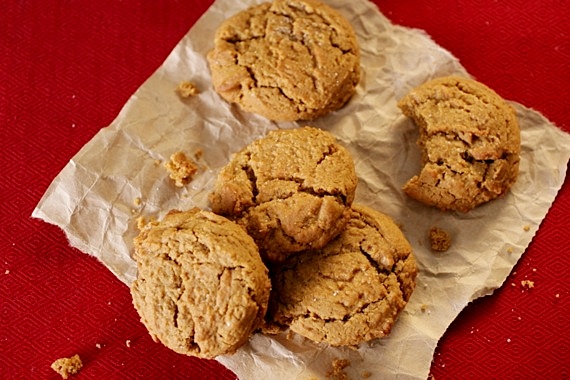
Soft and Spicy Gingerbread Cookies. I’m not ashamed to say I ate my weight in these this Christmas season! I love a good soft, chewy cookie and these are SO satisfying! There’s something addictive about their chewiness, I think! Perfect with a cup of hot tea or cocoa, these are by far, my favorite gingerbread cookie!

And lastly (but definitely not least on my list!), my Thick and Rich Homemade Hot Cocoa. It’s velvety, smooth, insanely chocolaty and amazingly decadent! One sip and you’ll be in chocolate heaven! If you’re a hot cocoa fiend like I am, you absolutely MUST try this ASAP- I guarantee you’ll be in love!
Well, there you have it, friends! My favorite recipes of 2011! I can’t believe the year is coming to a close, but I must say, I’m VERY excited to see what 2012 holds in store for us (I see lots of baby food in my future…)! Happy New Year, everyone!!!


