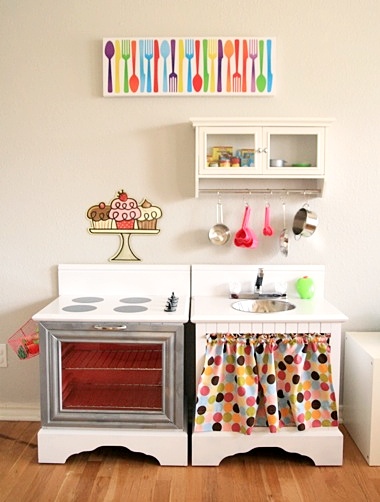
Those of you who follow me on twitter and Instagram already know that Joel and I have been working hard building Cassidy a play kitchen for the past couple of weeks. Well, it’s DONE and we’re THRILLED! I’ve featured it over on my other blog– along with lots more pictures and instructions. Go check it out! 🙂
Ok, I realize “World Nutella Day” was yesterday, but better late than never, right?
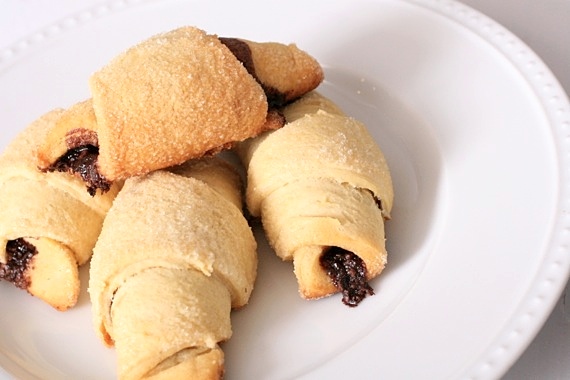
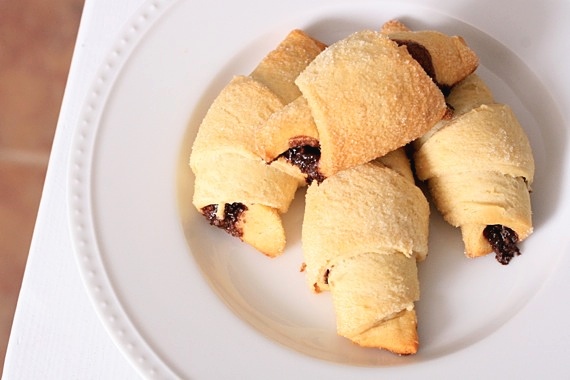
This is possibly one of the easiest recipes I’ve ever posted, considering every ingredient is store-bought. But hey, sometimes life can get a little crazy and you just need a recipe like this. All it takes is canned crescent roll dough, nutella, and sugar, and in minutes you’ll have a warm, gooey, comforting snack, breakfast, or dessert. Yes, please! These would actually be really cute (and quick!) for the kids’ Valentine’s Day breakfast- maybe even use a little pink decorating sugar and it’s just downright festive!
Quick and Easy Nutella Crescents
1 can refrigerated Pillsbury crescent roll dough
nutella
sugar, for sprinkling
Preheat the oven to 350 degrees. Spread a little nutella (about one tablespoon per triangle) on each triangle of dough. Starting with the big end, roll into a crescent shape and sprinkle generously with sugar. Arrange on a baking sheet lined with parchment paper and bake for about 8-10 minutes, until golden brown. Serve immediately. Makes 8 crescents.
Recipe source: Sing For Your Supper original
Well, folks, my baby is one today. My baby is one today. Let that sink in. My precious, soft, cuddly baby girl…is no longer a baby. We’ve just crossed over into toddler land. A toddler. How. Did. This. Happen?!
How could this be, when, just yesterday we packed our bags and headed to the hospital absolutely terrified?
Just yesterday tears rolled down my cheeks as I heard my baby cry for the first time.
Just yesterday Joel and I brought our sweet bundle home and began the most terrifying/satisfying/tremendous chapter of our lives.
It was JUST YESTERDAY. So how can this be, that suddenly I have a toddler walking around my house babbling sweetly, giving me high-fives, eating grilled cheese sandwiches, and saying, “oh myyyy” constantly (seriously- we have a little George Takei on our hands….)?
However it happened, time somehow sneaked in and stole my baby from me. It didn’t matter how many pictures and videos I took or how hard I squeezed her as I rocked her to sleep every night…it happened. She’s one. Next up, college.
Before I get too caught up in my own emotion, here are a few fun 12 month stats for the birthday girl:
As I mentioned before, yep…we’re walking. Full-on walking. It’s freaking adorable.
Eating solids like a boss. Spaghetti is still the favorite, but animal crackers and green beans run a close second. Meatloaf has also proven successful.
This girl loves shoes. Especially putting on the shoes. If I hold a shoe up, she’ll stick out her right foot every single time and let me put her shoes on her. If I take the shoes off, she’ll bring me said shoes and promptly stick her right foot in the air, just waiting for her shoe to be put on. She doesn’t seem to care much about the left foot. She’s perfectly satisfied with just the right shoe on. Adorable, this kid!
Still an awesome nighttime sleeper. 12 1/2 to 13 hours every single night. Naps, however, are a different story. I’m lucky if I get one hour long nap a day out of her.
She’s started trying to climb everything. And a dish got broken yesterday afternoon. We may need one of those onesies that says, “I’m why we can’t have nice things” on it. 😉
You should see the little red curls on the back of this kid’s head! Too much cuteness!
Still only 5 teeth, but she’s currently working on 2 new ones right now (fun times).
And now, here’s a short (hilarious) video of her walking. (turn up your volume; the sound’s the best part):
[FMP autohide=”true”]/wp271/wp-content/uploads/2013/01/cass_walks.mp4[/FMP]Happy birthday, Cassidy Grace. Your Daddy and I love you more than life itself!
P.S. I apologize for not updating sooner- I was literally locked out of my blog. Seriously. Something about a corrupted database…I dunno. Joel fixed it, though, so we’re back in business! So sorry for the absence!
Happy New Year, friends!! I hope the holidays were as magical for all of you as they were for me. Our first Christmas with Cassidy was truly wonderful. In fact, I’d love for you to read all about it and see the pictures I took. I’ve written a Christmas Recap post over on my family blog and I hope you’ll check it out!
You’ll notice I didn’t do a ‘Best of 2012’ post this year, because, well, I kind of find those obnoxious anyway, and…all the best of 2012 involved a little diaper-wearing red head; not food. 😉
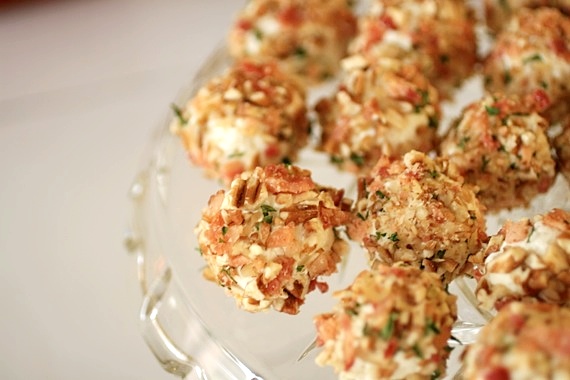
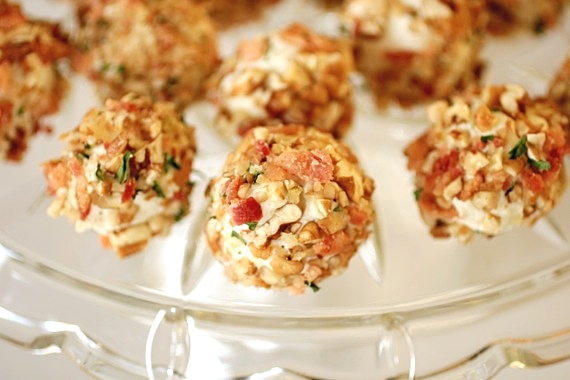
Now, onto the goods. I made these truffles with every intention of sharing them with you before the holidays were over, but better late than never, right? The fact is, these babies can be enjoyed any time of year! Any occasion! A Tuesday, perhaps! In fact, I may put them on the menu for Cassidy’s first birthday party. Because let me tell you- they’re goooooood. Better than good, really. Smooth, silky goat cheese mixed with a bit of honey and rolled in toasted pecans and crispy bacon. Yuuuuuummmm. Smear these bad boys on a toasted baguette and you’re well on your way to heaven, folks.
Goat Cheese, Bacon, and Pecan Truffles
8 ounces goat cheese, softened to room temperate
1 teaspoon honey
1 teaspoon half and half or milk
1/4 teaspoon salt
1 cup pecans, chopped
6 slices bacon, cooked until crispy and roughly chopped
2 teaspoons dried parsley
In a small pan, toast the pecans over medium-high heat until fragrant, about 5 minutes. Watch them carefully! Let cool completely. Combine the pecans, bacon, and parsley in a pie plate or large platter.
Line a baking sheet or large plate with parchment paper.
Combine the goat cheese, honey, half and half, and salt in a large bowl. Scoop out 1-2 inch balls and carefully roll in the pecan/bacon mixture. Set on the parchment paper-lined baking sheet or platter. Refrigerate for at least 30 minutes. Remove from the refrigerator 30 minutes before serving to take the chill off. Serve with toasted baguette slices or crackers. Makes about 35-40 truffles.
Recipe source: Sing For Your Supper original
We wish ALL of you a happy, warm, joyful Christmas filled with good food, good friends/family, and good cheer!
Love,
Joel, Amy, Cassidy, and Izzy
One last Christmas cookie post before the big day!
There are only 4 1/2 days till Christmas! How exciting! My baby’s first Christmas…..we absolutely CANNOT wait! I know she probably won’t have a clue what’s going on, but Mommy and Daddy will be brimming with excitement to witness our baby girl opening presents under the Christmas tree!
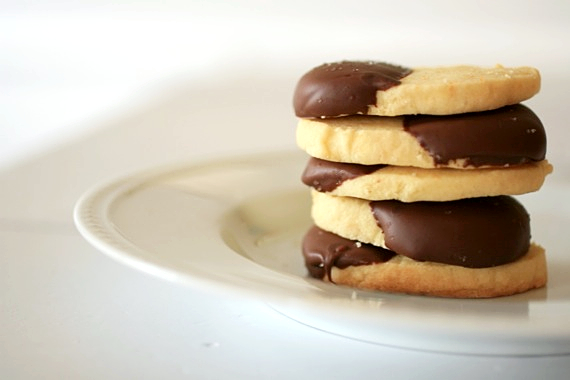
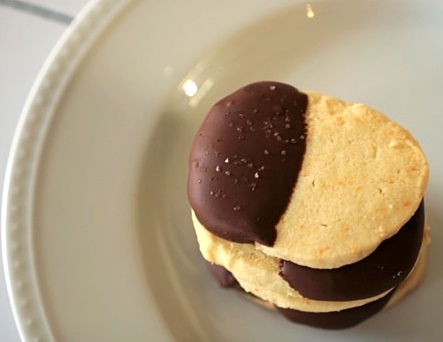
Anyway, I just had to post one more cookie recipe before I take off for the holiday fun. And let me tell you, this one is a KEEPER! Crisp, crumbly, buttery shortbread flecked with bright, citrusy orange peel, then dipped in luxurious dark chocolate and sprinkled with sea salt. OMG so amazingly good! (P.S. sable is the french word for shortbread). If you still have parties to go to, or perhaps want to leave Santa something a little more special this year, by all means, this cookie is for you!
Chocolate-Dipped Orange Sables
2 sticks (8 ounces) unsalted butter, softened at room temperature
3/4 cup sugar
1/2 teaspoon salt, preferably sea salt, plus more for sprinkling
2 large egg yolks, at room temperature
2 cups all-purpose flour
1/2 teaspoon almond extract
zest of 2 large oranges
2 cups melted dark chocolate, for dipping (you can use chips, or chop your own)
Working in a mixer fitted with a paddle attachment, beat the butter at medium speed until it is smooth and very creamy. Add the sugar, salt, and orange zest and continue to beat until smooth and velvety, not fluffy and airy, about 1 minute. Reduce the mixer speed to low and beat in the egg yolks and almond extract, again beating until well blended.
Turn off the mixer, pour in the flour, drape a kitchen towel over the mixer and pulse the mixer about 5 times at low speed for 1 or 2 seconds each time. Take a peek; if there is still a lot of flour on the surface of the dough, pulse a couple of more times; if not, remove the towel. Continuing at low speed, stir for about 30 seconds more, just until the flour disappears into the dough and the dough looks uniformly moist. If you still have some flour on the bottom of the bowl, stop mixing and use a rubber spatula to work the rest of it into the dough. (The dough will not come together in a ball — and it shouldn’t. You want to work the dough as little as possible. What you’re aiming for is a soft, moist, clumpy dough. When pinched, it should feel a little like Play-Doh.)
Scrape the dough onto a work surface, gather it into a ball and divide it in half. Shape each piece into a smooth log about 9 inches long (it’s easiest to work on a piece of plastic wrap and use the plastic to help form the log). Wrap the logs well and chill them for at least 2 hours. The dough may be kept in the refrigerator for up to 3 days or frozen for up to 2 months.
Preheat the oven to 350 degrees and line a baking sheet with a silicone baking mat or parchment paper.
Trim the ends of the roll if they are ragged and slice the log into 1/3-inch-thick cookies.
Place the rounds on the baking sheet, leaving an inch of space between each cookie, and bake for 17 to 20 minutes, rotating the baking sheet at the halfway point. When properly baked, the cookies will be light brown on the bottom, lightly golden around the edges and pale on top. Let the cookies rest 1 or 2 minutes before carefully lifting them onto a cooling rack with a wide metal spatula. Repeat with the remaining log of dough. (Make sure the sheet is cool before baking each batch.)
When the cookies are cool, dip each cookie (I like to just dip half of the cookie since white chocolate can be a bit rich) in the melted chocolate and place on wax paper. Sprinkle with a tiny bit of sea salt. Makes about 50 cookies.
Recipe source: sable recipe adapted from Dorie Greenspan; the orange-chocolate idea is a Sing For Your Supper original
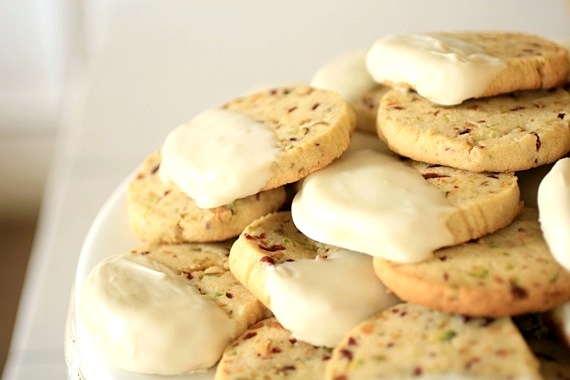
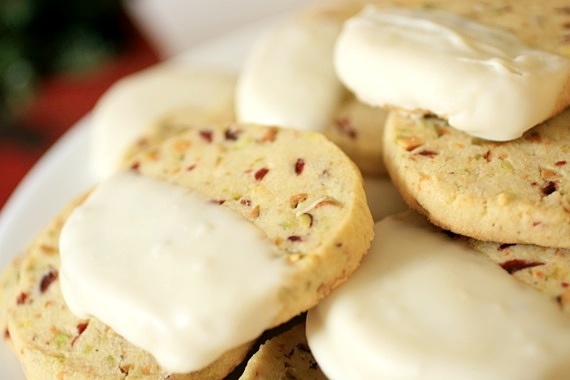
So far this Christmas season, I’ve been really proud of myself as far as branching out goes. Every year it seems I bake the same cookies, cakes, and snacks. I have lists and lists of awesome sounding recipes I’ve been wanting to try, yet I still end up making the same old things. Not that there’s anything wrong with a great standby, but you gotta be adventurous, right? I looooove shortbread and I looooove the combination of pistachios and cranberries; and that’s exactly how these cookies were born!
I recently mentioned that I baked these for our Christmas party (along with these Soft Almond Sugar Cookies), but I didn’t go into any detail. Well, let me tell you what a HIT these were! People kept going back and forth between these and the almond cookies trying to figure out their favorite, but I feel like these were the clear winner. I think it was the white chocolate that did it. 😉 These were so incredibly EASY! Great taste, great appearance, great method. GREAT Christmas cookie.
Pistachio-Cranberry Shortbread Cookies
2 sticks (8 ounces) unsalted butter, softened at room temperature
3/4 cup sugar
1/2 teaspoon salt, preferably sea salt
2 large egg yolks, at room temperature
2 cups all-purpose flour
1/2 teaspoon vanilla extract
3/4 cup chopped pistachios
1/2 cup dried cranberries, chopped
2 cups melted white chocolate chips, for dipping (optional)
Working in a mixer fitted with a paddle attachment, beat the butter at medium speed until it is smooth and very creamy. Add the sugar and salt and continue to beat until smooth and velvety, not fluffy and airy, about 1 minute. Reduce the mixer speed to low and beat in the egg yolks and vanilla, again beating until well blended.
Turn off the mixer, pour in the flour, drape a kitchen towel over the mixer and pulse the mixer about 5 times at low speed for 1 or 2 seconds each time. Take a peek; if there is still a lot of flour on the surface of the dough, pulse a couple of more times; if not, remove the towel. Continuing at low speed, stir for about 30 seconds more, just until the flour disappears into the dough and the dough looks uniformly moist. If you still have some flour on the bottom of the bowl, stop mixing and use a rubber spatula to work the rest of it into the dough. (The dough will not come together in a ball — and it shouldn’t. You want to work the dough as little as possible. What you’re aiming for is a soft, moist, clumpy dough. When pinched, it should feel a little like Play-Doh.) Stir in the pistachios and cranberries.
Scrape the dough onto a work surface, gather it into a ball and divide it in half. Shape each piece into a smooth log about 9 inches long (it’s easiest to work on a piece of plastic wrap and use the plastic to help form the log). Wrap the logs well and chill them for at least 2 hours. The dough may be kept in the refrigerator for up to 3 days or frozen for up to 2 months.
Preheat the oven to 350 degrees and line a baking sheet with a silicone baking mat or parchment paper.
Trim the ends of the roll if they are ragged and slice the log into 1/3-inch-thick cookies.
Place the rounds on the baking sheet, leaving an inch of space between each cookie, and bake for 17 to 20 minutes, rotating the baking sheet at the halfway point. When properly baked, the cookies will be light brown on the bottom, lightly golden around the edges and pale on top. Let the cookies rest 1 or 2 minutes before carefully lifting them onto a cooling rack with a wide metal spatula. Repeat with the remaining log of dough. (Make sure the sheet is cool before baking each batch.)
When the cookies are cool, dip each cookie (I like to just dip half of the cookie since white chocolate can be a bit rich) in the melted white chocolate and place on wax paper. Makes about 50 cookies.
Recipe source: sable (shortbread) recipe adapted from Dorie Greenspan; pistachio-cranberry-white chocolate idea is a Sing For Your Supper original
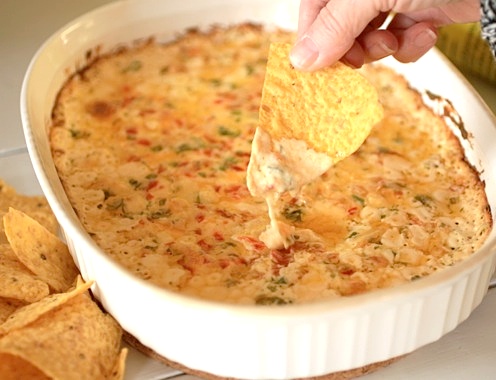
Have you ever noticed how almost every single party dish revolves around cheese?? Dips, cheese balls, cheese logs, pinwheels….it seems almost every single holiday recipe starts with an 8 ounce package of cream cheese. Not that I’m complaining! However, since learning of my lactose intolerance (and my mom’s, and possibly my sister’s), I tend to pay more attention to these things nowadays. I try to cut down on the amount of cheese dishes I make when I host parties. Goat cheese doesn’t count, thank the Good Lord (I’m not affected by goat’s milk, just cow’s milk), so there’s ALWAYS plenty of that! 🙂 So, this year, instead of a cheese ball (or two) and a couple of cheesy dips, I chose only one cheesy dish. This Baked Pimento Cheese Dip. Josie debuted it first, then Annie. After drooling over it on both girls’ blogs, I finally decided it was time to make it! Perfect party food, easy to make, and definitely a crowd-pleaser. What more could you ask for?
Baked Tex-Mex Pimiento Cheese
1/4 cup mayonnaise
1/4 cup greek yogurt
8 ounces cream cheese, softened to room temperature (reduced fat is fine)
3/4 cup chopped roasted red bell pepper
1 jalapeno pepper, seeds and ribs removed, chopped finely
8 oz extra sharp cheddar, grated (about 2 cups)
8 oz Pepperjack cheese, grated
1/3 cup minced scallion (2-3 scallions)
1/3 cup minced fresh cilantro
1 tsp Worcestershire sauce
1/4 tsp red pepper flakes (more or less to taste)
salt and pepper to taste
tortilla chips, for serving
Preheat the oven to 350 degrees and lightly grease a 2-quart baking dish.
In a large bowl, combine all the ingredients for the dip, reserving 1 tablespoon of each cheese for topping. Mix well and spoon mixture into the baking dish.
Top with the reserved cheese and bake 20-25 minutes, until hot and bubbly. Garnish with additional cilantro, and serve with tortilla chips.
Recipe source: adapted from Pink Parsley; originally from Southern Living
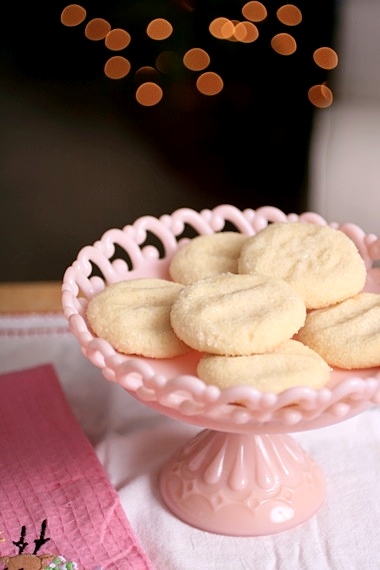
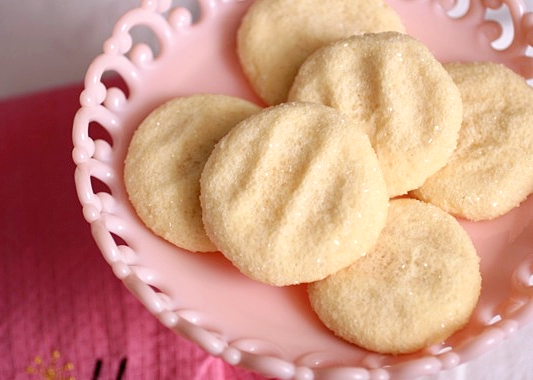
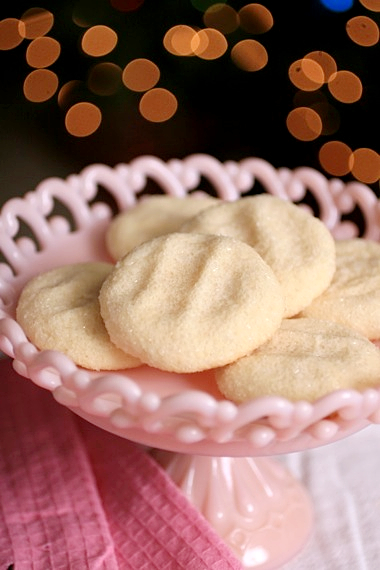
Ho, ho, ho! Santa Claus is coming soon- do you know which cookies you’ll be baking for him? We sure do! Normally, I’d be baking these M&M Cookies, a Christmas tradition in our family, but this year, I’ve decided on a new favorite! These soft, chewy, sugary cookies with a gloriously subtle and delicate almond flavor, and sparkly, crunchy sugar all over the outside…..WHAT. A. COOKIE! We hosted a Christmas party this weekend and I transformed into a baking fiend. I baked these amazing almond cookies, my favorite M&M cookies mentioned above, and shortbreads with pistachios, cranberries, and white chocolate (can’t wait to share those with you!). They were all amazing, but my hands-down favorite were these soft almond cookies.
Normally, I’m not a huge fan of anything with almond extract, but I decided to make these anyway, because my big sis loves it. I’m so glad I took a chance! Not only are these beautiful, they’re downright DE-licious! Try them this Christmas! Santa Claus will thank you! 🙂
Soft and Chewy Almond Sugar Cookies
1 1/2 cups sugar
1 1/2 cups (3 sticks) butter, at room temperature
2 eggs
2 teaspoon almond extract
1/2 teaspoon vanilla extract
2 1/2 cups cake flour**
1 cups all purpose flour
2 teaspoons cornstarch
2 teaspoons baking powder
1 teaspoon salt
coarse decorating sugar, for rolling the cookies
Preheat oven to 350 degrees.
Cream sugar and butter. Stir in eggs, almond extract, and vanilla. Combine flour, cornstarch, baking powder, and salt and add to butter/egg mixture.
Form dough into walnut sized balls and roll in decorating sugar. Place on ungreased baking sheet and press down to flatten slightly. Chill for at least 30 minutes.
Bake for 8 minutes; cookies should not brown much at all- do not overbake.
**If you don’t have cake flour, all purpose will work fine
Recipe source: adapted from Confections from the Cody Kitchen
I’m going to level with you- the reason I haven’t paid much attention to this blog lately isn’t because I have a new blog, or because it’s the holiday season, or because I’m just “soooo busy! OMG, it’s just like, crazy how busy I am, you know?!” (p.s. don’t you hate people like that?). It’s because I’ve simply been having too much fun lately. My little stinker is 10 months old now and friends, that’s a FUN age! We play, we crawl, we tickle, we “cook”…we have fun. I’m loving every second of being a mommy!
Unfortunately, that doesn’t always go hand-in-hand with being a great blogger. I wish I were one of those super moms that has time to do it all plus blog about it. Oh well. Can I make it up to you with some yummy soup?? I know the pictures are downright embarrassing, but the soup is pretty freaking awesome. We LOVE stuffed peppers, but sometimes I just don’t feel like messing with the whole process. This soup is a WINNER because you throw all your favorite components of stuffed peppers into a big pot and you’re done. We were super blown away with how easy and delicious this was!
Stuffed Pepper Soup
2 large bell peppers, roughly chopped
1 onion, chopped
4 carrots, chopped
2 celery stalks, chopped
1 can diced tomatoes (14.5 ounces)
1 small can tomato sauce (8 ounces)
salt and pepper
1 cup long-grain white rice
1 pound lean ground beef
6 cups chicken broth
1 bay leaf
1/2 teaspoon sugar
cheddar cheese, for topping
In a large stockpot, brown the ground beef with the onion, carrots, and celery. Drain off grease. Add the chicken broth, peppers, tomatoes, tomato sauce, salt, pepper, bay leaf, sugar, and rice. Bring to a boil, then reduce heat to medium-low. Simmer for at least 15-20 minutes, until the vegetables are tender and rice is fully cooked. Top with shredded cheddar cheese and serve. Serves approximately 6-8.
Recipe source: Sing For Your Supper original
