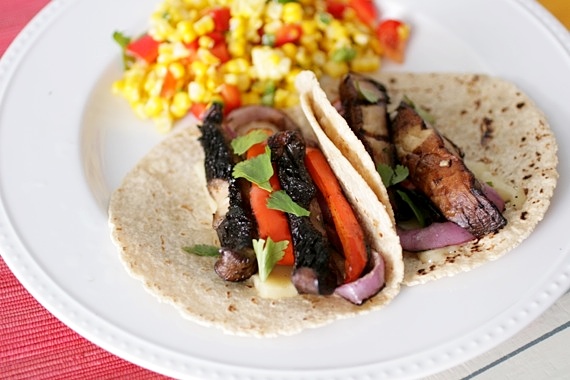
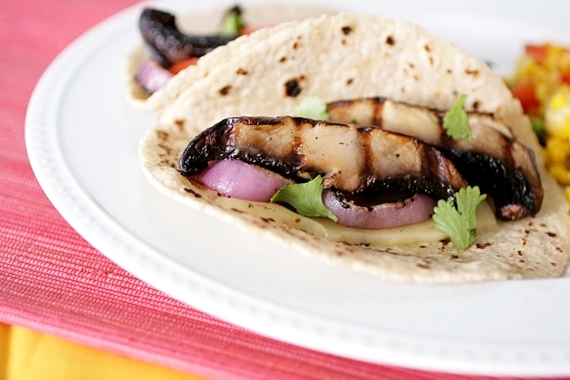
Happy May, y’all! It’s going to be a good month, I can just feel it! It started off especially awesome since Cassidy slept until 9:30 this morning! Hallelujah! AND, Saturday is Cinco de Mayo, so you know what that means- Mexican food and margaritas all around! Yee haw! Speaking of Mexican food- Joel and I made these amazing mushroom fajitas Saturday and BOY, were they good! I’m kind of obsessed with mushrooms, so the idea of a fajita centered entirely around garlicky grilled portobello mushrooms is fantastic in my book! I marinated the mushrooms in a garlic/lime juice/oil mixture and Joel grilled them; then we topped it with pepper jack cheese and grilled onions and peppers. Served alongside my grilled corn salad (always a favorite!), this was one amazing meal!
Mushroom Fajitas
2 portobello mushrooms; stems removed and sliced into thick slices
1 red onion, sliced into thin rings
1 red bell pepper, thinly sliced
2 cloves garlic, roughly chopped
1/4 cup vegetable oil
juice of 2 limes
salt
cilantro
shredded pepper jack cheese
4 corn tortillas
Combine the garlic, oil and lime juice in a small bowl and toss with the mushrooms to coat. Allow to marinate in the refrigerator for at least 15 minutes. Sprinkle with salt and grill mushrooms over medium-high heat until soft, about 2-3 minutes on each side. Grill onions and peppers about 10 minutes until soft. Top the corn tortillas with the mushrooms, vegetables, cheese and cilantro. Squeeze over additional lime juice if desired. Serves 2.
Recipe source: Sing For Your Supper original
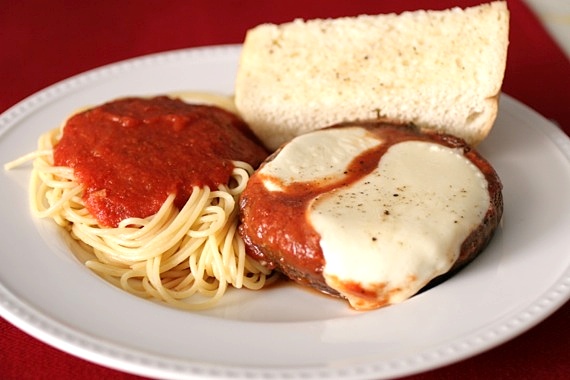
We’re all familiar with chicken parmesan- a breaded chicken cutlet topped with marinara sauce and mozzarella cheese. A lot of people’s favorite “Italian” dish. I’ve never been much of a fan, for whatever reason. This recipe, however, I’m a HUGE fan of! It’s basically just a vegetarian version of chicken parm; and it’s soooo much better, in my opinion. I love mushrooms any way I can get them and when they’re topped with marinara sauce and fresh mozzarella cheese??? Sign me up! The best part about this recipe? It’s ready for the table in about 30 minutes. You can’t beat that!
Portobello Mushroom Parmesan
4 portobello mushrooms, cleaned and stems removed
salt
pepper
1 cup marinara sauce (homemade or store-bought)
fresh mozzarella cheese, sliced in 1/4 thick slices (shredded is fine too)
grated parmesan cheese
Preheat the oven to 400 degrees. Season mushrooms with salt and pepper. Spread 1/2 cup of the marinara sauce on the bottom of a 9 by 13-inch baking dish. Place the mushrooms top-down on top of the marinara sauce and top with the remaining marinara sauce. Sprinkle with the parmesan cheese and bake about 15 minutes. Top with fresh mozzarella and return to oven for another 10-15 minutes until cheese is nicely melted. Serves 4.
Recipe source: heavily adapted from Giada De Laurentiis
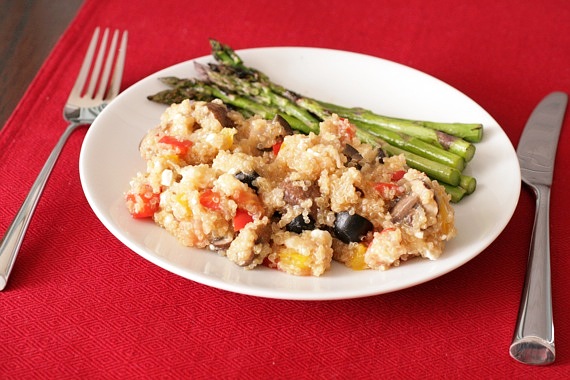
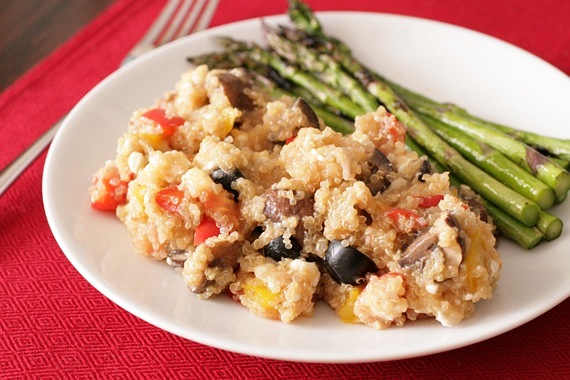
[keen-wah]. You thought it was [kwin-oah], didn’t you? 😉 That’s ok, so did I at first. Up until a couple of years ago, I had never even heard of this stuff, much less know how to cook it. But it’s become pretty popular lately- mostly due to how healthy it is (very high in protein and fiber), but also because it’s extremely versatile. You can bake with it, eat it for breakfast (like oatmeal), make a salad with it, cook it like rice and throw in lots of yummy vegetables…the list goes on! It’s a grain-like seed with a texture similar to a cross between rice and couscous (you can read all about quinoa here). Joel and I both loved the texture and thought it was all-around a delicious new food to add to our menu rotation! I cooked it with red and yellow bell peppers, red onions, garlic, baby portobella mushrooms, black olives and feta cheese for a flavorful Mediterranean twist – absolutely delicious! I’m so happy I finally decided to try quinoa and can’t wait to experiment with all kinds of flavors and dishes!
Mediterranean-Style Quinoa
1 cup uncooked quinoa, rinsed thoroughly
2 cups chicken broth
1 tablespoon olive oil
1/2 yellow bell pepper, chopped
1/2 red bell pepper, chopped
1/2 red onion, chopped
1 clove garlic, minced
squeeze of fresh lemon juice
6-8 baby portobella mushrooms, cut into quarters
1 small can chopped black olives
1/3 cup feta cheese
salt and pepper
Bring the quinoa and chicken broth to a boil over medium-high heat. Reduce the heat to low and simmer, stirring occasionally, for 20-25 minutes, until all the liquid has absorbed.
In the meantime, heat the olive oil in a large skillet over medium-high heat and sauté the onions, peppers and garlic until beginning to soften, about 7 minutes. Add in the mushrooms and cook for another 5 minutes. Turn off heat.
Add the cooked quinoa to the pan with the vegetables. Season with salt and pepper and stir in the lemon juice, black olives and feta cheese. Serve immediately. Serves 2-4.
Recipe source: Sing For Your Supper original
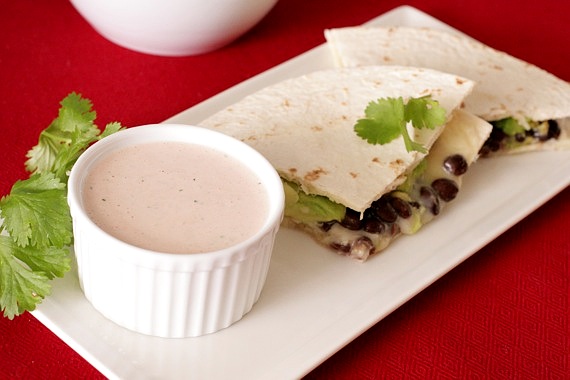
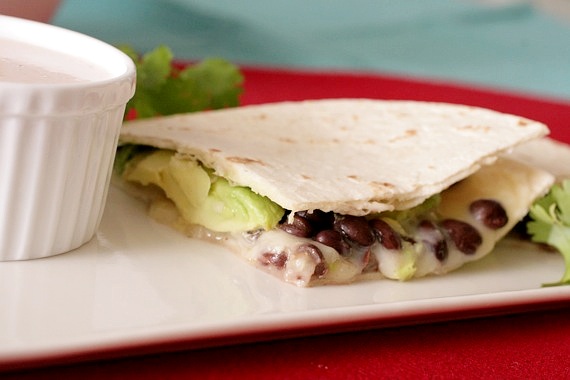
Have I mentioned how much I love quesadillas? All you need is tortillas and cheese and you’ve got the foundation for a great weeknight dinner! This time around, I chose black beans and avocado. Black beans are so good for you and full of flavor (we love them!) and the avocado added a nice creaminess. Add in a little grated monterrey jack cheese and cilantro and you’ve got a delicious dinner! I whipped up a quick dipping sauce with ranch dressing and homemade salsa that really gave the quesadillas a nice kick. We loved this meal and I’m certain I’ll be making it again and again.
Black Bean and Avocado Quesadillas
4 large flour tortillas
1 cup grated monterrey jack cheese
1 can black beans, drained and rinsed
1 avocado, sliced
cilantro
Preheat the oven to 350 degrees. Line two of the tortillas with the cheese, black beans, avocado and cilantro. Place the two remaining tortillas on top and bake for 5-7 minutes, until the cheese is melted. Slice into quarters.
If desired, mix 1/2 cup ranch salad dressing and 1/4 cup salsa for dipping. Serves 2.
Recipe source: Sing For Your Supper original
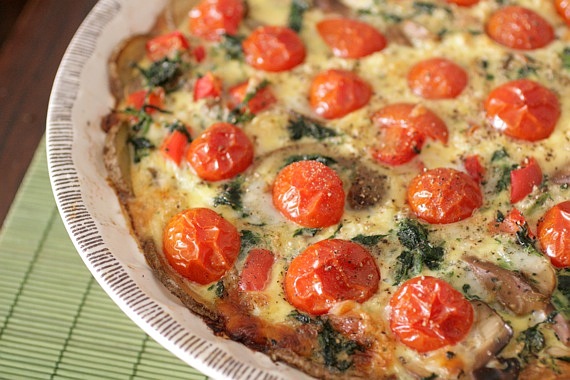
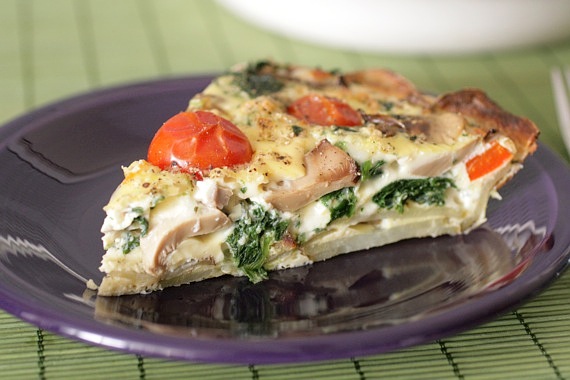
Quiche is just about my favorite quick-fix dinner. More than likely, I always have everything I need in my fridge and pantry to throw together a delicious meal in under an hour! My mom has a great recipe for quiche made with frozen hashbrowns as the crust, which was my inspiration for this. I sliced potatoes super thin and made a nice, crispy crust- something I think I’ll be doing a lot more in the future, this was delicious! The great news is, we felt great about eating it because it was so packed with vegetables and not sitting in a butter-loaded pastry crust (not that I really mind butter-loaded pastry…)! I used an unusual cheese in this quiche – a delicious Mexican Marigold Mint Caciotta that my sweet husband put in my stocking this Christmas. It comes from a local cheese factory in Dallas called the Mozzarella Company. Deeeeeeelish!!! However, this quiche would be great with goat cheese, feta or even plain ‘ol cheddar. Whatever cheese you have on hand and want to use would be just fine- that’s the beauty of quiche!
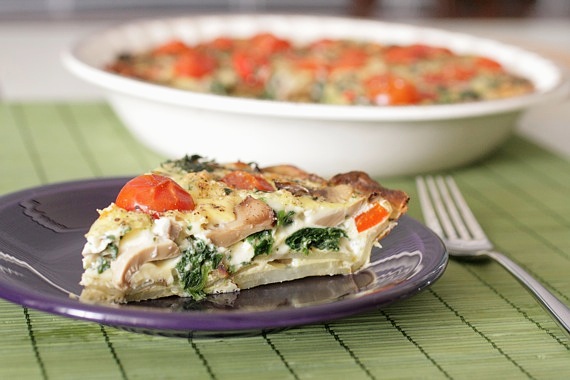
I just love how colorful it is!
Spinach and Tomato Quiche with Potato Crust
-my recipe
2 medium Russet potatoes, scrubbed and sliced into very thin disks (less than 1/8 inch)
1 1/2 tablespoons olive oil
salt and pepper to taste
1 small red bell pepper, chopped
1/2 cup frozen spinach, thawed and drained of all liquid
1/2 cup sliced mushrooms (canned works fine)
5 or 6 cherry tomatoes, cut into halves
1/2 cup cheese (any cheese you have on hand- cheddar is always great)
7 eggs
3/4 cup milk
Preheat oven to 400 degrees. Layer the sliced potatoes in an even layer in the bottom of a pie plate or quiche pan, overlapping the edges a bit. Brush with the olive oil then sprinkle with salt and pepper. Bake for 20 minutes, or until the potatoes are cooked through and slightly crisp. Reduce the oven temperature to 375 degrees.
In a large bowl, combine the red pepper, spinach, mushrooms and cheese. Spread mixture in an even layer into the potato crust, then place the tomatoes cut side down on top of the vegetables.
In another large bowl, combine the eggs, milk and salt and pepper. Whisk until totally combined. Pour over the the vegetables. Top with additional black pepper, if desired. Bake for 35-45 minutes, or until a knife inserted in the center comes out clean. Let cool for at least 10 minutes before slicing.
Serves 4
I just want to start off by saying, there are tons and tons of food blogs out there. Many with better pictures than mine, better writing skills, and just better overall food-blogginess; yet you’re here right now, reading mine. So thanks. Thanks for sticking with me and reading my silly posts and taking the time to comment- it really makes my day. My pictures may not be crystal clear and totally flawless, but you know what? I sort of like them that way- that’s exactly how our food looks before we sit down and dig in. I don’t spend an hour adding tiny pieces of parsley, or taking a cloth and wiping away stray crumbs or melted cheese that doesn’t belong. I like stray crumbs. 🙂 And I like my blog. And I’m thrilled beyond words that you like it too. So again, thanks. Thanks for being really fantastic readers. I really, really love you all.
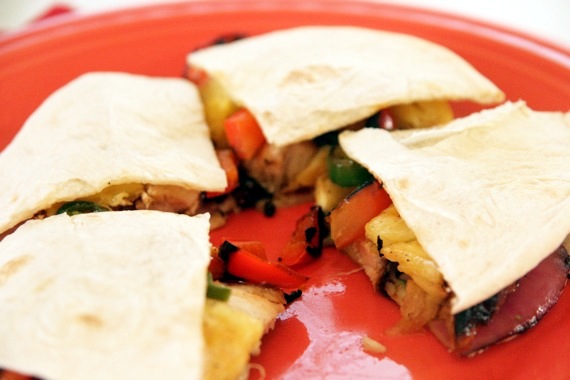
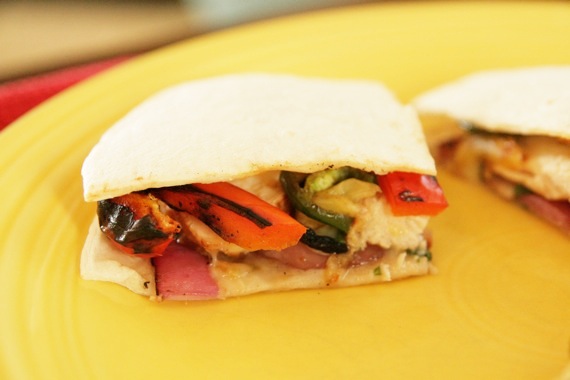
Ok, now that I’m done being sappy- here is a fantastic recipe for quesadillas. We made these this weekend and ate like big-fat-pigs! I was originally going to make these (do those not look insanely delicious?! I can’t wait to try them!), but didn’t have any bbq sauce. Then I remembered how much we adored the chicken kabobs I made a few weeks ago, and decided to just make quesadillas out of them (Good call, Amy!). These were cheesy, slightly sweet, a little spicy….a totally delicious meal! Can’t wait to make them again!
Grilled Chicken, Pineapple and Veggie Quesadillas
2 boneless, skinless chicken breasts
1/2 cup Lime Ponzu, plus more for brushing (If you don’t have this, just use soy sauce, a pinch of sugar and a little lime juice)
fresh pineapple, sliced (you’ll only need about 1/4 of the whole pineapple)
1 red bell pepper, cut into slices
1 red onion, sliced into rings
1 jalapeno pepper
pepperjack cheese
cilantro
large tortillas
Place the chicken in a large ziploc bag with 1/2 cup of the ponzu and refrigerate for at least 2 hours.
After 2 hours, grill the chicken over medium-high heat (about 5 minutes on each side). When the chicken is nearly done, add the peppers, onion and pineapple to the grill and brush with the additional ponzu while cooking. Turn only once and remove as soon as the chicken is done cooking.
Let the chicken rest for 5 minutes, then slice diagonally.
To assemble: preheat the oven to 400 degrees. Sprinkle a little pepperjack cheese on two tortillas (as much as you like- I used about 1/3 cup for each), then top with the sliced chicken, pineapple, peppers and onion. Top with a sprinkling of cilantro then place another tortilla on top of each. Bake for about 5 minutes, just long enough for the cheese to melt.
Cut quesadillas into 4 pieces. Serves 2.
*To keep the edges of the tortillas from curling up on the sides, dip your finger in a little water and brush along the outer edge of the tortilla just before baking.
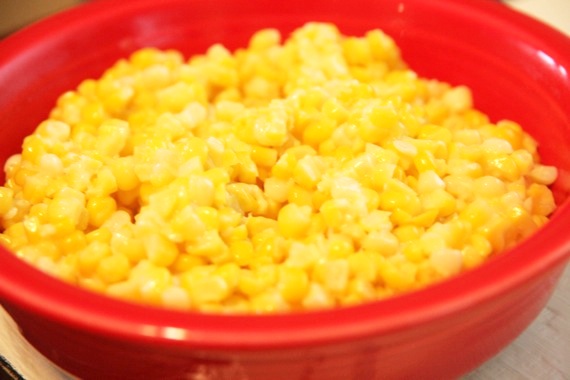
I love fresh corn. It’s one of my very favorite vegetables- so sweet, crunchy and fresh tasting. Yum. My favorite way to eat it is grilled- my hubby does a mean grilled corn on the cob! But I think this is my second favorite way to serve it- creamed. Now I know what you’re thinking, and no, this is nothing like those cans of mysterious, mushy, runny creamed corn. This is how my Great-Grandaddy, Pop, used to make it and it’s so simple and fast- and completely and utterly delicious. The only thing is, you simply must use fresh corn. Canned or frozen is absolutely NOT the same. Got it? Ok, here we go:
Classic Creamed Corn
5-6 ears of fresh corn, shucked (make sure to remove all the silk too)
2 tablespoons butter
salt to taste
splash heavy cream
In a medium skillet (cast iron is best, but not necessary), melt the butter over medium heat.
In the meantime, in a large bowl, slice the corn kernels off of each cob, then with the back (dull side) of your knife, apply pressure and scrape off all the juices from the cob- this is where all the good flavor comes from!
Add the corn and juices to the hot skillet and cook for 5-10 minutes, stirring occasionally, until the corn is beginning to soften just a bit. Don’t cook it too long- you want it to have a nice crunch to it. Add the salt and heavy cream. Serve immediately. Enjoy!
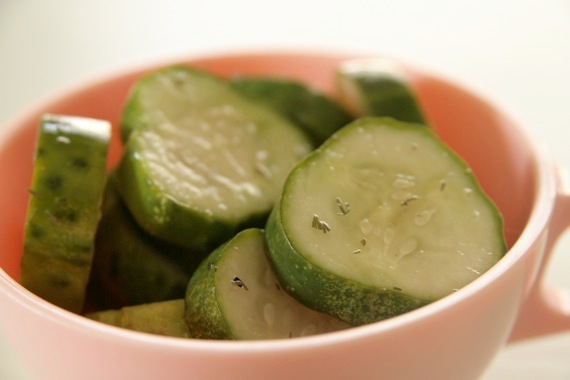
I love all things tangy, briny, or “vinegary”. My favorite flavor of potato chip is hands down, Salt and Vinegar (YUM!). So of course, I love to make my own “pickles”- however, these probably can’t really be considered real pickles. They’re more like quick pickles. Let’s call them “Quickles”. Hehehe…quickles….. Anyway, anytime I go to the Dallas Farmer’s Market, I always linger over the short little pickle-sized cucumbers and think, “I could SO make my own pickles”. But I never do and still never have, really. Someday, though, I promise, I’m going to dive head-first into this whole pickling thing- pickles, beets, okra, you name it! Until then, these “quickles” will have to do.
Basically, I slice cucumbers (any size will do, but these little ones work perfectly!), throw them in with some vinegar, water, salt, sugar, pepper and dill; let them sit in the fridge for awhile and voila! Quickles! You can add in anything you want, really- garlic, cayenne pepper…the possibilities are endless! I like mine extra “puckery” so I use plenty of vinegar, but you can use less if you like a more mild pickle. These measurements are just approximations, as I just throw everything in without measuring, so think of them more as “guidelines”.
Quick and Easy “Pickles” (or Quickles!)
10-12 small pickle-sized cucumbers, cut into thick slices
1/2 – 3/4 cup red wine vinegar
1/2 cup water
2 teaspoons dill (fresh or dried)
1 – 2 teaspoons salt (depending on how salty you like them)
1/2 teaspoon sugar
1 teaspoon black pepper
Mix all ingredients in a large bowl. Check for seasoning. Make sure all the cucumbers are covered by the liquid. Cover and refrigerate for at least 3 hours. Serve cold.
*I should mention that these small cucumbers are delicious by themselves with just a little salt and pepper – a great side dish!
And now onto more important matters- the winner of the Bob’s Red Mill Whole Grain Cookbook! And the winner is…………

Congrats, Jen! And thank you to everyone for your sweet comments! I’m so lucky to have such wonderful readers!!!
*On a separate note: if any of you are having issues with my blog not loading…please be patient- hubby is working on it. Once again, (it seems like this stuff never ends!) thanks to Go Daddy.com, we’re having server issues. Sometimes it kinda sucks hosting your own site……
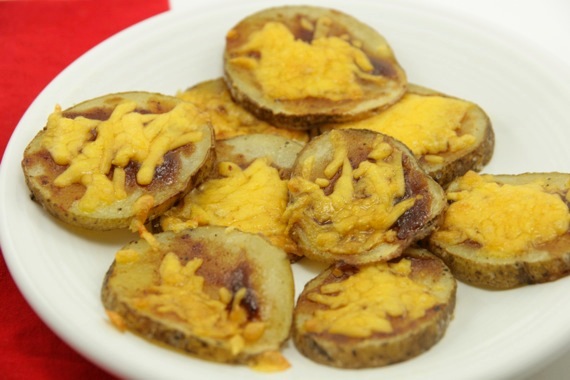
Pretty much everyone in my family or close circle of friends is well aware of my undying love for A-1 Sauce. I could eat it on just about anything…seriously. Growing up, anytime my dad would grill steaks, I would literally pour almost half a bottle of it all over my plate (including my baked potato) – over the years he learned not to be offended at me drowning his steaks in A-1; it’s not personal – it’s just what I do. 🙂 To this day, my favorite thing to eat A-1 on is my baked potato – I don’t eat one without it. Which is how I arrived at these. I was making sausage, pepper and onion sandwiches (coming soon) and wanted to make my yummy Southwestern Potatoes for a side dish, only I discovered I had no barbeque sauce. I noticed a bottle of A-1 in the fridge and thought about how much I love A-1 on my baked potatoes…so why not try it on these? Bullseye! These were SO good (even though, judging by the picture, they don’t look so appetizing…). We both gobbled these up in no time; and I can definitely say, I’ll be making these again soon.
A-1 Potatoes
2 unpeeled large potatoes, scrubbed
3 tablespoons olive oil
1/2 teaspoon salt
1/2 teaspoon black pepper
1/4 cup A-1 Sauce
1 cup shredded cheddar cheese
1/2 sour cream, optional (for dipping)
Line a large baking sheet with foil and preheat oven to 450 degrees.
Cut potatoes into 1/4 inch slices. Toss the potatoes, olive oil, salt and pepper in a big ziploc bag to coat the potatoes. Arrange potatoes in a single layer on the baking sheets. Bake until lightly browned, about 15-20 minutes. Brush with A-1 Sauce, then top with the shredded cheese. Bake until the cheese melts, about 3-5 minutes. Top with sour cream, if desired.
*You want to go easy on the salt, since the A-1 already has so much salt in it.
Here’s a cute story:
Once upon a time, when my parents were newly married (and I mean “newly” – they probably hadn’t even been married a week yet!) and just home from their honeymoon, my mother wanted to cook my daddy one of his favorite meals for their first married dinner at home- stuffed peppers. She worked hard in the kitchen and came out with a big platter of beautiful looking stuffed peppers. As they sat down and started to eat, they both noticed something wasn’t quite right – the peppers were crunchy! It was then my mother realized she’d neglected to cook the rice before adding it to the filling! She was so embarrassed, but my daddy kept on eating and said he thought they were great anyway – what a great husband!
Here’s another story:
Once upon a time, when Joel and I had just been married and had just gotten home from our honeymoon, I wanted to cook a nice meal for our first married dinner at home. I picked out a nice noodle casserole recipe and went to work. As my new husband and I sat down and started eating…lo and behold, the casserole went, crunch! crunch! and immediately I knew I had flubbed up somehow. Just as my mother had done years before when she was a young bride, I had neglected to boil my noodles before putting them in the casserole. Just like my sweet daddy had done, my hubby kept right on eating and said it was delicious and that he liked it crunchy, while I sat there blushing. Like mother, like daughter, I guess! Lucky for our husbands, we’ve both grown quite a lot since our first married days!
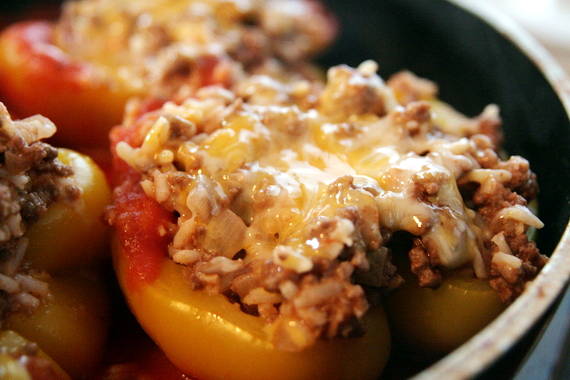
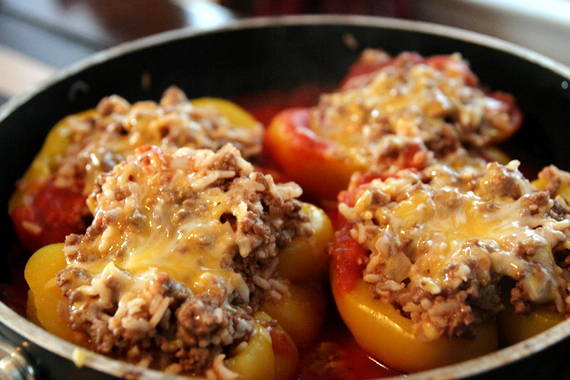
Believe it or not, when I was a kid, I hated these things. I hated peppers, I hated onions…I hated most things, it seems like. I didn’t even try these until I was almost married – my mother coooked them and I finally decided I’d give them a try. I ended up really liking them and getting the recipe from her. Finally, last night, I decided to make them myself – I did them exactly how my mother does them and WOW, these are SO much better than I remember!! They’re hearty and filling and have tons of great flavor! We both ate like pigs and cleaned our plates! Luckily, there’s one left and I get it for dinner tonight since hubby is going to a boys’ night! Yee haw!!
My Mom’s No-Bake Stuffed Peppers
2 medium bell peppers (any color – I used yellow)
1 teaspoon sugar
1/2 teaspoon basil
1-15 ounce can tomato sauce
1 pound lean ground beef
1 small onion, chopped
2 cups rice, cooked
1/2 cup grated cheddar cheese
Cut peppers in half lengthwise. Bring a large pot of salted water to a boil, drop the peppers in and boil for 5-6 minutes. In a small bowl, mix tomato sauce, basil and sugar and set aside. Brown meat and onion in a large skillet; drain. Stir in 1/2 the tomato sauce, 1/2 cup of the rice and the salt. Cover and simmer for 5 minutes; stir in cheese. Spoon meat mixture into peppers and place into skillet. Pour remaining tomato sauce around peppers; cover and simmer. Top with additional cheese, if desired. Serve on top of remaining rice.
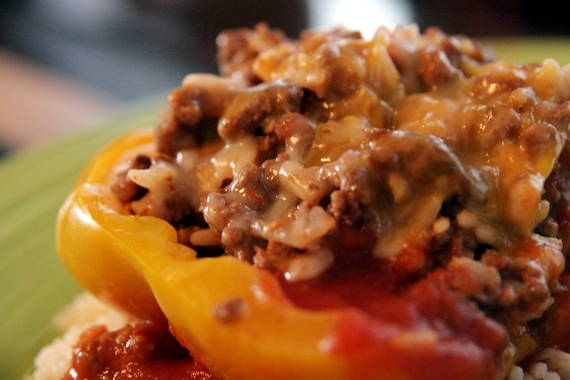
These really are SO good – do yourself a favor and try them out soon! I promise you’ll love them! Just don’t forget to cook the rice first! 😉 Enjoy!!


