Packing sucks. I think pretty much every person in the entire worlds knows this. For me, it’s not so much putting my things in boxes, but having a mess everywhere I turn and not being able to easily walk through my own house without tripping over a giant box. That’s the part I hate. Izzy hates it all. She hates us moving, she hates the packing, the boxes everywhere, and the general stress that goes along with moving. Poor doggie. I keep telling her she’s getting a huuuuge backyard upgrade, but I don’t think she cares at the moment.
Cassidy, on the other hand, is still happy as a clam. She doesn’t care that we have a ga-jillion more boxes to pack…when it’s playtime, it’s PLAYTIME, people! Hmm, maybe that’s why I don’t seem to have gotten anything done…. 😉
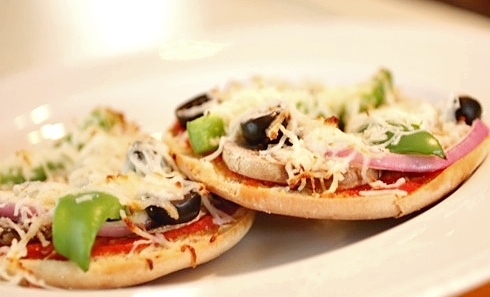
That’s where these simple pizzas come in. There is ZERO time for cooking when there are boxes to be packed. I just don’t have time to spare in the kitchen. Not to mention, all my pots and pans are packed. I used whole wheat bagel thins for these and they were really good- I like the bread-to-topping ratio. I can see a lot of these in our future once we move. There’s nothing easier, and they’re pretty darn tasty too!
Bagel Pizzas
2 whole wheat bagel thins (or regular bagels, if you prefer)
marinara sauce
shredded mozzarella cheese
1/2 a green bell pepper, chopped
1/2 a red onion, thinly sliced
black olives
thinly sliced button mushrooms
salt and pepper
Preheat the oven to 425 degrees. Lay the bagel halves in a single layer on a cookie sheet and toast for 5 minutes. Remove from oven.
Spread bagel thins with marinara and top with the vegetables, salt and pepper, then the cheese, using as much of each ingredient as you like. Place back in the oven for an additional 8-10 minutes, until cheese is melted and bubbly. Serves 2.
Recipe source: Sing For Your Supper original
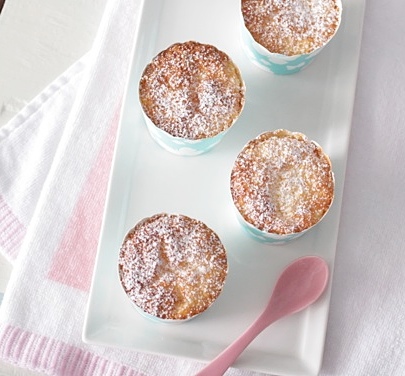
I have to admit, it’s been over six months since giving birth to Cassidy and I’m still having trouble losing the last bit of weight. We’ve been watching our portions and trying (TRY-ing) to cut back on sweets. However, for me, this proves veeeerrrry difficult…I can’t be expected to quit cold turkey! That’s why recipes like this make me happy- I still get my sweet fix, but I don’t have to feel so guilty afterwards!

This one couldn’t be easier- a box of angel food cake mix and a can of crushed pineapple. I loooove angel food cake, and the addition of pineapple makes it even yummier! Just bake it up in little cupcake liners and you have the perfect portion sizes! (of course, then, you’ll have to practice a little self control and not eat 12…..). 😉
Pineapple Angel Cakes
1 box angel food cake mix
1 20-ounce can crushed pineapple, undrained
Preheat oven to 350 degrees. Stir the pineapple into the cake mix and pour into cupcake pans lined with cupcake liners (you’ll have enough batter to fill around 24 cups).*
Bake for 20-25 minutes, until puffed and golden brown. Cool before serving. Serves 24.
*You can also bake in a 9×13 pan or a tube pan.
Recipe source: adapted from allrecipes.com

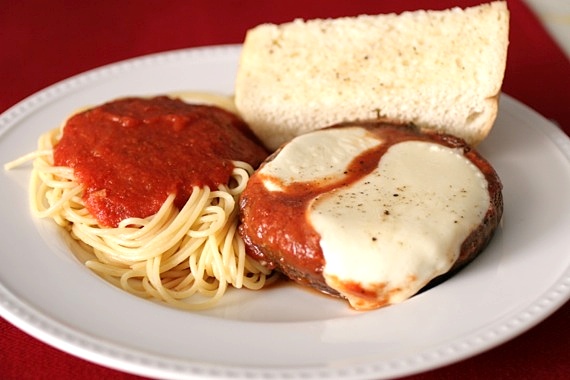
We’re all familiar with chicken parmesan- a breaded chicken cutlet topped with marinara sauce and mozzarella cheese. A lot of people’s favorite “Italian” dish. I’ve never been much of a fan, for whatever reason. This recipe, however, I’m a HUGE fan of! It’s basically just a vegetarian version of chicken parm; and it’s soooo much better, in my opinion. I love mushrooms any way I can get them and when they’re topped with marinara sauce and fresh mozzarella cheese??? Sign me up! The best part about this recipe? It’s ready for the table in about 30 minutes. You can’t beat that!
Portobello Mushroom Parmesan
4 portobello mushrooms, cleaned and stems removed
salt
pepper
1 cup marinara sauce (homemade or store-bought)
fresh mozzarella cheese, sliced in 1/4 thick slices (shredded is fine too)
grated parmesan cheese
Preheat the oven to 400 degrees. Season mushrooms with salt and pepper. Spread 1/2 cup of the marinara sauce on the bottom of a 9 by 13-inch baking dish. Place the mushrooms top-down on top of the marinara sauce and top with the remaining marinara sauce. Sprinkle with the parmesan cheese and bake about 15 minutes. Top with fresh mozzarella and return to oven for another 10-15 minutes until cheese is nicely melted. Serves 4.
Recipe source: heavily adapted from Giada De Laurentiis
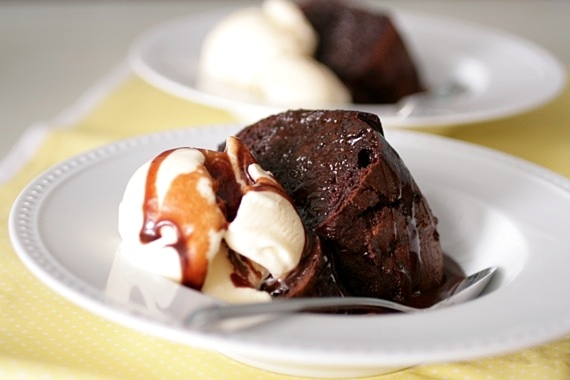
**Disclaimer: I am NOT one of those women who believes any sort of food, herbal remedy or old wives’ trick can induce labor. I fully believe my little girl will come when she is good and ready, thus making the idea of this cake completely bogus in principal, but nevertheless, good for a chuckle.
Evening primrose oil, castor oil, spicy foods, raspberry leaf tea…I’ve heard of just about every trick out there to induce labor. Of course I believe they’re all complete horse pucky. So naturally, when I was reading on a popular baby discussion forum about all these women baking and eating these so-called “labor cakes” to induce labor, I laughed out loud. Of all the ridiculous notions….yeah sure, a boxed mix chocolate cake is going to kick-start my labor…riiiight. However, I sat there and got to thinking about a warm, gooey, chocolaty cake fresh from the oven and just couldn’t resist. While I don’t believe any amount of chocolate will convince Cassidy to get a move on, any excuse to shove my face full of cake is good enough for me. So I made myself a labor cake. Following the recipe exactly (box mix and all). And it was dang good. Did Cassidy come? Nope. Did I enjoy my cake and go to bed with a smile on my face? You bet.
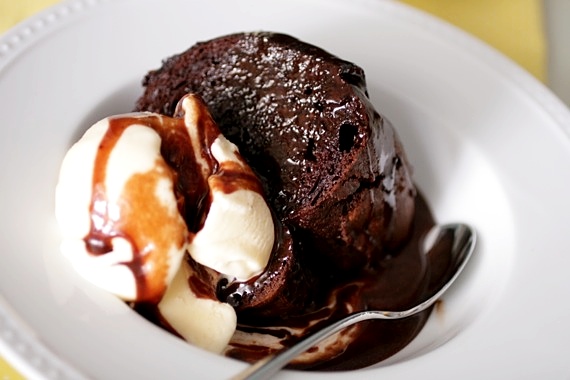
“Labor Cake” (A dressed up chocolate cake)
1 box Devil’s Food Cake mix
1 small package chocolate pudding mix
1 cup sour cream
3 eggs
1 1/3 cups water
1/2 vegetable oil
1 12-ounce package mini chocolate chips
Mix all ingredients in a large bowl and pour into a greased bundt pan. Bake at 350 degrees for 45-55 minutes, until a toothpick inserted comes out clean.
To make mine extra chocolaty, I topped it with my grandmother’s fudge icing:
Nana’s Fudge Icing (adapted to be a thin glaze rather than a thick frosting)
1/2 cup cocoa powder
1 1/2 cups sugar
3/4 cup (1 1/2 sticks) butter
1/2 cup milk
1/2 teaspoon salt
1 teaspoon vanilla
Heat all ingredients except vanilla in a small saucepan over medium heat. Stir until mixture is melted and beginning to thicken. Remove from heat and add vanilla. Let sit for about 5 minutes before serving.
Cake recipe source: www.justmommies.com
Well, it looks like we all survived the Christmas hustle and bustle! I hope you all had as wonderful a Christmas as we did! Although there was lots of driving involved, we had so much fun with our families and ate SO much good food! Joel and I certainly enjoyed our last Christmas as a twosome, but we couldn’t help but dream of next year’s Christmas and how special it will be with Cassidy! 🙂
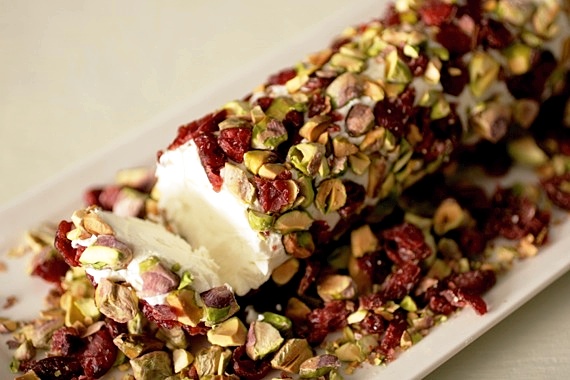
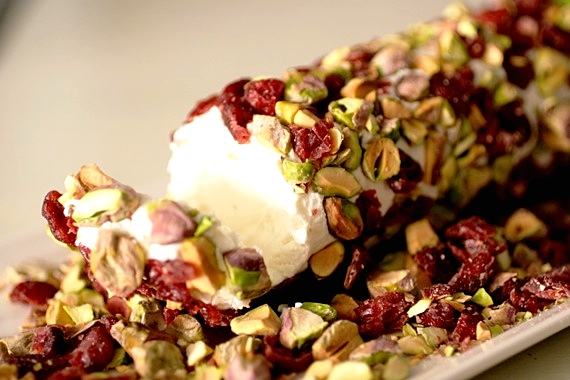
And now that Christmas is over, it’s time to start thinking about yummy New Year’s Eve snacks! Joel and I always have lots of different snack foods on New Year’s Eve instead of a big meal. We enjoy just staying home and enjoying a nice, quiet evening just the two of us (all that is sure about to change, huh?!). I’m thinking this year we’ll definitely be snacking on this appetizer for sure! I tried it just over a week ago when we had my parents and grandparents over for a nice meal (like we do every year before Christmas). I wanted a quick, easy, delicious appetizer that would require as little work as possible so I’d have more time for the rest of the cooking. I’ve had this recipe saved on Pinterest for weeks and weeks now and it turned out to be exactly what I was looking for. SO good! We all crowded around it and couldn’t stop eating it! The combination of the toasted pistachios and sweet cranberries was just ideal. I’ll be using this recipe again and again! If you’re headed to a party this New Year’s Eve or even just staying in like we do, this appetizer is just perfect! I hope you enjoy it as much as we did!
Goat Cheese Log with Pistachios and Cranberries
1 8-ounce log goat cheese
1/2 cup pistachios, shelled
1/2 cup dried cranberries, roughly chopped
sliced baguette or crackers for serving
In a small pan over medium-high heat, toast the pistachios until fragrant; about 3-5 minutes, stirring occasionally. Let cool.
Combine the pistachios and cranberries in a plate and roll the goat cheese log in the mixture until completely coated. Place on a serving dish and sprinkle the remaining pistachio/cranberry mixture around the log. Allow to sit out at room temperature for at least 15 minutes before serving so the cheese will soften nicely and become more spreadable. Serves approximately 6-8.
Recipe source: Real Simple
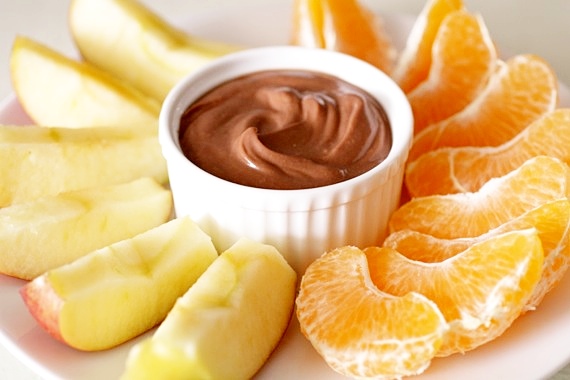
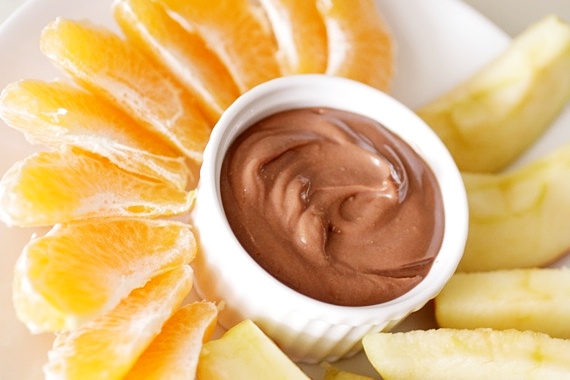
I’m sure by now, you’ve all heard about the awesomeness of Pinterest. If you haven’t, get over there right now and discover for yourself how addicting and fun it is! I’ve discovered more fantastic ideas for recipes, decorating, baby stuff, and so much more from there! Among them, this nutella yogurt fruit dip. 2 ingredients. How awesome is that?! I try to eat as much fruit as possible and after discovering this dip, it’s a breeze! If you’re looking for a healthier way to get your kids eating more fruit, definitely try this- it comes together in 5 seconds and it’s really delicious! Your family will love it!
Nutella Yogurt Fruit Dip
1 cup plain, nonfat Greek yogurt
1/2 cup nutella
Mix the two ingredients in a bowl and chill until ready to serve. Serve with any fruit you like- my favorites are apples and oranges. Serves 4-6.
Recipe source: The Family Kitchen
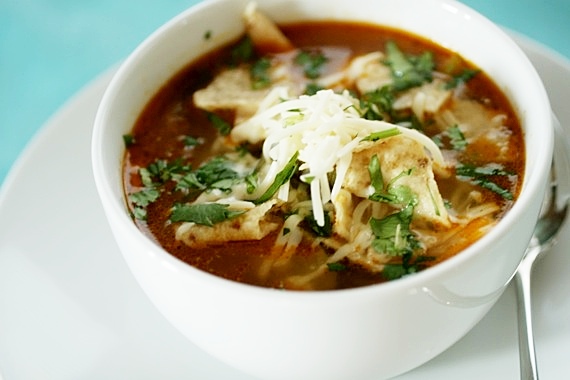
As a new bride (5 years ago this month- yay!), I bought a soup cookbook from Williams-Sonoma so I could learn to make easy, delicious soups for my new husband. I bookmarked a ton of recipes from the book but this one always stood out to me; it claimed to be a 15-minute soup. Intriguing! I tried it and found that not only was it a quick and easy recipe, it was super scrumptious! Joel fell in love with it and I’ve been making it religiously for 5 years now. In fact, this was the very first recipe I ever blogged waaaay back in April 2008 (isn’t it cute? The pictures are just terrible!)! I thought I’d go ahead and re-blog it since it never really got the attention it so deserves. Joel never gets tired of it and as soon as soup season rolls around every year, Chicken Tortilla Soup is his first request! I’m happy to make it for him as often as he wants because I happen to love it too and like I said before- it’s EASY. This isn’t your typical high-fat, loaded with tons of ingredients chicken tortilla soup. It’s base is a flavor-packed broth seasoned with chili powder, cumin and lots of lime juice (my favorite part!), and the zucchini is an authentic addition suggested by my friend Amanda’s mother. It’s simple, full of tons of great flavor and extremely satisfying!
Chicken Tortilla Soup
6 cups chicken stock
2 cups cooked, shredded chicken (I like to roast or poach bone-in chicken breasts until tender, then shred the meat. Additionally, you could also use a store-bought rotisserie chicken)
half an onion, chopped
1 clove garlic, minced
2 small-medium zucchinis, chopped
1 teaspoon chili powder
1 teaspoon cumin
1/4 teaspoon chipotle chile powder
juice from 2 large limes
salt and pepper to taste
Coat a large saucepan with olive oil over medium-high heat, add onion and zucchini and sautee until tender, about 3 minutes. Add the garlic, chili powder, cumin, chipotle chile powder, salt and pepper and stir until fragrant. Pour in stock and bring to a boil. Add the shredded chicken, reduce the heat to medium and simmer until the chicken is heated through. Add the lime juice and taste for seasoning. Ladle into bowls and top with and desired garnishes. Serves 4.
Garnish ideas:
crushed tortilla chips
shredded Monterey Jack cheese
sliced avocado
fresh cilantro
Recipe source: adapted from Williams-Sonoma’s Soup Made Fast

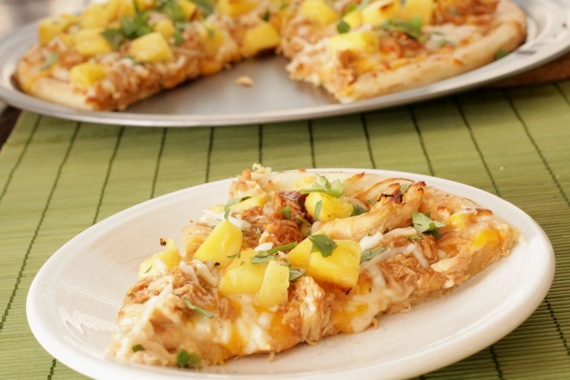
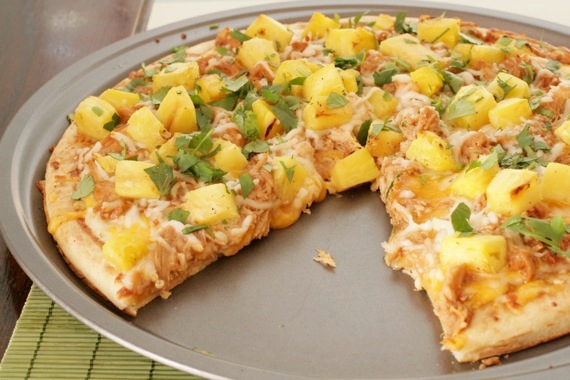
Thursday night at our house is usually “pizza night”. We didn’t really plan it out that way, it just sort of happened over time. By the time Thursday rolls around, I’ll have cooked dinner every night that week and we’re ready for something convenient, plus, we happen to live within a stones throw of the best pizza in the area. So, somehow, Thursday night eventually turned into “pizza night”. But just because it happens to be “pizza night”, doesn’t mean it has to be take out pizza. We love making pizza at home- our favorite variety is black olives, mushrooms, green olives and fresh tomatoes, but last week we wanted something different. I had some leftover grilled pineapple from the night before and thought the classic ham/pineapple combination might be good, but honestly, I’m a little tired of that one. Then I remembered I had two small chicken breasts thawed in the fridge, so I decided on BBQ chicken pizza with pineapple and cilantro! YES!
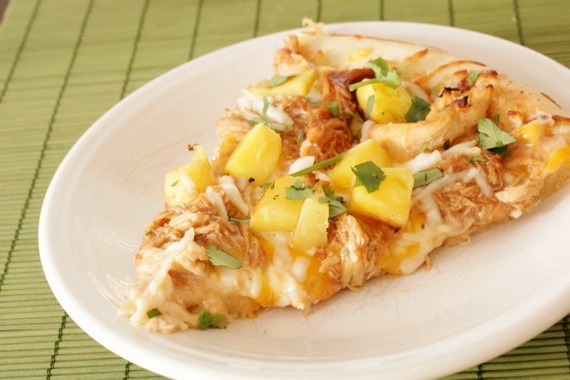
I cooked my chicken in the crockpot, then shredded it and tossed it with BBQ sauce, brushed the pizza crust with a very thin layer of BBQ sauce and ranch dressing, topped it with cheddar and mozzarella cheese, the BBQ chicken and the pineapple, then after baking, gave it a hearty sprinkling of cilantro. OMG-HOLY-YUM!!! We gobbled this up as if we hadn’t eaten in days! An instant favorite! You MUST try this pizza!
BBQ Chicken and Grilled Pineapple Pizza
1 large, thin pizza crust (I used Boboli brand)
1 cup grated mozzarella cheese
1/2 cup grated cheddar cheese
2 chicken breasts, fully cooked and shredded
1/2 cup BBQ sauce, plus more for brushing on the crust
1/4 cup ranch salad dressing (*I make my own with a ranch seasoning packet, mayo and buttermilk)
fresh pineapple, cut into 1-inch pieces (however much you like- we like lots!)
fresh cilantro, chopped, about 1/3 cup
Preheat the oven to 375 degrees. Toss the cooked, shredded chicken breasts with the BBQ sauce. Set aside.
Brush the pizza crust with a thin layer of BBQ sauce (if you’re using homemade pizza dough or the roll-out kind in the can, you’ll need to pre-bake it for 10 minutes or so, just to crisp it up a little bit. My crust was pre-baked already, so I skipped this step), then spread on the ranch dressing. Top with the cheddar cheese and mozzarella cheese, then the chicken and pineapple. Bake for about 15 minutes, until all the cheese is melted and the crust is golden brown. Top with the chopped cilantro. Makes 1 pizza.
Recipe source: Sing For Your Supper original
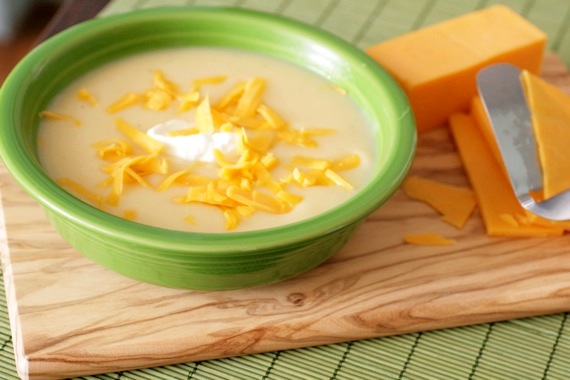
If you’re anything like me, some nights you’ll end up staring blankly into the fridge with no idea what you’re going to make for supper…and it’s almost suppertime. Lucky for you (and me!), if you’ve got a bag of potatoes and some onion , you’ve got the beginnings of a mighty tasty potato soup! This recipe isn’t new to the blog- it’s made an appearance before, BUT I just got a handy dandy macro lens for Christmas and couldn’t resist re-shooting this soup. Plus, I’ve made a couple of small changes to the recipe that make it just about perfect in my eyes (and Joel’s!). I made this not too long after Christmas and after a week of being horribly sick, and it tasted SO good! So rich and creamy with a slight tang from the sour cream- I really, really love it!
Creamy Potato Soup
-adapted from my mom’s recipe
5-8 medium size russet potatoes, peeled and cut into chunks
1 onion, chopped
1 chicken bouillon cube
salt and pepper to taste
1/3 cup sour cream
1/2 cup shredded cheddar cheese
Put the potatoes, onion and bouillon cube in a large stock pot and add enough water to cover. Cook uncovered, over medium-high heat until it begins to boil, then reduce the heat the low and cook for 30 minutes, or until the potatoes are very soft. Stir in salt and pepper. Using a regular blender or a hand blender (that’s what I used), puree the mixture until smooth and free of lumps (*if you use a regular blender, be sure to puree only a little at a time; you don’t want to overfill your blender). Stir in the sour cream and shredded cheese. Check for seasoning and add more salt and pepper as needed.
Garnish with additional sour cream and cheese, bacon bits or green onion if desired.

Playing with my new lens….what do you think? Maybe I should learn to focus better… 😉
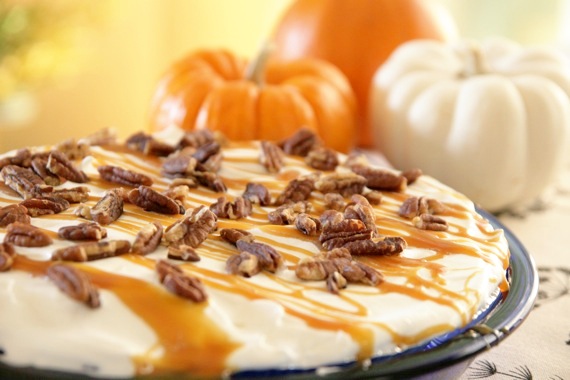
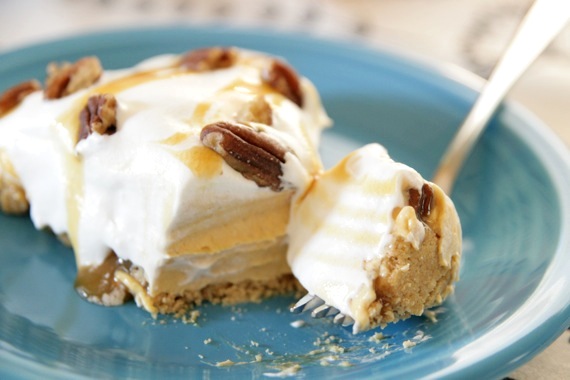
Let me start off by saying, this pie is delicious. Really, really delicious. Surprisingly delicious. After one taste, I sat there and finished off the entire slice before I was even finished photographing it! But before I go on any further, there’s something you should know about this pie. Here’s an email I recently received from a very, very sweet reader:
Amy, I’m one of your faithful followers and would like to make a request of you. We just recently found out that my dad is suffering from Multiple Myeloma (a cancer of the blood) and one of the side effects is diabetes. My dad loves his sweets and it’s been a little hard for him to make such a drastic adjustment to his diet. I would like to make him a tasty dessert that he would not believe was diabetic friendly. So now my request; sometime in the future could you post a diabetic recipe that I could make for my dad? I know that I can probably find literally thousands of recipes on the internet, but they wouldn’t have the thought and love put into them. Plus, if you make it and post it I know it will be AWESOME! Thanks so much for all the care you put into your blog. You are a very special person. Thanks again, Sheila
After reading Sheila’s touching email, there was absolutely NO way I was going to disappoint her. I immediately set out to find the most delicious, satisfying, ‘never-know-it’s-sugar-free’ recipe. That’s right. This pie is diabetic-friendly. And I am proud to say….YOU’D NEVER KNOW IT. After getting Sheila’s email, I emailed my Aunt Josie and got her best sugar-free recipe. My cousin Travis has diabetes, so Aunt Josie is a rockstar when it comes to flavorful, sugar-free cooking/baking. This pie is her favorite and now I can see why! It’s super easy, takes literally no time to put together and the pumpkin and spices really shine! What a crowd-pleaser! And just in time for Thanksgiving! So Sheila, I really hope your dad enjoys this pie…I sure enjoyed making it for you!
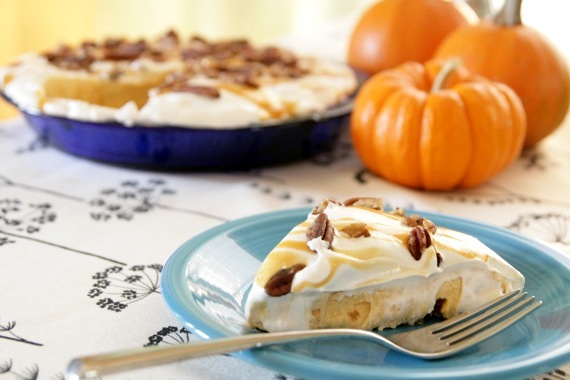
No-Bake Turtle Pumpkin Pie
-my Aunt Josie’s recipe
1/4 cup plus 2 tablespoons sugar free caramel ice cream topping, divided
1 graham cracker pie crust
1/2 cup plus 2 tablespoons pecan pieces, divided
1 cup cold 1% milk
2 packages (4-serving size) vanilla sugar-free, fat-free instant pudding
1 cup canned pumpkin
1 teaspoon ground cinnamon
1/4 teaspoon ground nutmeg
1/4 teaspoon ground cloves
1 tub (8 ounce) light whipped topping, thawed, divided
Pour 1/4 cup caramel topping into crust; sprinkle with 1/2 cup pecans.
Beat milk, pudding mixes, pumpkin, and spices with whisk until blended. Gently fold in 1 1/2 cup whipped topping. Spread into crust.
Refrigerate at least 1 hour. Top with remaining whipped topping and 2 tablespoons pecans. Drizzle with remaining 2 tablespoons caramel topping.
Nutritional analysis: (per one slice)
Calories – 165
Fiber – 2.7
Protein – 2
Total fat – 7
Carbohydrate – 23
**Josie notes that this pie is still a little high in carbs. So you might not want to go crazy and eat the whole thing yourself. 😉
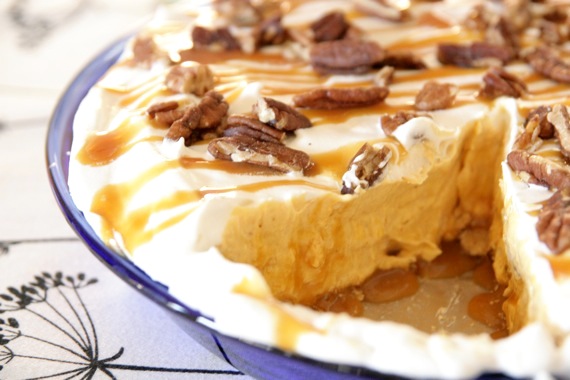
Mmm, just look at all that caramel oozing out…..*drool* Sheila, I sincerely hope this recipe makes your dad happy! And thank you for challenging me to try something outside of my comfort zone. I’m proud to say this is my very first diabetic-friendly recipe on Sing For Your Supper; hopefully there will be many more to come! Happy baking!
