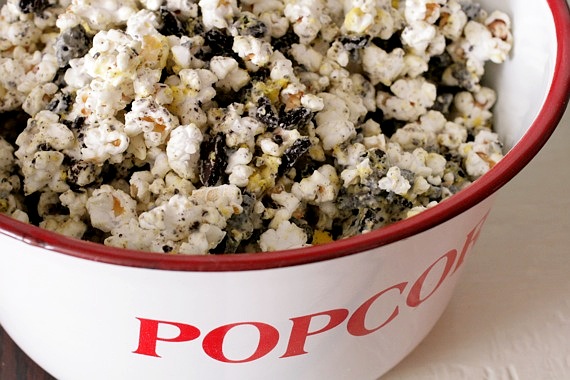
Warning: this snack is highly addictive and could cause awesomeness overload- a rare, but critical side effect to snack awesomeness. Munch with caution.
Remember when I made Bridget’s Bunny Bait? Well, I happened to have leftover popcorn and white chocolate candy coating, then I looked over and saw a half-eaten package of Springtime Oreos (you know, the kind with the pretty yellow cream?)….a legend was born and a monster was created – I couldn’t stop eating the stuff! This couldn’t be easier to make and couldn’t be more delicious. If you love Oreos as much as Joel and I do, this is right up your alley! Make it! Make it today!
Cookies and Cream Popcorn
1 bag popcorn, popped (I used the Fluffy White variety)
6 ounces white chocolate candy coating
10-15 Oreos, crushed or roughly chopped (I used the Springtime Oreos with yellow cream, which is why my popcorn has a bumble bee-type look) 🙂
Place the popped popcorn and Oreos in a large bowl. Heat the white chocolate candy coating in the microwave in 30 second intervals, stirring in between until melted and smooth.
Drizzle the white chocolate bark over the popcorn/Oreo mixture and stir to coat. Dump out on a large sheet of wax paper and spread into a single layer. Let cool and harden. Break into small pieces and serve.
Recipe source: Sing For Your Supper original
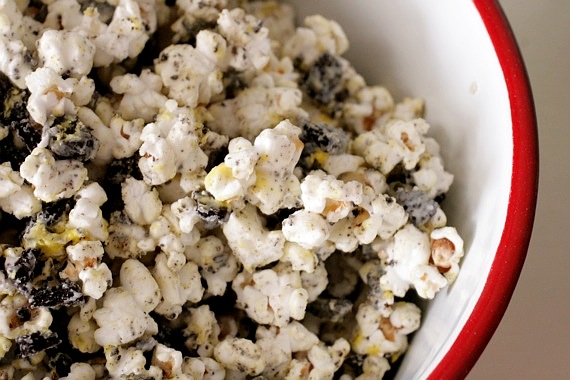
**I still get questions about this, so I’ll clarify: white chocolate candy coating (or almond bark) can be found on the baking aisle next to the chocolate chips and nuts. It comes in 12 ounce packages, usually in 1 large block (it sort of resembles a large ice tray). You can use regular chocolate chips, but you’ll have to refrigerate it to harden it before serving.
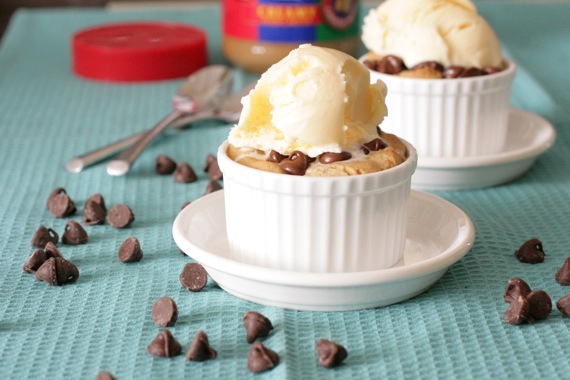
Every once in awhile, a dessert comes along that you can’t stop daydreaming about. You think about it while lying in bed trying to sleep, you think about it when you’re having a rough day, maybe you even think about it while you’re in the middle of giving a voice lesson (ahem…not me, of course…). I mean, who can resist a warm, gooey cookie with ice cream on top? Not me. NOT me.
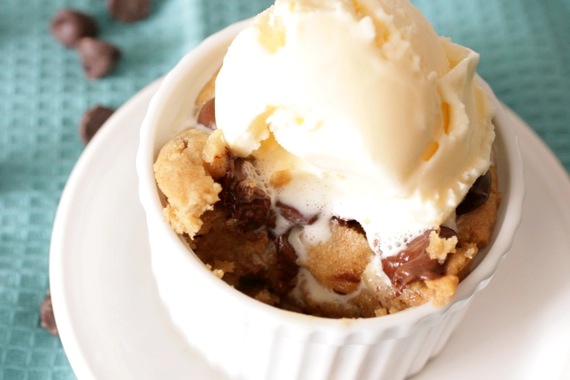
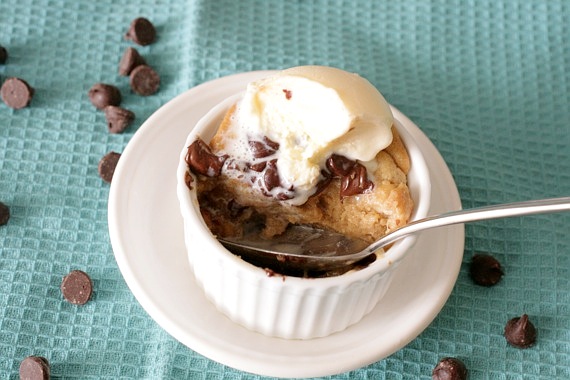
A couple of months back, I posted an excellent recipe for peanut butter cookies; after I made the initial batch, I safely tucked the extra dough away in the freezer for safe-keeping. The other night, in the midst of a warm-gooey-chocolaty craving emergency, I made these beauties. Peanut butter cookie dough, baked in a ramekin until just barely cooked (even a little gooey on the inside), then topped with chocolate chips and a big scoop of ice cream. Pretty much the best thing I’ve put in my mouth in a long time! I simply cannot resist warm gooey cookie dough, so this was an absolutely heavenly treat for me. Joel loved it too!
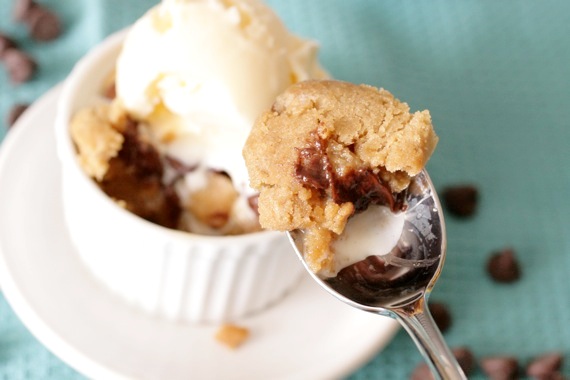
Peanut Butter-Chocolate Cookie Cups
peanut butter cookie dough (homemade or store-bought)
chocolate chips
ice cream
Preheat the oven to 350 degrees. Grease two 2 1/2-3 inch ramekins (muffin cups would also work if you don’t have ramekins).
Fill the ramekins 3/4 full with the cookie dough (slightly packed). Bake for 10-12 minutes, until just beginning to brown on the outside, but still slightly undercooked on the inside (feel free to bake a little longer if you don’t like it too gooey).
Top immediately with chocolate chips (as much as you’d like) and allow to melt slightly.
Top with ice cream and serve with a spoon. Perfect for late-night cravings and sweet tooth emergencies.
Recipe source: Sing For Your Supper original
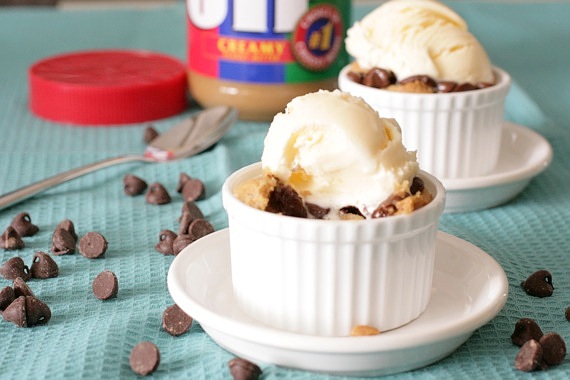
Mmmm….gooey peanut butter cookie…….
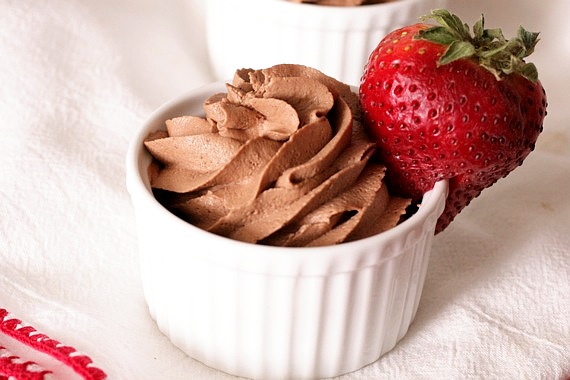
When I was a kid, my family used to go to this really nice seafood restaurant on special occasions. It was a huge buffet with crab legs, seafood gratins, pastas, fish, oysters, lobster tails and much, much more. It was a real treat. But the thing I cared about most on that buffet was always the chocolate mousse. I felt so grown up eating something out of a stemmed crystal glass. I would eat as much chocolate mousse as I could hold. It was silky smooth and oh-so luxurious – I absolutely loved it. Still do. Chocolate mousse has always been one of my very favorite desserts. Which is why I’ve had this recipe bookmarked for well over a year. For whatever reason I never got around to making my own chocolate mousse – then I saw this gorgeous recipe on Smitten Kitchen and knew I had to try it.
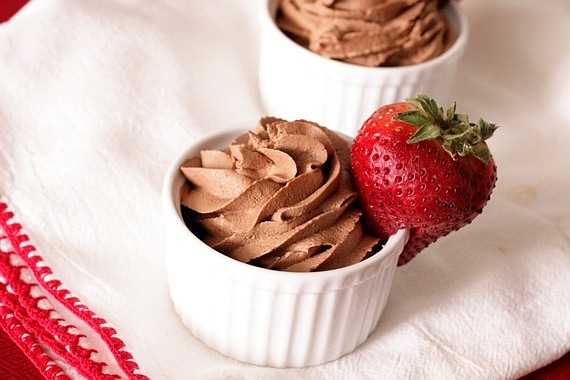
Deb describes this as “silky and decadent” and I could not agree more. The whipped egg yolks are what make this extra creamy and the whipped cream and beaten egg whites make it so light and fluffy it could almost float away. I’m being perfectly honest with you when I say this is the most delicious, luxurious chocolate mousse I’ve ever had in my whole life. An absolute dream.
Silky, Decadent Chocolate Mousse
8 ounces bittersweet chocolate (no more than 60% cacao), chopped
3/4 stick (3 ounces) unsalted butter, cut into 6 pieces
3 large eggs, separated
1 tablespoon Grand Marnier liqueur (or swap with a liqueur of your choice; yes, you can leave it out but it won’t be as good)
1 cup very cold heavy or whipping cream
2 tablespoons sugar
1/2 teaspoon vanilla
1/8 teaspoon salt
Set a large, heat-proof bowl over a saucepan of barely simmering water and melt the chocolate and butter in it, gently stirring it until smooth. Remove from heat. Alternately, you can melt them in your microwave, stirring thoroughly at 30 seconds and every 15 seconds thereafter until the mixture is smooth.
Beat the egg yolks in the bowl of an electric mixer fitted with a whisk attachment until thick enough to form a ribbon that takes a few seconds to dissolve — this will take about two to four minutes to achieve. Whisk yolks into chocolate mixture along with Grand Marnier, then cool to warm.
Wash your mixing bowl and beat the heavy cream, sugar and vanilla until it just holds stiff peaks. Transfer to another bowl and set aside. Wash your mixing bowl again (I know it requires lots of washes for this recipe; alternatively you can just use a hand mixer and 3 different bowls).
Beat the egg whites and salt until they just hold soft peaks.
Fold the whipped cream and beaten whites into the chocolate mixture, gently but thoroughly. Transfer to 8 (4 ounce) ramekins or one large serving bowl, or go restaurant-style, serving it in stemmed glasses with white or dark chocolate shavings on top.
To make ahead: Mousse can be chilled, its surface covered with parchment paper, up to 2 days. Let stand at room temperature at least 30 minutes before serving.
Recipe source: slightly adapted from Smitten Kitchen, originally from Gourmet Magazine, October 2009
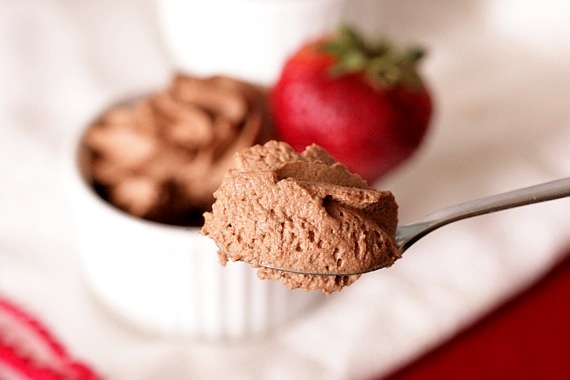
Lighter than air……
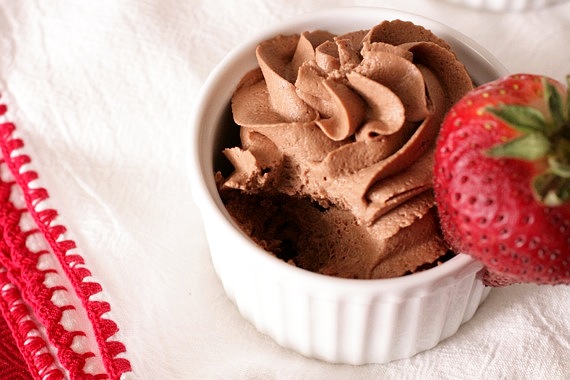
P.S. Happy, happy Valentine’s Day! 🙂
I’m actually not the world’s biggest fan of red velvet cake. Never have really seen the big deal. However, lately I’ve been craving it like crazy! I guess because so may delicious looking red velvet recipes have been popping up all over the blogosphere lately. I guess February is definitely a red velvet kind of month. A year or so ago, I copied down my great-grandmother’s recipe for red velvet cake and have been wanting to try it ever since. I figured now would be as good a time as any, then my friend Kelsey recommended I try her recipe- in fact, her exact words were, “try my recipe- I dare you not to love it.” Well, how can I resist THAT?! And luckily, upon comparing the two recipes, I found that Kelsey’s is almost identical to my great-grandmother’s, with only a couple of very minor differences. Excellent!
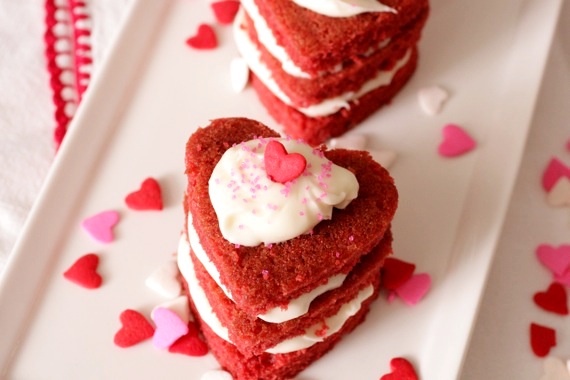
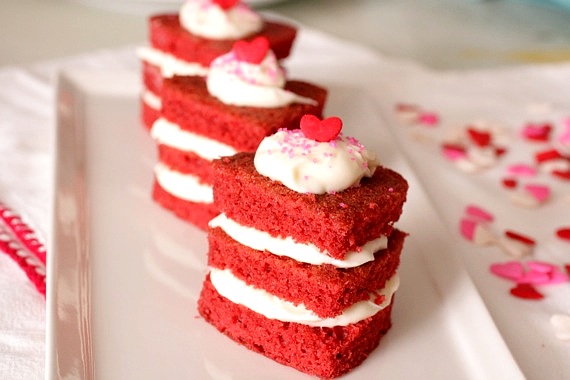
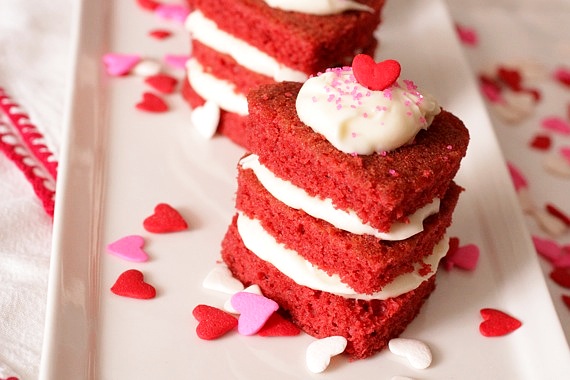
I didn’t want to make a traditional cake (which is very unlike me, but I just decided to ride the wave…), and ended up baking the cake in a jelly roll pan. After baking and cooling I found myself looking at it thinking, “well….what the heck do I do now?!” I knew I wanted to somehow do something heart-shaped, for a Valentine’s theme, but beyond that I was lacking inspiration. Lucky for me, my friend Leah suggested Napoleons. Perfect Leah, thanks! Napoleons (or Mille-feuille) are traditionally made with puff pastry and pastry creme, but I thought in honor of Valentine’s Day a cute little red velvet cake Napoleon would be oh-so-fun! The red velvet cake turned out so delicious- especially with the tangy cream cheese frosting! These little guys were so much fun to make and so easy! A perfect little sweet treat for your sweetheart this Valentine’s Day!
Red Velvet Cake Napoleons
For the cake:
2 1/2 cups cake flour
1 1/2 cups sugar
1 teaspoon baking soda
1 tablespoon cocoa powder
1 teaspoon salt
2 eggs
1 1/2 cups vegetable oil
1 cup buttermilk
2 tablespoons (1 oz.) red food coloring
1 teaspoon vanilla extract
1 teaspoon white distilled vinegar
For the frosting:
12 ounces cream cheese, softened
8 ounces butter (2 sticks), softened
1 1/2 teaspoons vanilla extract
3 cups confectioners’ sugar
squirt of fresh lemon juice
For the cake:
Preheat oven to 350 degrees. Grease and line a jelly roll pan with parchment paper.
Sift together flour, sugar, baking soda, cocoa, and salt into a medium bowl.
Beat eggs, oil, buttermilk, food coloring, vanilla, and vinegar in a large bowl with an electric mixer until well combined. Add dry ingredients and beat until smooth, about 2 minutes.
Pour batter into the prepared pan and bake for 30-35 minutes, or until a toothpick inserted into the middle comes out clean. Let cool completely.
When the cake is cooled, flip it onto a large surface and peel the parchment paper off. Using a heart-shaped cookie cutter, cut out hearts and set aside. Using a serrated knife, slice each heart in half. Set aside while you make the frosting.
For the frosting:
Beat cream cheese, butter, vanilla and lemon juice together in a large bowl with an electric mixer until combined. Add sugar and beat until frosting is light and fluffy, 3-5 minutes (you’ll end up with some left over).
To assemble:
Place a small amount of frosting on one of the hearts, place another heart on top, pressing down slightly, then more frosting; finally place one last heart on top and a dollop of frosting (that’s 3 hearts total). Top with sprinkles, if desired. Repeat with the remaining hearts. I ended up with 14 Napoleons.
Recipe source: cake and frosting seen on Apple A Day, originally from Saveur.com
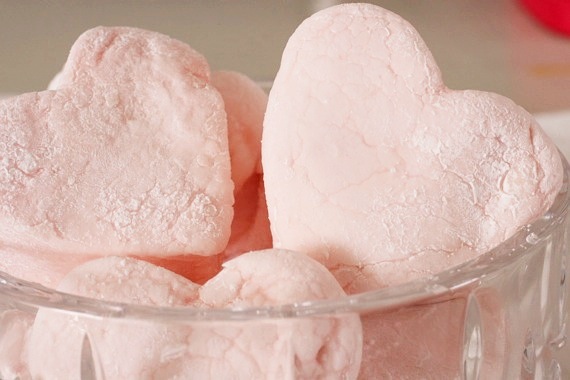
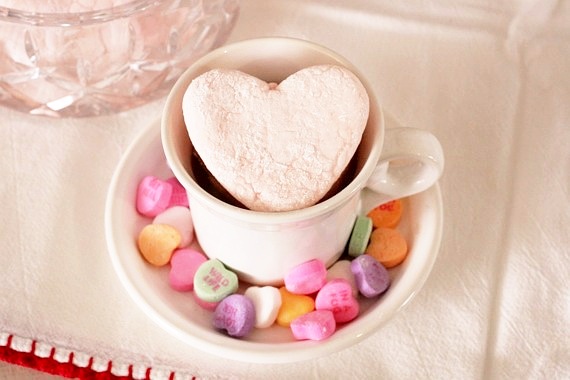
Here’s another fluffy-frilly-girly recipe, just in time for Valentine’s Day. Pink Raspberry Marshmallows. I’ve discovered something about myself- I really like making homemade marshmallows! I just love whipping all that white, puffy fluff in the mixer! And let me tell you, homemade marshmallows are by far better than the packaged ones! Especially these- they have a light raspberry flavor and I think the pinkness adds a little something extra. 😉
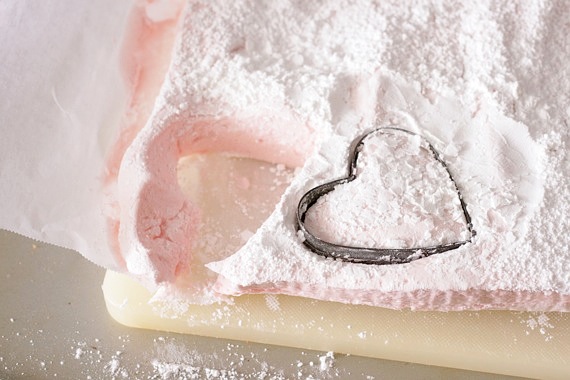
I used Dorie Greenspan’s recipe, then used a heart-shaped cookie cutter to cut out the marshmallows. Very, very simple! A perfect Valentine’s treat! And if I may make a suggestion, these would taste mighty delicious dipped in some chocolate fondue (now THERE’s a perfect Valentine’s treat!!)!
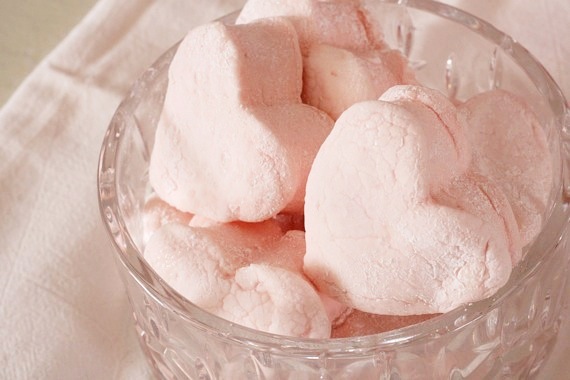
Pink Raspberry Marshmallows
About 1 cup potato starch or cornstarch
2 tablespoons light corn syrup
2 1/4-ounce packets unflavored gelatin
3 large egg whites, at room temperature
3/4 cup cold water
1/2 tablespoon pure vanilla extract
1/2 tablespoon raspberry liqueur
1 1/4 cups plus 1 tablespoon sugar
pink food coloring
Line a 9×9 pan with parchment paper and dust the paper generously with potato starch or cornstarch. Have a candy thermometer at hand.
Put 1/3 cup of the water, 1 1/4 cups of the sugar and the corn syrup in a medium saucepan over medium heat. Bring the mixture to a boil, stirring until the sugar dissolves. Once the sugar is dissolved, continue to cook the syrup — without stirring — until it reaches 265 degrees F on the candy thermometer, about 10 minutes.
While the syrup is cooking, work on the gelatin and egg whites. In a microwave-safe bowl, sprinkle the gelatin over the remaining cold water (a scant 7 tablespoons) and let it sit for about 3 minutes, until it is spongy, then heat the gelatin in a microwave oven for 20 to 30 seconds to liquefy it. (Alternatively, you can dissolve the gelatin in a saucepan over low heat.)
Working in the clean, dry bowl of a stand mixer fitted with the whisk attachment or in another large bowl with a hand mixer, beat the egg whites on medium-high speed until firm but still glossy — don’t overbeat them and have them go dull.
As soon as the syrup reaches 265 degrees F, remove the pan from the heat and, with the mixer on medium speed, add the syrup, pouring it between the spinning beater(s) and the sides of the bowl. Add the gelatin and continue to beat for another 3 minutes, so that the syrup and the gelatin are fully incorporated. Beat in the vanilla, raspberry liqueur and pink food coloring, if desired.
Using a large rubber spatula, scrape the meringue mixture onto the parchment-lined pan. Then spread it into the corners and continue to spread it out. Lift the excess parchment paper up to meet the edge of the batter, then rest something against the paper so that it stays in place.
Dust the top of the marshmallows with potato starch or cornstarch and let the marshmallows set in a cool, dry place. They’ll need about 3 hours, but they can rest for 12 hours or more.
Once they are cool and set, cut the marshmallows with a pair of scissors, a long thin knife or a cookie cutter. Whatever you use, you’ll have to rinse and dry it frequently (if you use a cookie cutter, be sure to dip it in some cornstarch or powdered sugar between each use). Have a big bowl with the remaining potato starch or cornstarch at hand and cut the marshmallows as you’d like — into squares, rectangles or even strips (as they’re cut in France). As each piece is cut, drop it into the bowl. When you’ve got 4 or 5 marshmallows in the bowl, reach in with your fingers and turn the marshmallows to coat them with starch, then, one by one, toss the marshmallows from one hand to the other to shake off the excess starch; transfer them to a serving bowl. Cut and coat the rest of the batch.
Makes about 1 pound of marshmallows.
Recipe source: Dorie Greenspan, Baking From My Home to Yours
Let me apologize for my strange disappearance these past few days. I’ve been having so much fun spending time off with my hubby that I sort of put blogging on the back burner for a little bit. However, I don’t guess I really have to apologize if I don’t want to…this is MY blog after all, and should I choose to spend all my time cavorting with my man instead of blogging, I suppose that’s quite alright. 😉
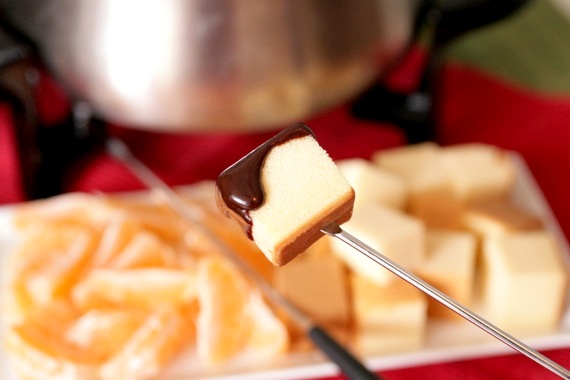
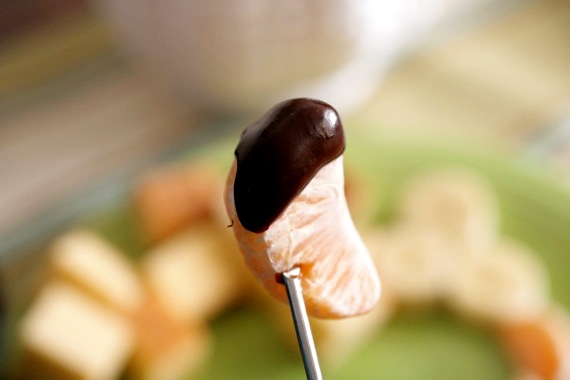
This decadent chocolate fondue is a recipe I’ve been dying to share with you for simply years now. For whatever reason, I never seemed to get a decent picture of it until now, so I’m thrilled to FINALLY share it with you! I make this probably every single Valentine’s Day and sometimes New Year’s Eve or special anniversaries. I just love fondue (especially this recipe because it literally tastes like a liquid version of my Nana’s fudge!). It’s just so much fun to eat and Joel and I always have a great time when I make it. It’s my mom’s recipe (big shocker) and the whole family loves it. And it’s so amazingly quick to make- all you need is about 5 minutes!
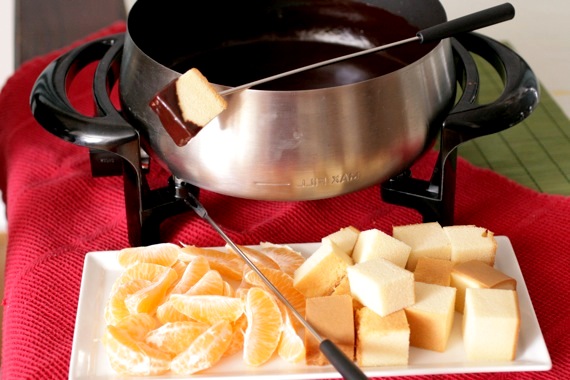
Fudgy Chocolate Fondue
-my mother’s recipe
1/2 cup (1 stick) butter
1/2 cup cocoa powder
3/4 cup sugar
1/2 cup evaporated milk
1 teaspoon vanilla
Melt butter in a small saucepan over medium heat; add cocoa powder, sugar and milk, stirring constantly until the sugar dissolves. Remove from heat and stir in vanilla. Transfer to a fondue pot.
Serve with cubes of pound cake (I personally love it with cheesecake bites!), strawberries, bananas, oranges and anything else you want! Enjoy!
**If you don’t have a fondue pot, I highly recommend an electric non-stick version- it makes it so much easier for clean up, and I like being able to control the temperature.
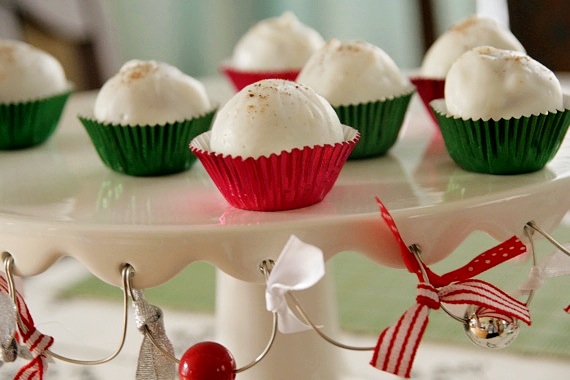
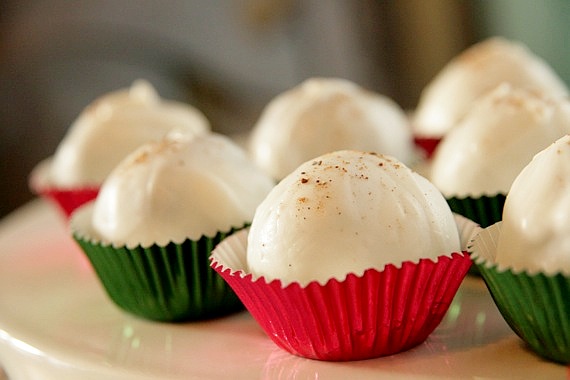
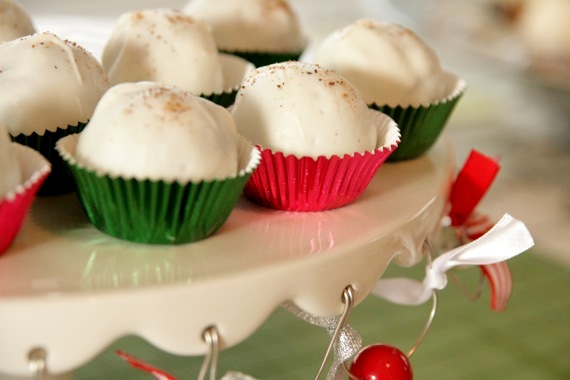
Cake/cookie truffles (or ‘cake balls‘, as they’re more commonly referred to– I’m not a big fan of serving ‘cake balls‘) make some of the best party food. I’m very fond of serving finger foods at parties- it makes mingling so much easier. And goodies like this are always SO popular! I’ve made cake/cookie truffles many times– just using different ingredients, like different flavors of homemade cookies, different cakes, and now spicy gingerbread. This time around, I started with my great-grandmother’s recipe for gingerbread and mixed in some cream cheese- SO good! I always prefer using the almond bark coating (instead of white chocolate), just because it drys so quickly and creates a great crunchy outer shell. A quick sprinkling of nutmeg and you’ve got a beautiful, totally delicious two-bite treat! Perfect for holiday parties!
Gingerbread Truffles
-gingerbread recipe from my great-grandmother
For the Gingerbread:
1/2 cup sugar
1/2 cup butter, softened
1/2 cup molasses
1 egg
1 teaspoon ginger
1 teaspoon cinnamon
1 teaspoon baking soda
1/2 teaspoon salt
1 1/2 cup flour
1/2 cup boiling water
Mix together the butter and sugar, then add the egg and molassess, mixing well. In a separate bowl, combine the flour, spices, soda and salt, then add to wet mixture. Stir to combine, then add the boiling water and mix. Pour batter into a greased 9×13 pan and bake at 350 degrees for 25-35 minutes or until springy. Let cool completely.
You will also need:
1 package almond bark or white candy coating
1 8-oz. block cream cheese, at room temperature
nutmeg, for garnish
When cake is completely cooled, crumble into the bowl of a stand mixer (you could also use a hand mixer for this; even your hands!) and add in the cream cheese. Mix until the cake and cream cheese is totally combined. Roll out into walnut-sized balls and place on a sheet pan lined with wax paper. Chill for 1 hour.
Melt the almond bark in the microwave in 1 minute increments, stirring in between, until it is completely smooth. Dip the balls in one at a time (I use a toothpick for this) and coat with the almond bark. Set on a sheet of wax paper and sprinkle with nutmeg. Allow to harden completely. At this point you can serve immediately or freeze for later use.
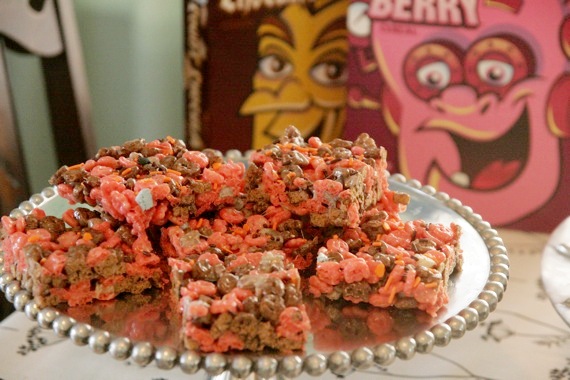
There are certain things that just seem make the Halloween season a little happier for me. Like Halloween Oreos, candy corn (even though I don’t eat it- it just looks nice in my candy dish), the cute little Pillsbury cookies with the jack-o-lantern and ghost designs, and last but not least, Count Chocula, Franken Berry and Boo Berry cereals. Around here, you can only get them around Halloween (which is unfortunate, because I’d certainly like to enjoy them year round!). I was lucky enough to find a couple of boxes of Count Chocula and Franken Berry at Target the other day and I was so excited I decided to use them for something extra special- Halloween krispie treats!
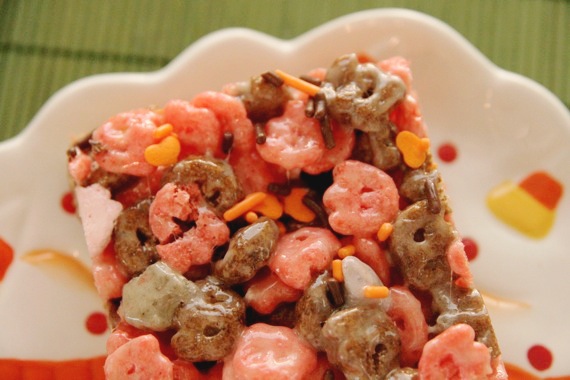
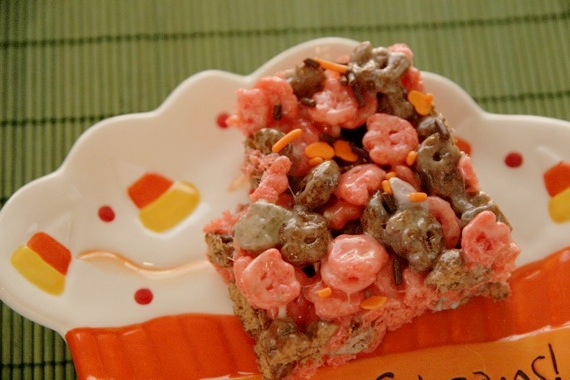
These were so chewy-gooey-yummy and a cinch to make- all you need is marshmallows, butter and cereal (exactly the same as Rice Krispie Treats, but better!), and maybe some cute Halloweeny sprinkles, for good measure. These would be a perfect treat to make with the kiddos and they’re a delicious, simple dessert for a last minute get-together or Halloween party!
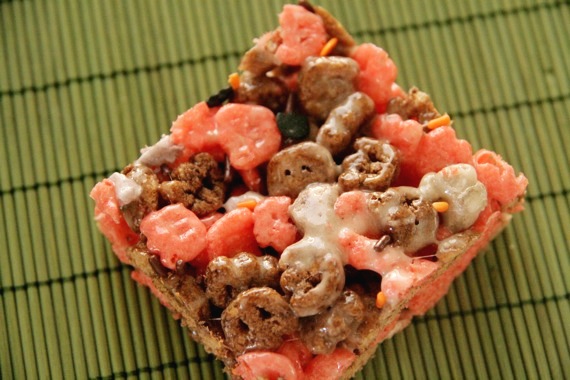
Halloween Krispie Treats
-recipe adapted from www.ricekrispies.com
3 tablespoons butter
4 cups miniature marshmallows
6 cups Count Chocula and Franken Berry cereal
In large saucepan melt butter over low heat. Add marshmallows and stir until completely melted. Remove from heat.
Add cereal. Stir until well coated.
Using buttered spatula or wax paper evenly press mixture into 13 x 9 x 2-inch pan coated with cooking spray. Cool. Cut into 2-inch squares. Best if served the same day.
Here I am again (and honestly, I just can’t believe it!), thanking you all for your continued support through Project Food Blog. I’m just blown away by your unfailing sweet, generous comments, encouragement and your votes. You are all truly wonderful readers…I am SO lucky to have you!! THANK YOU!!!
Ok, so here’s the challenge for Round 4: Sure, you can take a pretty picture. But your task here is to go above and beyond and use photography to create a step-by-step, instructional photo tutorial. It could be anything from how to bone a chicken to how to make your favorite recipe, but your photos need to guide the reader through the steps.
Honestly, at first, I thought this challenge would be a cinch. “Eh, what’s a few extra pictures?” However, it didn’t take long (about 12 seconds) for me to discover one very simple factor: step-by-step photos are HARD. For an A.D.D girl, something as simple as taking a few extra photos of the cooking process can be DAUNTING. I found myself running all over the kitchen, dining room and living room trying to get lists together, compiling my ingredients, writing down every single step of each recipe and trying to get my camera settings figured out (it takes awhile to do step-by-step photos, and your lighting is changing constantly- if you don’t change your camera settings accordingly, your pictures will absolutely start to suck). So needless to say, this has been the hardest challenge for me BY FAR. But, I barreled through and got it done- and came out with two totally awesome and delicious recipes to share with you! Yay me!!
For this challenge, I decided to do the kind of food that makes me happy (and my hubby!)- nachos. It was a very BIG game day in Texas today- the Aggies were playing a big game (who am I kidding, every game is a big game at our house!), then the Rangers with a playoff game after that. Needless to say, we needed game day food and we needed it bad. Just one kind of nacho wouldn’t be enough. I decided on two different kinds: Tequila Lime Chicken Nachos and Bananas Foster Nachos (yes, bananas foster- and let me just say….I’ve come up with a doozy.) So let’s open with recipe #1! This is how my family makes nachos- just layer on your favorite flavors. It’s great with seasoned ground beef, shredded chicken, or even meatless! I decided shredded chicken with a little tequila and lime juice would be perfect (and it was!)! Let’s get started!
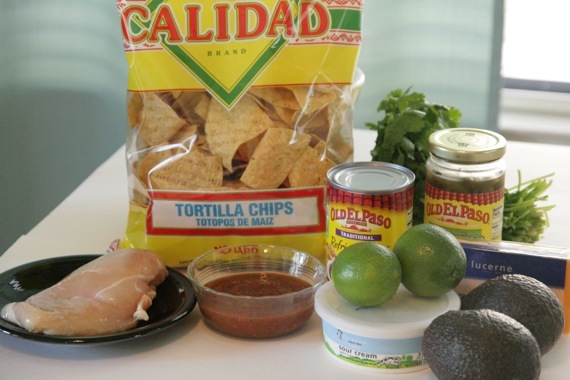
You’ll need: 1 chicken breast, tortilla chips, a can of refried beans, shredded cheddar cheese, cilantro, jalapeno peppers, limes, sour cream, guacamole and salsa, salt and pepper and tequila (not pictured…oops).
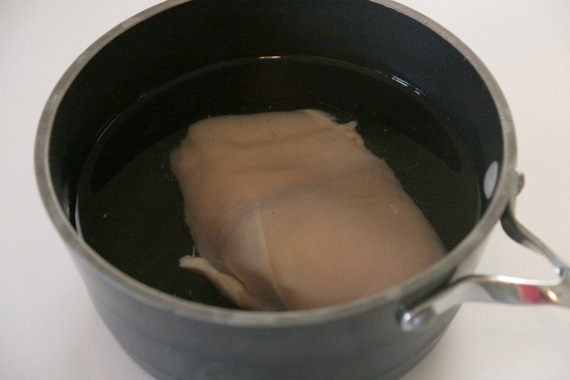
Put the chicken in a small pot, cover with water and bring to a boil. Cook for about 10-15 minutes, until the chicken is cooked through.
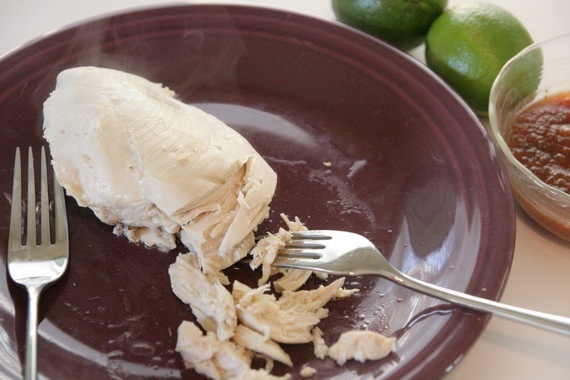
Remove from water and shred with two forks. Toss with 1 tablespoon tequila, the juice of one lime and salt and pepper to taste. Set aside.
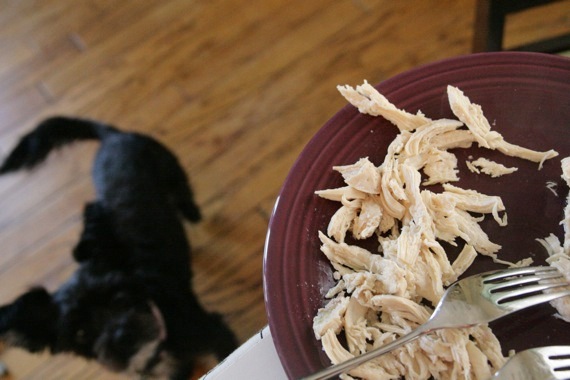
But before you season your chicken, be sure to give your sweet doggy a little tidbit. 😉
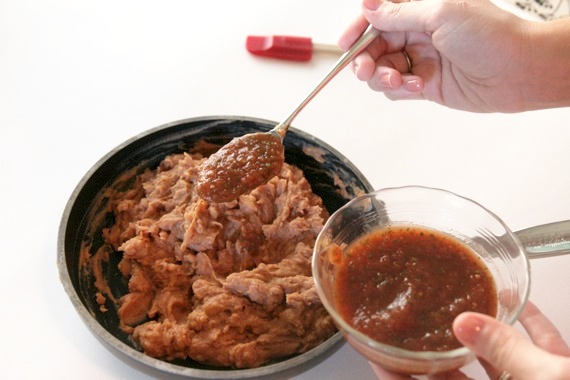
Put your refried beans in a small skillet, stir in 1 (rounded) teaspoon of salsa and a splash of the juice from your jarred jalapenos (trust me, it’s good! Plus, it helps thin it out a little bit so it’s easier to spread). Cook the beans over medium-low heat, until heated through. Set aside.
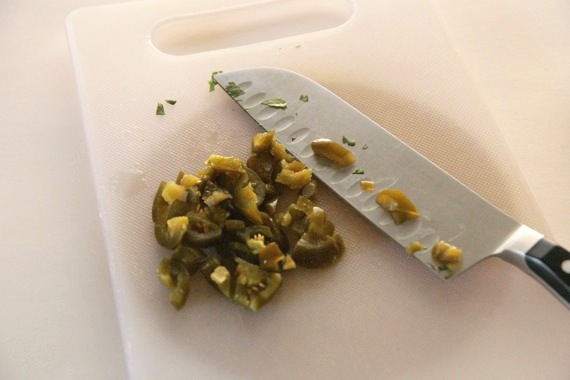
Chop 8-10 slices of the jalapenos.
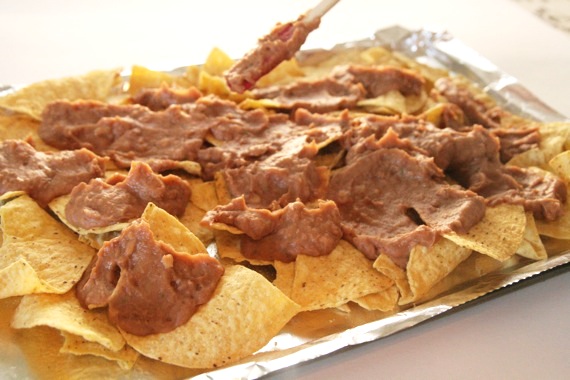
Spread out some tortilla chips on a baking sheet lined with foil and top with the beans. Just spoon some on, then gently spread it out with a small spatula.
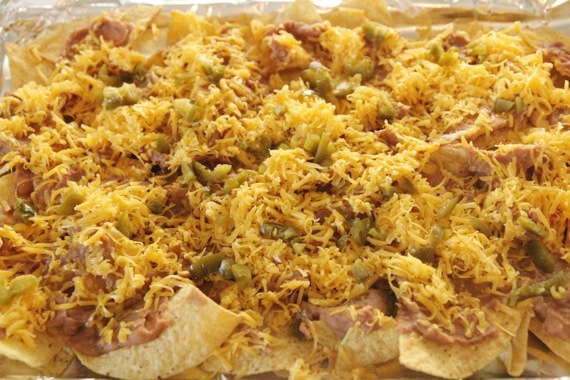
Top with the shredded cheese and the chopped jalapenos.
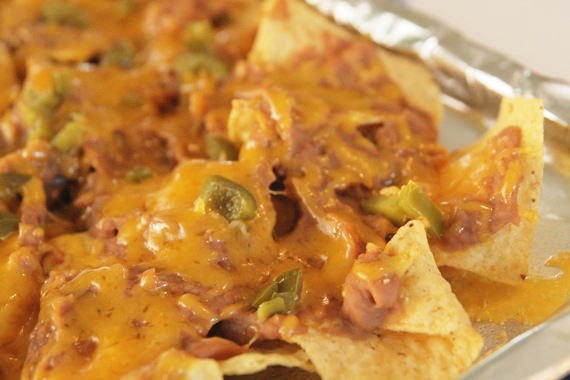
Bake it in a preheated 350 degree oven for about 5 minutes, until it looks all gooey and delicious, like this.
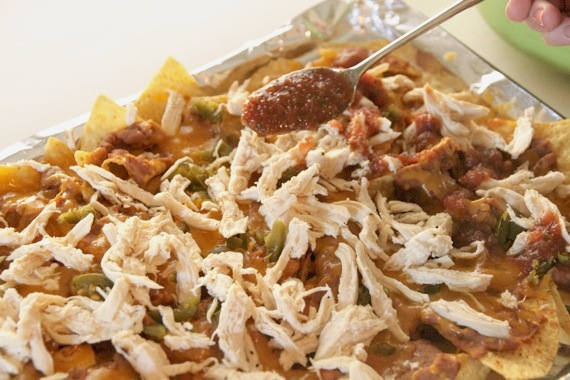
Top with the chicken then spoon on some of your salsa.
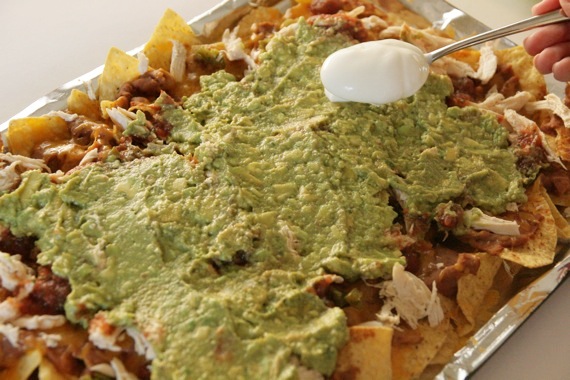
Spread the guacamole over the top, then dollop with sour cream.
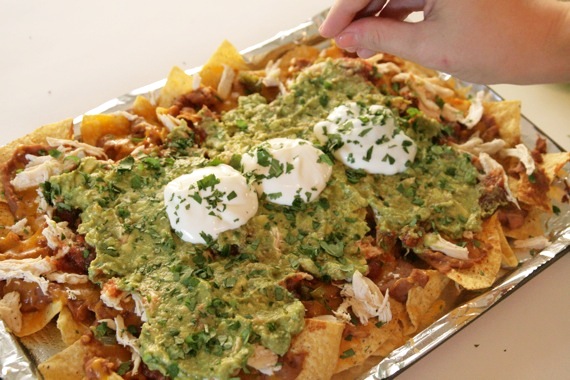
Sprinkle with the chopped cilantro.
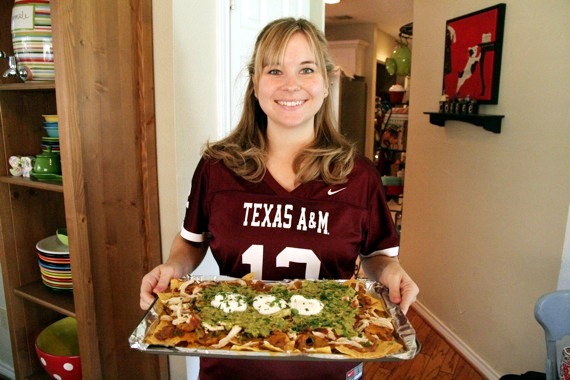
And….ENJOY!!
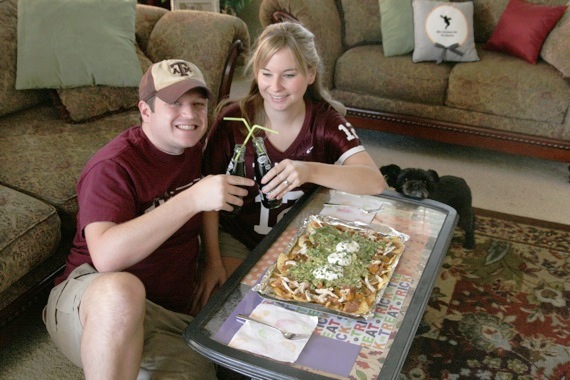
Game Day nachos are best enjoyed with cold Dublin Dr. Pepper…Mexican Coke would be excellent as well. 😉
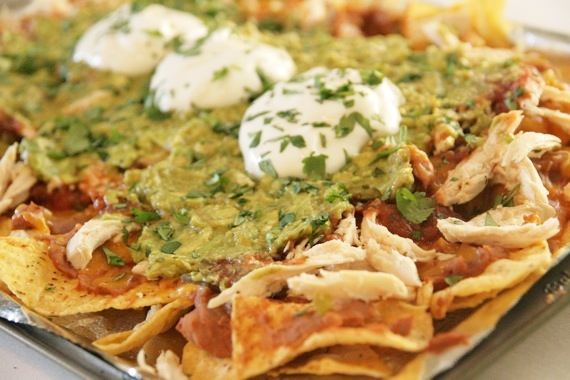
These nachos are seriously GOOD (and they serve a whole boat-load of people!). They’re packed with so many different layers of flavor- the chicken is so moist and the hint of tequila really adds a lot! This is seriously, the perfect game day food! But those aren’t the star of today’s meal….these Bananas Foster Nachos are BY FAR, some of the BEST dessert food I have ever had. Seriously. An explosion of awesome in your mouth. So rich…so gooey…so amazing! I can’t wait to show them to you! Here we go- hold onto your hats…this is gonna be good.
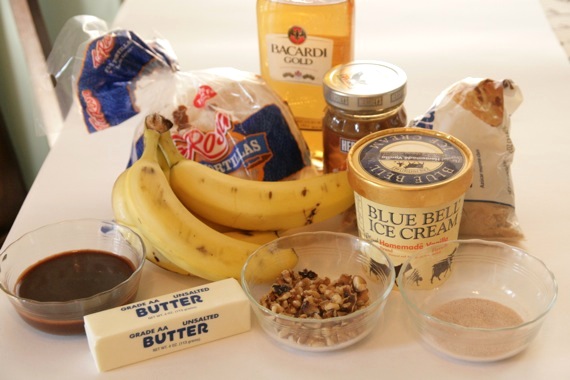
You’ll need: flour tortillas, rum, caramel sauce (by all means, make homemade if you want to- I chose not to today), brown sugar, bananas, vanilla ice cream, chopped toasted walnuts, cinnamon/sugar, butter and hot fudge (I use this recipe).
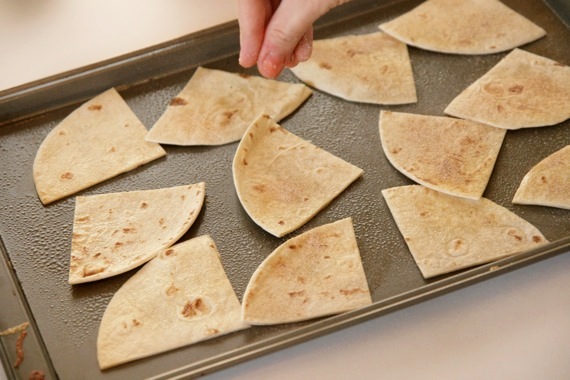
Start by cutting 3 tortillas into quarters. Arrange on a greased baking sheet and spray with butter spray. Sprinkle with cinnamon/sugar. Bake in a 350 degree oven for about 10-12 minutes, until crisp. Set aside.
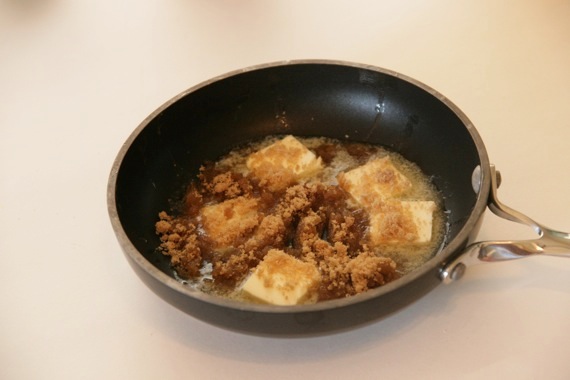
In a small saucepan, melt half a stick (4 tablespoons) butter, 2 tablespoons brown sugar and 1 teaspoon cinnamon.
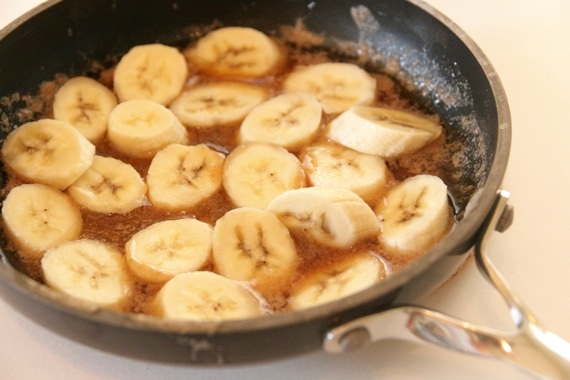
Place three sliced bananas in the pan, gently stir, then add in 2 teaspoons rum. Cook over medium-high heat for about 3 minutes. You still want the bananas to have some texture, so be sure not to overcook them.
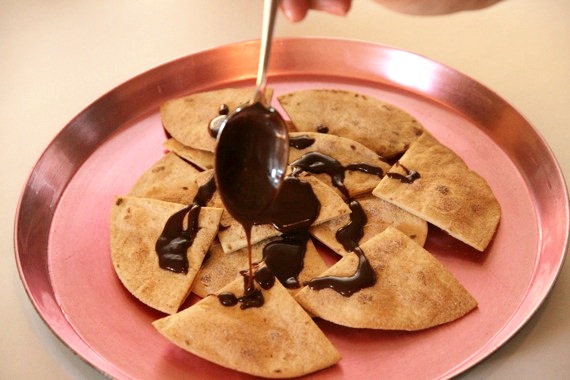
Arrange the tortilla wedges on a platter and drizzle with hot fudge (not too much- this dish can get RICH quick!).
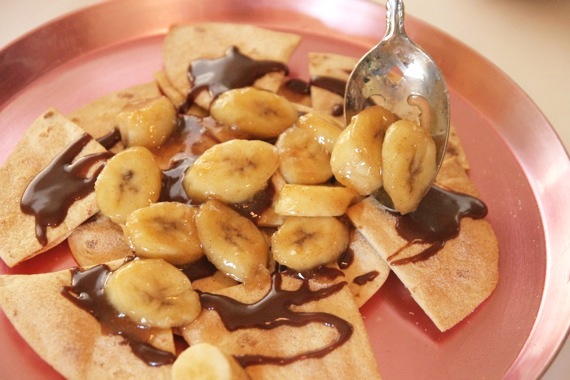
Top with the bananas. Wow. This is looking good already!
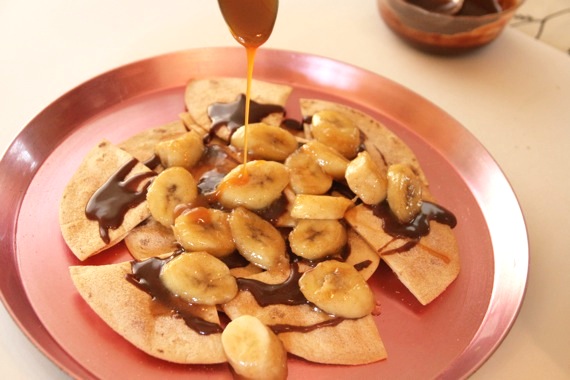
Drizzle with the caramel sauce. Try not to lick the spoon.
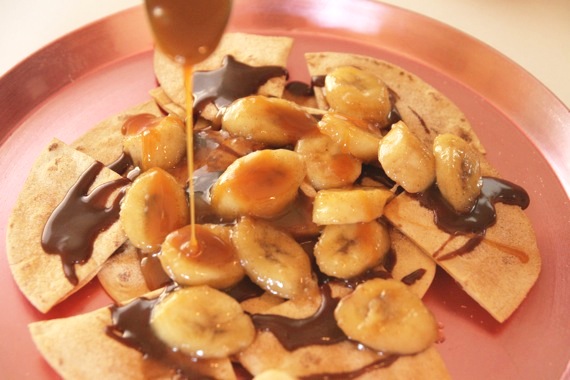
Seriously. Don’t lick that spoon.
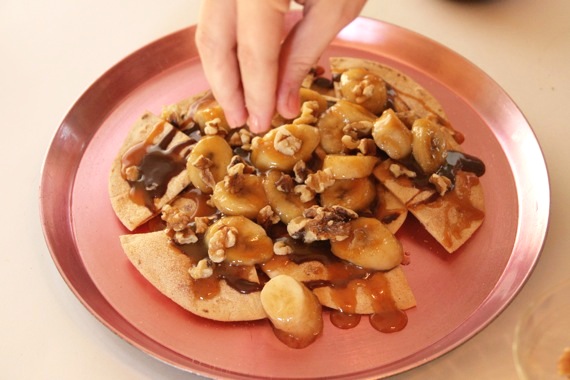
Sprinkle with the toasted walnuts.
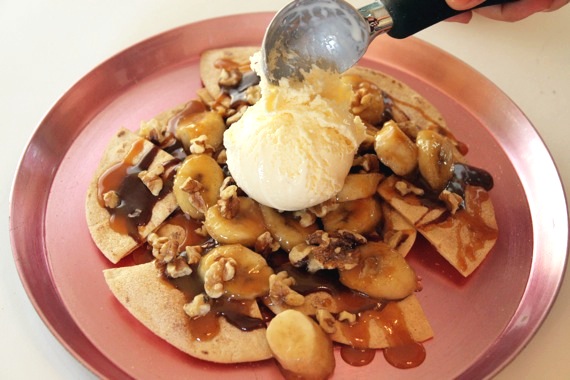
And finally, top with a couple of hearty scoops of vanilla ice cream. Holy cow.
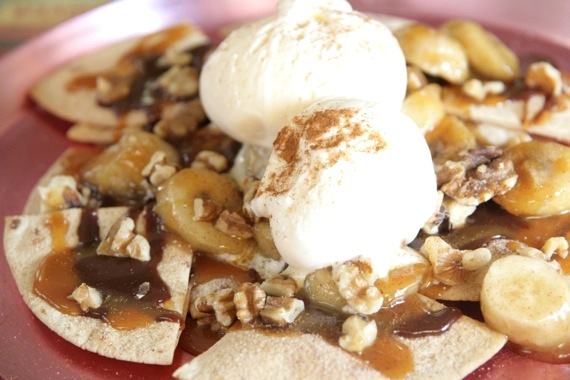
Go ahead and sprinkle with a teensy tiny bit of cinnamon.
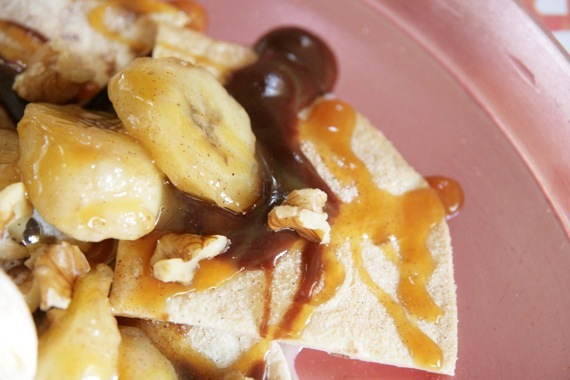
OMIGOSH, OMIGOSH, OMIGOSH….

Take a bite…and find yourself on a short trip to “Delicious-Gooey-Yum-Yum-Land”. A truly magical place….
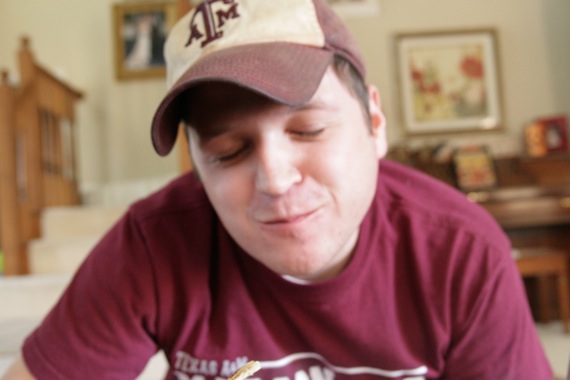
Oh yeah…he’s there too…welcome, honey. Welcome.
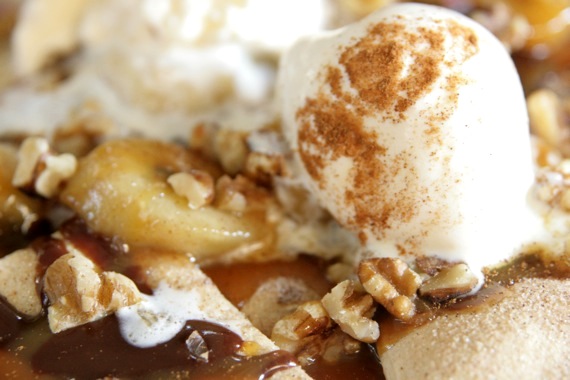
You’re welcome.
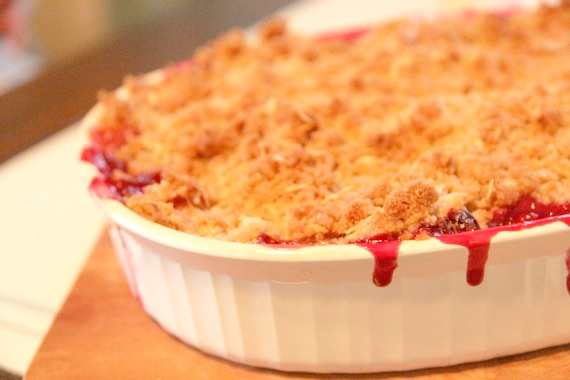
First of all, I know this is a terrible picture, but I just HAD to share this recipe with you!! We had our good friends Sean and Shelby (and their little boy Colin and dog Fancy) over for dinner the other night and I served this for dessert – WOW, was it good! Once again, Ina Garten doesn’t disappoint- this is her recipe and it’s delicious! The top was so crunchy and buttery and the inside was thick and gooey (YUM). I even cut back on the butter and sugar and it was still SO rich and sweet! Served with a scoop of vanilla ice cream, it just doesn’t get much better…..
Plum Crunch
-adapted from Ina Garten
3 pounds black plums, pitted and quartered
1/2 cup sugar
1/4 cup all-purpose flour
juice of half a lemon
For the topping:
1 1/2 cups all-purpose flour
1/2 cup granulated sugar
3/4 cup light brown sugar, lightly packed
1/2 teaspoon kosher salt
1 cup oatmeal
12 tablespoons (1 1/2 sticks) cold unsalted butter, diced
Vanilla ice cream, for serving
Preheat the oven to 375 degrees F.
For the fruit, in a large bowl, combine the plums, sugar, flour, and lemon juice. Pour the mixture into a 12 by 8-inch shallow baking dish.
For the topping, combine the flour, granulated sugar, brown sugar, salt, oatmeal, and butter in the bowl of an electric mixer fitted with the paddle attachment. Mix on low speed until the mixture is crumbly and the butter is the size of peas. Scatter evenly over the plum mixture.
Bake the plum crunch for 40 to 45 minutes, until the plums are bubbling and the top is browned. Serve warm or at room temperature with ice cream.


