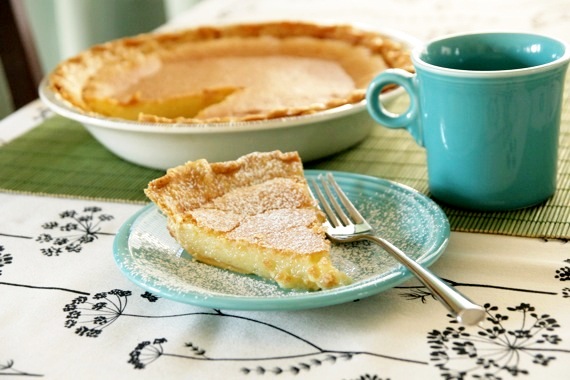
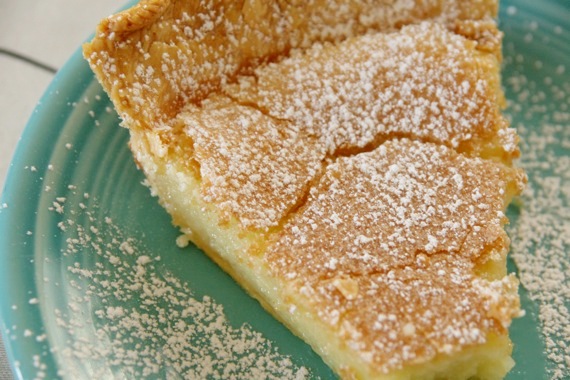
Continuing with my Thanksgiving-inspired week, I’ll post every man’s favorite: buttermilk pie. It really is man pleasin’. Really. Every male that has ever eaten this pie has gone ape for it. I don’t know if it’s the sugary-sweet filling or the creamy, buttery texture, but men seriously adore buttermilk pie. In fact, the primary reason I’m posting this right now is because my friend Michael recently sent me a text saying, “you need to make buttermilk pie!” Done and DONE, Mikey! It’s a holiday staple in our family, too. There has never been a holiday get-together that didn’t include this pie. In fact, every Thanksgiving and Christmas my mom is sure to make extra so that my dad will be able to have plenty of leftovers. This is one of Baba’s most famous and requested recipes and I’m so proud and happy to post it here for you. Make this part of your Thanksgiving dessert table- trust me.
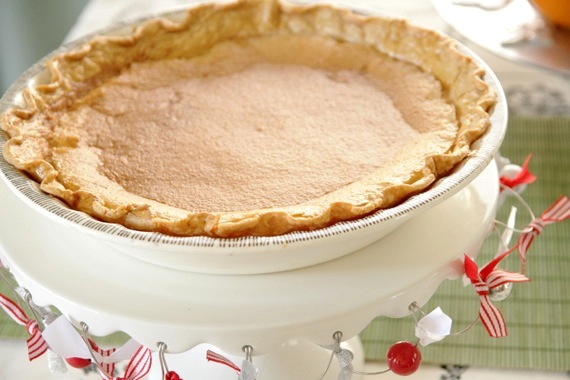
Baba’s Buttermilk Pie
-old family recipe (really, really old!)
*makes 2 9-inch pies
2 9-inch pie crusts, unbaked
3 3/4 cups sugar
1/2 cup flour
1/2 teaspoon salt
1 teaspoon vanilla
6 eggs, beaten
1 cup (2 sticks) butter, melted
1 cup buttermilk
**a little lemon zest and a squeeze of juice is a nice addition, but my dad hates lemon in his buttermilk pies, so we’ve never really done it. I did this time and it really adds a nice, subtle tartness.
Mix sugar, flour and salt. Add eggs, butter, buttermilk and vanilla. Pour into two unbaked pie crusts and bake for 1 hour at 350 degrees (check them at 50 minutes- if they’re too jiggly put them back in for a few more minutes. They shouldn’t jiggle very much at all when they’re done). If the tops are getting too brown, cover loosely with foil for the remainder of baking time. Let cool for at least 1 hour before slicing.
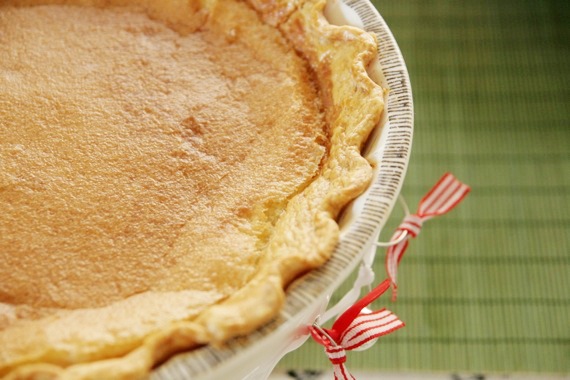
Now, to those of you thinking, “what the heck?! Buttermilk?!” Don’t worry- there isn’t even the slightest hint of buttermilk taste. It’s just sweet, thick, and buttery. A delicious Southern tradition. Man, it’s so great to live in the South. 😉
I hope everyone had a wonderful, happy Christmas! We certainly did – we witnessed our very first White Christmas (in Texas!)!! It was totally wonderful (except the part where we had to drive home on frozen highways…not so much fun…). The weather lately has been totally unbelievable and completely wonderful – I’m sitting here typing this post watching the snow fall outside again! It’s SO cool! And this time I’m very thankful to be watching it snow from the comfort of my home, instead of driving in it.
Anyway, this post is all about a wonderful tradition. Coffee cake. The coffee cake my family has eaten for breakfast every Christmas morning since the 80’s (at least!). It absolutely wouldn’t be Christmas without it. Yuuuuummmm. And yes, I realize Christmas is over, but I wanted to share the recipe because really, there’s nothing “Christmasy” about this cake. It’s just a simple, normal coffee cake that can be enjoyed any day of the year – we just choose to eat it on Christmas. But that doesn’t mean you have to!
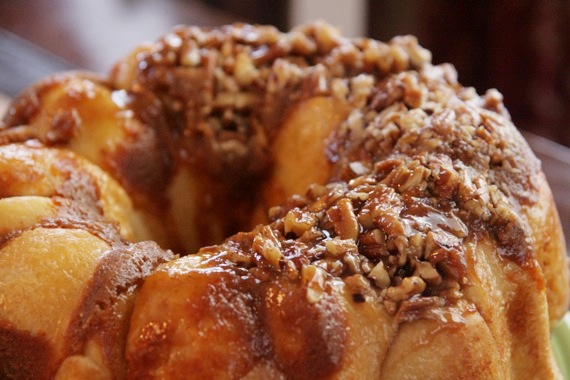
(If you’re wondering why only half of it has pecans, hubby hates nuts, so I made it half and half….silly boy!)
This couldn’t be easier to make – 5 ingredients total. Just assemble the night before, let it sit out overnight and bake it the next morning, and you’ve got delicious, gooey, coffee cake! Too easy! You’ve got to try this one!
Overnight Coffee Cake
1 package frozen white dinner rolls (I use Rhodes brand)
1 package butterscotch pudding (not instant!)
1 cup chopped pecans
1 stick butter, melted
1/2 cup brown sugar
Spray a bundt pan with cooking spray and sprinkle chopped pecans over the bottom of the pan. Arrange the frozen rolls in the pan and sprinkle with the butterscotch pudding mix. Mix the melted butter and brown sugar together in a small bowl and pour over the frozen rolls. Grease a piece of foil and cover the pan; let sit out overnight (do not refrigerate).
The next morning, preheat the oven to 350 degrees. Bake the coffee cake for 30 minutes, covered loosely with foil. Let sit out for 10 minutes before inverting on to a platter and serving.
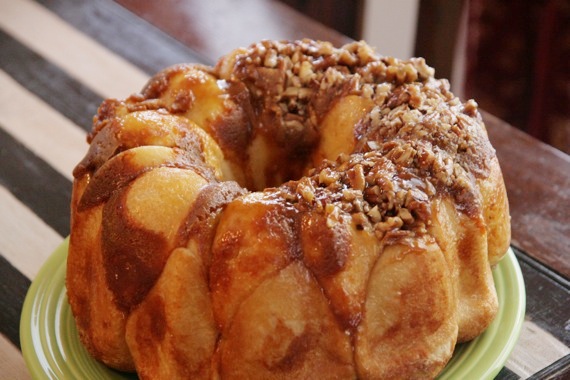
I really don’t recommend omitting the nuts – it just doesn’t turn out the same (as you can see on the left side of the cake…) – they’re really necessary, in my opinion. This is a wonderfully delicious breakfast treat – give it a try this weekend! It would make a great New Year’s Day breakfast!

This weekend, we had a our friends Michael and Andrea over for a little while and Andrea and I decided to get in the kitchen and do some cookie decorating (a first for both of us!). Luckily I had some gingerbread dough already chilled in the fridge, so we set out to decorate gingerbread men – so much fun! I used Katie’s recipe for her Soft and Spicy Gingerbread Cookies – SO good!! I’m only sorry I didn’t double the batch…these were the best tasting gingerbread cookies I’ve ever had! Here’s the recipe:
Soft and Spicy Gingerbread Cookies
-seen on Good Things Catered, adapted from Allrecipes.com
1 c. butter
1 c. sugar
1 c. molasses (I didn’t have enough molasses, so I used half honey)
1 egg
4 c. sifted all-purpose flour
1 tsp salt
1 1/2 tsp baking powder
1/2 tsp baking soda
1 tsp ground cinnamon
2 tsp ground cloves
2 tsp ground ginger
1 tsp ground nutmeg
In the bowl of a stand mixer, cream together the butter and sugar until smooth. Stir in molasses and egg.
Combine the flour, salt, baking powder, baking soda, cinnamon, cloves, ginger, and nutmeg; blend into the molasses mixture until smooth.
Cover, and chill for at least one hour.
Preheat the oven to 350 degrees and line a baking sheet with parchment paper.
On a lightly floured surface, roll the dough out to 1/4 inch thickness. Cut into desired shapes with cookie cutters. Place cookies 2 inches apart on cookie sheets.
Bake for about 10 minutes in the preheated oven, until firm. Let cool for 10 minutes on pan. Remove from cookie sheets to cool on wire racks.
Frost or decorate when cool.

I’m quite proud of my little gingerbread boys!
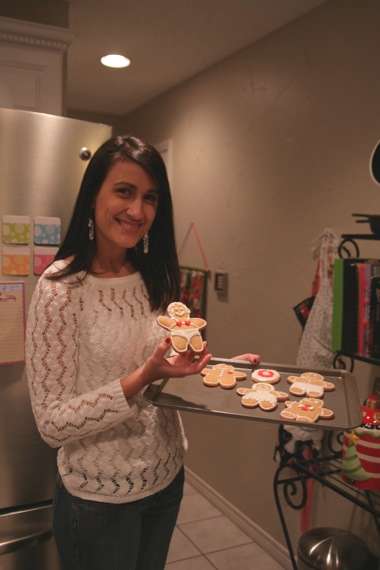
So is Andrea! Hers were super cute – she actually made little outfits for her cookies; including a cute little bikini! I decided to play it safe (and boring) and keep all mine the same (snoooooooooze….).

I do love the pearl buttons, though – we had a ton of fun with those pearl non-pareils! And no, these aren’t the most professional-looking gingerbread men, but I thought it was pretty good for our first try!

All of Andrea’s cute little outfits…
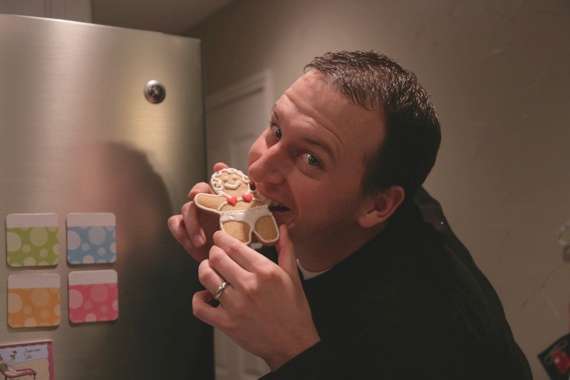
And Michael destroying it….. 😉
We had a really fun time, and I can’t wait to learn more about decorating cookies and hopefully get better one of these days! This will probably be my last post before Christmas, so I want to go ahead and wish everybody a happy and wonderful Christmas! Enjoy your time with your family and friends, and don’t forget the reason we celebrate – the birth of our Lord! Merry Christmas!

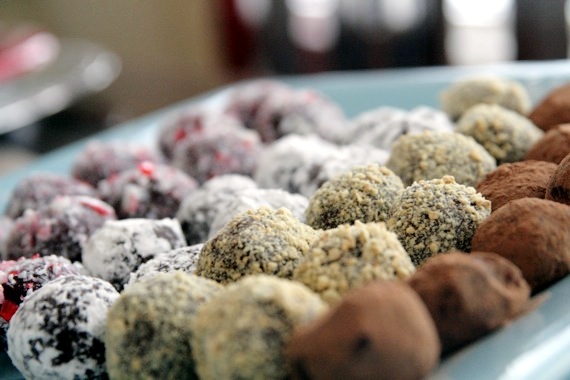
Yes, that’s right – I’ve been truffle-making! Last night I realized I had everything on hand to make 4 kinds of chocolate truffles, and things like that tend to excite me…it almost never happens that I have everything on hand to make anything. So I turned on my Harry Connick, Jr. Christmas music (love me some HCJ..), got busy and came up with 4 very tasty assortments of truffles:
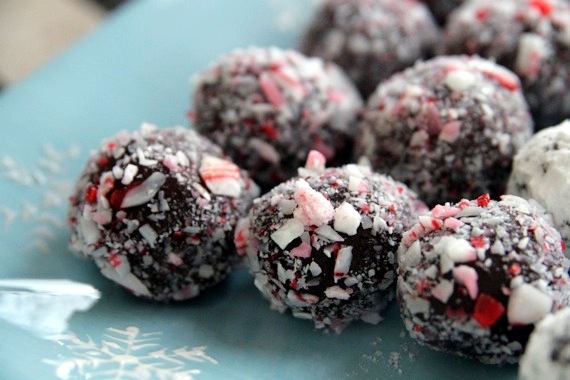
Peppermint Crunch Truffles
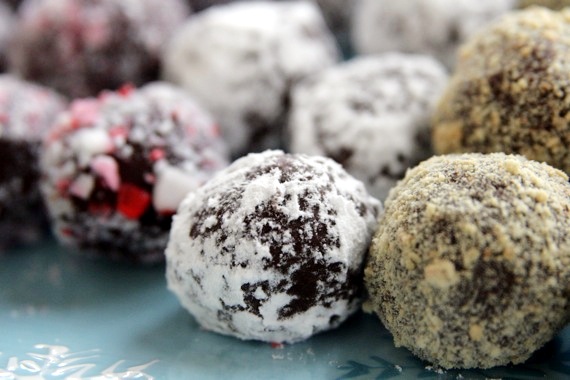
Orange Truffles
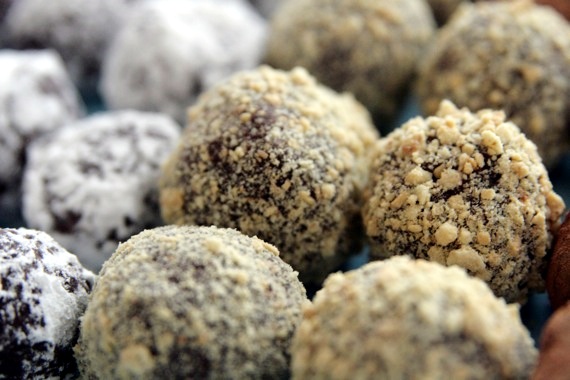
S'Mores Truffles
And lastly…
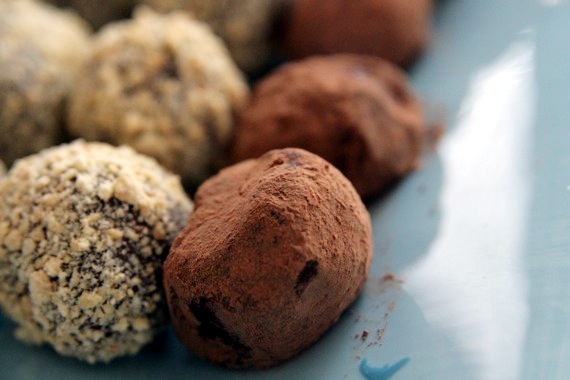
Raspberry Truffles
Truffles are really so simple. Start by making a chocolate ganache (chocolate and cream melted together), let it chill, then roll out little balls and voila! Here’s how I did mine:
Chocolate Truffles
1 cup heavy cream
12 ounces bittersweet chocolate, chopped
1/4 cup sugar (I like mine a little sweeter)
Bring the cream and sugar to a boil over low heat, pour over the chocolate and stir until smooth. (At this point I separated mine into 4 different bowls; one for each flavor.)
For the Peppermint:
Add 1 or 2 drops peppermint extract to the ganache and stir to combine.
For the Orange:
Add a sizable splash of Grand Marnier orange liquer and stir to combine.
For the S’Mores:
Add 1 or 2 drops pure vanilla extract (I used vanilla paste) and stir to combine.
For the Raspberry:
Add a sizable splash of Chambord Raspberry liquer and stir to combine.
Cover and chill the bowls for at least 4 hours or overnight. Roll into walnut size balls, roll in desired topping and chill until ready to serve. As far as toppings, I used crushed up candy canes for the peppermint, powdered sugar for the orange, and cocoa powder for the raspberry. For the S’Mores truffles, I chopped up marshmallows and placed a small piece inside of each truffle, then rolled them in graham cracker crumbs.
So simple! I think I might take these to my hubby’s office for his co-workers this afternoon….I thought it might be a nice surprise for everybody. I hope they go over well!
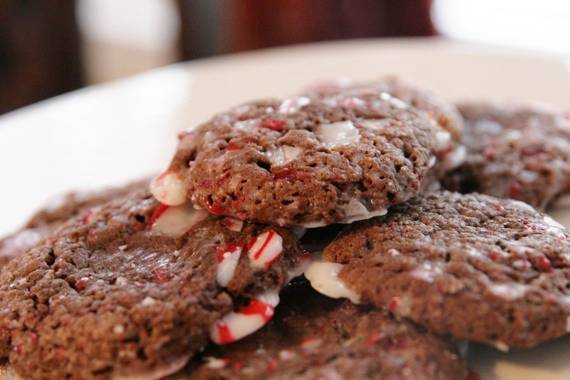
I love chocolate and peppermint together! That’s why I’m willing to try any cookie/brownie/ice cream recipe that calls for chocolate and peppermint – you just can’t go wrong with that combination. And yes, I know I’ve been doing a lot of desserts (mainly cookies) lately, but hey, that’s what I DO at Christmastime…I bake. I bake a lot. Those extra 10 holiday pounds aren’t gonna put themselves on, you know?? And I have my Christmas fat-pants just waiting for me in the closet…so bring on the sugar, butter and flour!
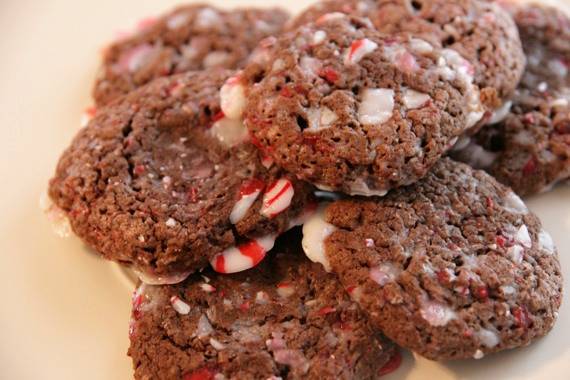
I found these cookies on Two Peas in Their Pod (and I must say, theirs look waaaaay better than mine!) and knew I had to try them. That day. I mean, just listen to that title – Chocolate Peppermint Crunch Cookies….ahhh, beautiful. Doesn’t that sound like heaven? Well, it tastes like it, too – and that’s not just me saying that; I took them to work and all the other voice teachers, choir directors and choir students loved them. Really loved them! For me, it’s the crunchy outsides and the soft, chewy insides, followed by the flavor of deep chocolate and the coolness of the peppermint. A delicious cookie! However, I will say that these are the messiest little buggers I’ve ever worked with. Talk about a sticky dough! But worth it in the end.
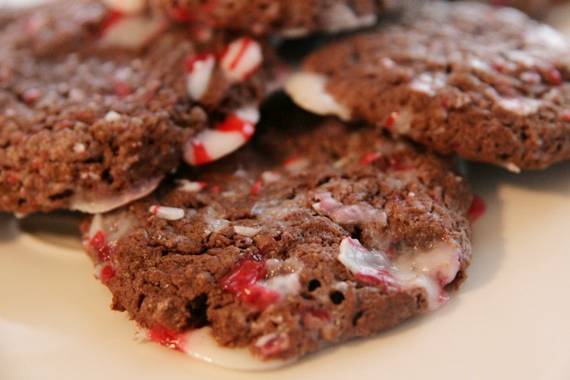
These are absolutely beautiful before baking – lovely little balls covered with chunks of candy cane, but after baking, unfortunately, they lose some of their outer beauty. Mine really spread a lot, which I can’t figure out, because I chilled the dough thoroughly; oh well. They still taste good, though, and that’s all that matters in my book! Happy Baking!!
Chocolate Peppermint Crunch Cookies
-Two Peas in Their Pod
2 cups sifted all-purpose flour
2 teaspoons baking powder
1/2 teaspoon salt
1/4 cup canola oil
4 ounces 99% unsweetened chocolate, melted
2 cups granulated sugar
4 large eggs
2 teaspoons pure vanilla extract
5 candy canes-crushed up
Combine the flour, baking powder and salt. Set aside. In the bowl of a stand mixer fitted with the paddle attachment, combine the oil, chocolate and granulated sugar and blend on medium speed. With the mixer running, add the eggs, one at a time, followed by the vanilla, scraping the sides of the bowl as necessary. There may be some small clumps of sugar in the batter at this point. Add the dry ingredients and mix on low speed, stopping once to scrape down the sides. Mix until just incorporated, 2 to 3 minutes. The dough will be sticky.
Gather the dough into a disk, wrap in plastic wrap and chill for at least 2 hours or overnight.
Position the racks in the lower and upper thirds of the oven and preheat to 350 degrees. Line 2 baking sheets with Silpats or parchment paper.
Pour the crushed candy canes onto a plate or into a shallow bowl. Roll the dough into 1-inch balls and roll each ball into the candy cane pieces, so that all sides are covered. Place 2 inches apart on the prepared sheets.
Bake for 10 minutes for soft, chewy cookies, or 12 minutes for crisp cookies, rotating the pans halfway through baking. The cookies do set up, so if you want them soft, take them out at 10 minutes. Let cool completely on cooling racks. The cookies can be stored in an airtight container for 3 to 4 days.
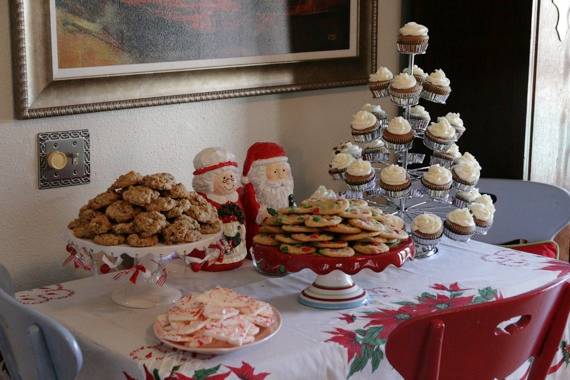
Last night we had the family over for a big Christmas party. I love having people over during the holidays – I get to show off my Christmas decorations, serve my favorite snack foods, and most importantly, have a good time with the people I love. There were 16 people total, so of course there was lots and lots of food! I made 2 big batches of my toasted oatmeal cookies, a batch of M&M cookies, spice cupcakes with cream cheese frosting and peppermint bark (to name a few).
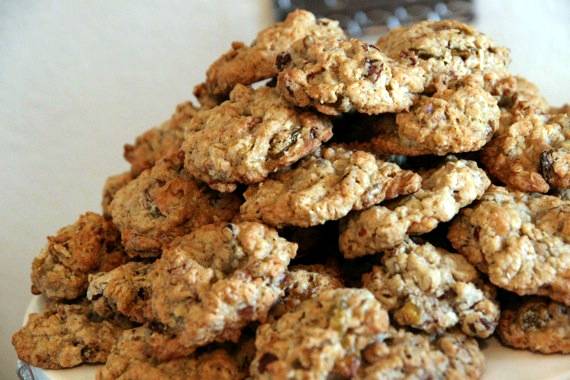
Toasted Oatmeal Cookies
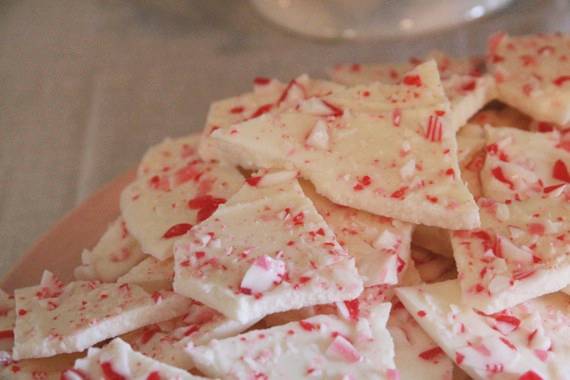
Peppermint Bark
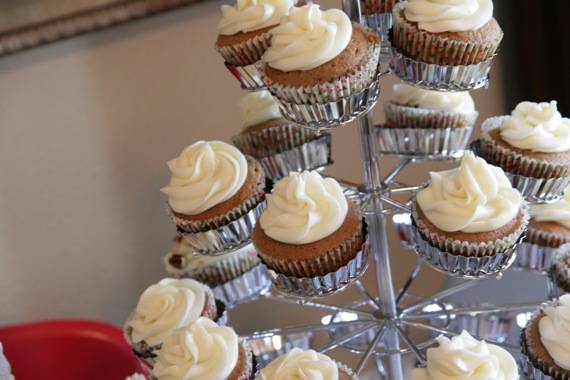
Spice Cupcakes with Cream Cheese Frosting

M&M Cookies
My sister brought her famous “soggy sandwiches” (you assemble a bunch of turkey and cheese sandwiches, put them all in a big jelly roll pan, pour melted butter over the tops, sprinkle with Italian seasoning, and bake for 5 minutes until the cheese melts – sinful!!), my Aunt Josie brought a chocolate roll-up cake, and Nana brought crockpot cocktail weenies. And my sweet Grandaddy brought me a big, beautiful Poinsettia! Some of my favorites from the party include:
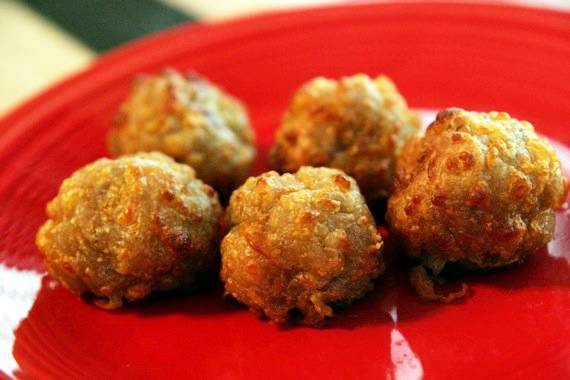
Sausage balls – SO good! It absolutely would not be a party in our family without these babies! Recently, my sister found that adding milk makes them a lot more moist. We love to use maple sausage – it adds such great flavor!
Sausage Balls
3 cups Bisquick baking mix
1 pound maple pork sausage
4 cups shredded cheddar cheese
1/2 cup milk
pinch Cayenne Pepper
Preheat oven to 350 degrees. Mix all ingredients in a large bowl (it’s easiest if you have a Kitchen Aid mixer – use the dough hook), roll into 1 inch balls and bake for 12-15 minutes or until the balls are golden brown. Cool completely.
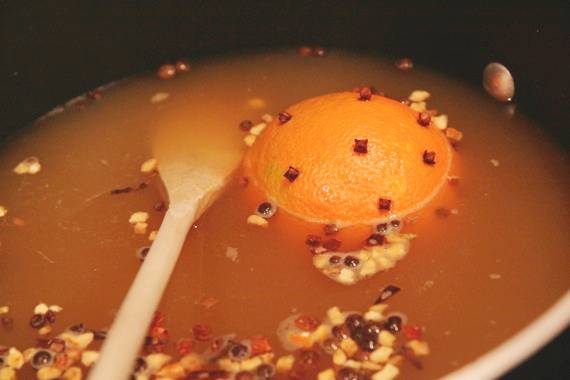
My mom’s Christmas Wassail – just like the sausage balls, it really wouldn’t be Christmas without this wassail. My mom’s been making it every single Christmas since the ’80’s and every year we look forward to it! It simmers for 2 hours, so the entire house smells heavenly! Keep the container that your apple cider came in to store any leftover wassail; then just pour yourself individual cups and microwave anytime you want hot wassail!
Christmas Wassail
2 quarts apple cider
1 46-oz. can pineapple juice
1/4 cup lemon juice
1 teaspoon allspice
15-20 cloves, stuck into an orange or apple
3-5 cinnamon sticks
Combine all ingredients in a large pot or crockpot on high heat. Bring to a boil, then reduce heat to low and simmer for 2 hours.
*You’ll notice all kinds of stuff floating around in my picture – I added some Williams Sonoma mulling spices that I had on hand; it’s not needed, though.
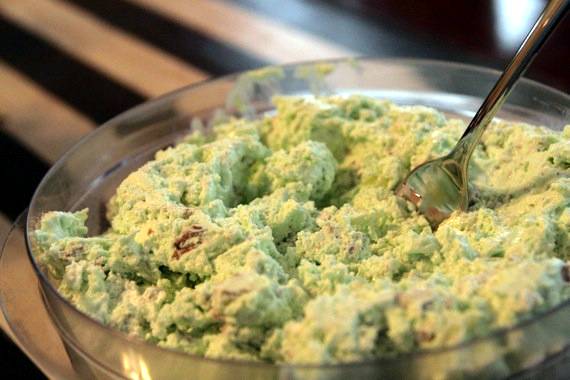
And finally, my favorite – Granna’s Green Stuff. This is seriously the best stuff ever – fluffy…creamy…….green. Originally, my great-grandmother would always make this every Christmas, now her daughter-in-law, my grandmother (Granna), makes it a lot, as we request it a LOT! It’s GOOD!! This recipe is as close as I can get to my great-grandmother’s recipe – she never would tell anyone what was in it! I’m pretty sure this is it, though…
“Green Stuff” (It’s really called Lime Jello Salad, but we’ve always known it as green stuff)
1 (3 oz.) pkg. lime Jello
1 c. hot water
(Heat up drained pineapple juice for part of liquid.)
Mix. Stir until well dissolved. Set until jelly-like consistency then carefully whip with electric mixer.
1/2 pkg. (4 oz.) cream cheese
1 can (15 oz.) crushed pineapple, drained
1/2 c. chopped pecans
1 c. whipping cream
Whip cream until stiff. Add cream cheese. Mix in Jello and blend thoroughly. Fold in pineapple and nuts. Put into a serving bowl and chill for at least 4 hours.
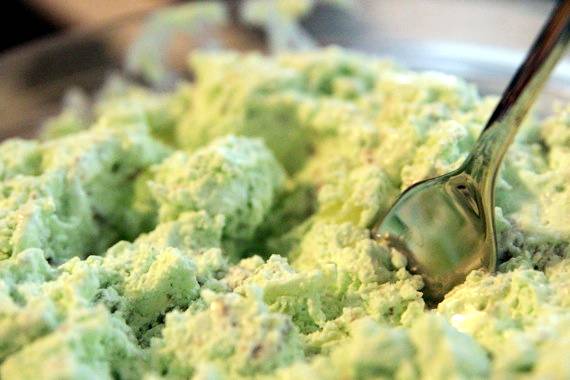
Just look at that fluffy green goodness!! Anyway, we had an absolutely delightful party last night – thanks to everyone who came and brought delicious food and great company!
I’ve been holding onto a little piece of news for a couple of weeks now – about a month ago, I entered a cookie contest for a newspaper in the DFW area. A week went by and I got an email saying my cookies (Toasted Oatmeal with Golden Raisins, Pecans and Coconut) made it onto the Semi-Finals! Woo-Hoo! Honestly, I never expected them to even get that far. The next step was for me to take a plate of my cookies to the newspaper office for more judging. Shortly thereafter, I got another email – onto the Final round! Oh YEAH! This time, professional pastry chefs and bakery owners would make my cookies following the recipe I provided (um, talk about nerve-wracking!). Then, I got a call from super-sweet Stephanie saying I WON! Holy cow, this was a total and utter shock! What an awesome surprise…my humble little oatmeal cookie won a contest; now that will brighten anyone’s day!
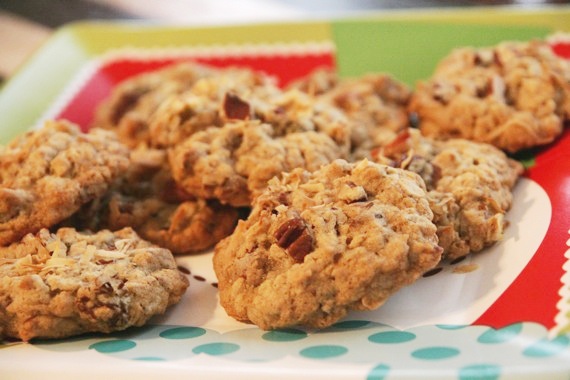
This is an awesome opportunity because my cookies are going to be sold at a bakery in Fort Worth for 2 weeks this month! How cool is that?! They can even be shipped nation-wide; and all the proceeds go to charity – really cool! I got to have my picture in the paper and everything (that’s a big deal for ‘lil ‘ol me!) – the photo shoot was so much fun…the photographer had me make all kinds of fun poses/faces! I’m just glad they chose a semi-normal looking picture for the article!
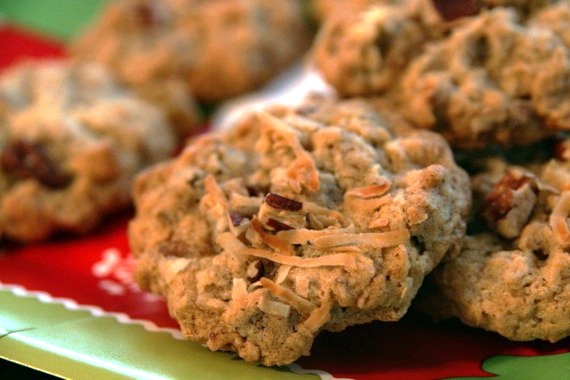
Just for fun, here is the article, which includes the recipe (sorry, it’s no longer online!). Thanks again, Stephanie, all the other Fort Worth Star Telegram employees and pastry chefs who chose my cookie and gave me a really fun treat this holiday season!!
Toasted Oatmeal Cookies with Golden Raisins, Coconut and Pecans
1 1/2 cups old-fashioned oats
1 cup all-purpose flour
1/2 teaspoon baking soda
1/2 teaspoon baking powder
1/2 teaspoon salt
1/2 cup (one stick) plus 3 tablespoons unsalted butter, at room temp.
1/2 cup packed brown sugar
1/2 cup granulated sugar
1 large egg
1 tablespoon half and half
1 teaspoon vanilla extract
1 teaspoon pumpkin pie spice
1 cup coarsely chopped pecans
1/2 – 1 cup (however much you want, really) shredded sweetened coconut
1 cup golden raisins
Preheat oven to 350 degrees. Combine oats, coconut and pecans and spread on a baking sheet. Toast in the oven for 5-7 minutes, or until the coconut becomes fragrant, stirring frequently. Let cool. Combine flour, baking soda, baking powder, salt and pumpkin pie spice in a bowl. Set aside. In a separate bowl, cream both sugars and butter until light, fluffy and smooth. Add egg, half and half and vanilla and blend until smooth. Stir in the flour mixture, the toasted oat mixture, then the raisins. Drop dough onto a cookie sheet lined with parchment paper in rounded spoonfuls (or you can use a cookie scoop) about 2 inches apart. Bake for about 12 -15 minutes or until edges of cookies are golden brown. Transfer to a wire rack for cooling.
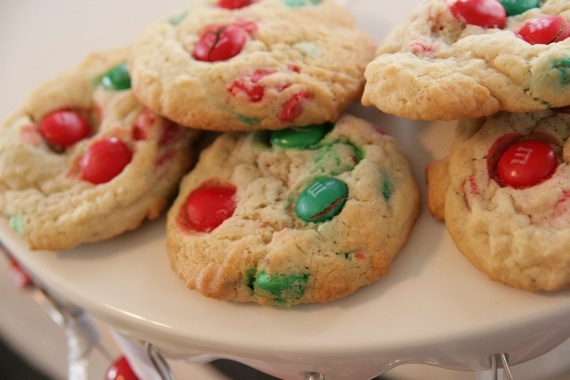
Here’s something sort of weird about me (one of many): I love M&M’s in my Christmas cookies, but I’m not a big fan of them by themselves. It always kind of baffles me when people say their favorite candy is M&M’s. I mean, there are so many varieties of candies out there…why M&M’s?? To each his own, I guess. Now, when it comes to cookies, however, I love to bake with M&M’s (but only if they’re red and green, of course!). Whether it’s my Monster Cookies, chocolate chip cookies with M&M’s, or these yummy, simple drop cookies, they’re always delicious and they always make me feel a little “jollier” around Christmastime (it’s very important to feel jolly at Christmas! :-)). When my sister and I were little, we always left Santa M&M cookies on Christmas Eve, so naturally, this kind of cookie just screams Christmas for me.
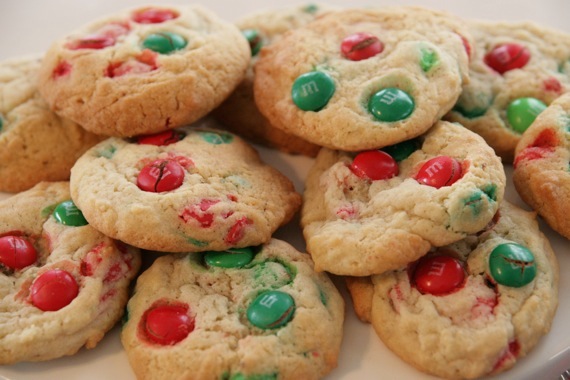
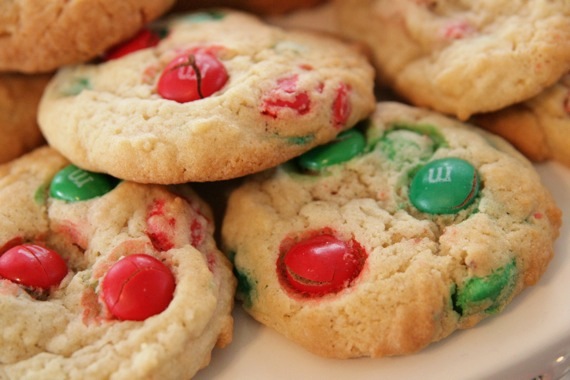
Speaking of Christmas-y things, what color lights do you prefer on your Christmas tree?? Me, I love the colored lights – they’re much happier and cheery looking. Oddly enough, this year we have a white-lighted tree….just not the same… Anyway, back to business. I went searching for a good ‘ol drop cookie recipe and decided to check the King Arthur Flour site, which is quickly becoming my favorite online resource for baking recipes, and found this recipe. It’s totally simple, straight-forward and really, really tasty. The thing I loved most was that the cookie part wasn’t too buttery and sweet; it was nicely balanced and let the M&M’s be the star. These are just plain ‘ol, simple M&M cookies, but just seeing a plate full of them makes you feel warm and fuzzy…and of course, jolly! If you have kids, these are perfect cookies to make for Santa – they’re easy enough that the kids can help, and they end up looking very Christmas-y and fun! Enjoy!
M&M Christmas Cookies
–King Arthur Flour
1/2 cup butter
1/3 cup + 1 tablespoon granulated sugar
1/3 cup brown sugar, light or dark, packed
1/2 teaspoon salt
1 teaspoon vanilla
1/4 teaspoon baking soda
1/2 teaspoon baking powder
1 large egg
1 1/2 cups All-Purpose Flour
2 tablespoons milk, optional
2 cups Holiday M&M’s
Preheat the oven to 375°F. Lightly grease two baking sheets, or line with parchment. Beat together the butter, sugars, salt, vanilla, baking soda, and baking powder until well combined. Add the egg, beating until smooth. Scrape the sides of the bowl, and beat again until smooth.
Add the flour, mixing it in completely. Stir in the milk, then carefully stir in the M&M’s.
Drop the cookies by rounded spoonfuls onto the prepared baking sheets, spacing them about 2″ apart. A cookie scoop works well here.
Bake the cookies for 14 to 16 minutes, until they’re a light golden brown, and a bit darker around the edges.
Remove them from the oven, and cool right on the baking sheets.
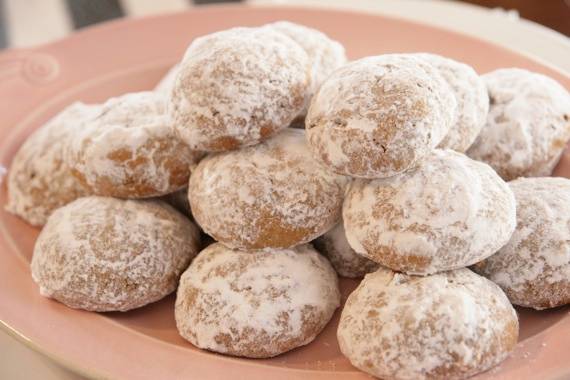
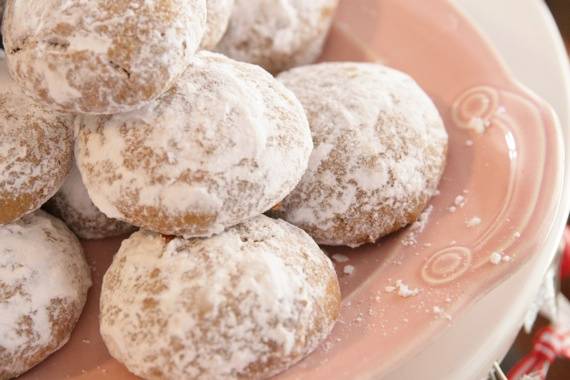
You don’t know how long I’ve been waiting for this time of year to get here! I absolutely love the Holiday season….and more importantly, the baking adventures it brings. I’ve already been baking all kinds of cookies and having tons of fun trying new recipes. Like these Pfeffernüsse – German spice cookies, traditionally made at Christmas.
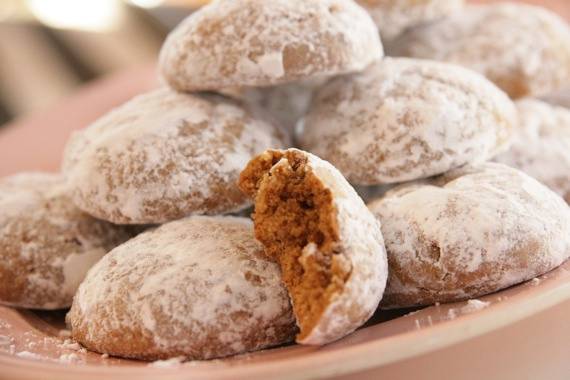
I first fell in love with these in college while taking a German course. My professor had just gotten back from Germany and brought us a whole array of German Christmas cookies to try. These were among them, and ooooh boy, were they good! Since then, I’ve been searching for the perfect recipe for Pfeffernüsse, so I can make them at home. This recipe is a Martha Stewart, and while it’s close….it’s not exactly what I’m looking for. However, the cookies were delicious (sort of like a molasses cookie) and my co-workers seemed to really enjoy them.
Pfeffernüsse
-Martha Stewart
1 1/4 cups confectioners’ sugar
2 1/4 cups all-purpose flour
1/4 teaspoon freshly ground pepper
3/4 teaspoon ground cinnamon
1/2 teaspoon ground allspice
1/4 teaspoon freshly ground nutmeg
1/4 teaspoon ground cloves
1/4 teaspoon baking soda
1/2 cup (1 stick) unsalted butter, room temperature
3/4 cup firmly packed light-brown sugar
1/4 cup unsulfured molasses
1 large egg
1/2 teaspoon pure vanilla extract
Preheat oven to 350º. Line two baking sheets with parchment paper. Place confectioners’ sugar in a brown paper bag (I used a bowl).
In a medium bowl, combine flour, pepper, cinnamon, allspice, nutmeg, cloves, and baking soda. Set aside.
Place butter, brown sugar, and molasses in a bowl of an electric mixer fitted with paddle attachment. Beat on medium speed until fluffy, about 3 minutes. Beat in egg and vanilla. With mixer on low speed, add flour mixture; beat until just combined. Pinch off dough in tablespoon amounts; roll into 1 1/4-inch balls. Arrange balls 1 1/2 inches apart on prepared baking sheets. (Dough can be frozen at this point, covered tightly with plastic wrap, up to 1 month).
Bake until cookies are golden and firm to the touch with slight cracking, about 15 minutes. Transfer sheets to a wire rack to cool slightly, about 10 minutes. Working in batches, place cookies in paper bag; shake until well coated. Let cool completely on wire rack. Store in airtight container.
And now here’s the part that I’m most excited about: my first giveaway!!! It being cookie season and all (and because they started playing Christmas music on XM radio!), I thought it only fitting to give you a little something to get you started.
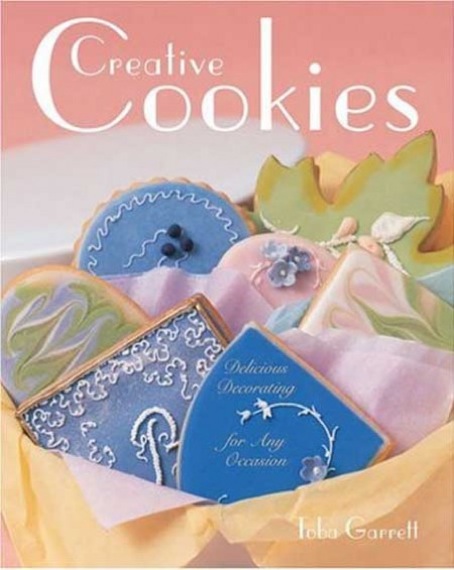
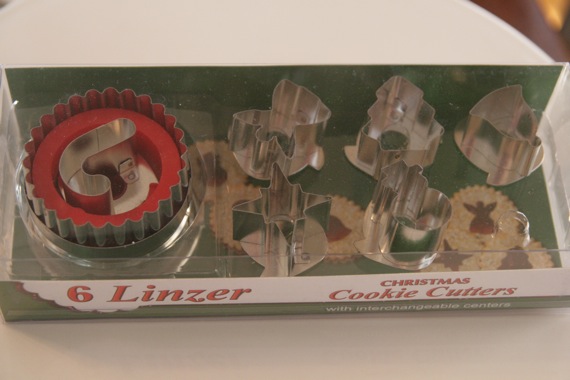
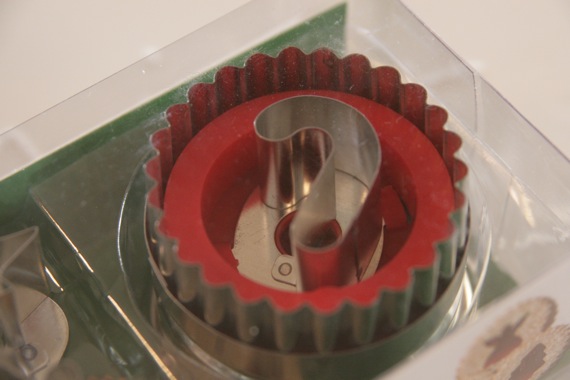
I recently saw this book reviewed on The National Cookie Network blog and immediately bought one. Great tips and pictures showing you how to perfectly decorate cookies for any occasion (with an entire section dedicated to Christmas cookies!). Perfect for a cookie decorating idiot like myself. And since it’s so fantastic, I decided to get an extra copy for you!! AND since you can’t make great holiday cookies without some fabulous cookie cutters: this Holiday Linzer Cookie Cut-Out set is yours as well. Woo Hoo!!
All you have to do to enter is leave me a comment on this post answering this little question:
What Holiday cookie are you dying to try this year?
RULES:
1.) Only one entry per person, please
2.) You have until midnight Friday, Nov. 20. I’ll post the winner on Monday.
Good luck!!
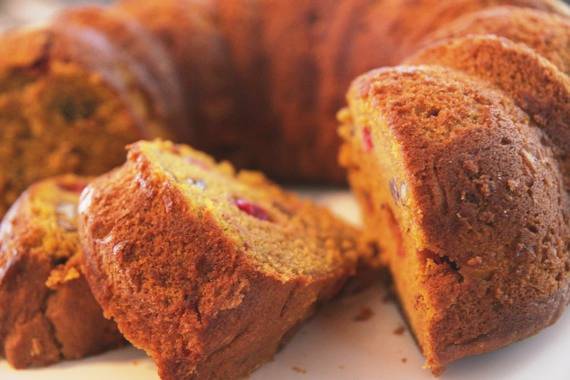
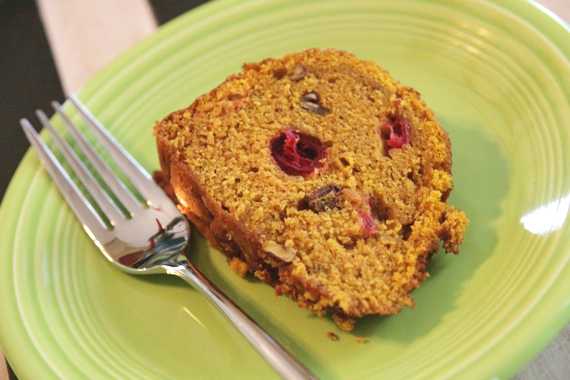
This is such a great cake – there’s pumpkin, pecans, fresh cranberries, and lots of spice. SO full of yummy holiday flavors! Dorie’s All In One Holiday Bundt Cake was chosen by Britin of The Nitty Britty. I absolutely loved it – this reminds me a lot of the Cranberry Orange Bread I make every year at Thanksgiving…in fact, now that I think of it, this cake would be delicious with a bit of orange zest/juice! Next time, definitely!
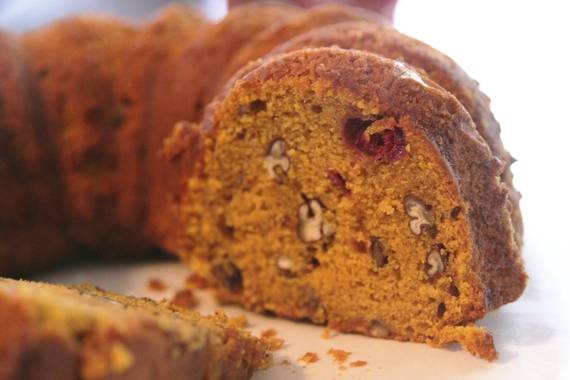
The texture is nice and chunky, and the cranberries give so much extra flavor. I left out the apples because I just didn’t feel like apples in my cake that day. I will most definitely be making this cake again and again. It really is perfect for the holidays! Thanks, Britin, for a great pick!
All-In-One Holiday Bundt Cake
-Dorie Greenspan
2 cups all purpose flour
2 tsp baking powder
1/2 tsp baking soda
2 tsp ground cinnamon
1/4 tsp freshly grated nutmeg
pinch of salt
1 tsp ground ginger
10 tbsp unsalted butter, room temp
1 cup sugar
1/2 cup (packed) light brown sugar
2 large eggs, room temp
1 tsp vanilla extract
1 1/4 cups canned unsweetened pumpkin puree
1 large apple, peeled, cored, and finely chopped
1 cup cranberries, halved or coarsely chopped
1 cup pecans, coarsely chopped
Whisk together the flour, baking powder, baking soda, cinnamon, nutmeg, salt, and ginger, set aside.
Beat butter and both sugars until light and fluffy. Add the eggs one at a time, and beat for 1 minute after each addition. Beat in the vanilla. Reduce mixer speed to low and add pumpkin and chopped apple, don’t be concerned if the mixture looks curdled. Still on low speed, add the dry ingredients, mixing only until they are incorporated. With rubber spatula, stir in the cranberries and pecans. Scrape the batter into the pan and smooth the top with the rubber spatula.
Bake for 60 minutes or until a thin knife inserted into the center of the cake comes out clean. Transfer the cake to a rack and cool for 10 minutes before unmolding, then cool to room temperature. Dust with confectioners’ sugar.
